NvidiaのJetson Nanoを手に入れたので、AWS IoT Greengrassが使えるか実際に試してみました。
Jetson NanoのセットアップはGetting Started With Jetson Nano Developer Kitを参考にしましたが、SDカードにイメージを焼いて、起動するだけで、特にハマることなくあっさりと動きます。
アーキテクチャを確認してみるとaarch64だというのが確認できます。
$ uname -a
Linux nvidia-desktop 4.9.140-tegra #1 SMP PREEMPT Wed Mar 13 00:32:22 PDT 2019 aarch64 aarch64 aarch64 GNU/Linux
ここから、Greengrassのセットアップを進めていきます。
基本的な手順は、AWS IoT Greengrass の使用開始を参考に進めます。
1.Greengrassが動かせる環境かを確認
Greengrassを動かす際に、対象のデバイスが要件を満たしているかを調べるスクリプトが有るので、それを使って確認します。
ここからは、Jetson NanoにSSHして、ターミナルで操作して行きます
Greengrass用のuser、Groupの作成
sudo adduser --system ggc_user
sudo groupadd --system ggc_group
スクリプトの実行
ダウンロード
wget https://github.com/aws-samples/aws-greengrass-samples/raw/master/greengrass-dependency-checker-GGCv1.8.0.zip
unzip greengrass-dependency-checker-GGCv1.8.0.zip
実行
cd greengrass-dependency-checker-GGCv1.8.0/
sudo ./check_ggc_dependencies

==========================Checking script dependencies==============================
The device has all commands required for the script to run.

========================Dependency check report for GGC v1.8.0=========================
System configuration:
Kernel architecture: aarch64
Init process: /lib/systemd/systemd
Kernel version: 4.9
C library: Ubuntu GLIBC 2.27-3ubuntu1
C library version: 2.27
Directory /var/run: Present
/dev/stdin: Found
/dev/stdout: Found
/dev/stderr: Found
----------------------------Commands and software packages--------------------------
Python version: 2.7.15rc1
NodeJS 6.10: Not found
Java 8: Not found
wget: Present
realpath: Present
tar: Present
readlink: Present
basename: Present
dirname: Present
pidof: Present
df: Present
grep: Present
umount: Present

---------------------------------Platform security----------------------------------
Hardlinks_protection: Enabled
Symlinks protection: Enabled

-----------------------------------User and group-----------------------------------
ggc_user: Present
ggc_group: Present

----------------(Optional) Greengrass container dependency check----------------

--------------------------------Kernel configuration--------------------------------
Kernel config file: /proc/config.gz

Namespace configs:
CONFIG_IPC_NS: Enabled
CONFIG_UTS_NS: Enabled
CONFIG_USER_NS: Enabled
CONFIG_PID_NS: Enabled

Cgroup configs:
CONFIG_CGROUP_DEVICE: Enabled
CONFIG_CGROUPS: Enabled
CONFIG_MEMCG: Enabled

Other required configs:
CONFIG_POSIX_MQUEUE: Enabled
CONFIG_OVERLAY_FS: Enabled
CONFIG_HAVE_ARCH_SECCOMP_FILTER: Enabled
CONFIG_SECCOMP_FILTER: Enabled
CONFIG_KEYS: Enabled
CONFIG_SECCOMP: Enabled
CONFIG_SHMEM: Enabled

------------------------------------Cgroups check-----------------------------------
Cgroups mount directory: /sys/fs/cgroup

Devices cgroup: Enabled and Mounted
Memory cgroup: Enabled and Mounted


------------------------------------Results-----------------------------------------
Note:
1. It looks like the kernel uses 'systemd' as the init process. Be sure to set the
'useSystemd' field in the file 'config.json' to 'yes' when configuring Greengrass core.

Missing optional dependencies:
1. Could not find the binary 'nodejs6.10'.

If NodeJS 6.10 or later is installed on the device, name the binary 'nodejs6.10' and
add its parent directory to the PATH environment variable. NodeJS 6.10 or later is
required to execute NodeJS lambdas on Greengrass core.

2. Could not find the binary 'java8'.

If Java 8 or later is installed on the device name the binary 'java8' and add its
parent directory to the PATH environment variable. Java 8 or later is required to
execute Java lambdas on Greengrass core.

Supported lambda isolation modes:
No Container: Supported
Greengrass Container: Supported

----------------------------------Exit status---------------------------------------
You can now proceed to installing the Greengrass core 1.8.0 software on the device.
Please reach out to the AWS Greengrass support if issues arise.
環境は問題ないですね!(Java, nodejsがないと出ますが、今回はpythonで試すので、インストールされていなくても大丈夫)
Jetson TX2を利用した場合はセットアップが大変ですが、Nanoは特に設定を変更することなく、利用可能でした。
2.Greengrassの準備
動作できることが確認できたので、AWSのマネージメントコンソール(MC)からGreengrassの設定をして、ソフトウエアのダウンロードを行います。
2019/3/31時点の手順ですので、最新の情報はAWS IoT Greengrass の使用開始を参照してください
Greengrassグループの作成
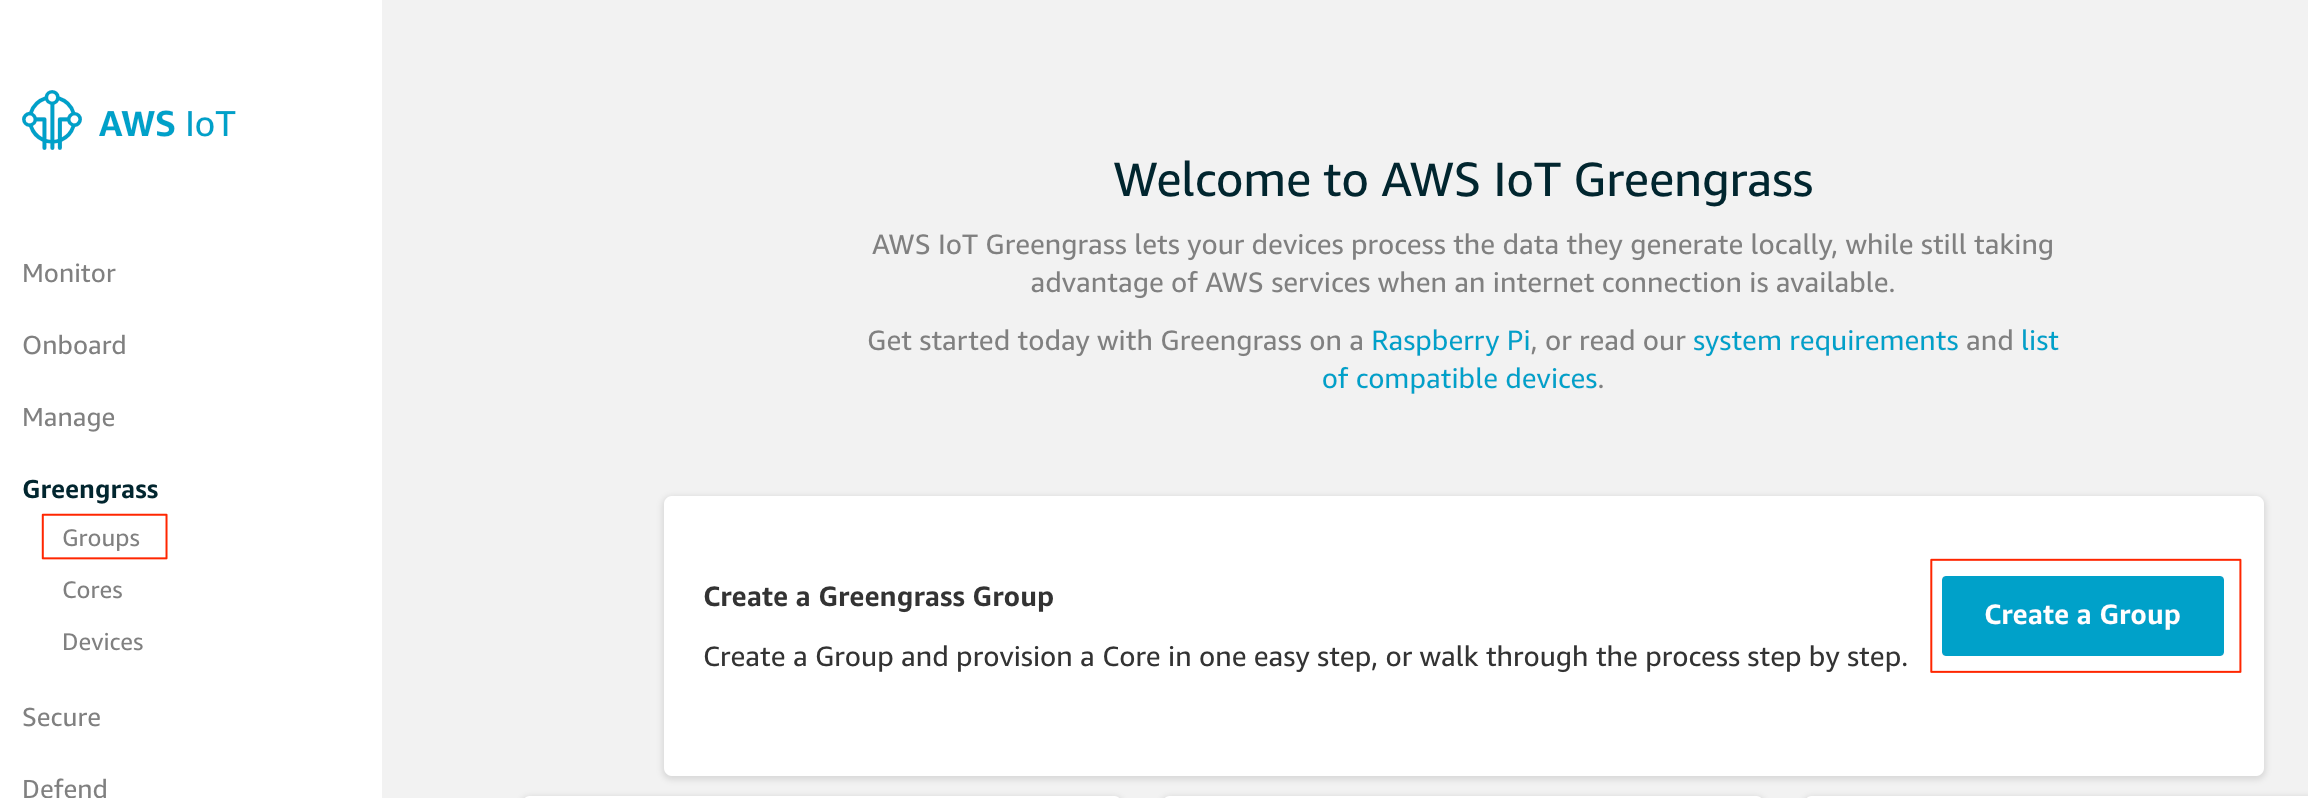
AWS IoTのMCを開きます。
最初に、グループを作成
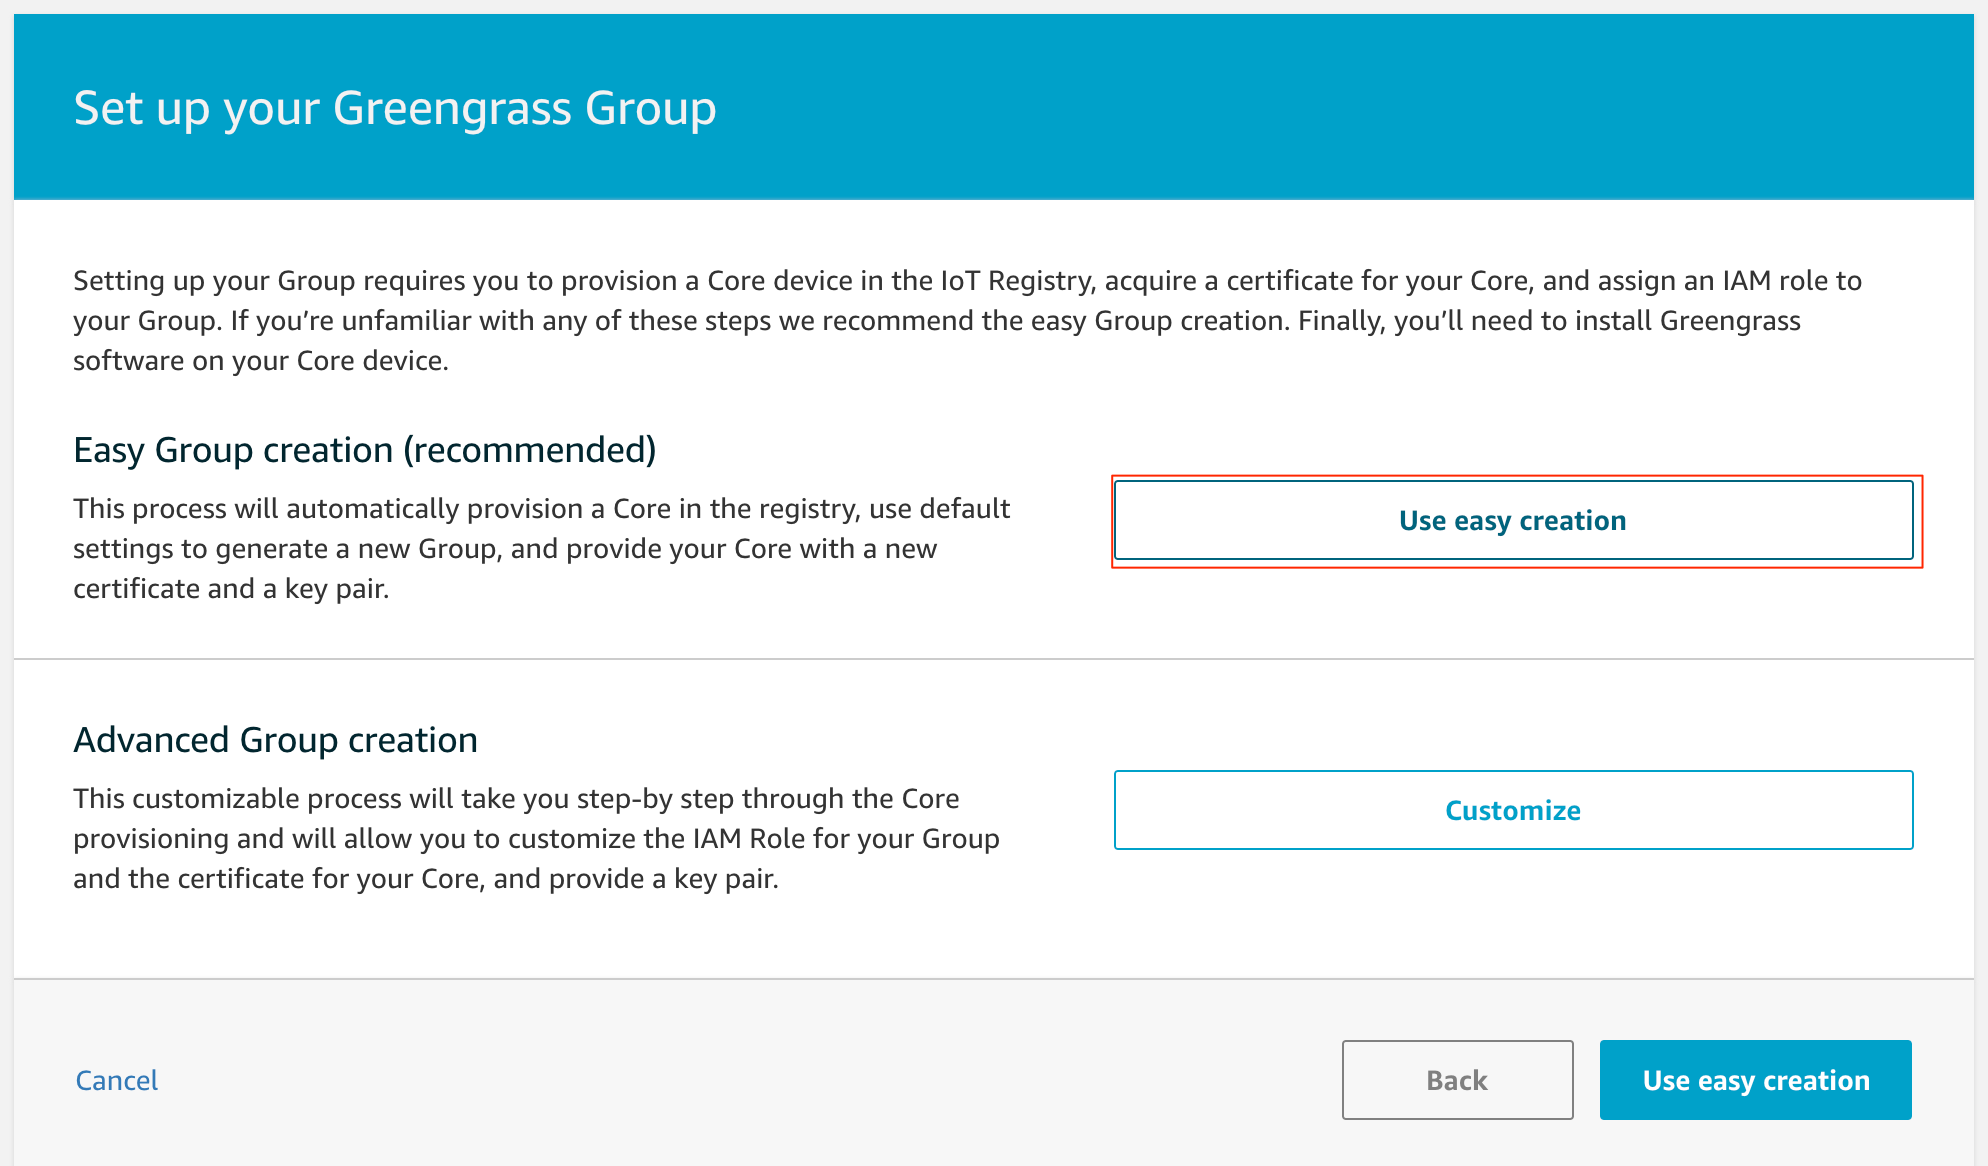
Use easy creationを選択
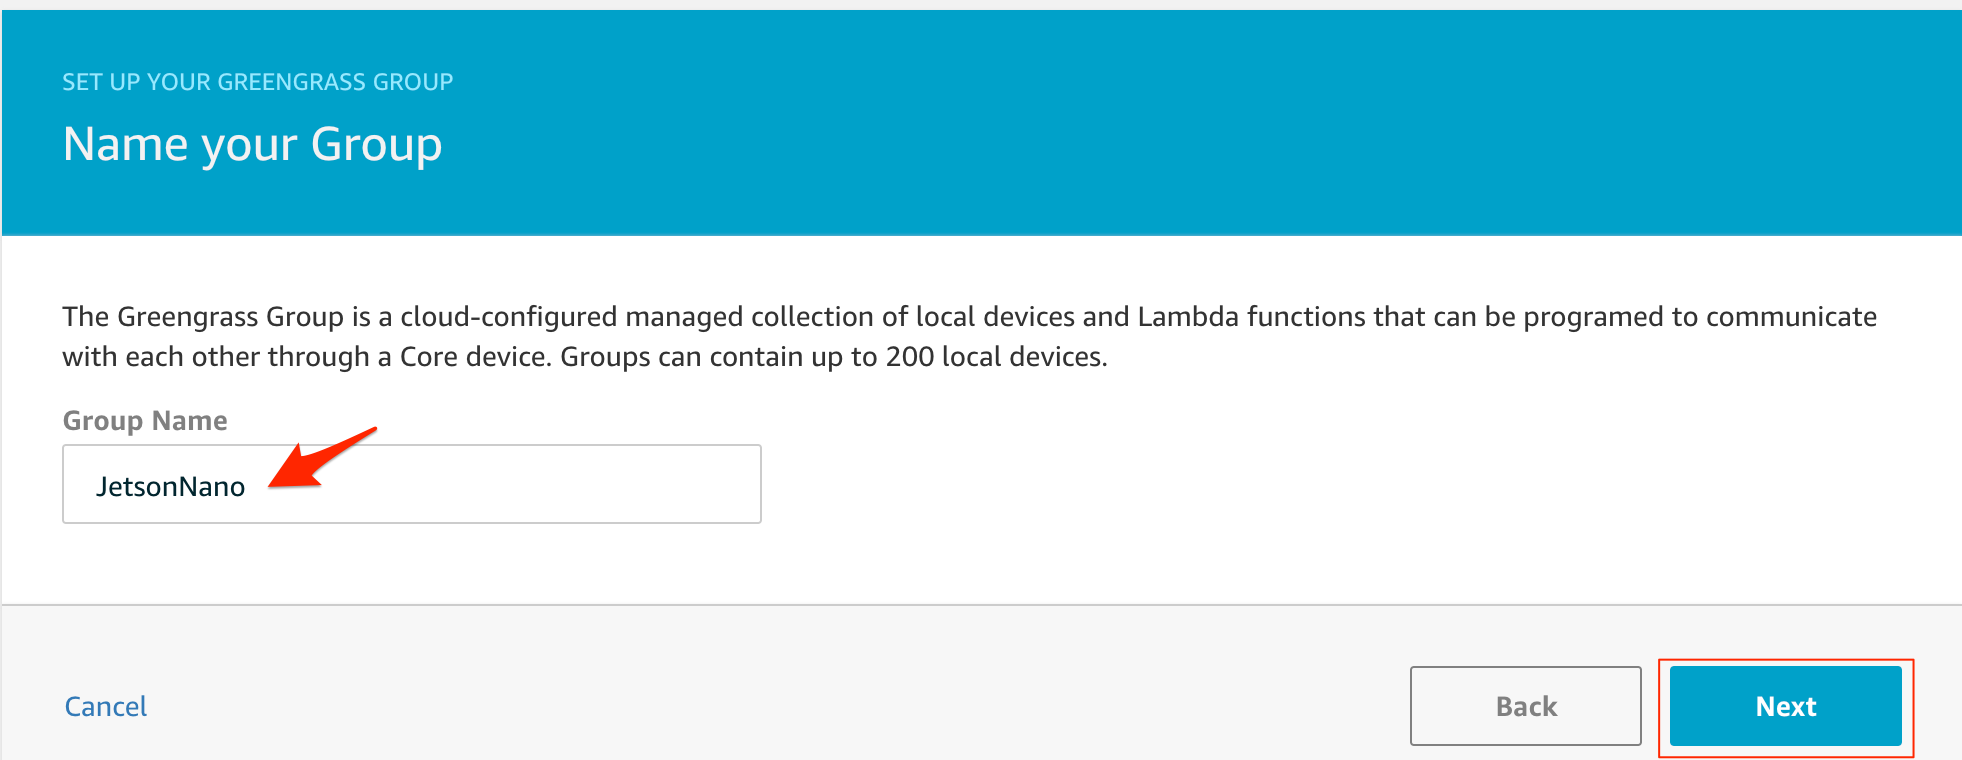
Greengrassのグループ名を入力してNextを選択
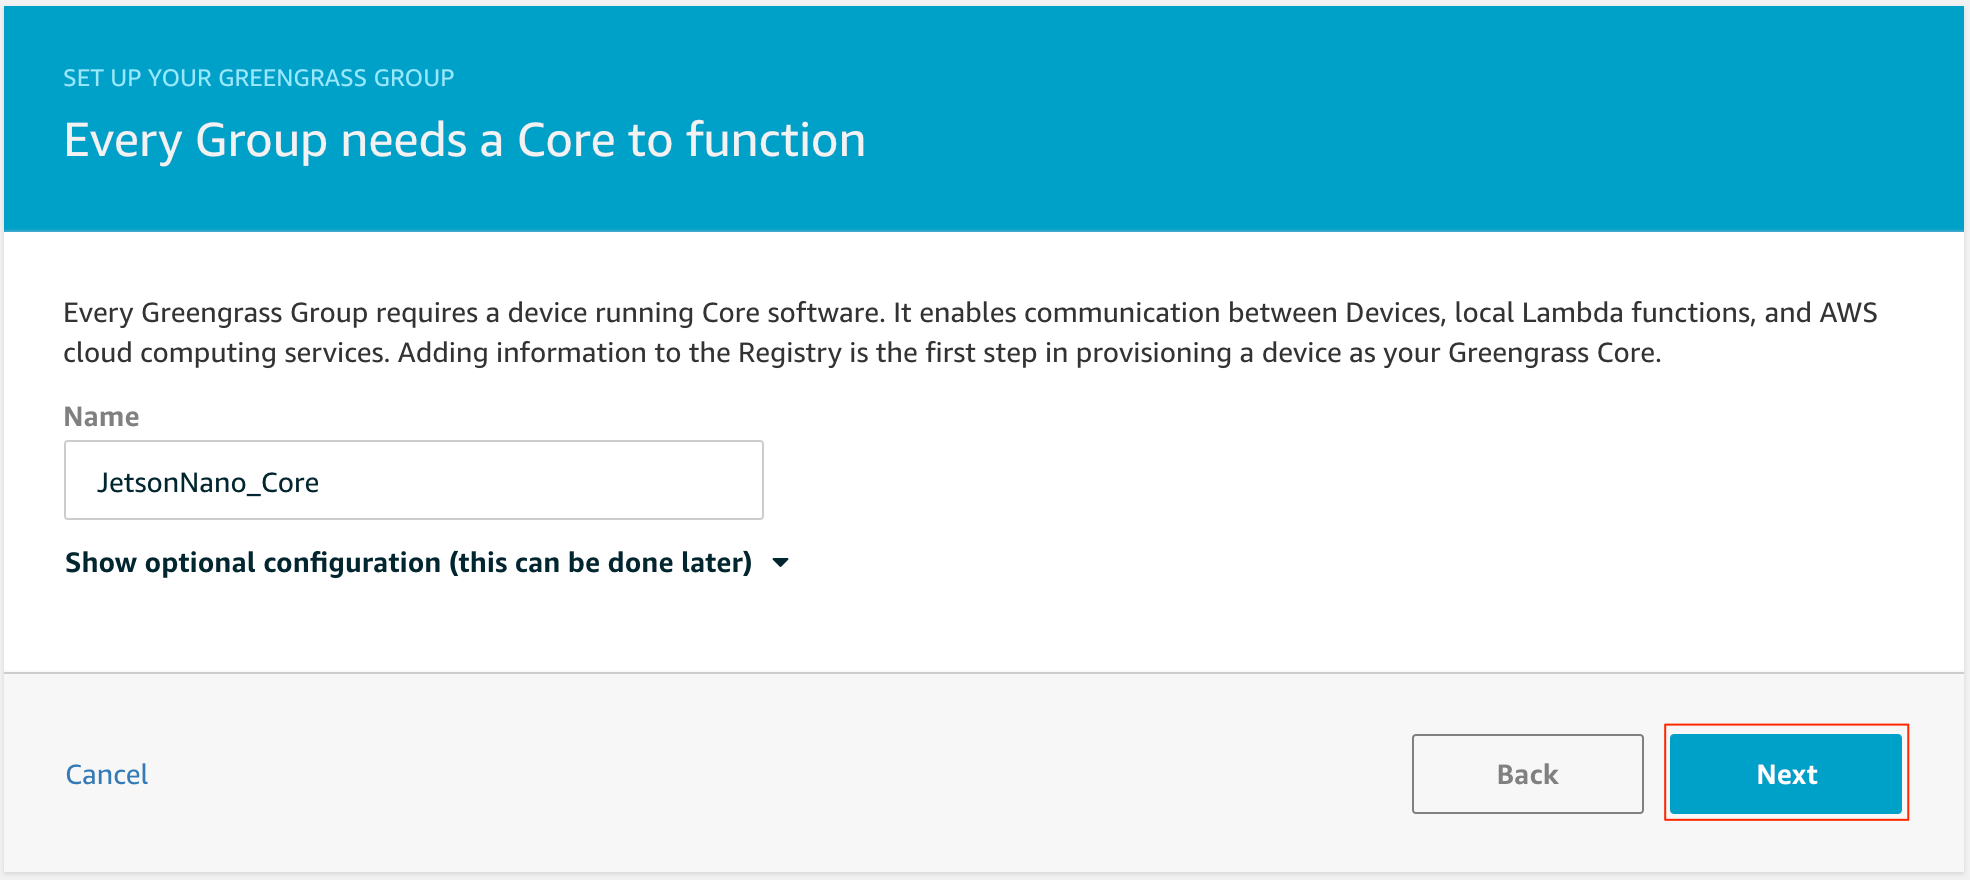
Greengrass Coreの名称を入力(今回は自動補完される名前をそのまま利用)して、Nextを選択
このCoreがAWS IoTのThingとなる
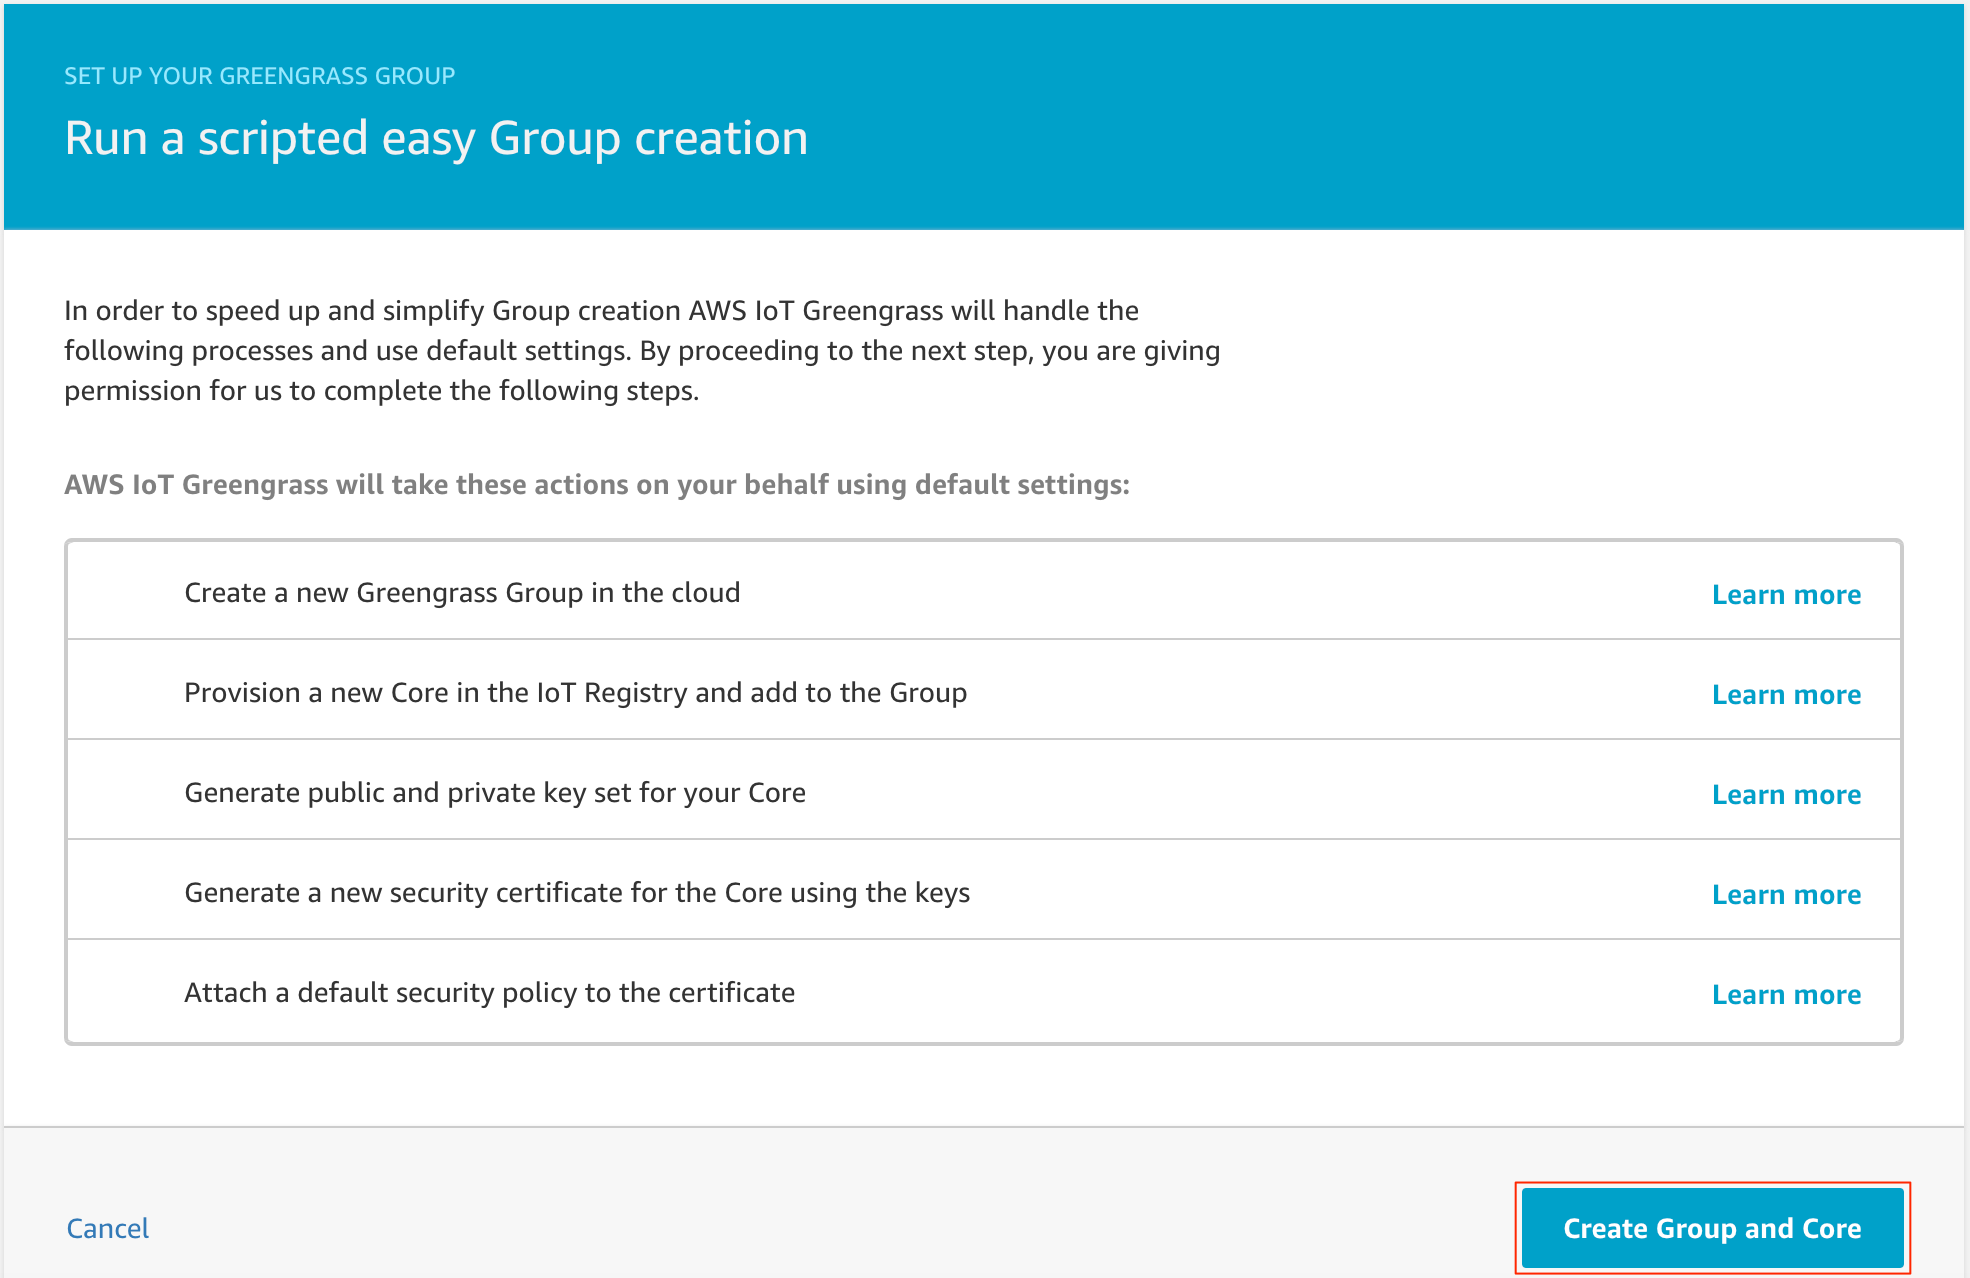
Greengrass作成の際に行われる処理が表示されるので、確認したらCreate Group and Coreを選択
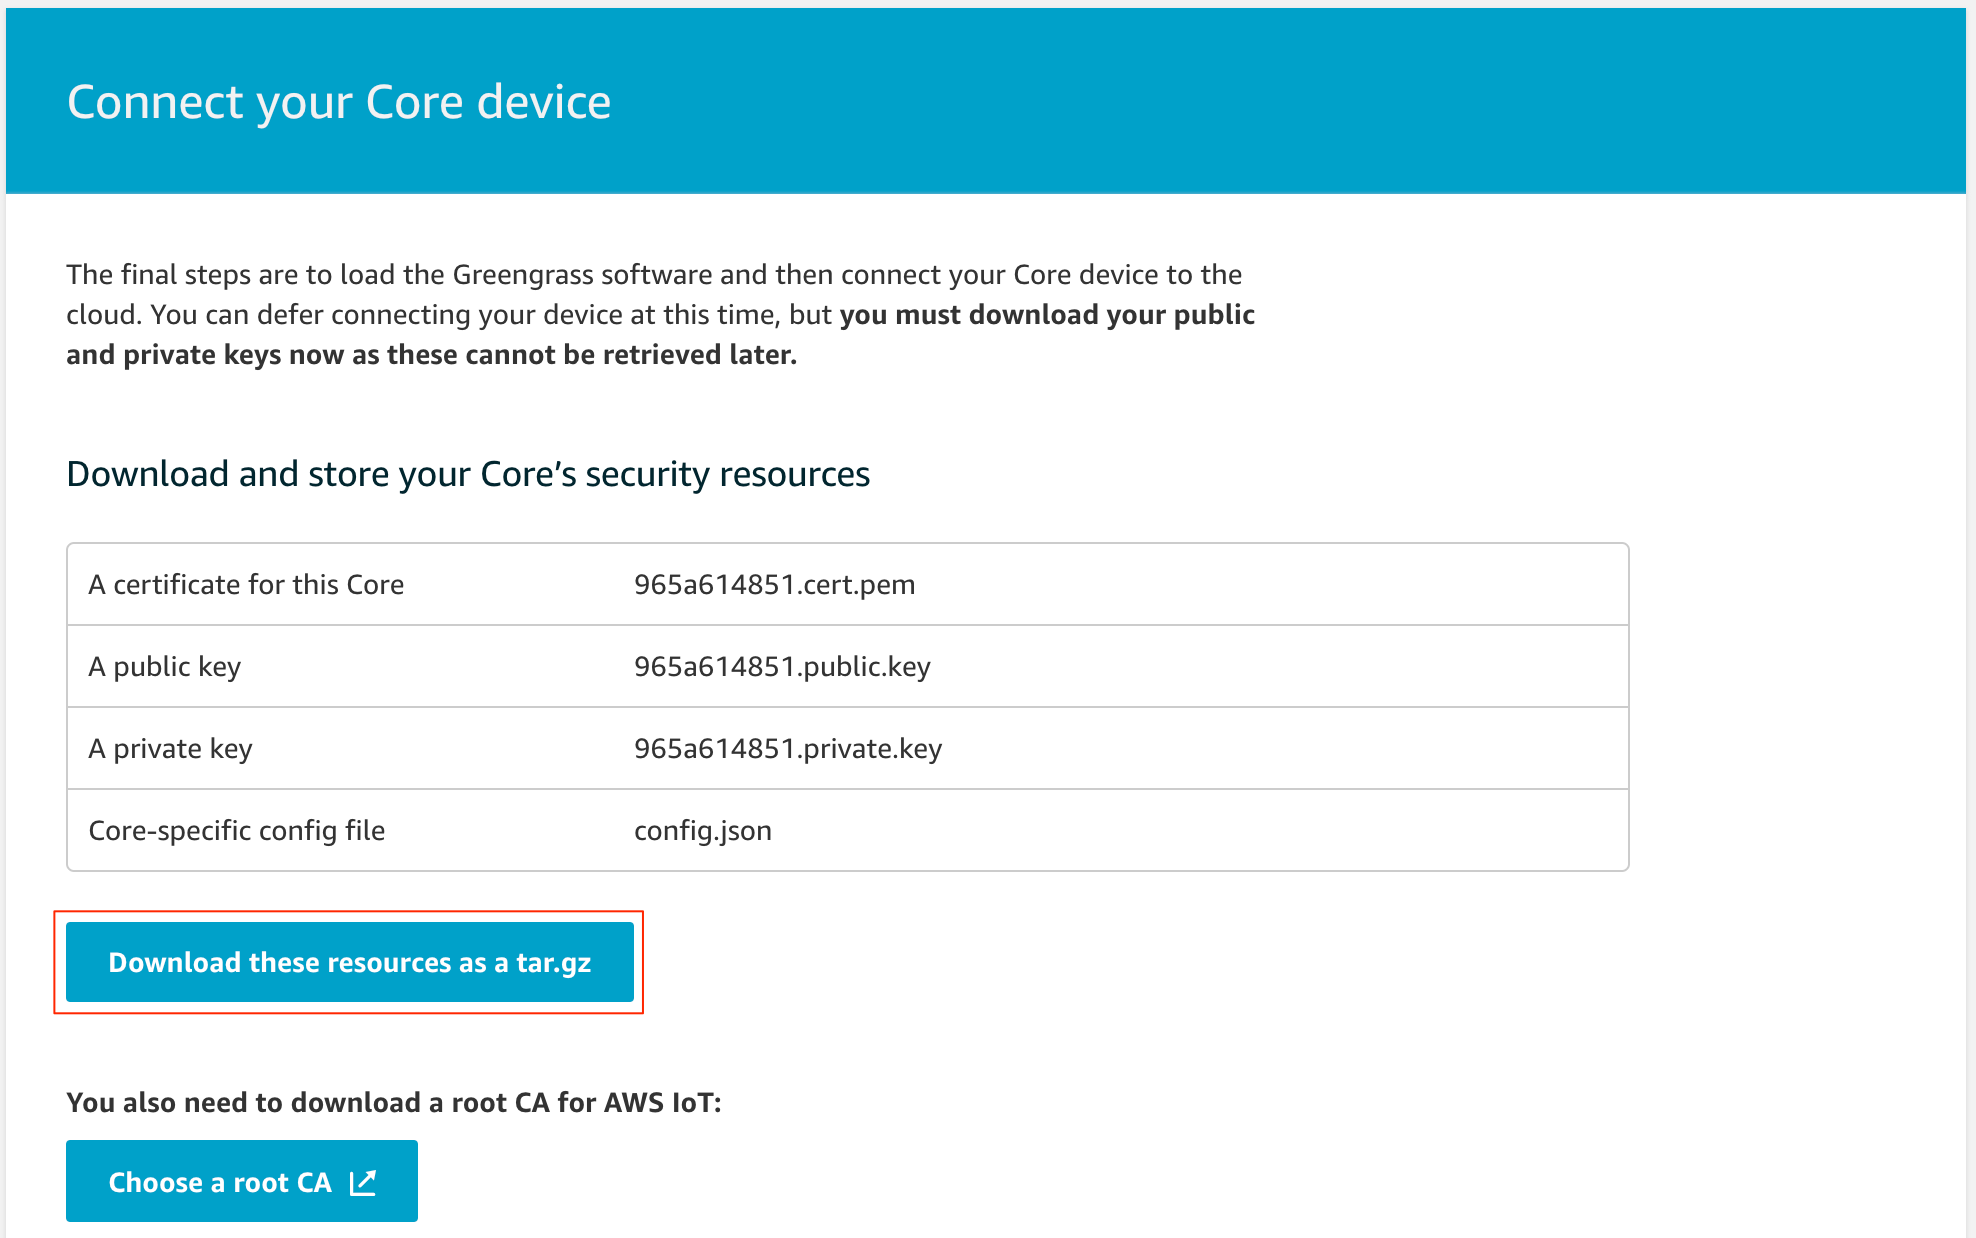
Greengrass Coreように作成された証明書と設定情報を含んだファイルをダウンロードするので、Download these resources as a tar.gzを選択
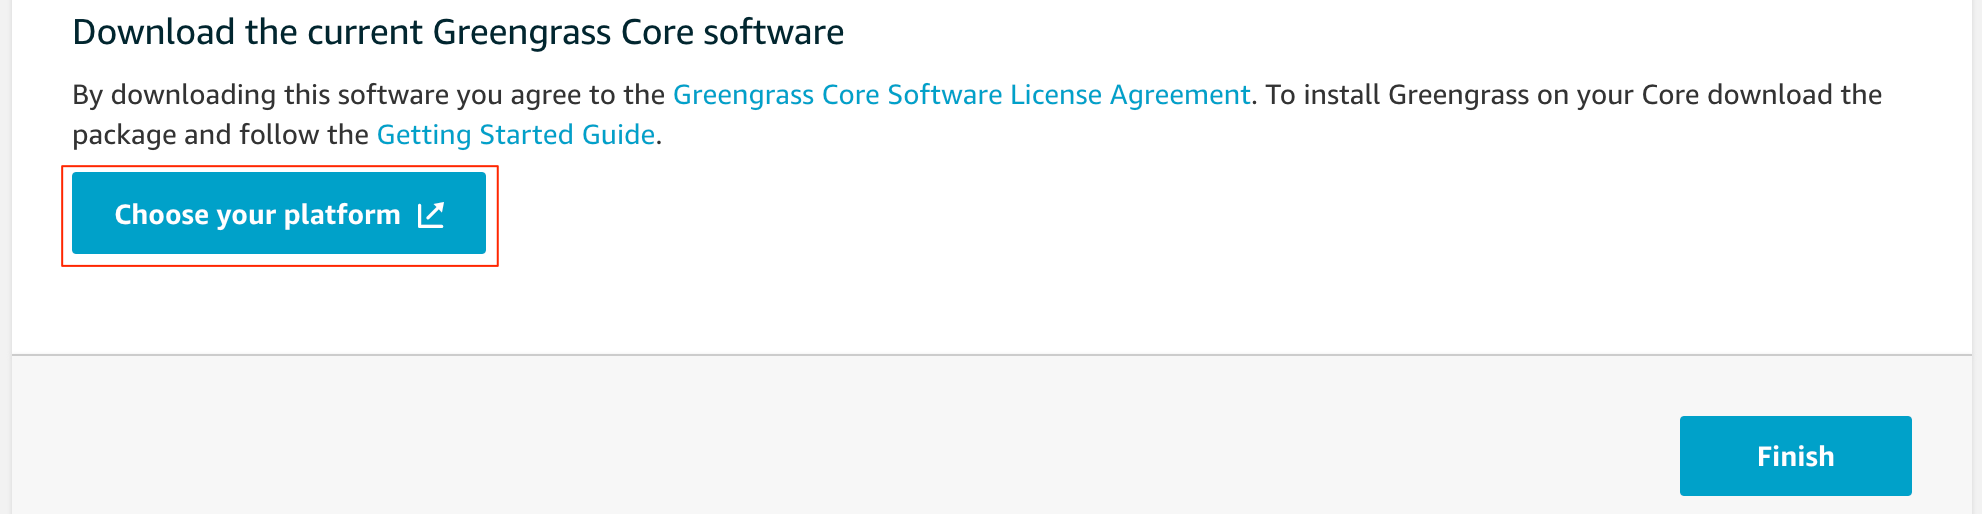
Greengrassのソフトウエアをダウンロードするので、Choose your platformを選択
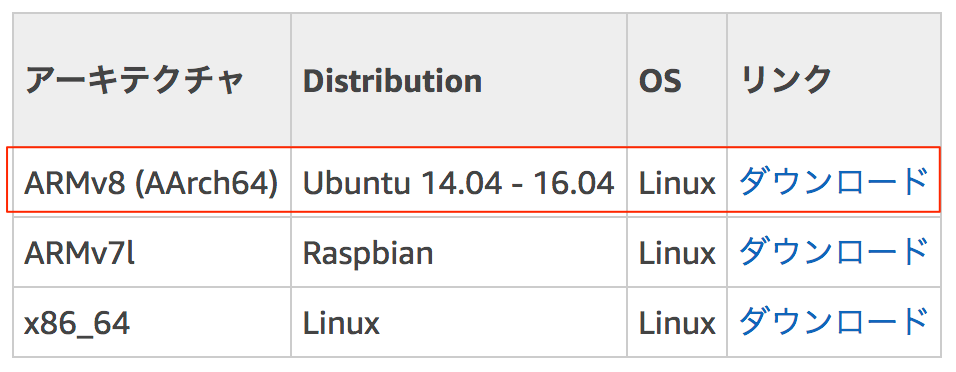
ダウンロード画面から、Jetson Nano用のファイルを選んでダウンロードを選択
(先の手順でuname -aで調べたアーキテクチャaarch64)
ダウンロードが終わったら、前の画面に戻ってFinishを選択することを忘れずに
3.Greengrassのインストール
AWS IoT側の設定が終わったので、Jetson Nanoにダウンロードしたファイルをセットアップします。
まずは、自分のPCからSCPでファイルをコピーします。IPアドレス、ユーザー名、ファイル名は実際の環境に合わせてください
scp ~/11111111-setup.tar.gz nvidia@192.168.1.11:~/

scp ~/greengrass-linux-aarch64-1.8.0.tar.gz nvidia@192.168.1.11:~/
Jetson NanoにSSHし、以下のコマンドでコピーしたファイルを配置します
sudo tar -zxvf greengrass-linux-aarch64-1.8.0.tar.gz -C /
sudo tar -zxvf 11111111-setup.tar.gz -C /greengrass
AWS IoTのエンドポイントの検証で利用するRoot CAの証明書もダウンロードします
sudo wget https://www.amazontrust.com/repository/AmazonRootCA1.pem -O /greengrass/certs/root.ca.pem
Greengrassで利用する証明書や、エンドポイントの設定は/greengrass/config/config.jsonに書かれています
cat /greengrass/config/config.json
{
  "coreThing" : {
    "caPath" : "root.ca.pem",
    "certPath" : "11111111.cert.pem",
    "keyPath" : "11111111.private.key",
    "thingArn" : "arn:aws:iot:us-east-1:1234567890:thing/JetsonNano_Core",
    "iotHost" : "1234567890-ats.iot.us-east-1.amazonaws.com",
    "ggHost" : "greengrass-ats.iot.us-east-1.amazonaws.com",
    "keepAlive" : 600
  },
  "runtime" : {
    "cgroup" : {
      "useSystemd" : "yes"
    }
  },
  "managedRespawn" : false,
  "crypto" : {
    "principals" : {
      "SecretsManager" : {
        "privateKeyPath" : "file:///greengrass/certs/11111111.private.key"
      },
      "IoTCertificate" : {
        "privateKeyPath" : "file:///greengrass/certs/11111111.private.key",
        "certificatePath" : "file:///greengrass/certs/11111111.cert.pem"
      }
    },
    "caPath" : "file:///greengrass/certs/root.ca.pem"
  }
}
これで、起動する準備ができたので、実際に起動します。
sudo /greengrass/ggc/core/greengrassd start
Setting up greengrass daemon
Validating hardlink/softlink protection
Waiting for up to 40s for Daemon to start

Greengrass successfully started with PID: 21862
起動しているかプロセスを見てみましょう
ps aux | grep greengrass
root     21862  1.5  0.4 908468 17372 pts/1    Sl   06:58   0:00 /greengrass/ggc/packages/1.8.0/bin/daemon -core-dir /greengrass/ggc/packages/1.8.0 -greengrassdPid 21857
ログの状態も確認してみます
sudo cat /greengrass/ggc/var/log/system/runtime.log

[2019-03-31T06:58:30.946+09:00][INFO]-===========================================
[2019-03-31T06:58:30.946+09:00][INFO]-Greengrass Root: /greengrass
[2019-03-31T06:58:30.946+09:00][INFO]-Greengrass Write Directory: /greengrass/ggc
[2019-03-31T06:58:30.946+09:00][INFO]-Group File Directory: /greengrass/ggc/deployment/group
[2019-03-31T06:58:30.947+09:00][INFO]-Default Lambda UID: 125
[2019-03-31T06:58:30.947+09:00][INFO]-Default Lambda GID: 999
[2019-03-31T06:58:30.947+09:00][INFO]-===========================================
[2019-03-31T06:58:30.947+09:00][INFO]-The current core is using the AWS IoT certificates with fingerprint: 746042da68b1380ca7c07471
[2019-03-31T06:58:30.948+09:00][WARN]-worker process info: /greengrass/ggc/packages/1.8.0/var/worker/processes
[2019-03-31T06:58:30.948+09:00][WARN]-worker process info: /greengrass/ggc/packages/1.8.0/var/worker/processes
[2019-03-31T06:58:30.95+09:00][INFO]-Reloading registry
[2019-03-31T06:58:30.95+09:00][INFO]-The current core is using the AWS IoT certificates with fingerprint: 746042da68b1380ca7c07471
[2019-03-31T06:58:30.954+09:00][INFO]-Connecting with MQTT: endpoint: 1234567890-ats.iot.us-east-1.amazonaws.com:8883: clientId JetsonNano_Core
[2019-03-31T06:58:30.954+09:00][INFO]-MQTT connection attempt: attemptId: mZHY, clientId: JetsonNano_Core
[2019-03-31T06:58:31.9+09:00][INFO]-MQTT connection successful: attemptId: mZHY, clientId: JetsonNano_Core
[2019-03-31T06:58:31.9+09:00][INFO]-Started Deployment Agent and listening for updates
[2019-03-31T06:58:31.9+09:00][INFO]-Started Deployment Agent and listening for updates
[2019-03-31T06:58:31.901+09:00][INFO]-MQTT connection connected. Start subscribing: clientId: JetsonNano_Core
[2019-03-31T06:58:31.901+09:00][INFO]-Deployment agent connected to cloud
[2019-03-31T06:58:31.901+09:00][INFO]-Start subscribing 2 topics, clientId: JetsonNano_Core
[2019-03-31T06:58:31.902+09:00][INFO]-Trying to subscribe to topic $aws/things/JetsonNano_Core-gda/shadow/update/delta
[2019-03-31T06:58:32.116+09:00][INFO]-Subscribed to : $aws/things/JetsonNano_Core-gda/shadow/update/delta
[2019-03-31T06:58:32.116+09:00][INFO]-Trying to subscribe to topic $aws/things/JetsonNano_Core-gda/shadow/get/accepted
[2019-03-31T06:58:32.36+09:00][INFO]-Subscribed to : $aws/things/JetsonNano_Core-gda/shadow/get/accepted
[2019-03-31T06:58:32.565+09:00][INFO]-All topics subscribed, clientId: JetsonNano_Core
Subscribeもされているので、正しく起動できたのが確認できました
つぎに、MCからデプロイをしてみて、GreengrassとAWS IoTが連携できるかを確認します

Automatic detectionを選択
初めてデプロイするときは、Roleを作成しますみたいなダイアログが表示されるので、作成してください。
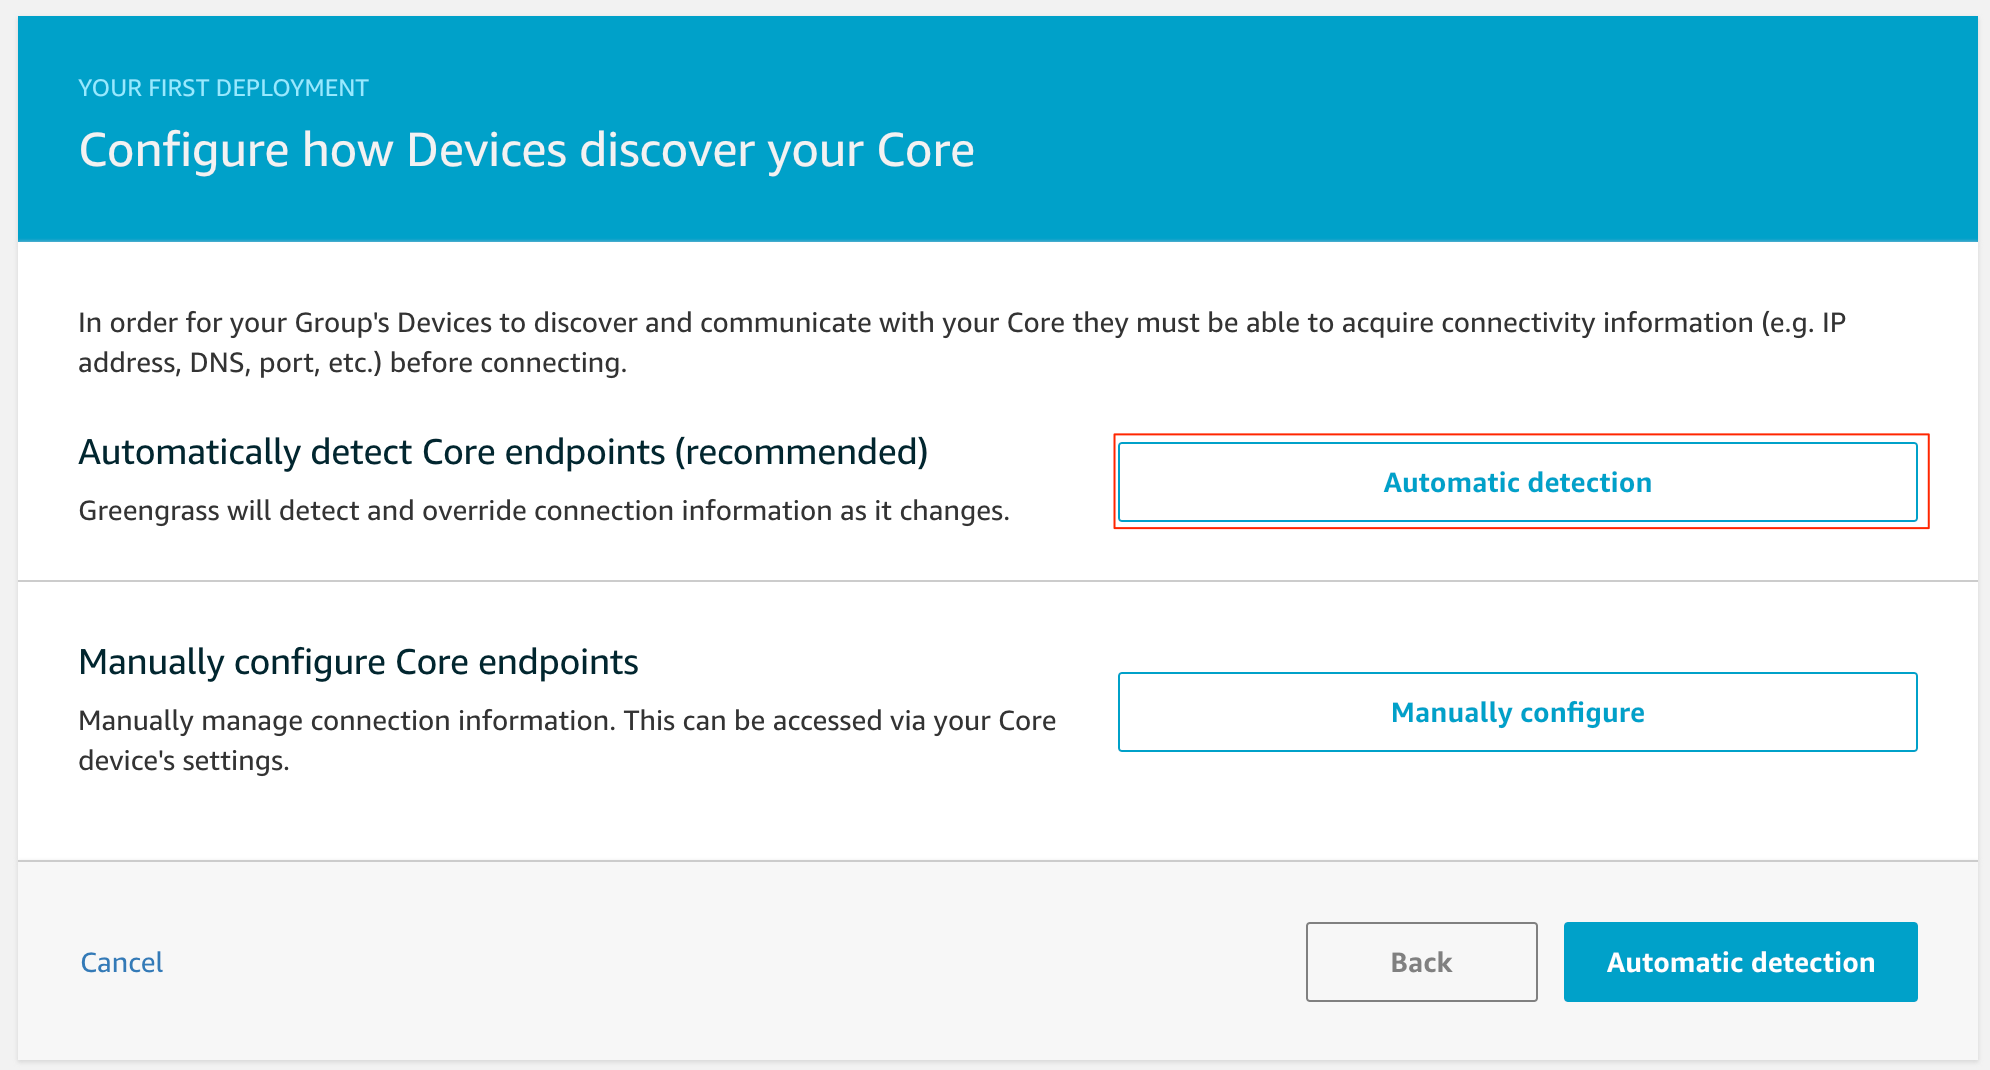
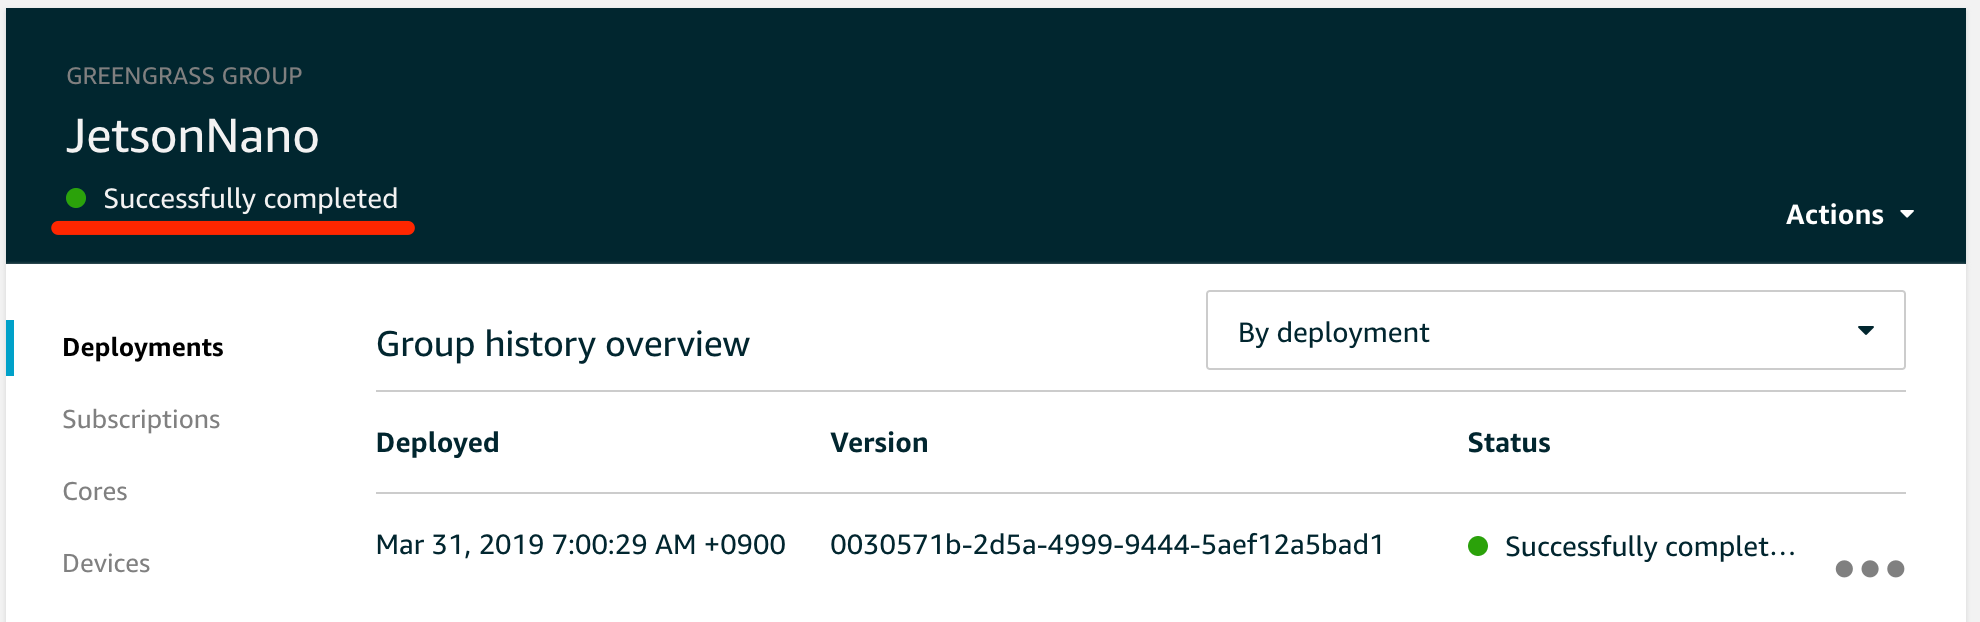
何も設定を追加していないので、すぐに正常にデプロイと表示されます。
(前の手順でRoleを作成したときは反映までに少し時間がかかるためデプロイに失敗します。数分待ってから再度デプロイしてください)
4.Lambdaをデプロイしてメッセージを送信する
ここまでで、Greengrassが動くことが確認できたので、実際にLambdaをデプロイしてデバイスからAWS IoTにメッセージを送れるかを確認します。
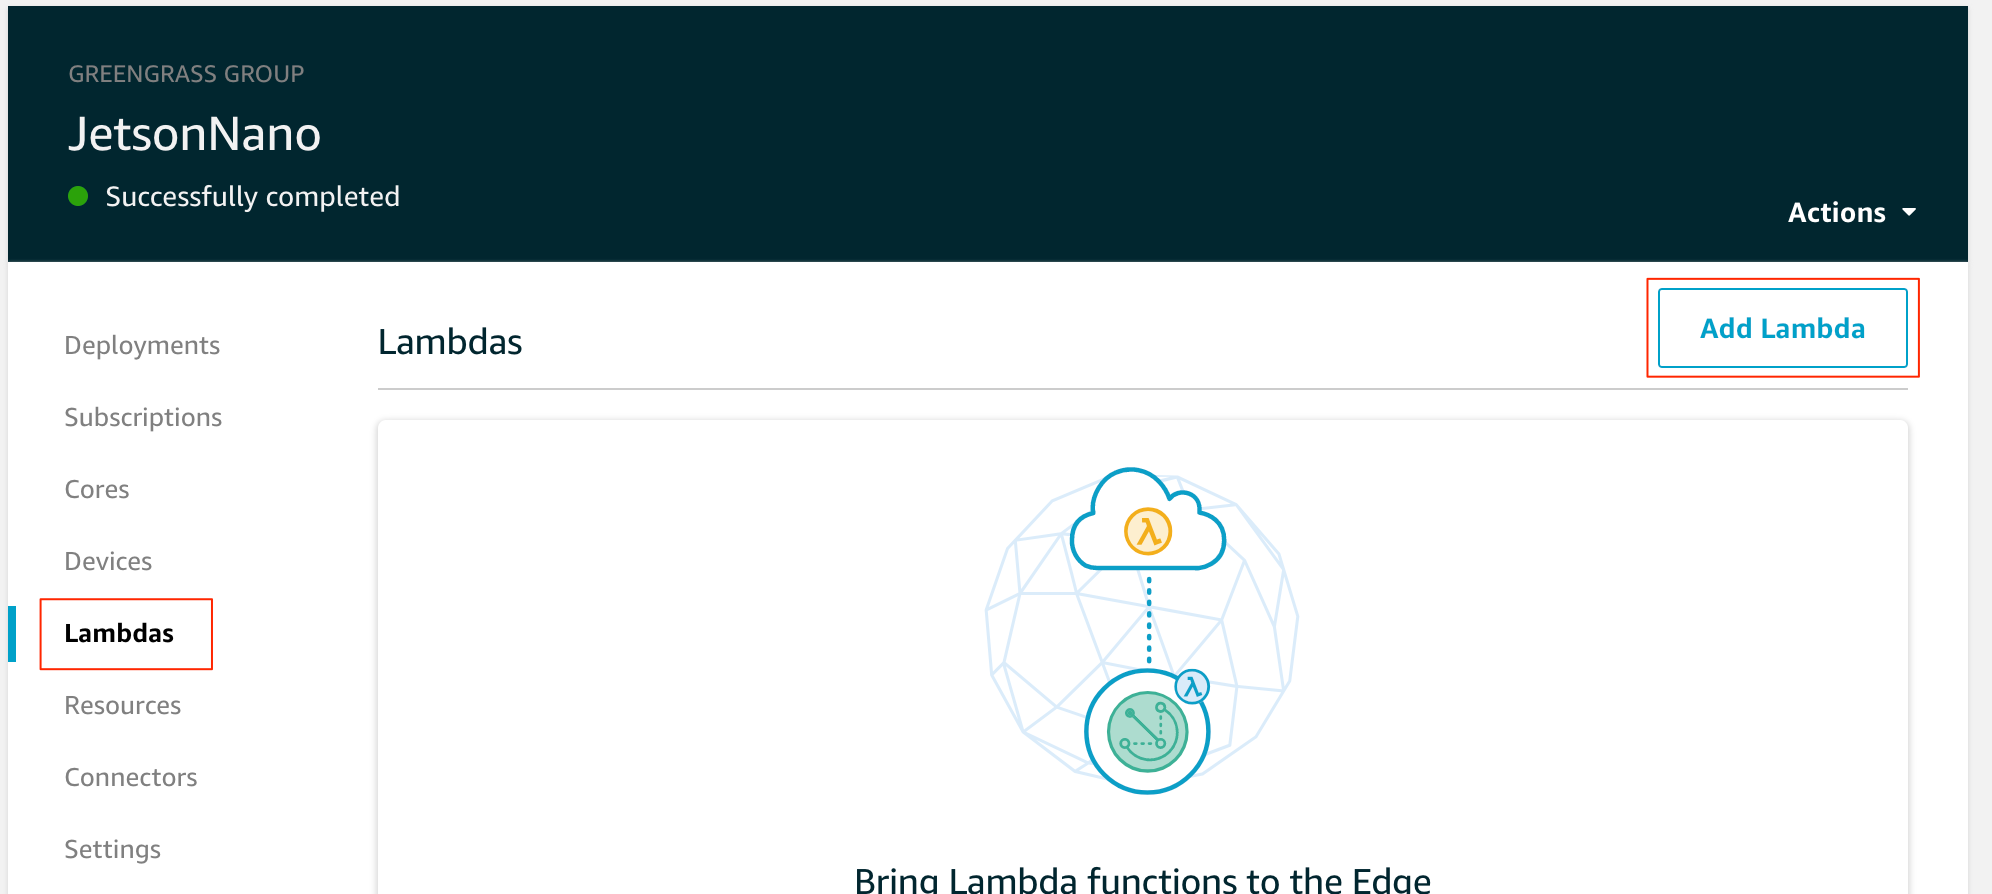
作成したGreengrass Groupを選び、Lambdasを選択し、Add Lambdaを選択する
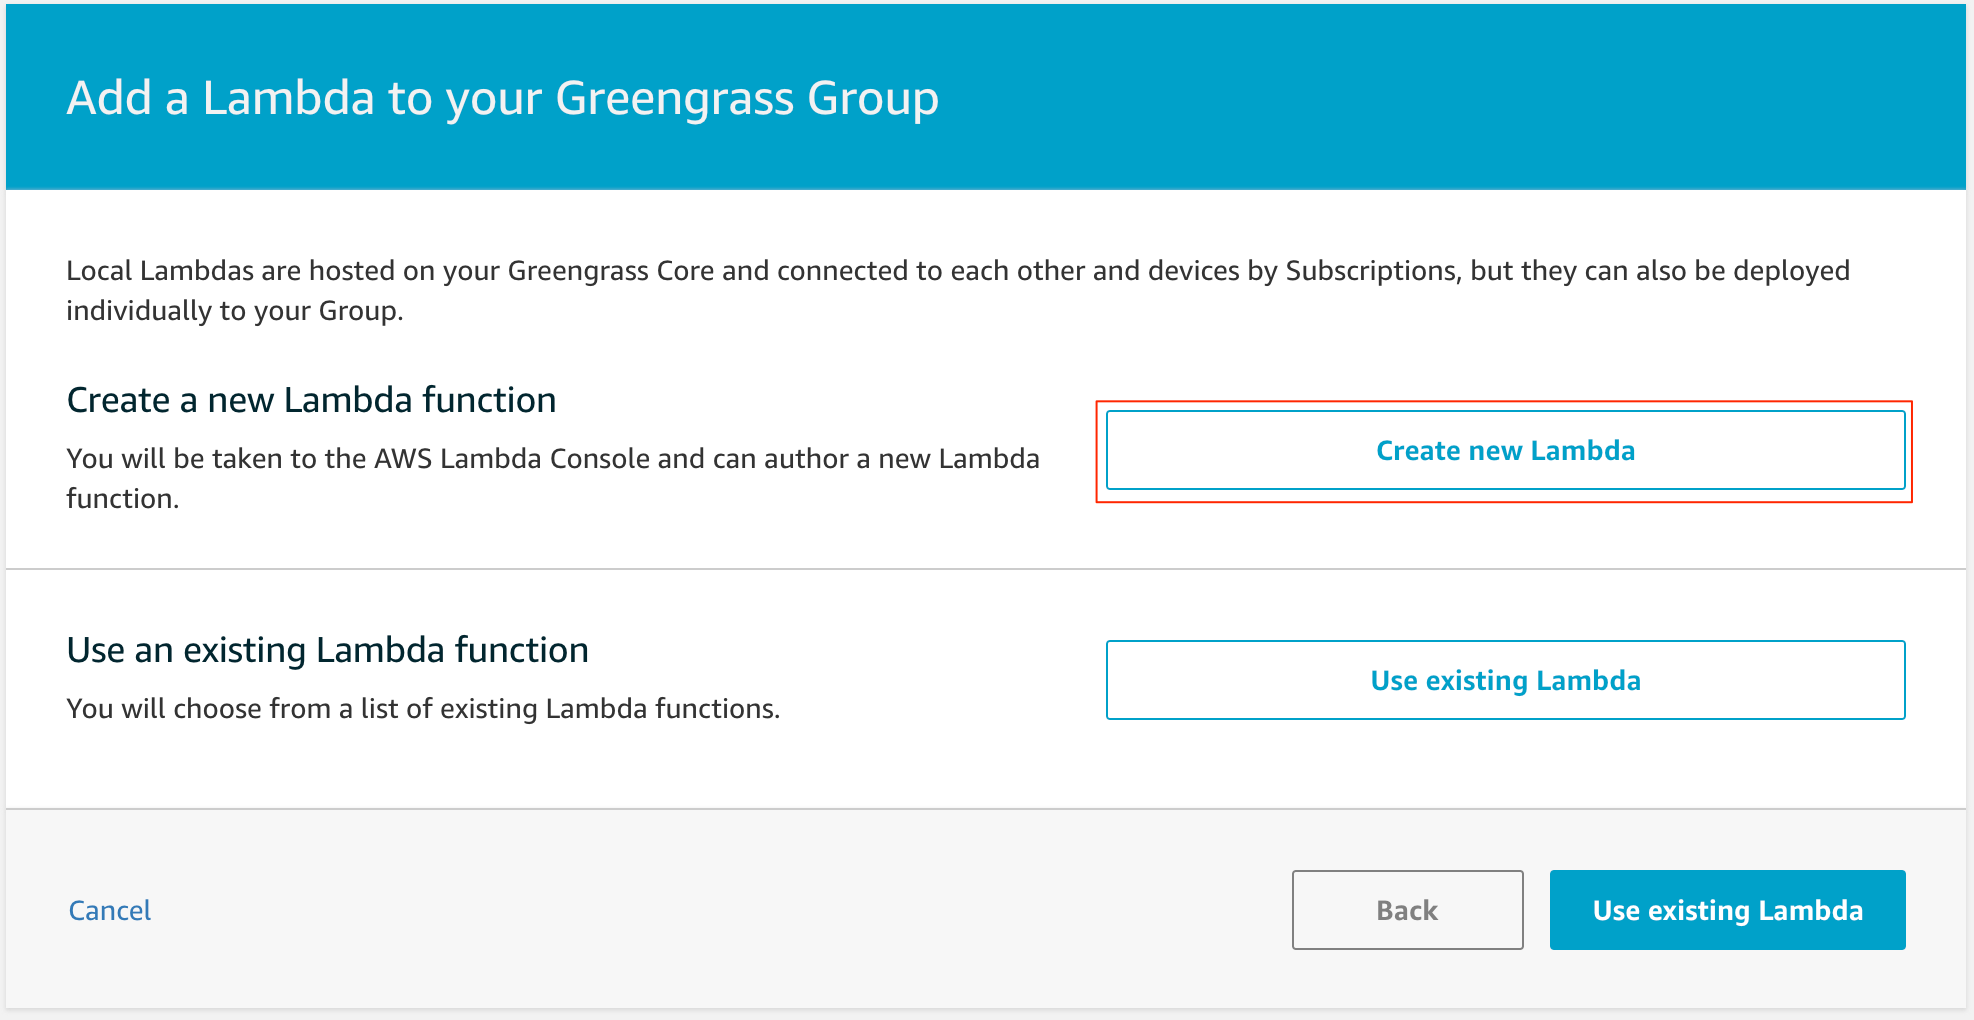
Create new Lambdaを選択
Lambdaのコンソールが開くので、以下を指定し、Create Functionを選択
- Lambda名
- Runtimeは、Python2.7 (Greengrassの対応言語)
- Roleは、実際にはGreengrassの実行Roleが適用されるので、ここではbasicなのを作成してます

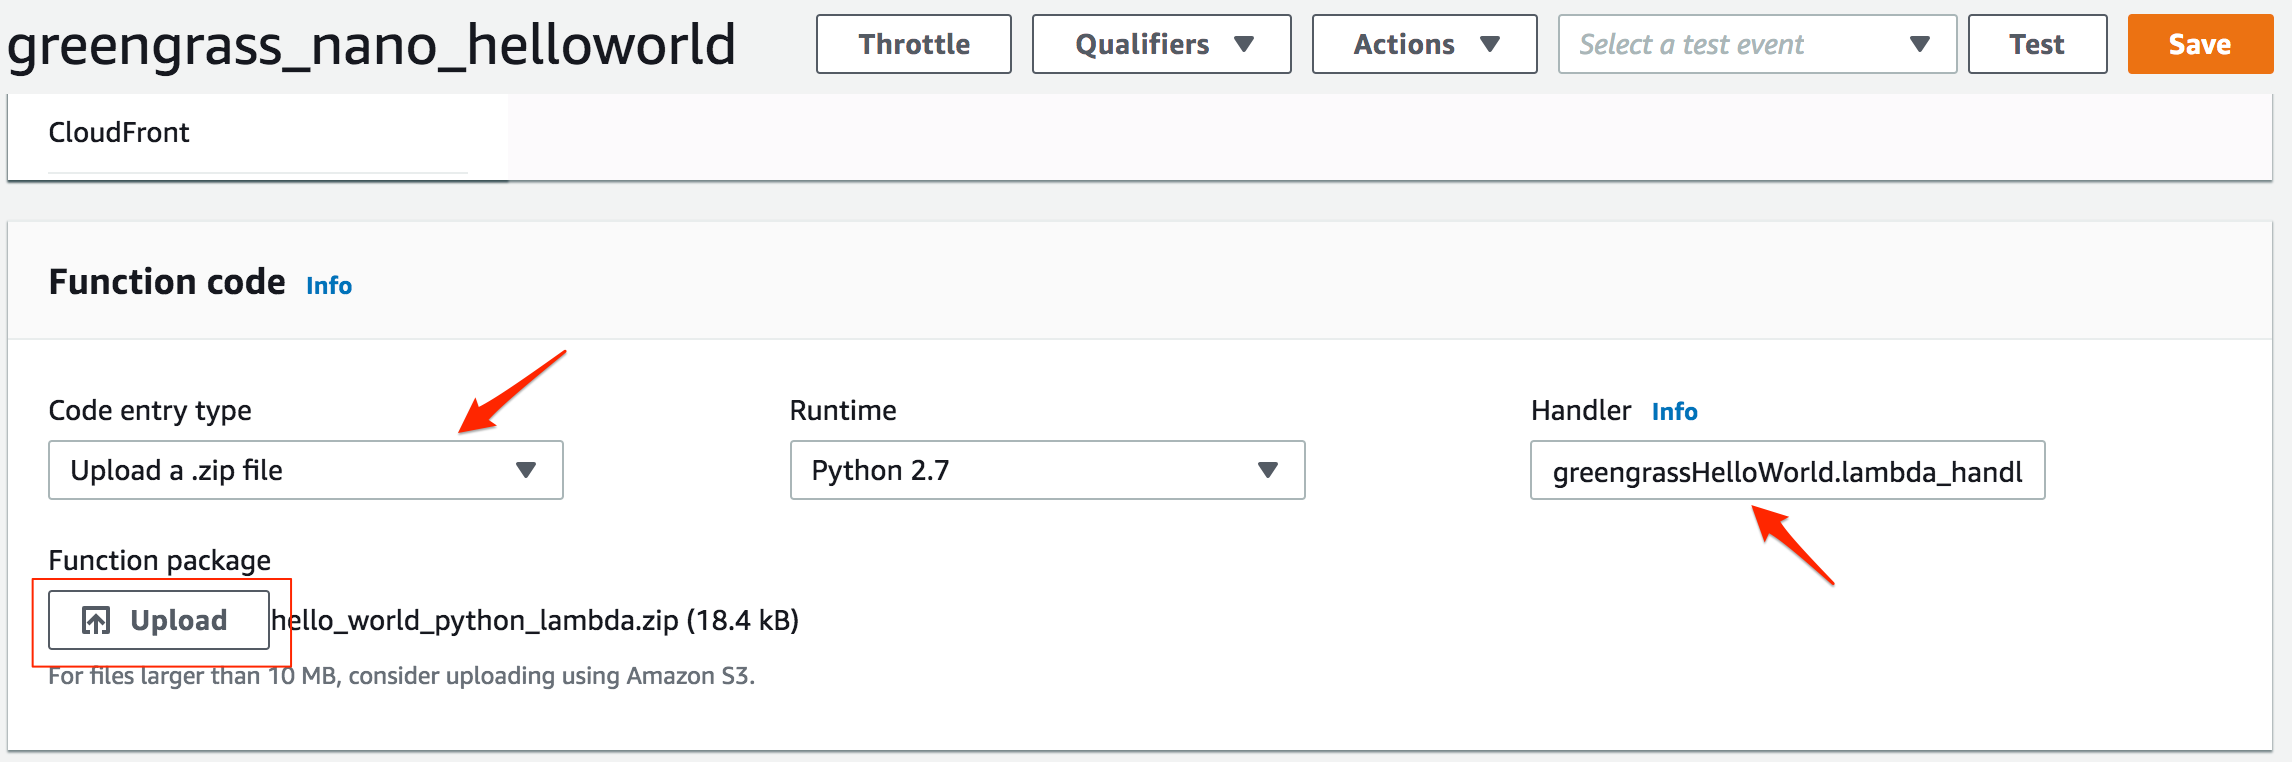
Lambda 関数の作成とパッケージ化に有るサンプルソースをzip化して、Uploadから指定します。Handlerのところは、サンプルソースのファイル名に合わせます。最後にSaveを選択し作成を完了します。
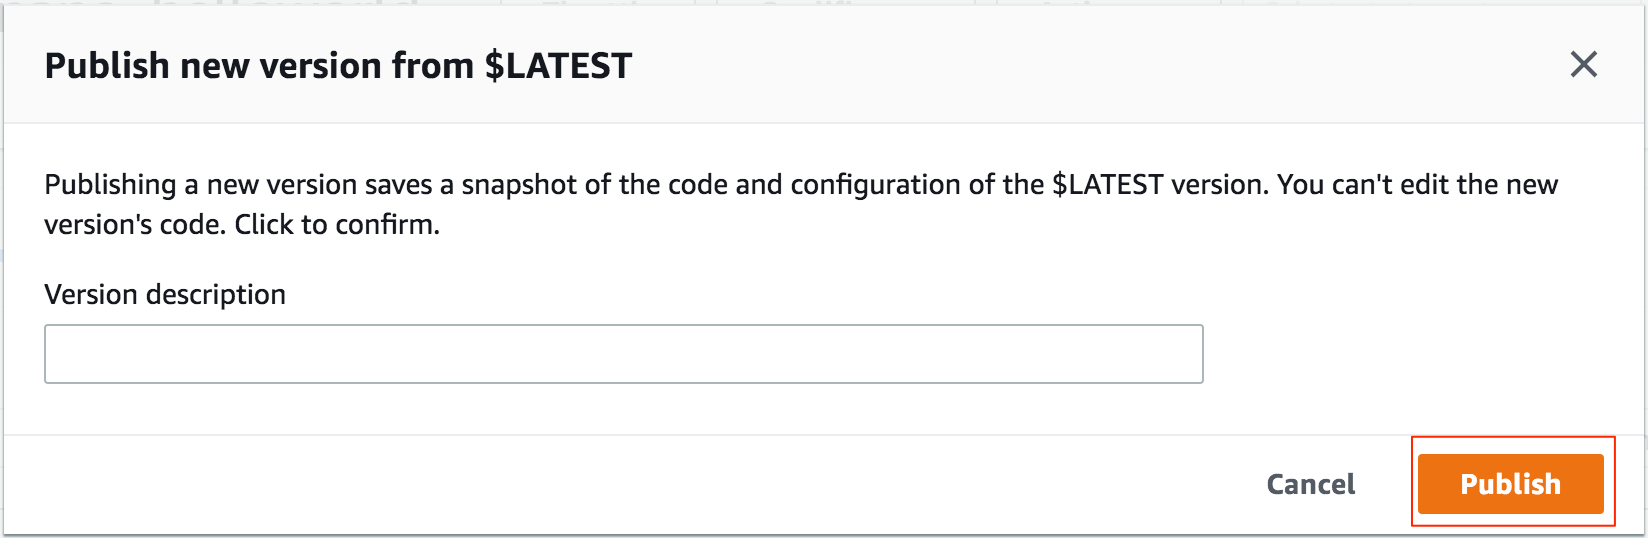
Lambdaのバージョンを作成するので、Actions > Publish new versionを選択します

Publishを選択
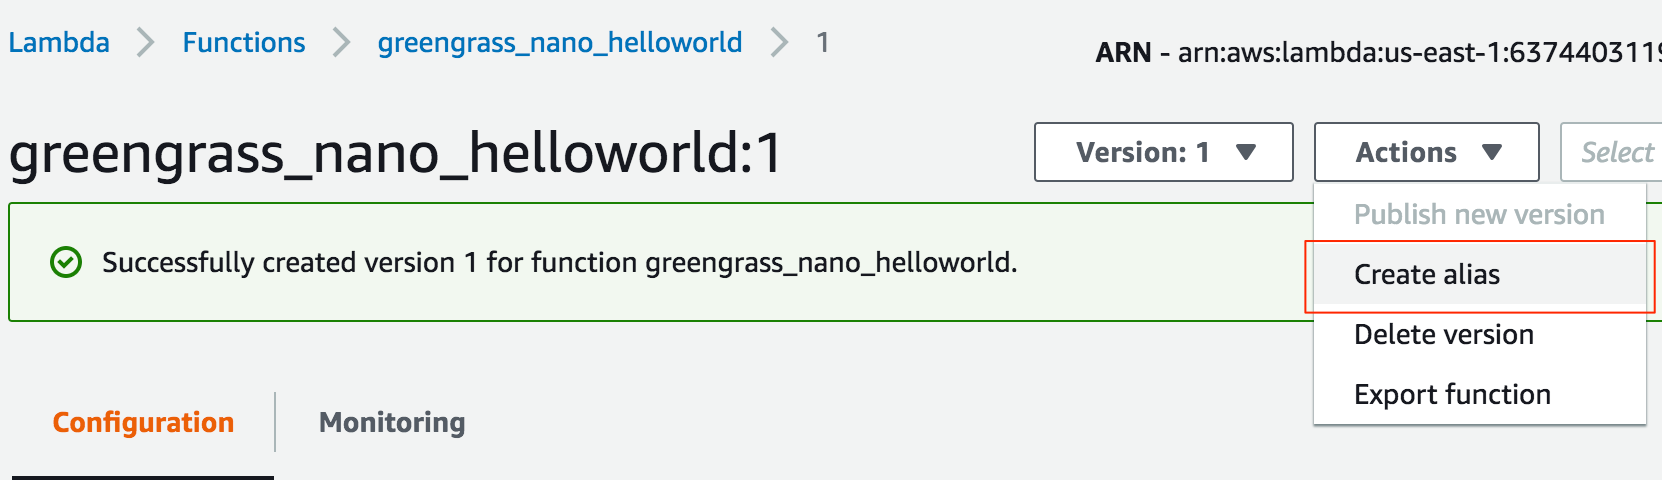
次にAliasを作成したいので、Actions > Create aliasを選択
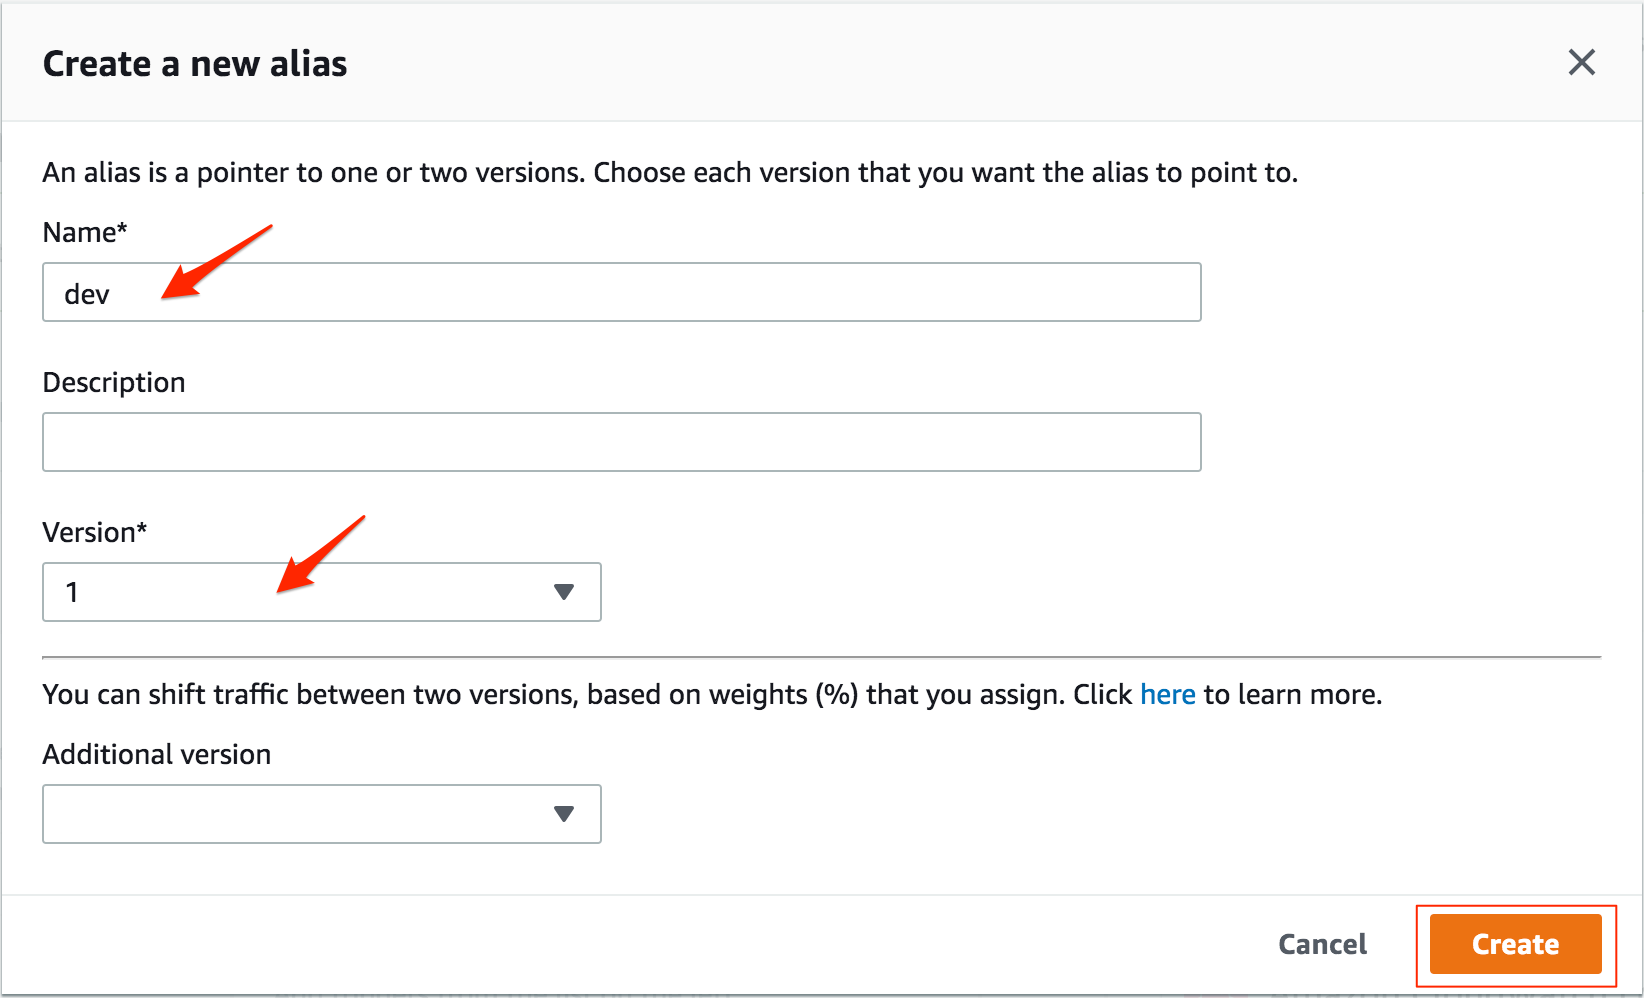
名前をつけて、先ほど作成したversionを選び、Createを選択
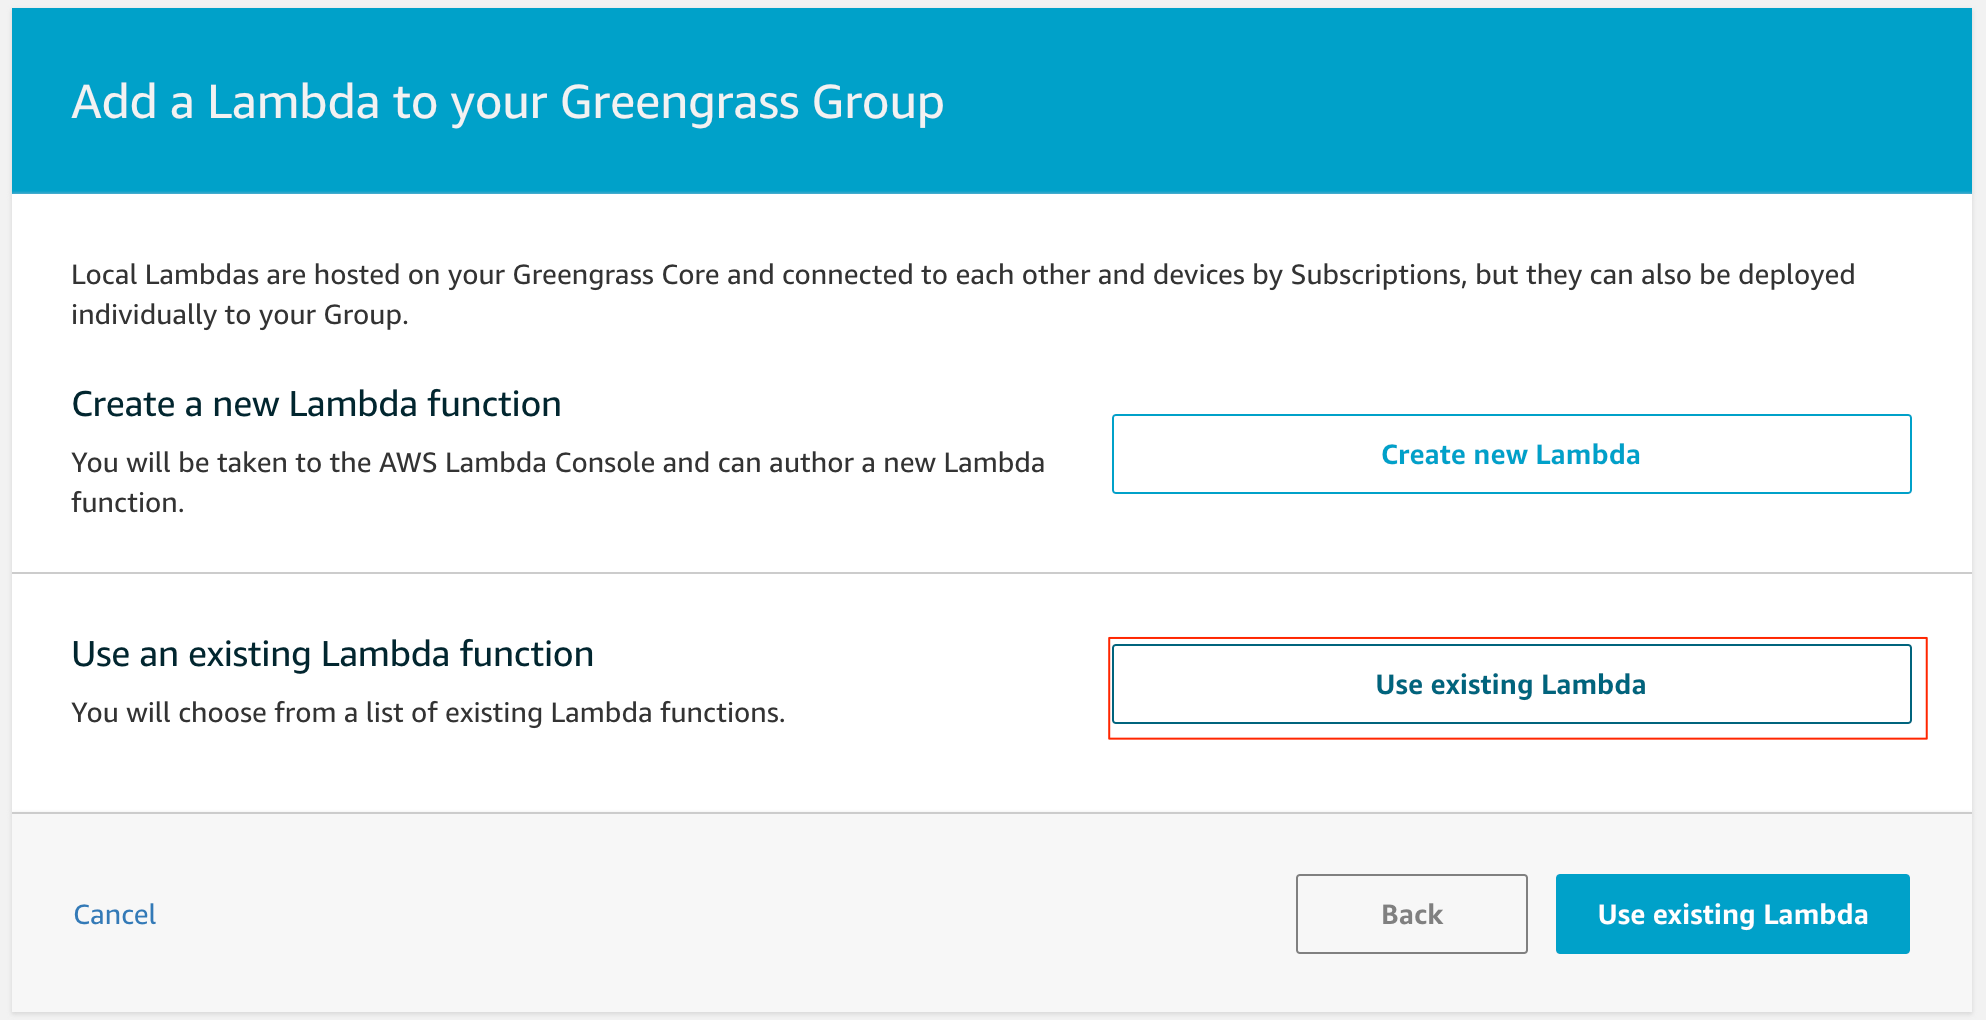
Greengrassの画面に戻ってUse existing Lambdaを選択
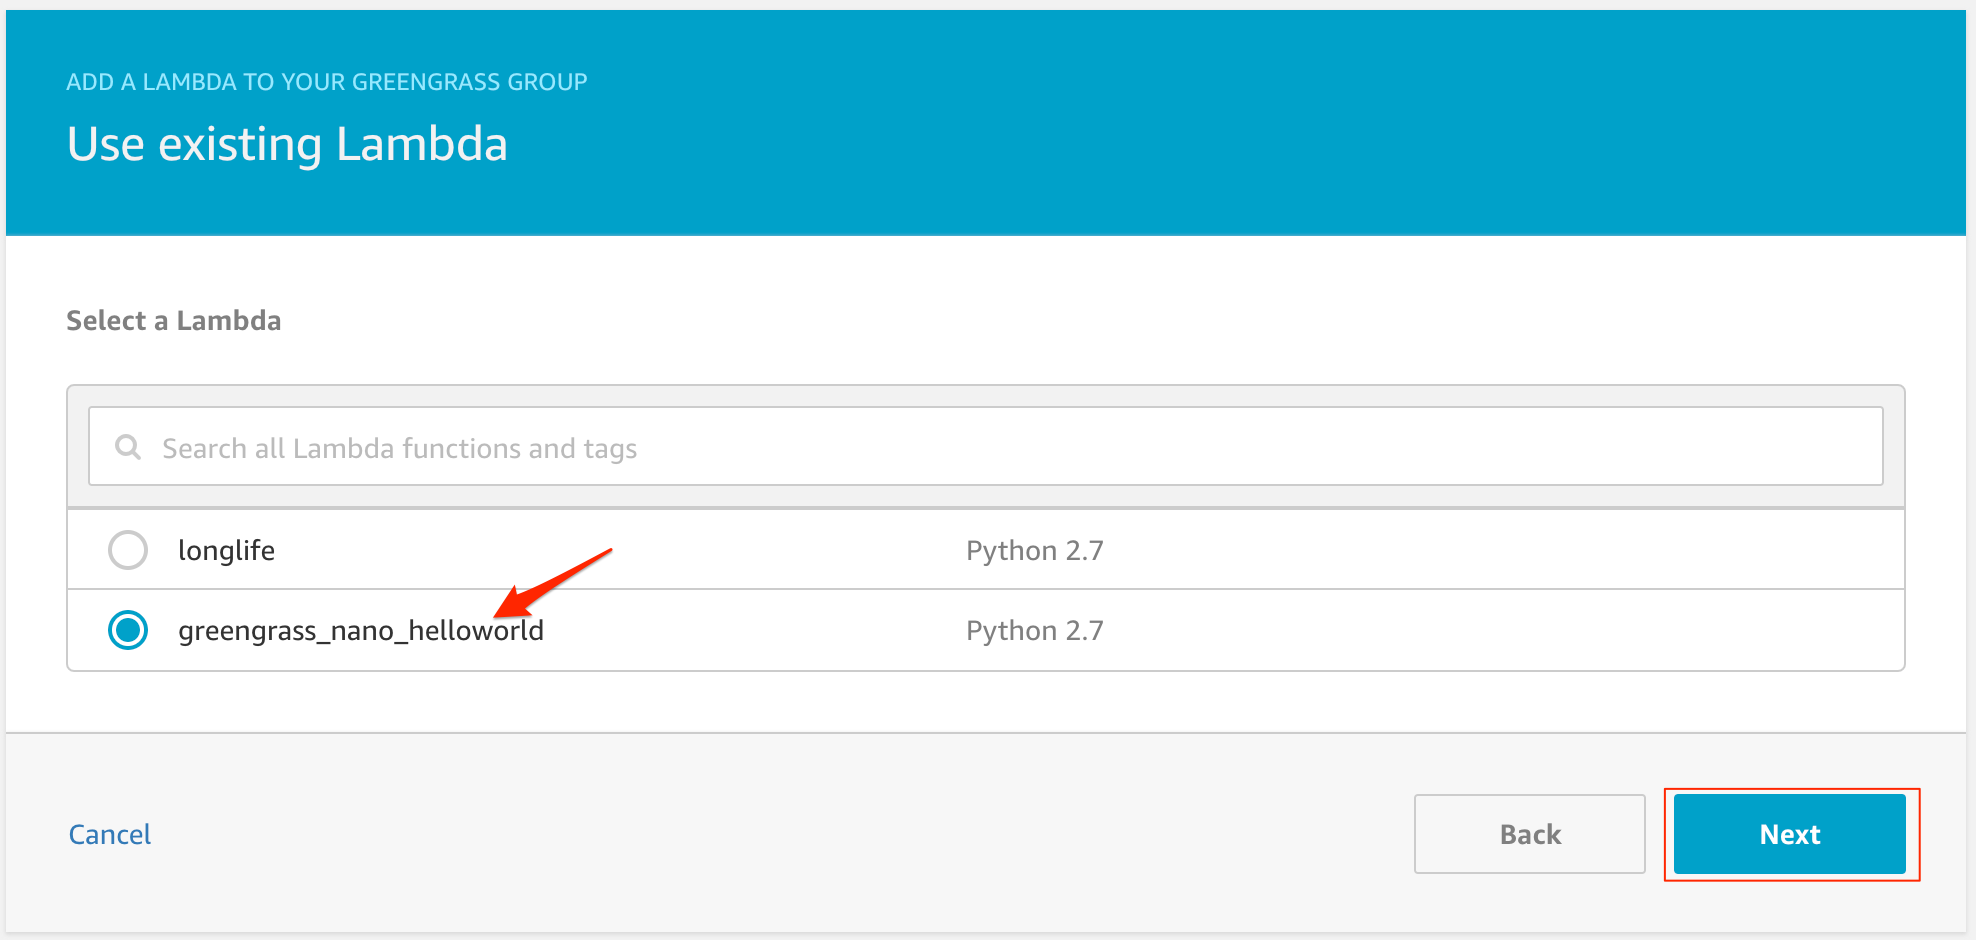
先ほど作成したLambdaを選択
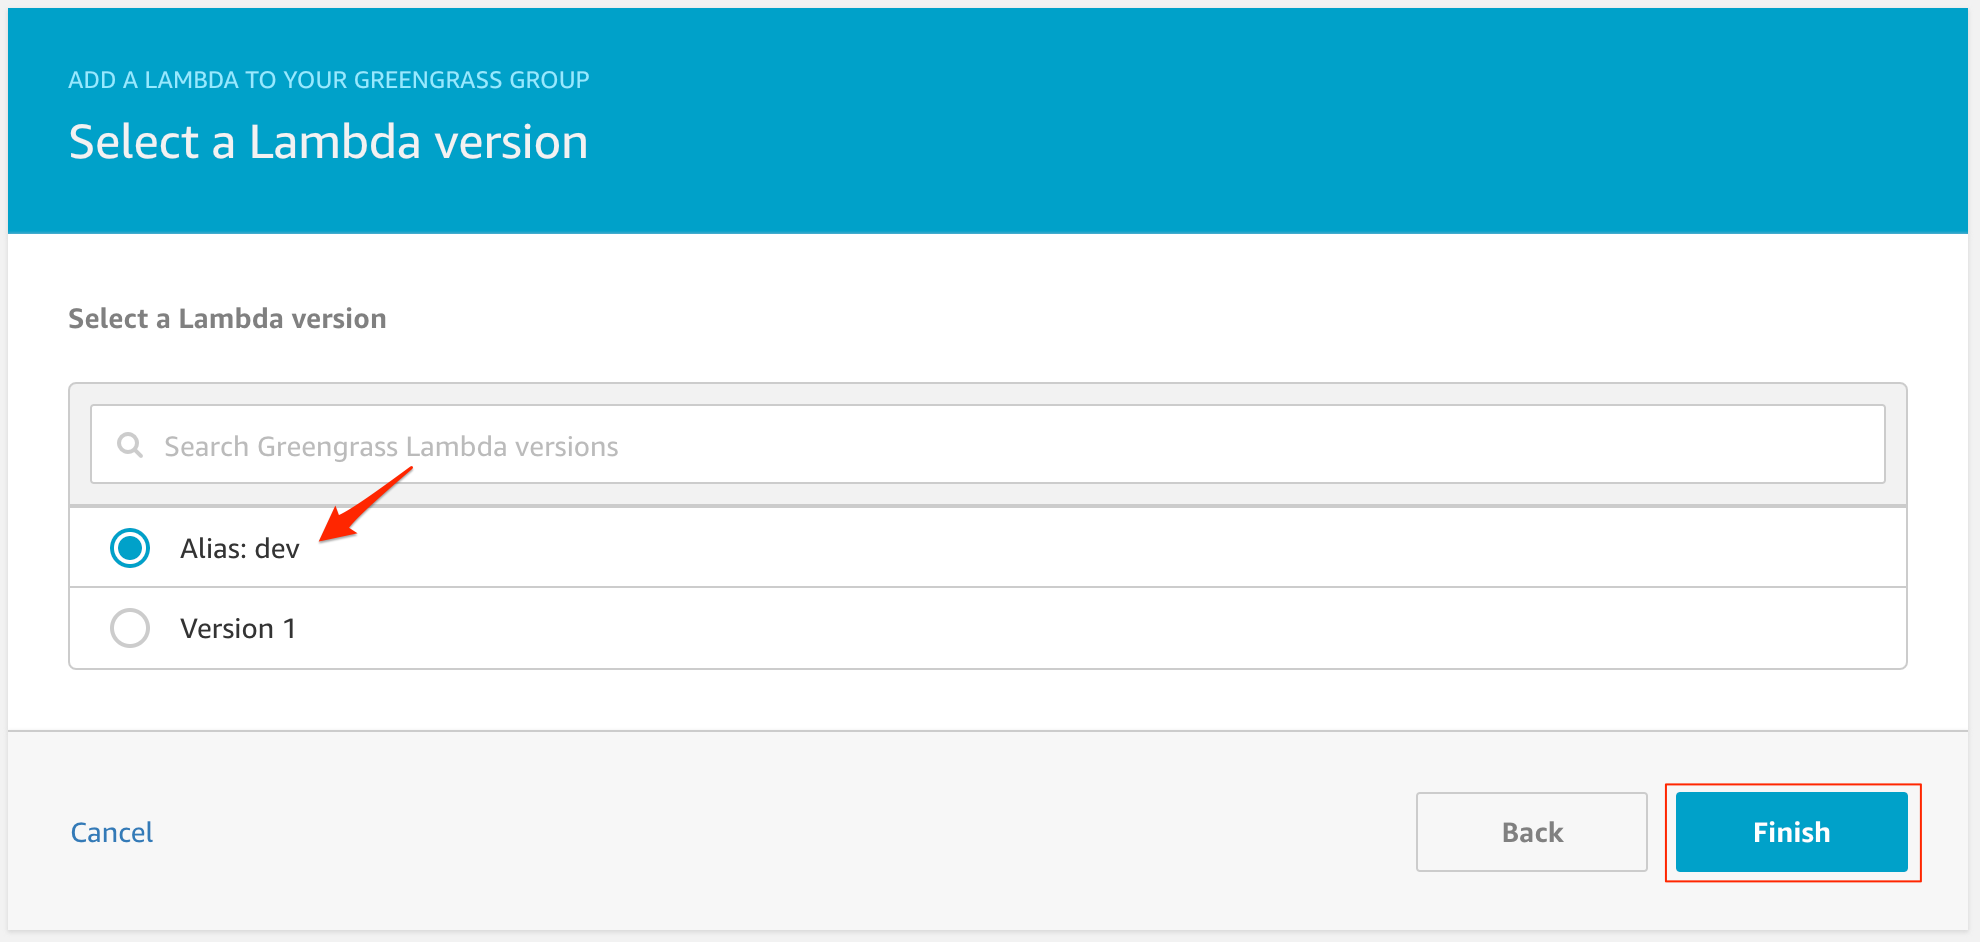
利用するバージョンで、作成したAliasを選択して、Finishを選択
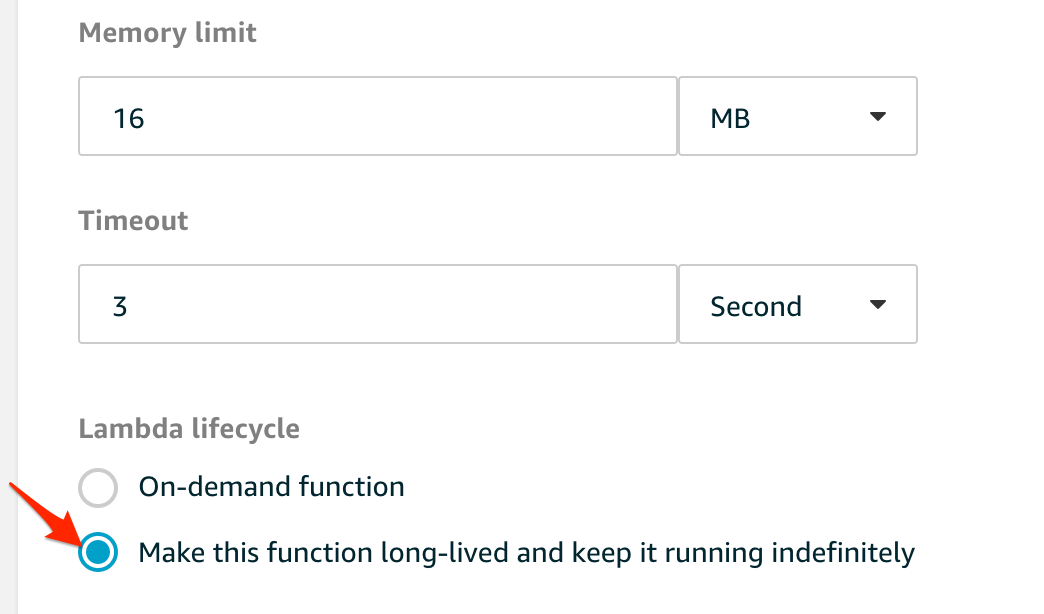
Lambdaが追加されるので「…」を選び、Edit configurationを選択
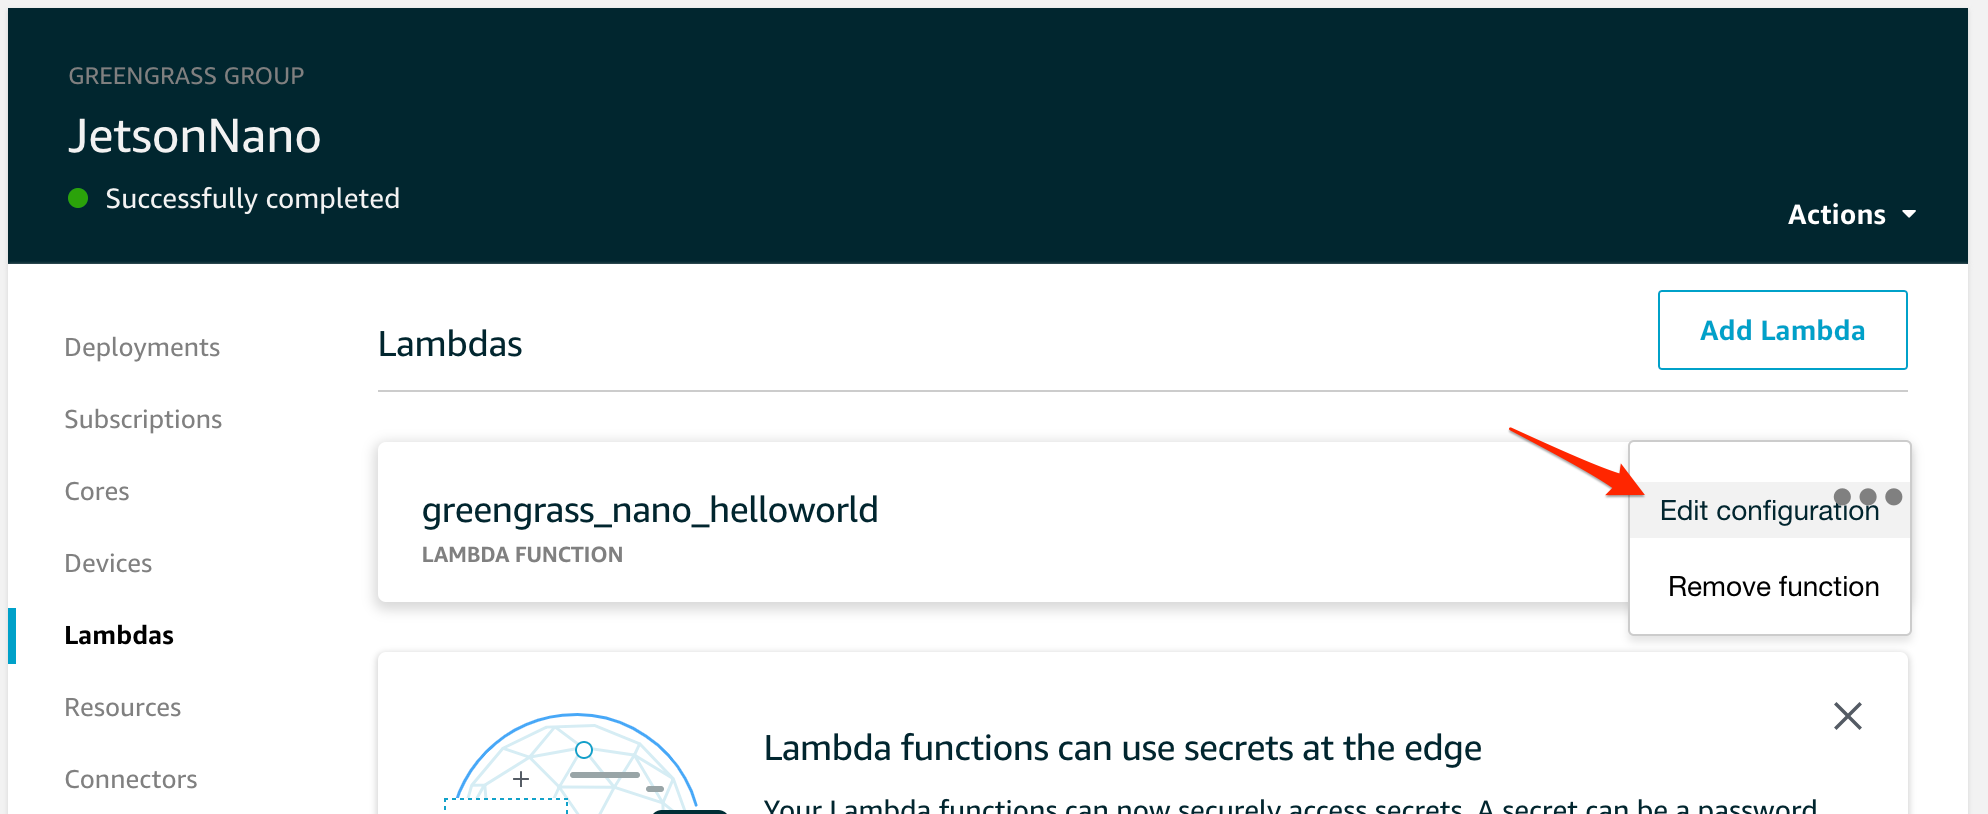
Make this function long-lived and keep it running indefinitelyを選択します。
今回のLambdaはイベントドリブンで実行されるlambdaではなく、long lived lambdaと言う、常時実行しているタイプにするためです。
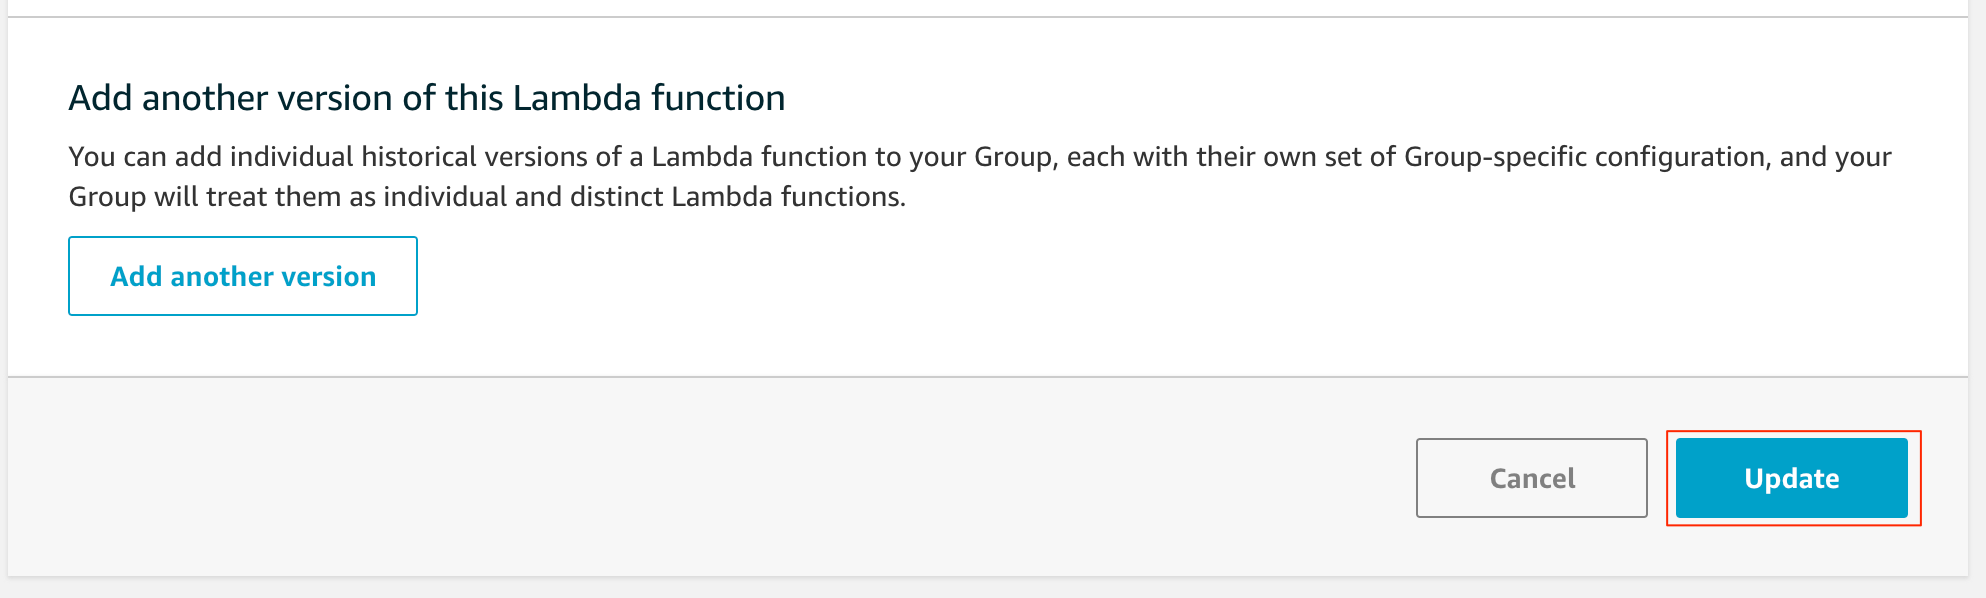
最後に一番下のUpdateを選択
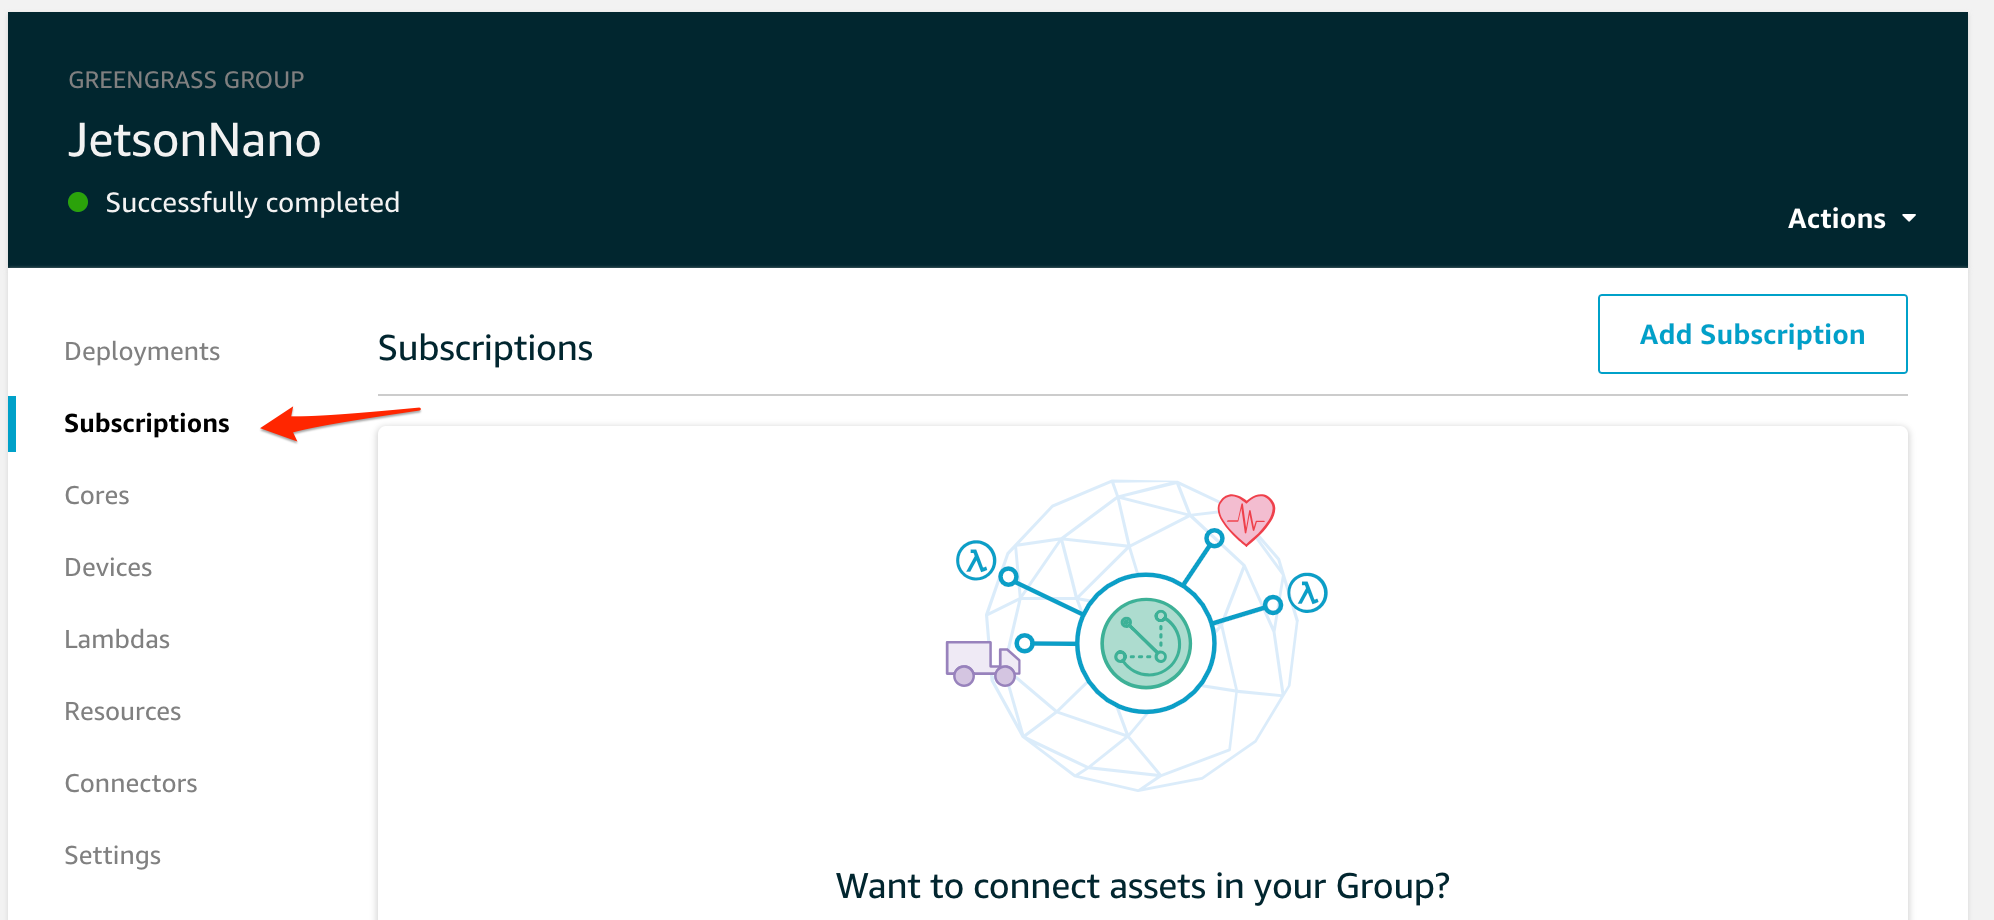
次にサブスクリプションの設定を行うので、Subscriptionsを選択。
Greengrassは自身と、下にぶら下がるthingといった構成も出来、どういったデータをどこに送るかや、特定のデータが来たらLambdaを実行するといった事ができます。それらのルーティングの設定をここのサブスクリプションで行います。
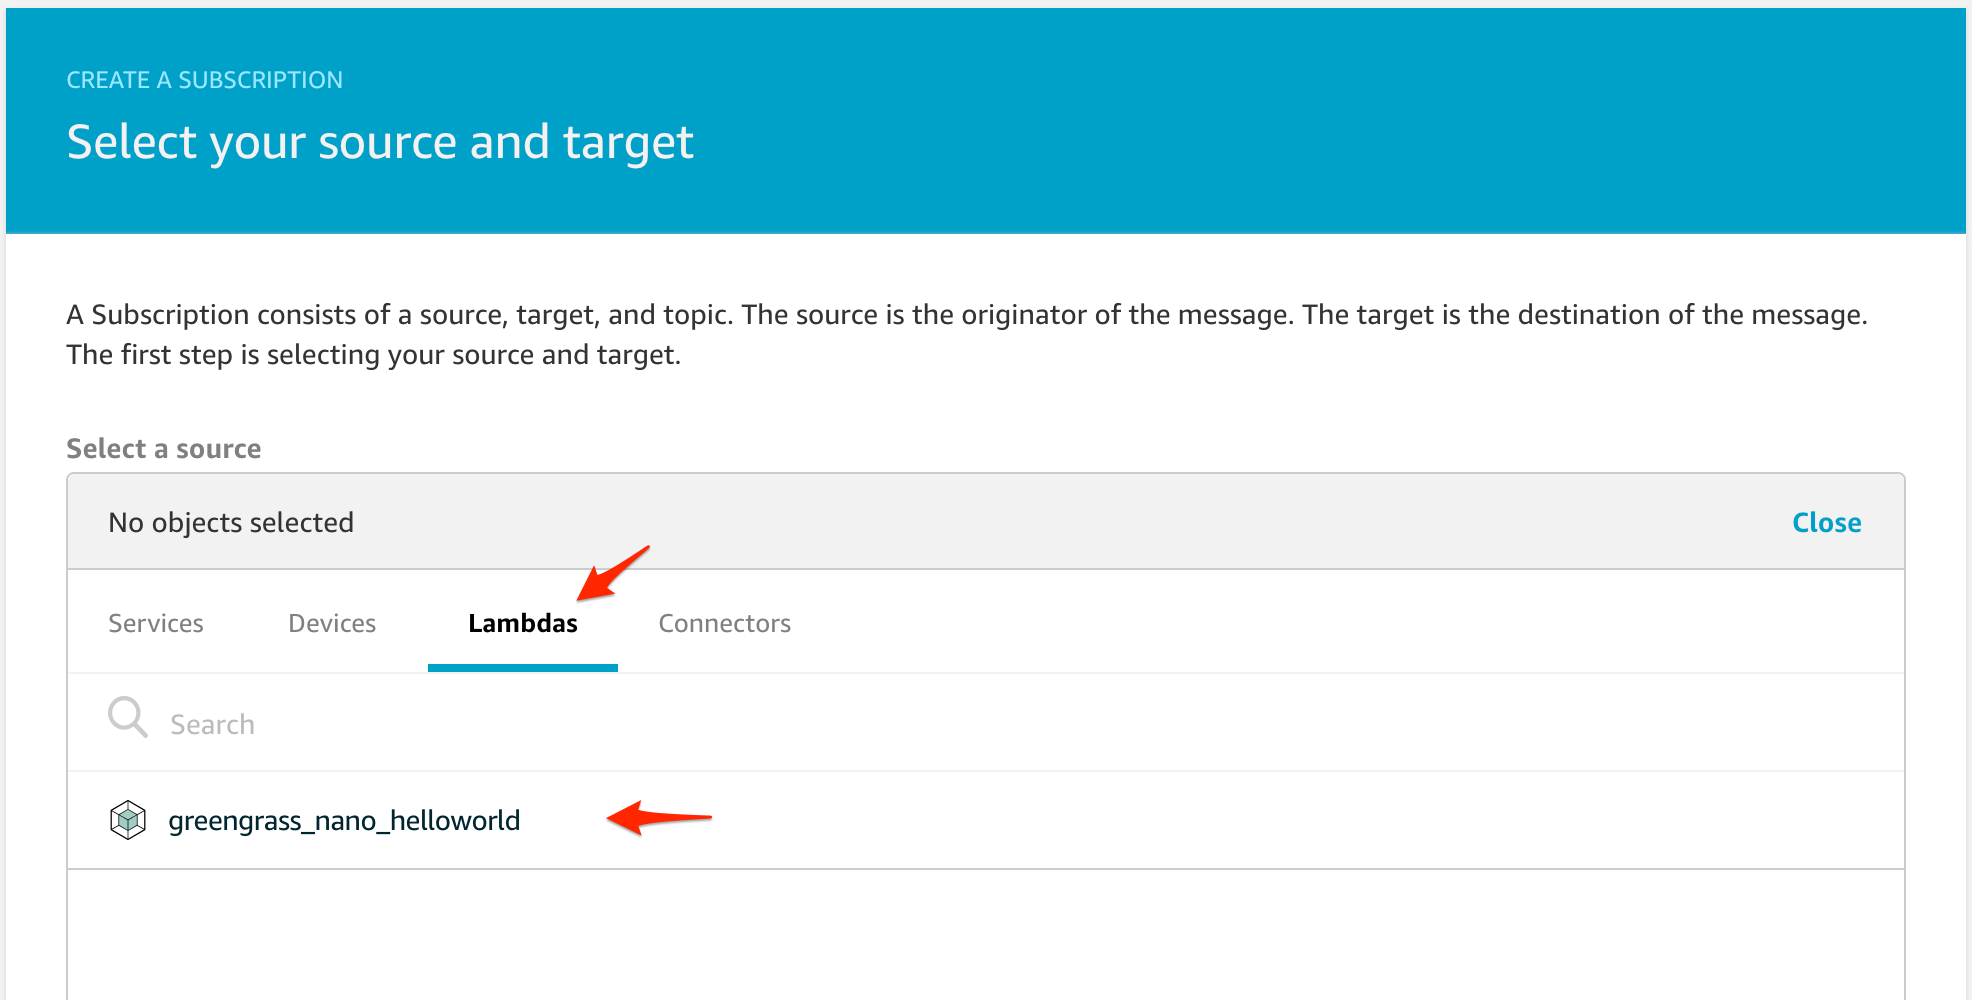
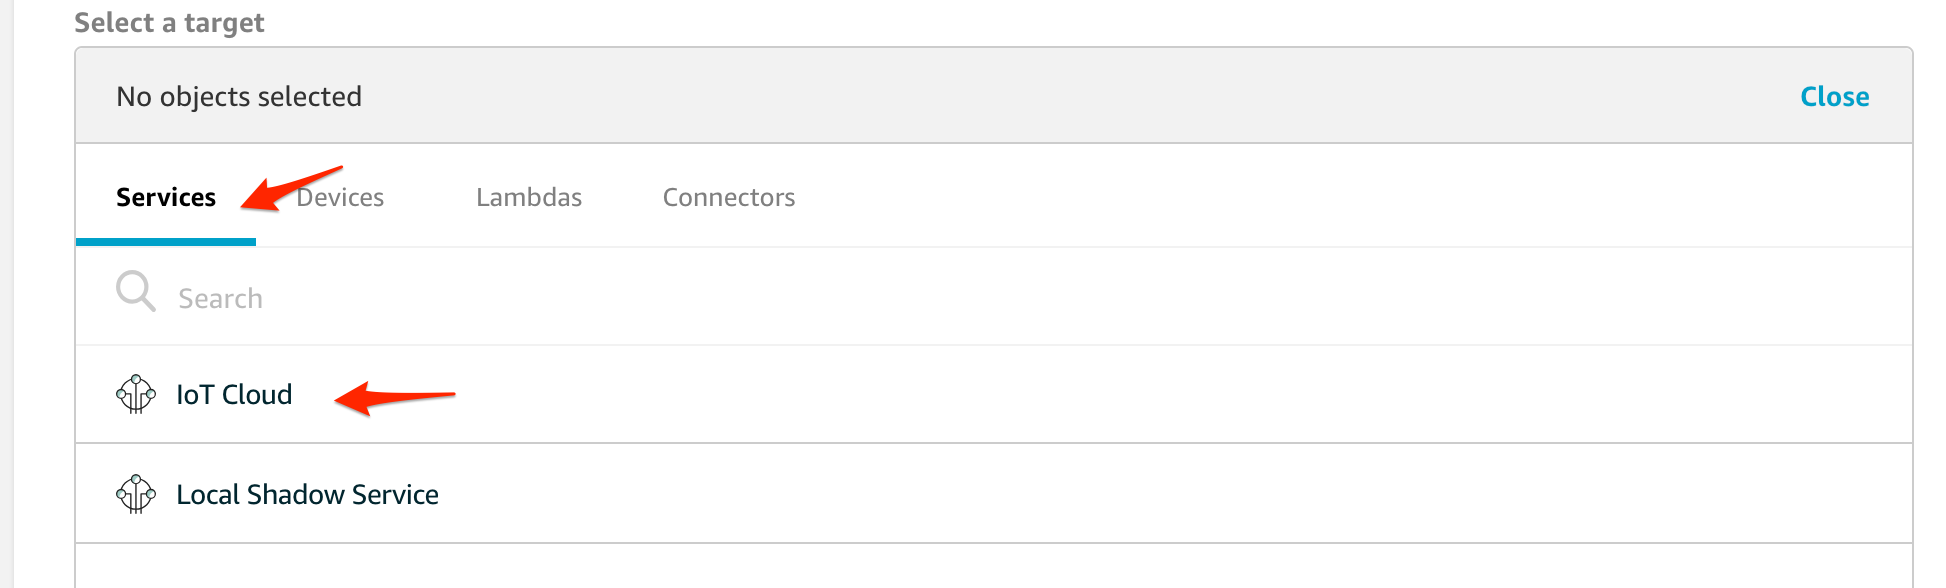
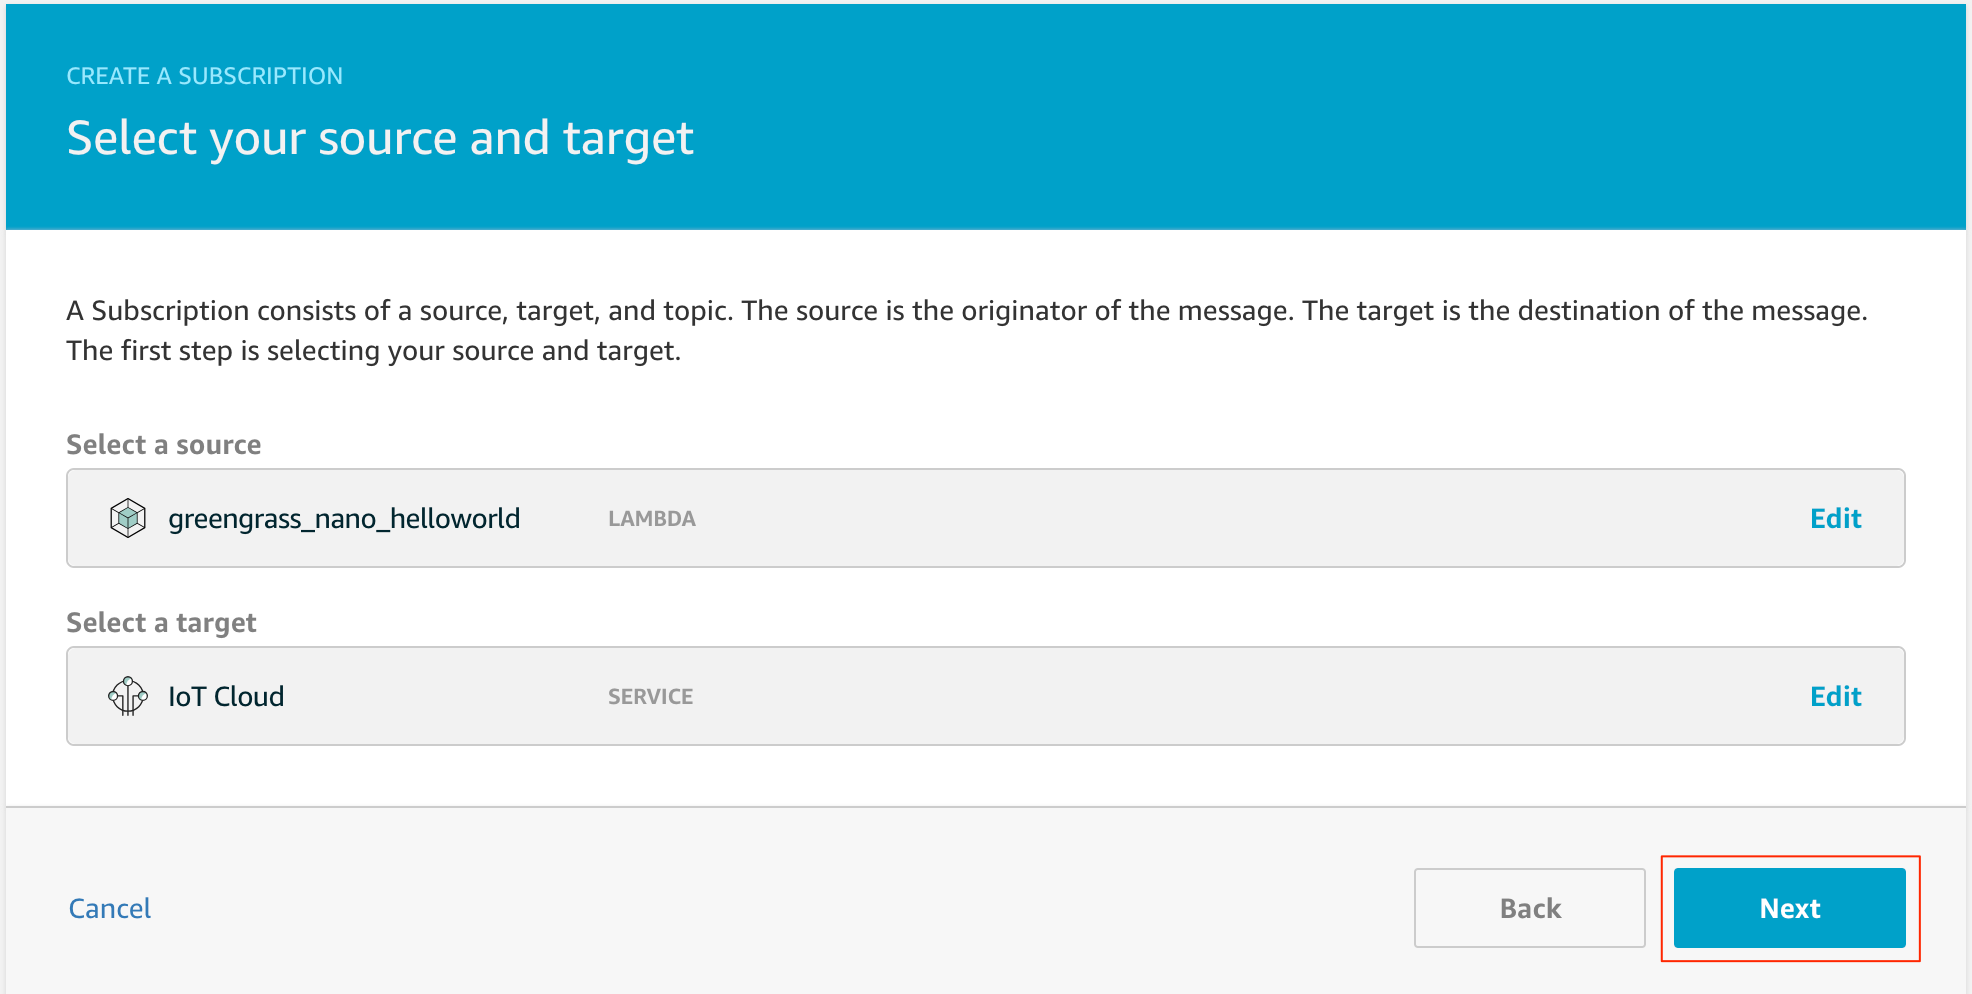
LambdaからAWS IoTにデータをpublishしたいので、sourceにLambdaを指定します
そして、TargetにIoT Cloudを指定
確認してNextを選択
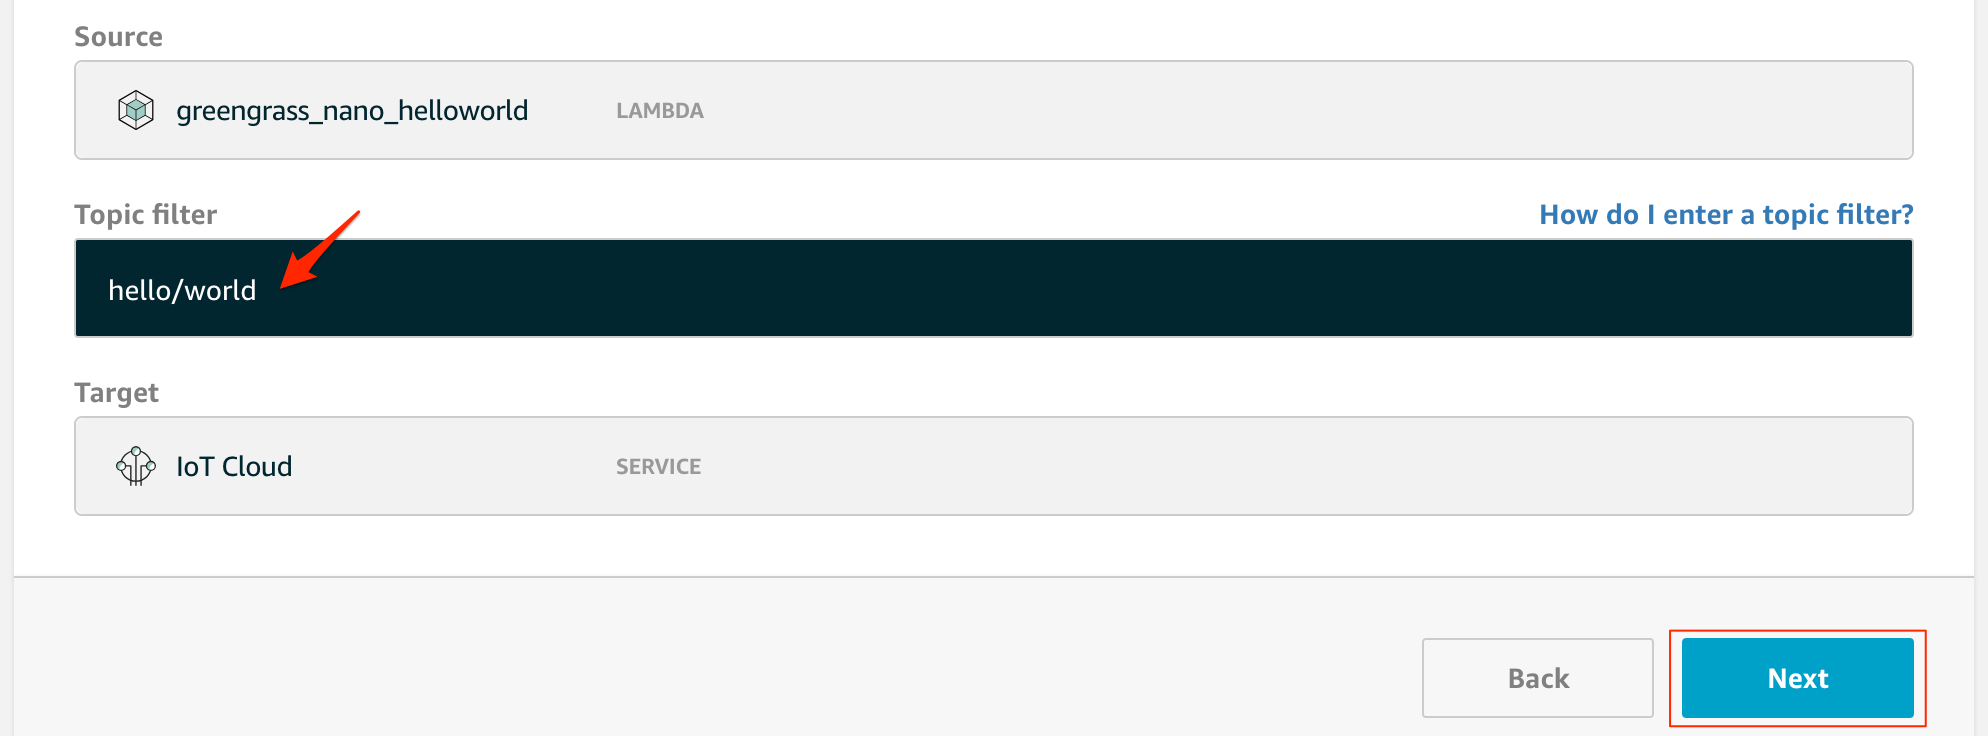
どのデータに対してこのサブスクリプションを適用するか指定するので、サンプルプログラムはhello/worldというtopicにデータをpublishするので、Topic filterにhello/worldを入力して、Nextを選択
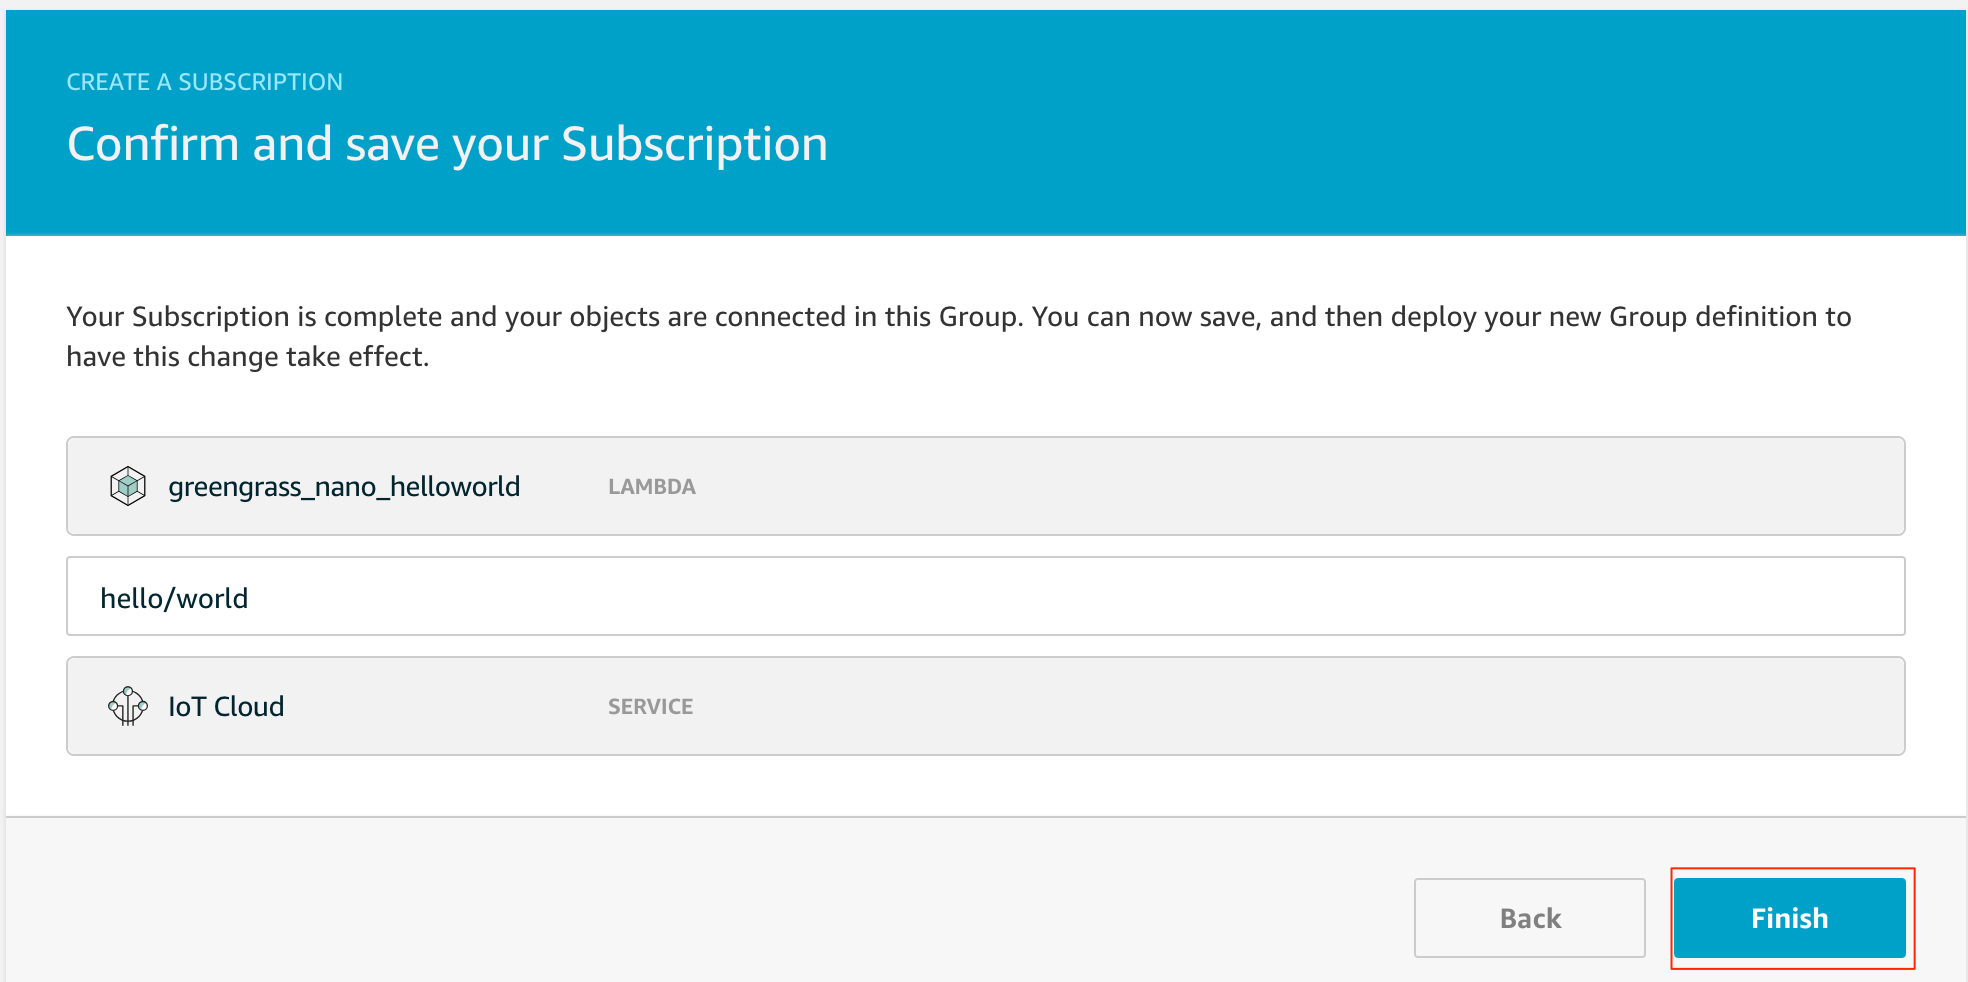
最後に確認して、Finishを選択
これで、Greengrassにデプロイをします
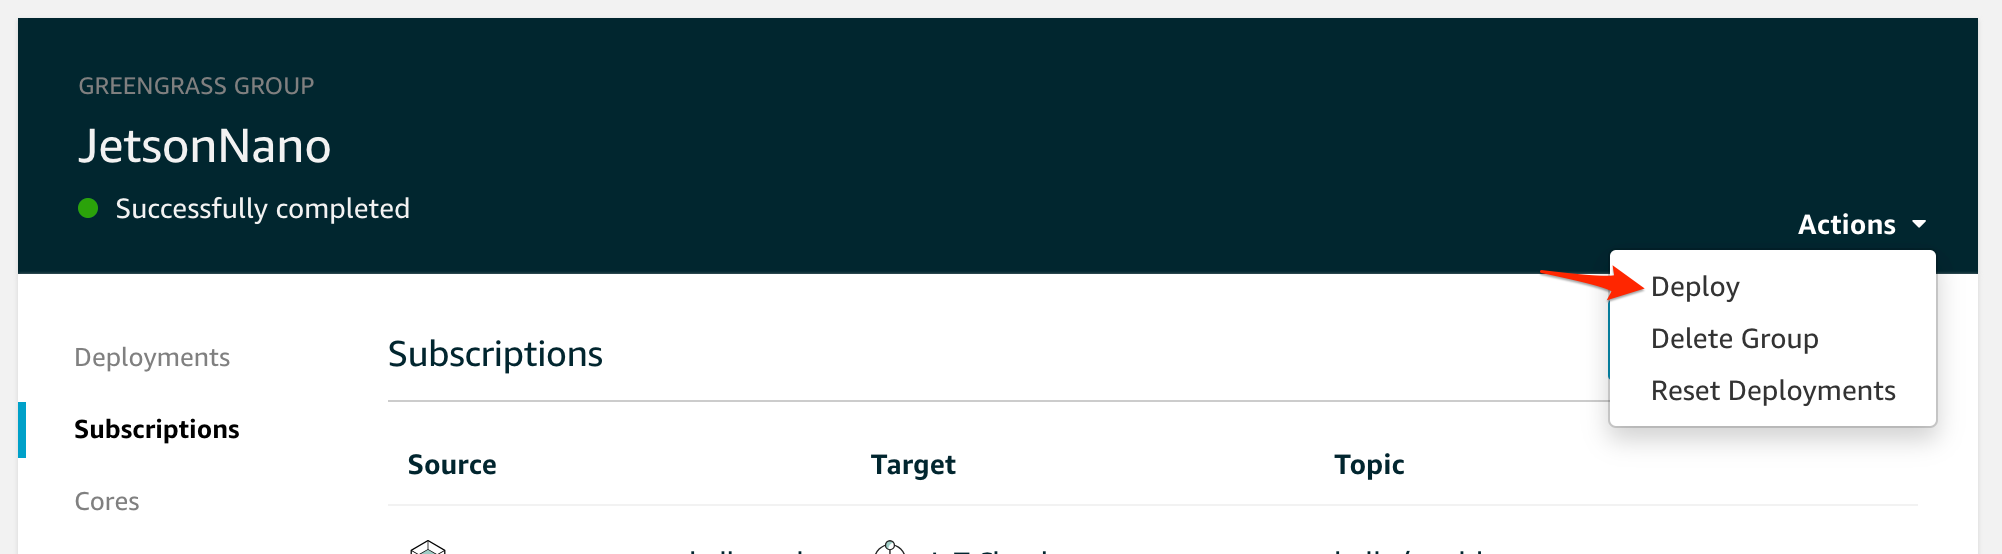
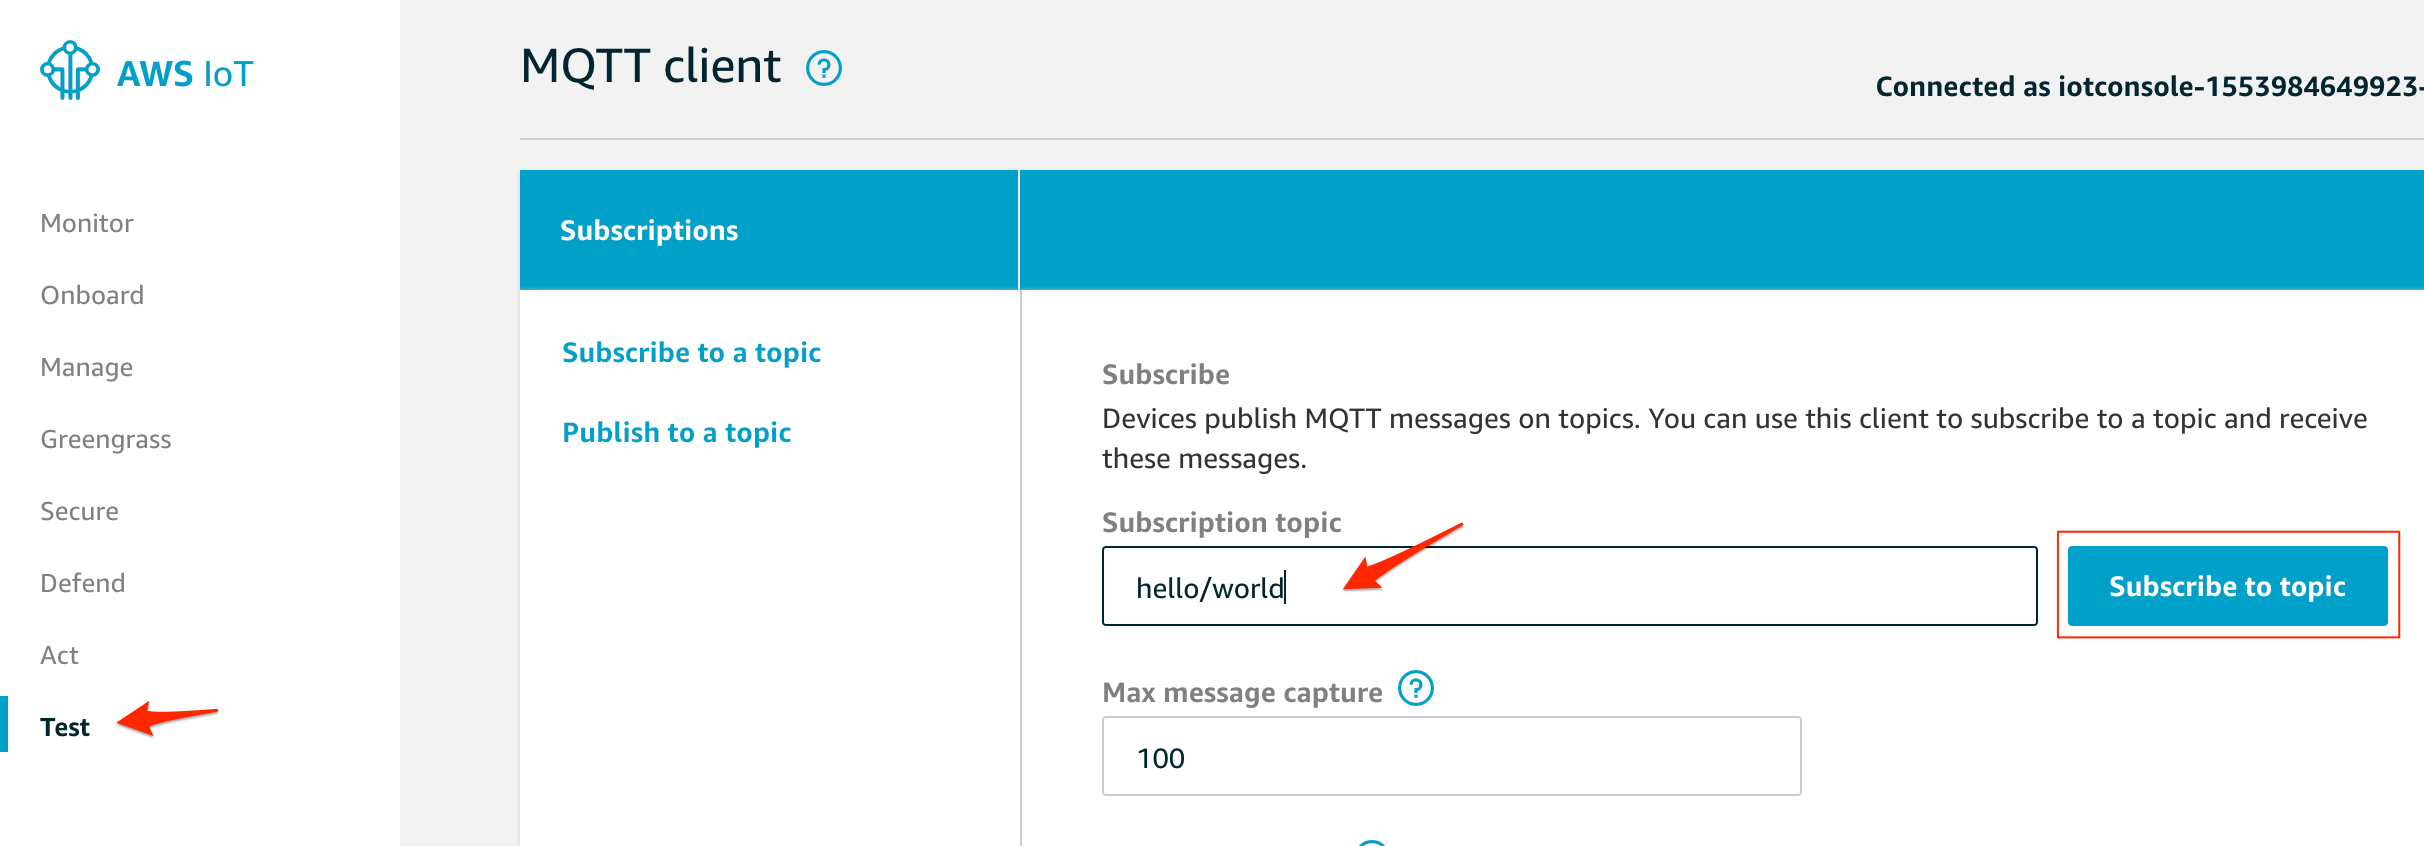
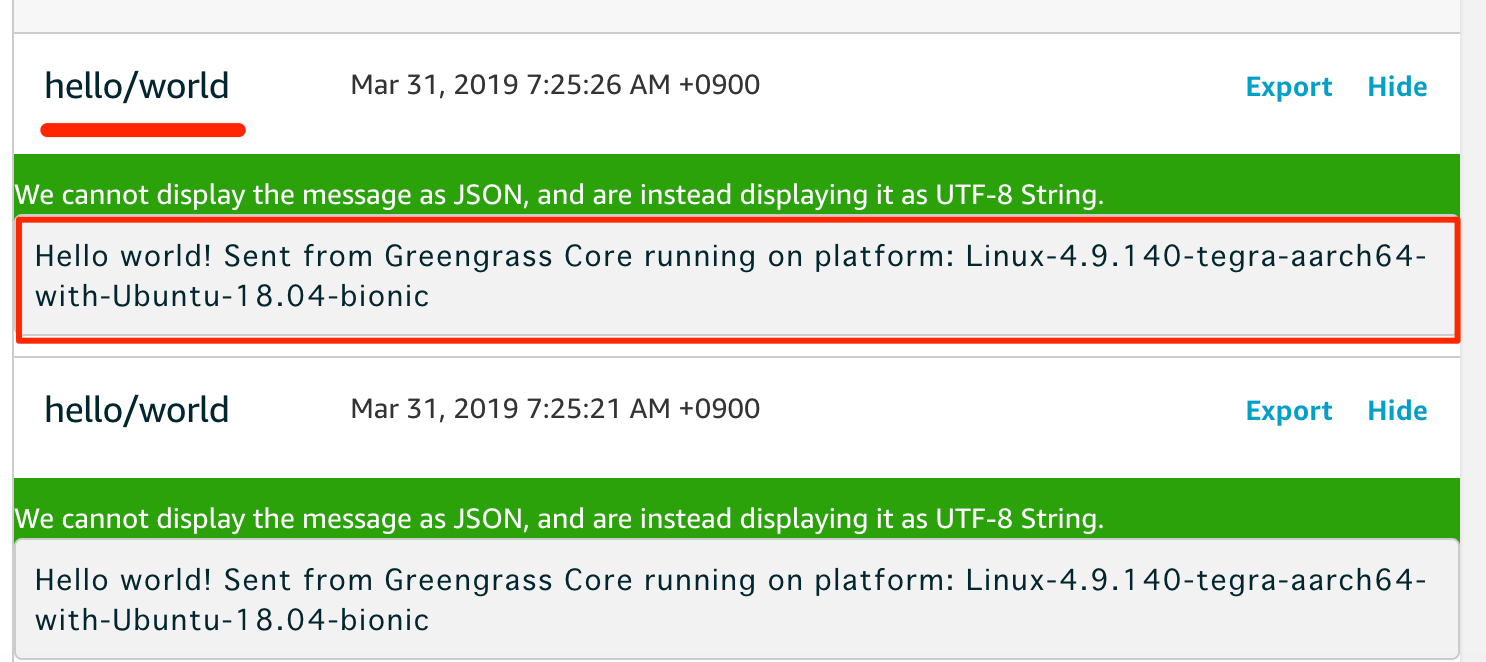
実際にデータが届いているか確認するには、MCにあるMQTTのテストクライアントで、hellow/worldtopicをsubscribeしてみます
ちゃんとデータが届くのが確認できました!
まとめ
Jetson Nanoをセットアップして、Greengrassを動かしてみました。Jetson TX2よりも楽に動かせたので、これは色々試すのには良さそうですね!
次の回では、Greengrass上で推論を行っていみたいと思います
4/13追記
Jetson Nano Developer KitでAWS IoT GreengrassのML Inferenceを試す
免責
発言内容は個人的な意見であり、所属する企業を代表するものではありません。
掲載しているソースコードは、サンプルレベルの物ですので動作を保証するものではありません。