概要
vue.jsの環境を作る際vue-cliを使うと楽に作れるがseleniumテストがデフォルトで動かなかったのでメモ
環境
- CentOS7.4
- node 6.12.2(LTSはもっと上のバージョンだがepel-releaseで入ったのがこれだった)
構築
vueの環境構築
vue-cliの導入(ついでにyarnも入れておく。)
sudo npm install -g vue-cli yarn
projectの作成
vue init webpack example
? Project name example
? Project description A Vue.js project
? Author
? Vue build standalone
? Install vue-router? Yes
? Use ESLint to lint your code? Yes
? Pick an ESLint preset Standard
? Set up unit tests Yes
? Pick a test runner jest
? Setup e2e tests with Nightwatch? Yes
? Should we run `npm install` for you after the project has been created? (recommended) yarn <=ここだけ選択をデフォルトから変更

   vue-cli ・ Generated "example".


# Installing project dependencies ...
# ========================

yarn install v1.3.2
info No lockfile found.
[1/5] Validating package.json...
[2/5] Resolving packages...
[3/5] Fetching packages...
info fsevents@1.1.3: The platform "linux" is incompatible with this module.
info "fsevents@1.1.3" is an optional dependency and failed compatibility check. Excluding it from installation.
[4/5] Linking dependencies...
warning "jest > jest-cli > jest-environment-jsdom > jsdom > request-promise-native@1.0.5" has unmet peer dependency "request@^2.34".
warning "jest > jest-cli > jest-environment-jsdom > jsdom > request-promise-native > request-promise-core@1.1.1" has unmet peer dependency "request@^2.34".
[5/5] Building fresh packages...
success Saved lockfile.
Done in 125.48s.


Running eslint --fix to comply with chosen preset rules...
# ========================

yarn run v1.3.2
$ eslint --ext .js,.vue src test/unit test/e2e/specs --fix
Done in 5.36s.

# Project initialization finished!
# ========================

To get started:

  cd example
  npm run dev

Documentation can be found at https://vuejs-templates.github.io/webpack
※基本的には質問にデフォルトとyesで答えていけばいいが最後のshould we~の下りだけはyarnを選択する
もし選択しなかった場合はプロジェクト作成完了後以下
cd example
yarn install
テスト環境構築
といってもデフォルトでほとんどできているのでseleniumに足りないもの追加する
テストに必要なパッケージの導入
sudo yum -y install java-1.8.0-openjdk java-1.8.0-openjdk-devel
chromeの導入
ドライバ周り
wget https://chromedriver.storage.googleapis.com/2.9/chromedriver_linux64.zip
unzip chromedriver_linux64.zip
sudo mv chromedriver /usr/local/bin/
sudo chown root:root /usr/local/bin/chromedriver
sudo yum install -y libX11 GConf2 fontconfig
chrome本体
vi /etc/yum.repos.d/google-chrome.repo
[google-chrome]
name=google-chrome
baseurl=http://dl.google.com/linux/chrome/rpm/stable/$basearch
enabled=1
gpgcheck=1
gpgkey=https://dl-ssl.google.com/linux/linux_signing_key.pub

sudo yum install -y google-chrome-unstable libOSMesa google-noto-cjk-fonts
npmパッケージ
//projectのルートディレクトリで行う
npm install chromedriver --save
設定の修正
そのままだとseleniumサーバをあげたときにhung upしてしまうので下記ファイルに設定を追加
test/e2e/nightwatch.conf.js
-        acceptSslCerts: true
+        acceptSslCerts: true,
+        'goog:chromeOptions': {
+            args: [
+               'headless',
+               'no-sandbox'
+             ],
+        },
テスト実行
npm run test

> example@1.0.0 test [projectのフルパス]
> npm run unit && npm run e2e


> -example@1.0.0 unit [projectのフルパス]
> jest --config test/unit/jest.conf.js --coverage

 PASS  test/unit/specs/HelloWorld.spec.js
  HelloWorld.vue
    ? should render correct contents (28ms)

Test Suites: 1 passed, 1 total
Tests:       1 passed, 1 total
Snapshots:   0 total
Time:        1.203s
Ran all test suites.
-----------------|----------|----------|----------|----------|----------------|
File             |  % Stmts | % Branch |  % Funcs |  % Lines |Uncovered Lines |
-----------------|----------|----------|----------|----------|----------------|
All files        |     7.69 |        0 |    33.33 |     12.5 |                |
 src             |        0 |        0 |        0 |        0 |                |
  App.vue        |        0 |        0 |        0 |        0 |... 19,20,21,22 |
 src/components  |      100 |      100 |      100 |      100 |                |
  HelloWorld.vue |      100 |      100 |      100 |      100 |                |
-----------------|----------|----------|----------|----------|----------------|

> example@1.0.0 e2e [projectのフルパス]
> node test/e2e/runner.js

Starting selenium server... started - PID:  3197

[Test] Test Suite
=====================

Running:  default e2e tests
 ? Element <#app> was visible after 101 milliseconds.
 ? Testing if element <.hello> is present.
 ? Testing if element <h1> contains text: "Welcome to Your Vue.js App".
 ? Testing if element <img> has count: 1

OK. 4 assertions passed. (11.547s)
上記のようになれば成功
CI環境構築
今時ならここら辺は最低限やっておきたい
travis-ci
よく使われているであろうtravis-ciを使う
- githubとの連携が容易
- travis-ci.orgとtravis-ci.comの二種類がある
- travis-ci.orgはpublicリポジトリでフリーで使える。OSSなどはこちらを利用する。
- travis-ci.comはprivateリポジトリ向けで有料
- .travis.ymlを記述することで設定。基本動作だけでいいなら使用言語を書くだけでいい
- これはどこもそうだがbuildに通ってるかどうかのバッチが取れる。

設定
- https://travis-ci.org/ でgithubとの連携を行う。
- こんなページに飛ぶので連係したいリポジトリをonにする。
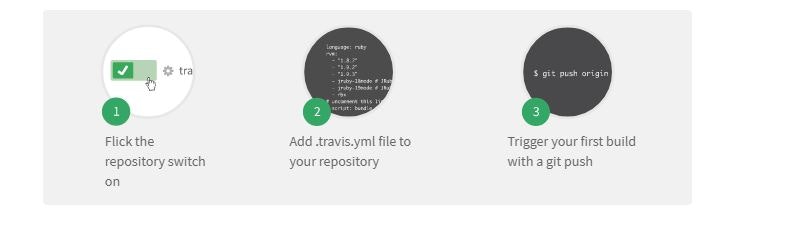
- .travis.ymlの編集
.travis.yml
language: node_js
node_js:
  - "6"
dist: trusty
sudo: false
cache: yarn
notifications:
  email:
    on_success: never
- 使用言語node
- デフォルトだと古いバージョンを使いnpm installにこけるのでversion指定
- yarnが使えるように設定(これでbuild時間が短縮される)
- 成功したときは通知を送らず失敗したときのみ通知を送るようにする
4.pushする。
成功するとこんな感じ

Codeカバレッジ計測
これをあげることはそこまで意味ないと思いますがある程度は指標としてあったほうがいいと思うのでcoverallsを使用します
coveralls
設定
1.https://coveralls.ioでgithubとの連携
2.同様にリポジトリとの連携をonにしておく
3.必要なnpmパッケージを導入
npm install coveralls --save-dev
4.テストに必要な設定を追加
package.json
+    "unit-conv": "jest --config test/unit/jest.conf.js --coverage && cat test/unit/coverage/lcov.info | ./node_modules/coveralls/bin/coveralls.js",
+    "test-travis": "npm run unit-conv && npm run e2e",
.coveralls.yml
+service_name: travis-ci
.travis.yml
+script: 'npm run test-travis'
こうするとtravis-ciからcoverallsに情報が送られる。
バッチとしてはこんな感じ