IBM Cloud Kubernetes Service(IKS)上にWeave FluxをHelm Operator付きでセットアップし、HelmリリースをFluxで管理できることを確認する。
| コンポーネント | バージョン |
|---|---|
| Kubernetes | v1.11.7+IKS |
| Helm | v2.12.3 |
| Fluxチャート | 0.6.3 |
| Flux | 1.10.1 |
IKSの無料クラスターで確認。IKSでのクラスターのセットアップについては省略。他のKubernetes環境でも同じだと思われる。
Helm OperatorなしでMinikube環境に入れてみたときのログは以下。
Helmのセットアップ
以下に従いHelmをセットアップする。
kube-system NamespaceにtillerというServiceAccountを作成しcluster-adminのClusterRoleをバインドするClusterRoleBindingを作成する。
kubectl apply -f https://raw.githubusercontent.com/IBM-Cloud/kube-samples/master/rbac/serviceaccount-tiller.yaml
$ kubectl apply -f https://raw.githubusercontent.com/IBM-Cloud/kube-samples/master/rbac/serviceaccount-tiller.yaml
serviceaccount/tiller created
clusterrolebinding.rbac.authorization.k8s.io/tiller created
$
(補足)以下のようなyamlをapplyしている。
apiVersion: v1
kind: ServiceAccount
metadata:
 name: tiller
 namespace: kube-system
---
apiVersion: rbac.authorization.k8s.io/v1
kind: ClusterRoleBinding
metadata:
 name: tiller
roleRef:
 apiGroup: rbac.authorization.k8s.io
 kind: ClusterRole
 name: cluster-admin
subjects:
 - kind: ServiceAccount
   name: tiller
   namespace: kube-system
作成したServiceAccountを指定してhelmを初期化してtillerをインストールする。
helm init --service-account tiller
$ helm init --service-account tiller
$HELM_HOME has been configured at /Users/sotoiwa/.helm.

Tiller (the Helm server-side component) has been installed into your Kubernetes Cluster.

Please note: by default, Tiller is deployed with an insecure 'allow unauthenticated users' policy.
To prevent this, run `helm init` with the --tiller-tls-verify flag.
For more information on securing your installation see: https://docs.helm.sh/using_helm/#securing-your-helm-installation
Happy Helming!
$
Fluxのインストール
基本的には以下の手順に従う。
以下も参考にする。
- https://github.com/weaveworks/flux/blob/master/chart/flux/README.md
- Managing Helm releases the GitOps way
Fluxのチャートのリポジトリを追加する。
helm repo add weaveworks https://weaveworks.github.io/flux
リポジトリを確認。
$ helm repo list
NAME          	URL
stable        	https://kubernetes-charts.storage.googleapis.com
local         	http://127.0.0.1:8879/charts
weaveworks    	https://weaveworks.github.io/flux
$
チャートを確認する。
$ helm search flux
NAME            	CHART VERSION	APP VERSION	DESCRIPTION
stable/influxdb 	1.1.1        	1.7.2      	Scalable datastore for metrics, events, and real-time ana...
weaveworks/flux 	0.6.3        	1.10.1     	Flux is a tool that automatically ensures that the state ...
stable/kapacitor	1.1.1        	1.5.2      	InfluxDB's native data processing engine. It can process ...
stable/telegraf 	0.3.3        	1.5        	Telegraf is an agent written in Go for collecting, proces...
$
デフォルトのvaluesを確認する場合は以下のコマンドを実行するか、READMEのここを見る。
helm inspect values weaveworks/flux
HelmReleaseのCRDを作成する。なお、CRDはチャートのオプションでリリースに含めて作成することも可能だが、ここではあらかじめ作成する。
kubectl apply -f https://raw.githubusercontent.com/weaveworks/flux/master/deploy-helm/flux-helm-release-crd.yaml
HelmReleaseのリソースが使えるようになる。
$ kubectl apply -f https://raw.githubusercontent.com/weaveworks/flux/master/deploy-helm/flux-helm-release-crd.yaml
customresourcedefinition.apiextensions.k8s.io/helmreleases.flux.weave.works created
$ kubectl get HelmRelease
No resources found.
$
FluxをデプロイするNamespaceは先に作成する。
kubectl create ns flux
Fluxのチャートをリリースする。GitHub Enterpriseの場合はサーバーの公開鍵を確認してパラメータに指定する必要があるので、ssh-keyscanコマンドで確認した結果を渡す。
YOUR_GIT_HOST=github.hogehoge.com
YOUR_GIT_USER=fugafuga
YOUR_GIT_REPO=flux-get-started
KNOWN_HOSTS=$(ssh-keyscan $YOUR_GIT_HOST)

helm upgrade --install flux \
  --set helmOperator.create=true \
  --set helmOperator.createCRD=false \
  --set git.url="git@${YOUR_GIT_HOST}:${YOUR_GIT_USER}/${YOUR_GIT_REPO}.git" \
  --set-string ssh.known_hosts="${KNOWN_HOSTS}" \
  --set git.pollInterval=60s \
  --set registry.pollInterval=60s \
  --namespace flux \
  weaveworks/flux
$ helm upgrade --install flux \
>   --set helmOperator.create=true \
>   --set helmOperator.createCRD=false \
>   --set git.url="git@${YOUR_GIT_HOST}:${YOUR_GIT_USER}/${YOUR_GIT_REPO}.git" \
>   --set-string ssh.known_hosts="${KNOWN_HOSTS}" \
>   --set git.pollInterval=60s \
>   --set registry.pollInterval=60s \
>   --namespace flux \
>   weaveworks/flux
Release "flux" does not exist. Installing it now.
NAME:   flux
LAST DEPLOYED: Wed Feb 20 17:55:40 2019
NAMESPACE: flux
STATUS: DEPLOYED

RESOURCES:
==> v1/Pod(related)
NAME                                 READY  STATUS             RESTARTS  AGE
flux-846b8894cc-9nbzc                0/1    ContainerCreating  0         3s
flux-helm-operator-76c6f6b947-6vcnk  0/1    ContainerCreating  0         3s
flux-memcached-8f69f4b95-rdx6q       0/1    ContainerCreating  0         3s

==> v1/Secret
NAME             TYPE    DATA  AGE
flux-git-deploy  Opaque  0     3s

==> v1/ConfigMap
NAME              DATA  AGE
flux-kube-config  1     3s
flux-ssh-config   1     3s

==> v1/ServiceAccount
NAME  SECRETS  AGE
flux  1        3s

==> v1beta1/ClusterRole
NAME  AGE
flux  3s

==> v1beta1/ClusterRoleBinding
NAME  AGE
flux  3s

==> v1/Service
NAME            TYPE       CLUSTER-IP      EXTERNAL-IP  PORT(S)    AGE
flux-memcached  ClusterIP  172.21.179.175  <none>       11211/TCP  3s
flux            ClusterIP  172.21.148.170  <none>       3030/TCP   3s

==> v1/Deployment
NAME                DESIRED  CURRENT  UP-TO-DATE  AVAILABLE  AGE
flux                1        1        1           0          3s
flux-helm-operator  1        1        1           0          3s
flux-memcached      1        1        1           0          3s


NOTES:
Get the Git deploy key by either (a) running

  kubectl -n flux logs deployment/flux | grep identity.pub | cut -d '"' -f2

or by (b) installing fluxctl through
https://github.com/weaveworks/flux/blob/master/site/fluxctl.md#installing-fluxctl
and running:

  fluxctl identity


$
fluxctlでFluxが生成したSSH鍵ペアの公開鍵を確認する。
fluxctl identity --k8s-fwd-ns flux
(または)
export FLUX_FORWARD_NAMESPACE=flux
fluxctl identity
(または)
kubectl -n flux logs deployment/flux | grep identity.pub | cut -d '"' -f2
確認した公開鍵をGitHub上でリポジトリのdeploy keyに追加する。Write accessをつけること。
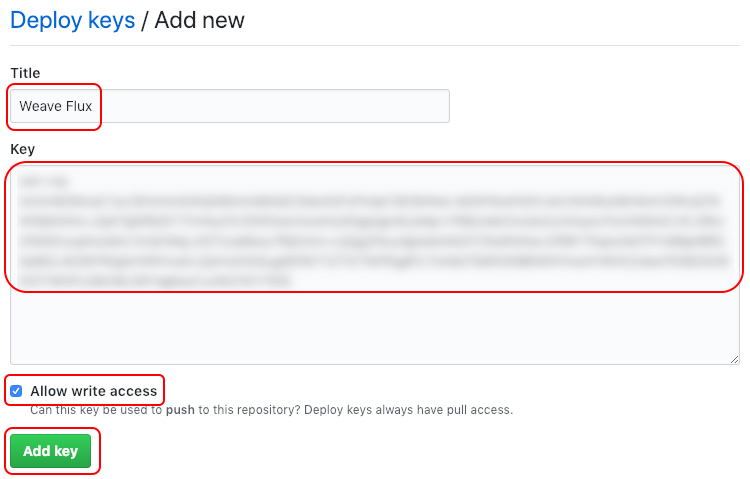
以上で完了。
マニフェストのリリース確認
普通のマニフェストがFluxによってデプロイできることを確認する。
マニフェストの作成
busyboxのPodのyamlを作成する。
apiVersion: v1
kind: Pod
metadata:
  name: busybox
spec:
  containers:
  - name: busybox
    image: busybox:latest
    imagePullPolicy: Always
    command:
      - tail
      - -f
      - /dev/null
git pushによるデプロイ
作成したマニフェストをmasterブランチにgit pushする。
git add busybox-pod.yaml
git commit -m "add busybox pod"
git push
リポジトリは以下のような状態。yamlはどこにあってもよいので、実際はNamespaceごとやリソースの種類ごとに整理するのがよさそう。
flux-get-started
├── README.md
└── busybox-pod.yaml
fluxのログをtailする場合は以下コマンドを実行
kubectl -n flux logs -f deployment/flux
しばらく待つと、busyboxのPodが作成されることが確認できる。
$ kubectl get po
NAME                              READY   STATUS    RESTARTS   AGE
busybox                           1/1     Running   0          4m
details-v1-855bb76df-4xsd4        2/2     Running   0          2h
productpage-v1-6959d4fcd7-s8v4x   2/2     Running   0          2h
ratings-v1-58458c9545-c4mrd       2/2     Running   0          2h
reviews-v1-55cf7957d-mt86p        2/2     Running   0          2h
reviews-v2-f79f665c-z6mps         2/2     Running   0          2h
reviews-v3-859d8947bd-g2cjx       2/2     Running   0          2h
$
Helmチャートのリリース確認
FluxでHelmリリースもできることを確認する。ここではWeave ScopeをHelmで導入する。
マニフェストの作成
はじめにデプロイ先のNamespaceのマニフェストを作成する。
apiVersion: v1
kind: Namespace
metadata:
  name: scope
続いてHelmReleaseのマニフェスト定義を作成する。HelmReleaseについては以下を参照。
weave-scopeのチャートはstableリポジトリにある。リポジトリのURLを確認する。
$ helm search weave-scope
NAME              	CHART VERSION	APP VERSION	DESCRIPTION
stable/weave-scope	0.11.0       	1.10.1     	A Helm chart for the Weave Scope cluster visualizer.
$ helm repo list
NAME          	URL
stable        	https://kubernetes-charts.storage.googleapis.com
local         	http://127.0.0.1:8879/charts
weaveworks    	https://weaveworks.github.io/flux
$
HelmReleaseのマニフェストは以下のように作成。valuesはデフォルトでもよさそうだが、ちゃんとvaluesが渡せることを確認したいので、image.pullPolicyをAlwaysに指定した。
apiVersion: flux.weave.works/v1beta1
kind: HelmRelease
metadata:
  name: weave-scope
  namespace: scope
spec:
  releaseName: weave-scope
  chart:
    repository: https://kubernetes-charts.storage.googleapis.com/
    name: weave-scope
    version: 0.11.0
  values:
    image.pullPolicy: Always
git pushによるデプロイ
マニフェストをgit pushする。
git add scope-namespace.yaml weave-scope-helmrelease.yaml
git commit -m "add weave-scope helmrelease"
git push
リポジトリは以下のような状態。
flux-get-started
├── README.md
├── busybox-pod.yaml
├── scope-namespace.yaml
└── weave-scope-helmrelease.yaml
FluxとHelm Operatorのログは以下コマンドでtailする。
kubectl -n flux logs -f deployment/flux
kubectl -n flux logs -f deployment/flux-helm-operator
しばらく待つと、Namespaceが作成され、HelmReleaseも作成されている。
$ kubectl get ns
NAME             STATUS   AGE
default          Active   2d
flux             Active   2h
ibm-cert-store   Active   2d
ibm-system       Active   2d
istio-system     Active   2d
kube-public      Active   2d
kube-system      Active   2d
scope            Active   6m
$ kubectl get HelmRelease --all-namespaces
NAMESPACE   NAME          AGE
scope       weave-scope   6m
$
weave-scopeがHelmリリースされ、valuesも渡されている。
$ helm ls
NAME       	REVISION	UPDATED                 	STATUS  	CHART             	APP VERSION	NAMESPACE
flux       	1       	Wed Feb 20 17:55:40 2019	DEPLOYED	flux-0.6.3        	1.10.1     	flux
weave-scope	1       	Wed Feb 20 19:07:44 2019	DEPLOYED	weave-scope-0.11.0	1.10.1     	scope
$ helm get values weave-scope
image.pullPolicy: Always

$ kubectl get po -n scope
NAME                                                READY   STATUS    RESTARTS   AGE
weave-scope-agent-weave-scope-xncrb                 1/1     Running   0          3m
weave-scope-frontend-weave-scope-7bcf9bc6bc-c4dzw   1/1     Running   0          3m
$
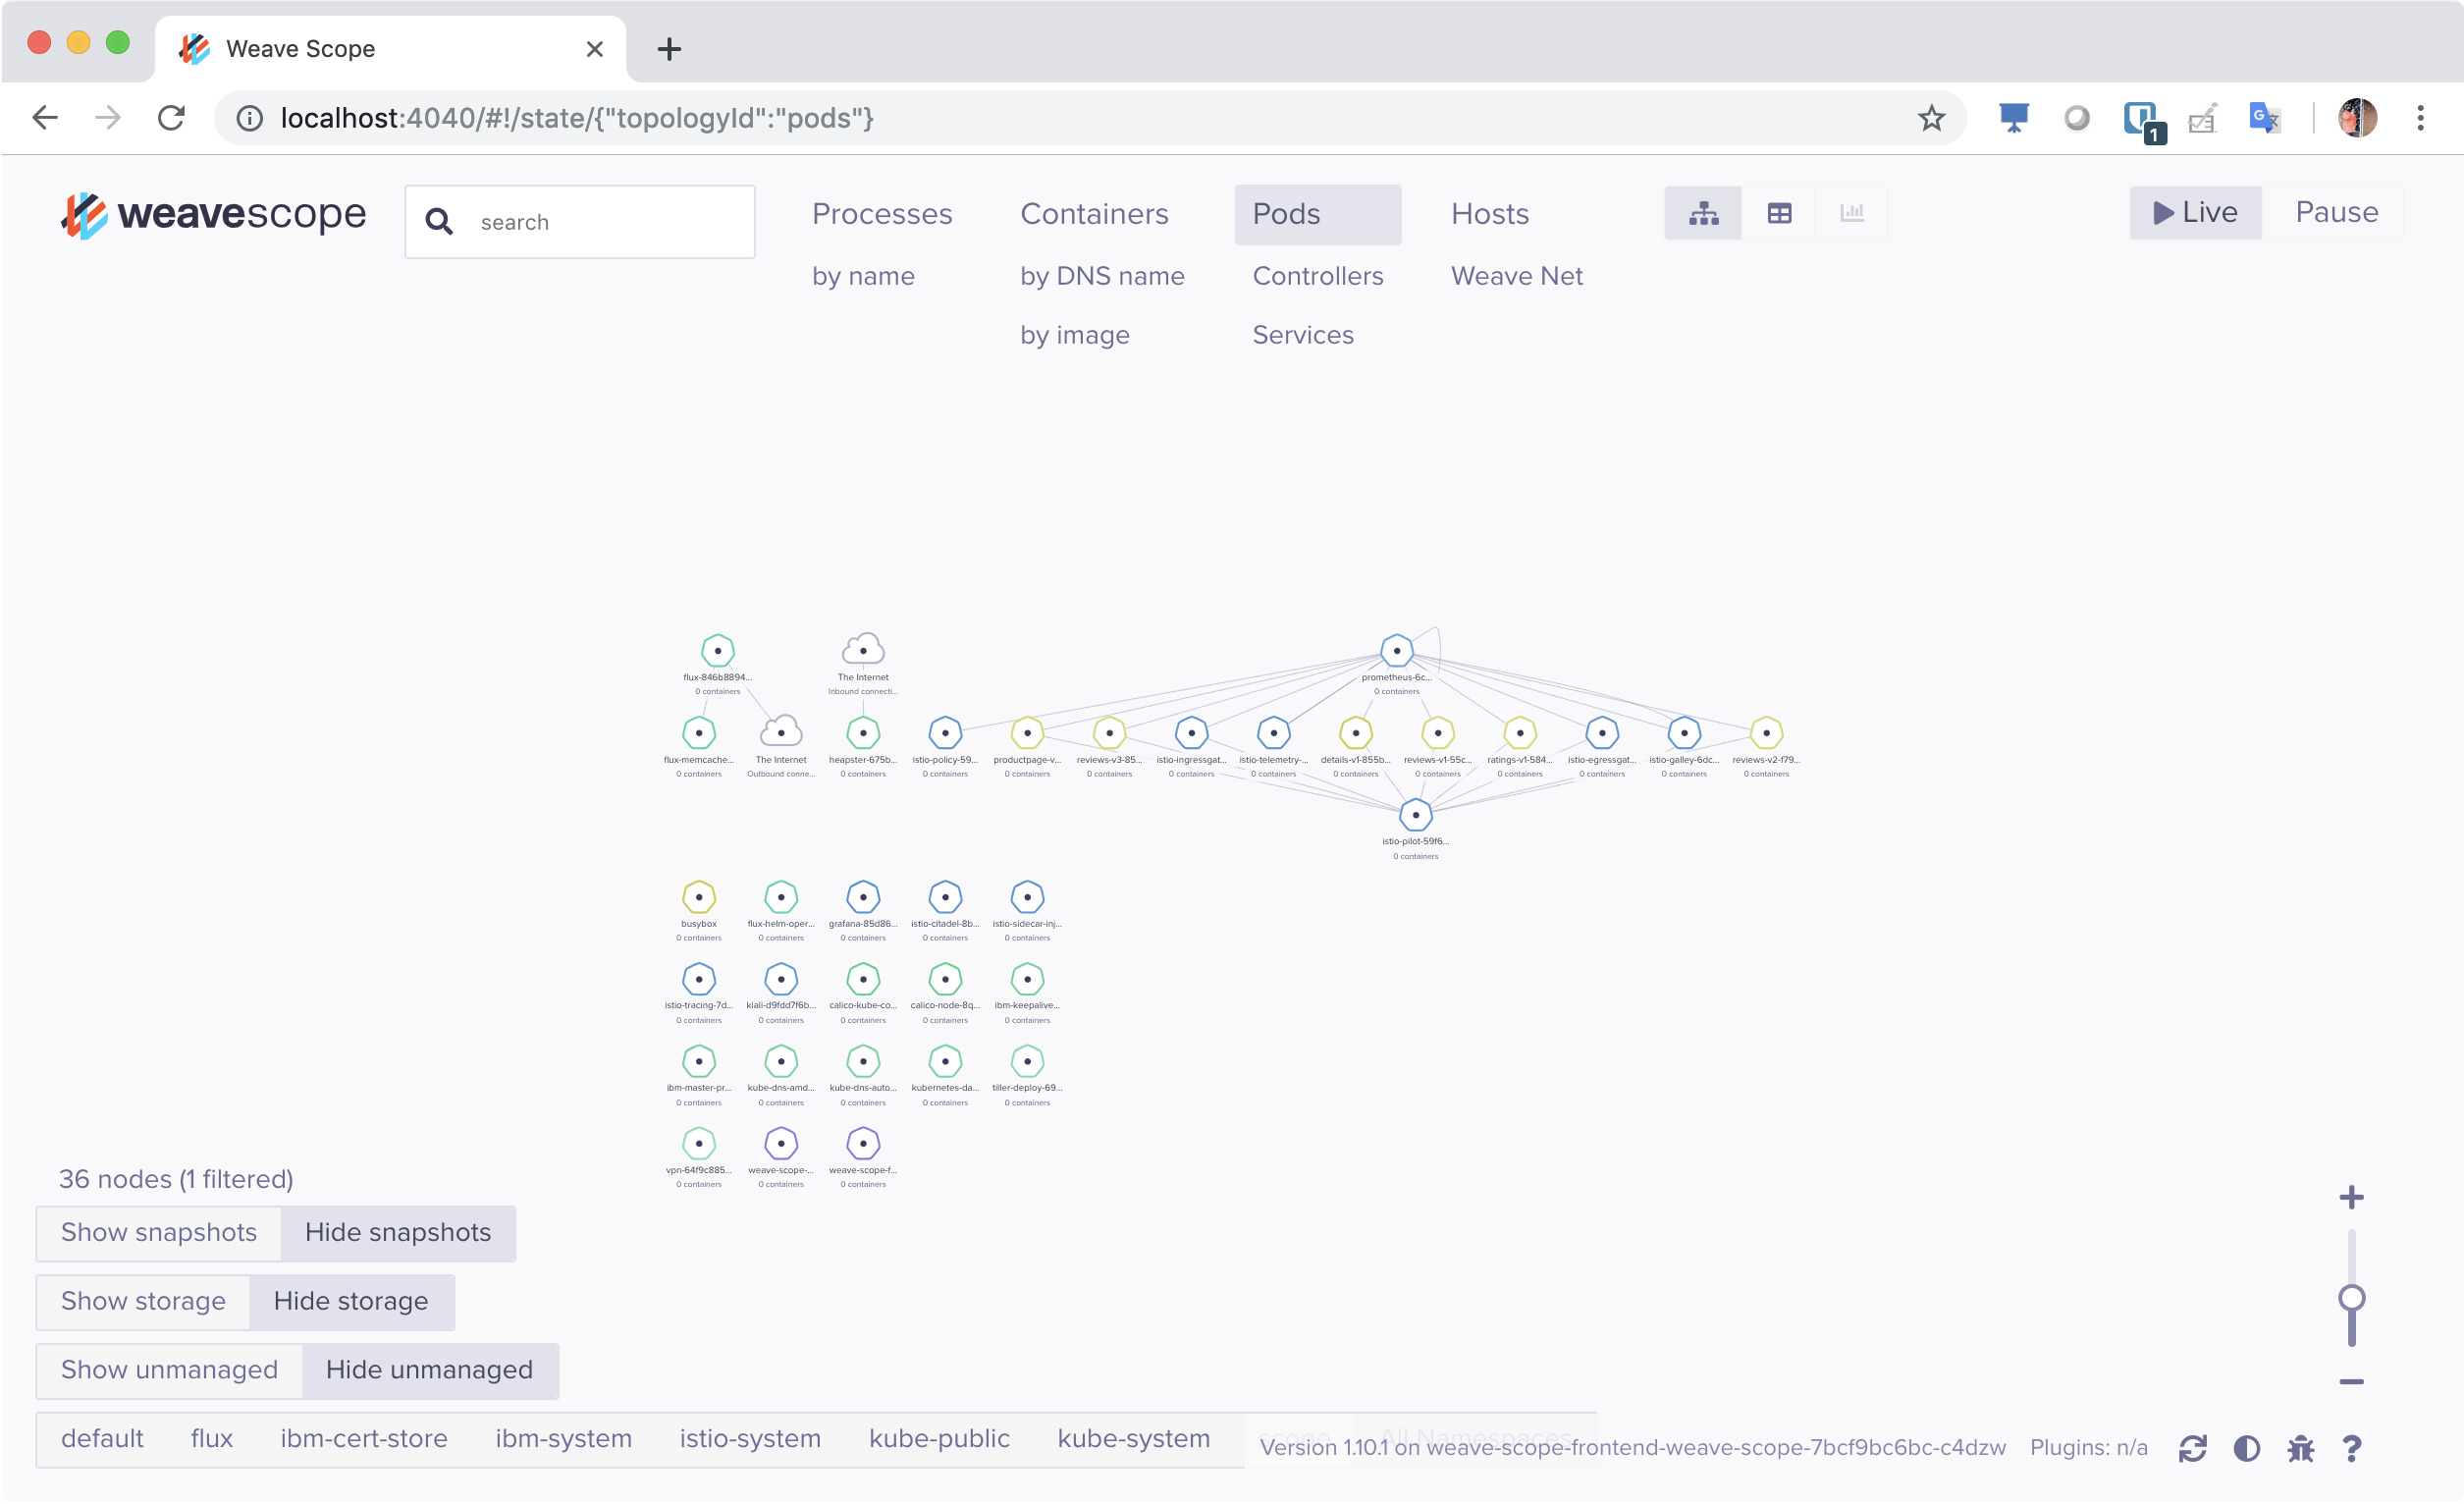
Weave Scopeの稼働確認
Weave ScopeにアクセスするためPort Forwoadする。
kubectl port-forward -n scope "$(kubectl get -n scope pod --selector=component=frontend -o jsonpath='{.items..metadata.name}')" 4040
ブラウザでhttp://localhost:4040からWeave Scopeにアクセスできる。