バッチ設定方法
1.「スタート」をクリックし、アプリの一覧を表示します。
「W」欄の「Windows管理ツール」をクリックして、「タスクスケジューラ」をクリックします。

2.「タスクスケジューラ」が表示されます。
「操作」をクリックし、表示された一覧から「基本タスクの作成」をクリックします。

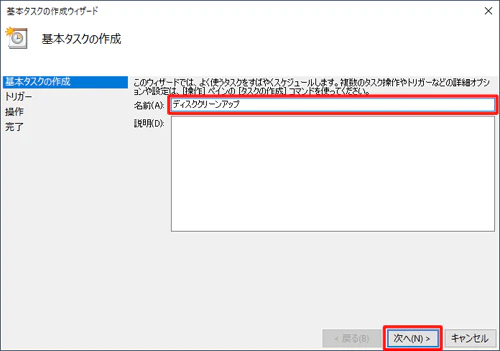
3.基本タスクの作成ウィザード」が表示されます。
「名前」ボックスにタスクの名前を入力して、「次へ」をクリックします。
ここでは例として、「ディスククリーンアップ」と入力します。
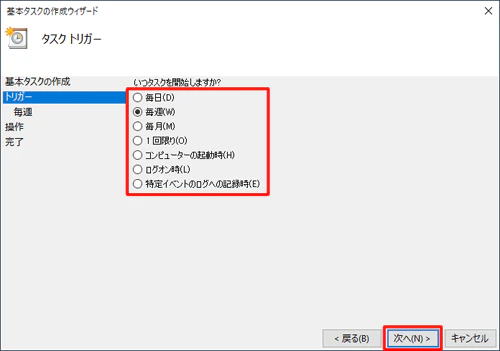
4.タスクを実行する開始時期をクリックして、「次へ」をクリックします。
ここでは例として、「毎週」をクリックします。
5.「開始」ボックスにタスクを開始する日時を入力し、「間隔」ボックスに週単位の間隔を入力して、タスクを実行する曜日にチェックを入れて、「次へ」をクリックします。
ここでは例として、毎週月曜日12:00に開始するように設定します。

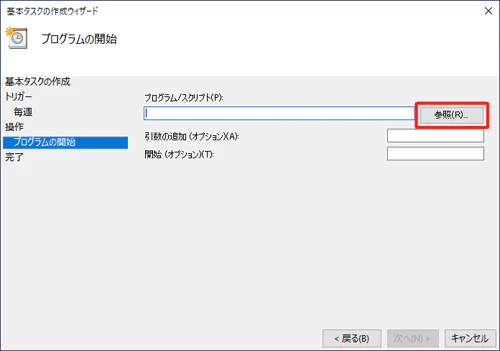
6.「プログラムの開始」をクリックして、「次へ」をクリックします。

7.「プログラム/スクリプト」ボックスの右側の「参照」をクリックします。
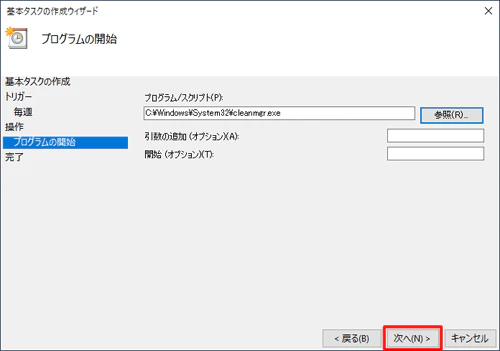
8.実行したいプログラムを選択または入力して、「開く」をクリックします。
ここでは例として、「ファイル名」ボックスに「cleanmgr.exe」と入力します。

9.「プログラム/スクリプト」ボックスに実行したいプログラムが表示されていること確認し、「次へ」をクリックします。
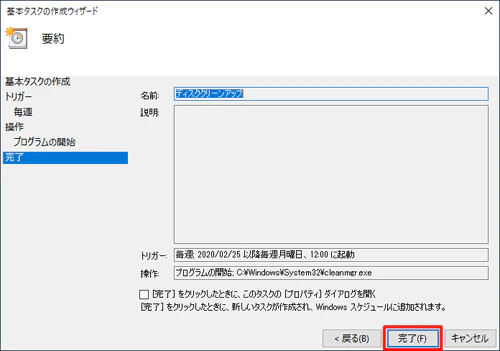
10.表示されている内容に誤りがないことを確認して、「完了」をクリックします。
※ 修正が必要な場合は、「戻る」をクリックして前の手順に戻り修正します。
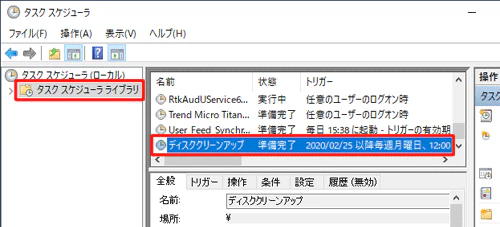
11.「タスクスケジューラ」画面に戻ります。
画面左側の「タスクスケジューラライブラリ」をクリックし、作成したタスクが追加されていることを確認します。
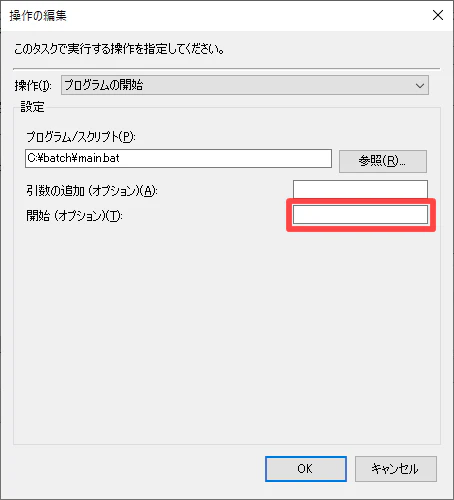
注意点
下記のようなバッチの場合、手順7.の開始「オプション」をルートパスに設定する必要がある
main.bat
call a.exe
start /b b.exe
call c.exe
相対パス時の手順

参照サイト