概要
この記事は、XAML Advent Calendar 2017の10日目の記事です。
ViewとViewModelをどうやって紐付けるかはMVVMでは一度は必ず悩む問題だと思います。
私はDataTemplateでViewModel→Viewの登録を行うことが多いです。
しかしVisualStudioでのデザイン時データコンテキスト(d:DataContext)ではその登録とは別に、ViewModelを指定する必要があります。
そこでデザイン時にDataTemplateの情報を元に適切なViewModelを自動配置してくれるMarkupExtensionを作りました。
実行結果
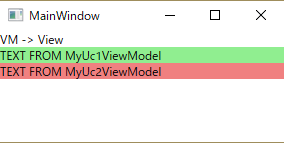
題材とするデモアプリの実行結果です。
MainWindowの中に2つのUserControlがあるだけです。
変更前デモアプリコード
今回のMarkupExtension導入前のコードです。
MainWindowではUserControlを直接指定せず、ContentControlに子ViewModelを指定しています。
<Window
    x:Class="DataTemplateByCode2.MainWindow"
    xmlns="http://schemas.microsoft.com/winfx/2006/xaml/presentation"
    xmlns:x="http://schemas.microsoft.com/winfx/2006/xaml"
    xmlns:d="http://schemas.microsoft.com/expression/blend/2008"
    xmlns:local="clr-namespace:DataTemplateByCode2"
    xmlns:mc="http://schemas.openxmlformats.org/markup-compatibility/2006"
    Title="MainWindow" Width="300" Height="150" mc:Ignorable="d">
    <Window.DataContext>
        <local:MainWindowViewModel />
    </Window.DataContext>
    <StackPanel>
        <TextBlock Text="VM -> View" />
        <ContentControl Content="{Binding MyUc1VM}" />
        <ContentControl Content="{Binding MyUc2VM}" />
    </StackPanel>
</Window>
UserControlではVMのプロパティTitleとバインディングしています。
<UserControl
    x:Class="DataTemplateByCode2.MyUc1"
    xmlns="http://schemas.microsoft.com/winfx/2006/xaml/presentation"
    xmlns:x="http://schemas.microsoft.com/winfx/2006/xaml"
    xmlns:d="http://schemas.microsoft.com/expression/blend/2008"
    xmlns:local="clr-namespace:DataTemplateByCode2"
    xmlns:mc="http://schemas.openxmlformats.org/markup-compatibility/2006"
    d:DesignHeight="50" d:DesignWidth="200" Background="LightGreen"
    mc:Ignorable="d">
    <StackPanel>
        <TextBlock Text="{Binding Text}" />
    </StackPanel>
</UserControl>
MainWindowViewModelには2つのVMがプロパティとしてあります。
public class MainWindowViewModel
{
    public MyUc1ViewModel MyUc1VM { get; set; } = new MyUc1ViewModel();
    public MyUc2ViewModel MyUc2VM { get; set; } = new MyUc2ViewModel();
}
UserControlに対応するViewModelには1つプロパティがあるだけです。
public class MyUc1ViewModel
{
    public string Title { get; set; } = "TEXT FROM MyUc1ViewModel";
}
App.xamlと別ResourceDictionaryでDataTemplateを使ってVM→Viewの登録を行います。
App.xaml直下と別ファイルに分けたのは単なる動作確認で普通は統一します。
<Application
    x:Class="DataTemplateByCode2.App"
    xmlns="http://schemas.microsoft.com/winfx/2006/xaml/presentation"
    xmlns:x="http://schemas.microsoft.com/winfx/2006/xaml"
    xmlns:local="clr-namespace:DataTemplateByCode2"
    StartupUri="MainWindow.xaml">
    <Application.Resources>
        <ResourceDictionary>
            <ResourceDictionary.MergedDictionaries>
                <ResourceDictionary Source="Templates.xaml" />
            </ResourceDictionary.MergedDictionaries>
            <DataTemplate DataType="{x:Type local:MyUc1ViewModel}">
                <local:MyUc1 />
            </DataTemplate>
        </ResourceDictionary>
    </Application.Resources>
</Application>
<ResourceDictionary xmlns="http://schemas.microsoft.com/winfx/2006/xaml/presentation"
                    xmlns:x="http://schemas.microsoft.com/winfx/2006/xaml"
                    xmlns:local="clr-namespace:DataTemplateByCode2">
    <DataTemplate DataType="{x:Type local:MyUc2ViewModel}">
        <local:MyUc2/>
    </DataTemplate>
</ResourceDictionary>
もう1つのUserControlと対応するViewModelは背景色と文字列の内容が違うだけなので省略します。
課題
UserControlにおいて、このままですとデザイナ画面にVM由来の文字列が表示されません。
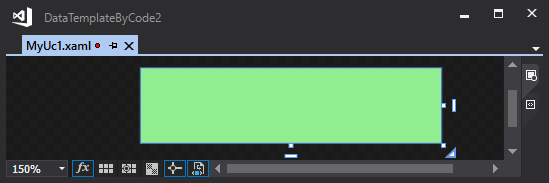
そこでXAML内でデザイン時DataContextを指定します。
先程のMyUc1.xamlのUserControl句の最後に追加します。
mc:Ignorable="d"
d:DataContext="{d:DesignInstance {x:Type local:MyUc2ViewModel},IsDesignTimeCreatable=True}">
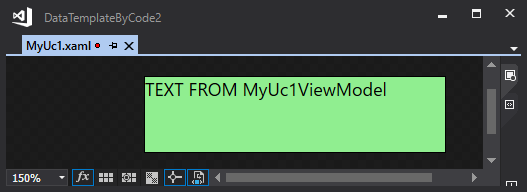
無事にデザイナ画面でもViewModel由来の文字列が追加されました。
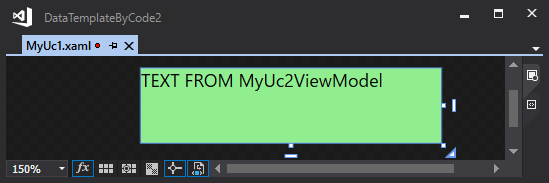
しかしこのままですと重複があります。
つまり
・DataTemplateではViewModel→View
・各Viewのd:DataContextではView→ViewModel
の結びつけが行われており、内容が重複している。
View⇔ViewModel間の組み合わせが変わったら両者を変更する必要があります。
DataTemplateだけ修正してd:DataContexがそのままの場合、
実行時エラーは何も出ませんが、デザイナ画面がエラーしたり、デザイン時と実行時で画面が異なってしまいます。
実は上のコードもUc1にUc2ViewModelを指定していますが、なかなか気づきづらいと思います。
MarkupExtensionの導入
そこでDataTemplateを元にView型から対応するViewModelを供給するMarkupExtensionを使ってこの課題を解決します。
/// <summary>
/// DataTemplateを元にView型から対応するViewModelを供給するMarkupExtension
/// </summary>
public class ViewModelProviderExtension : MarkupExtension
{
    /// <summary>
    /// 検索するView型
    /// </summary>
    public Type ViewType { get; set; }

    public ViewModelProviderExtension() { }

    public ViewModelProviderExtension(Type viewType)
    {
        this.ViewType = viewType;
    }

    public override object ProvideValue(IServiceProvider provider)
    {
        //現在のアプリケーションのResourceDictionaryと入れ子になっているResourceDictionaryを平坦化
        var resources = new List<ResourceDictionary> { Application.Current.Resources };
        resources.AddRange(Application.Current.Resources.MergedDictionaries);

        var dataTemplateExs = resources
            //ResourceからValueを取り出しDataTemplate型だけ抽出して平坦化
            .SelectMany(x => x.Values.OfType<DataTemplate>())
            //DataTemplateを匿名型に変換
            .Select(x =>
                new
                {
                    //Contentを生成してView型情報に変換
                    viewType = x.LoadContent().GetType(),
                    //DataTypeをViewModel型情報に変換
                    viewModelType = x.DataType as Type
                });

        //一致するView型を探し、対応するViewModel型を選択
        var selectViewModelType = dataTemplateExs
            .FirstOrDefault(a => a.viewType == ViewType)
            ?.viewModelType;

        if (selectViewModelType == null)
        {
            return null;
        }
        //該当するViewModel型を作成
        var vm = Activator.CreateInstance(selectViewModelType);
        return vm;
    }
}
ViewModelProviderの実装の説明はコード内に書いたので、そちらを参照下さい。
使用方法はViewModelProviderのコンストラクタにViewの型をわたして、d:DataContextに指定します。
mc:Ignorable="d"
d:DataContext="{local:ViewModelProvider {x:Type local:MyUc1}}">
実行時にも使用可能
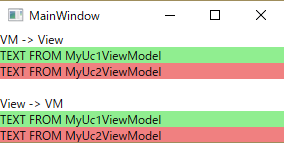
必要性があるかはわかりませんが、実行時にも使用可能です。
先程のMainWindowを修正します。
<StackPanel>
    <TextBlock Text="VM -> View" />
    <ContentControl Content="{Binding MyUc1VM}" />
    <ContentControl Content="{Binding MyUc2VM}" />
    <TextBlock/>
    <TextBlock Text="View -> VM"/>
    <local:MyUc1 DataContext="{local:ViewModelProvider {x:Type local:MyUc1}}"/>
    <local:MyUc2 DataContext="{local:ViewModelProvider {x:Type local:MyUc2}}"/>
</StackPanel>
ContentControlがViewModelからViewを表示するように
ViewModelProviderがViewに対応したViewModelを供給します。
まとめ
デザイン時DataContextはVMの内容を反映したデザインを確認しながらViewを編集できるので便利です。
今回のViewModelProviderを使用するとViewに対応したViewModelが自動で供給されます。
これにより、DataTemplateと重複した記述が削れることと、実行時と違うViewModelを使用するのを防ぐことが出来ます。
注意点
このMarkupExtensionは内部でDataTemplateにある全てのViewのインスタンス生成を行います。
ですのでViewが増えたり、特定のViewのインスタンス生成が重いとデザイナ画面が極端に重くなります。
追伸:ViewTypeを書かずに済むように自動で取得する方法があったら教えてください。
環境
VisualStudio2017
.NET Framework 4.7
C#7.1
