はじめに
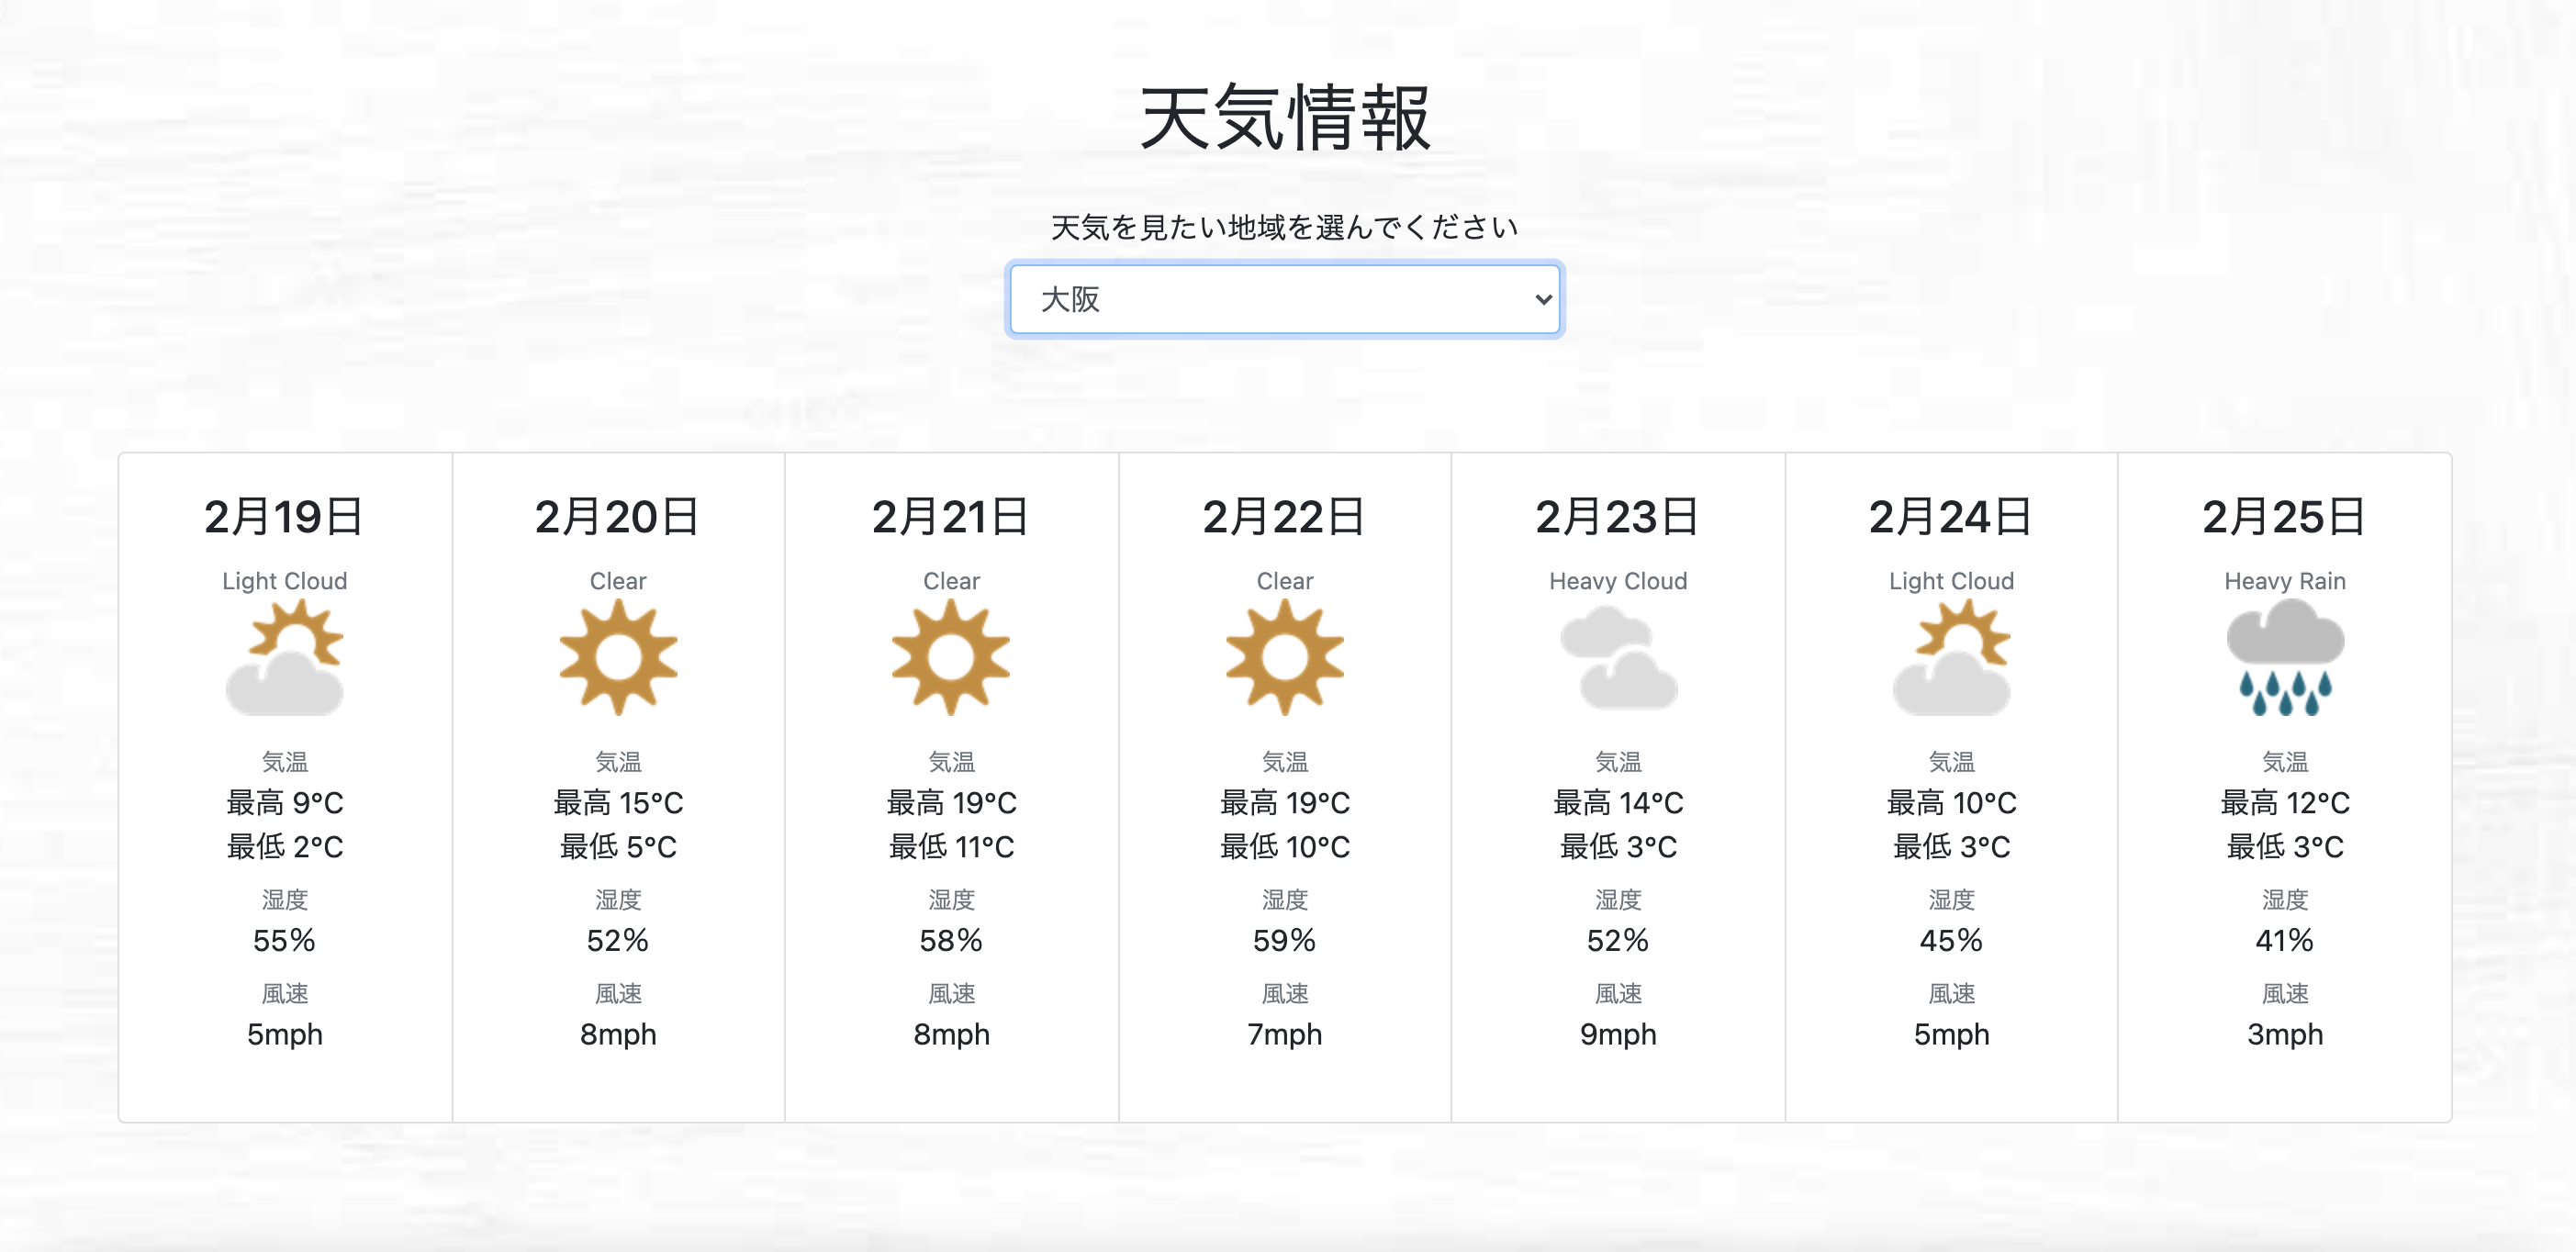
天気予報API(MetaWeather)を使って、一週間分の天気を表示する簡単なアプリケーションをつくりました。備忘録として記事を残します。
Node.jsやVueの環境が準備されていることを前提として進めていきます。
環境
- Mac
- Vue CLI 4.5.11
- Vue 2.6.12
- npm 6.14.10
- Node.js 14.15.4
必要パッケージをインストール
axiosでAPIと非同期通信、Bootstrap-vueでスタイル作成を行っているので、これらをnpmインストールします。あわせて moment.js という日付の形式を変換するモジュールもインストールします。今回は vue-router は使いませんでした。
① axiosとvue-axiosをインストール
npm install axios vue-axios
② Bootstrap-vueをインストール
npm install bootstrap-vue
③ moment.jsをインストール
npm install moment
npm 5.0.0 以降からは install 時にデフォルトで save(dependenciesに追加)してくれます。今回は npm 6.14.10 なので、--saveオプションを指定する必要はありません。
追加できたか確認
package.jsonのdependenciesにインストールしたモジュールが追加され、この様になっているか確認します。
"dependencies": {
    "axios": "^0.21.1",
    "bootstrap-vue": "^2.21.2",
    "core-js": "^3.6.5",
    "moment": "^2.29.1",
    "vue": "^2.6.11",
    "vue-axios": "^3.2.4"
  },
使用したソースコード
下記がソースコードの一部です。
main.jsを編集
特に設定を弄っていなければmain.jsが最初に呼ばれているエントリーファイルなので、ここで使用するモジュールを読み込みます。axiosとbootstrap-vueはエントリーファイルでインポートするよう指定されています。
Vue.js用に作られたモジュールを使う場合に Vue.use( ) を使います。
import Vue from 'vue'
import App from './App.vue'

import BootstrapVue from 'bootstrap-vue'
import 'bootstrap/dist/css/bootstrap.css'
import 'bootstrap-vue/dist/bootstrap-vue.css'
Vue.use(BootstrapVue)

import axios from 'axios'
import VueAxios from 'vue-axios'
Vue.use(VueAxios, axios)


Vue.config.productionTip = false

new Vue({
  render: h => h(App),
}).$mount('#app')
template内部(HTML)
<b-card-group>などはBootstrap-vueでスタイルをつけています。
data.weatherList オブジェクトにAPIから取得したデータが格納されています。それをv-forの繰り返し文で表示しています。
<template>
<div>
<!-- 略 -->

  <b-card-group cols="3" cols-sm="4" cols-md="6" cols-lg="7">
    <b-card v-for="weather of weatherList" v-bind:key="info.date">
      <b-card-title>{{ weather.date | moment }}</b-card-title>
      <b-card-text>
        <ul>
          <li class="small text-muted">{{ weather.weather_state }}</li>
          <li><img v-bind:src="weather.image_url" /></li>
          <li class="small text-muted mt-3">気温</li>
          <li>最高 {{ weather.max_temp | roundUp }}°C</li>
          <li>最低 {{ weather.min_temp | roundUp }}°C</li>
          <li class="small text-muted mt-2">湿度</li>
          <li>{{ weather.humidity }}%</li>
          <li class="small text-muted mt-2">風速</li>
          <li>{{ weather.wind_speed | roundUp }}mph</li>
        </ul>
      </b-card-text>
    </b-card>
  </b-card-group>
</div>
</template>
script内部(JavaScript)
選択された地域IDである woeid をパラメータに使用し、axiosでAPIにリクエスト。
そのaxiosで取得した情報を、data内のオブジェクトのinfosに代入しています。
<script>
import axios from "axios";
import moment from "moment";

export default {
  data() {
    return {
      woeid: null, //地域ID
      weatherList: {},
    };
  },
  methods: {
     // 省略
     // 「getDataUrl」に天気取得のためのURLを生成

      getDataUrl.forEach((value, key) => {
        axios
          .get(value)
          .then(
            function (response) {
              var weather = response.data[0];

              this.$set(this.weatherList, key, {
                date: weather.applicable_date, //日付
                max_temp: weather.max_temp, //最高気温
                min_temp: weather.min_temp, //最低気温
                wind_speed: weather.wind_speed, //風速
                weather_state: weather.weather_state_name, //天候
                humidity: weather.humidity, //湿度
                image_url:
                  "https://www.metaweather.com/static/img/weather/ico/" +
                  weather.weather_state_abbr +
                  ".ico", //天気アイコン
              });
            }.bind(this)
          )
          .catch(function (error) {
            console.log(error);
          });
      });
    },
  },
  filters: {
    roundUp(value) {
      return Math.ceil(value);
    },
    moment: function (date) {
      return moment(date).format("M月DD日");
    },
  },
};
</script>
App.vueを編集
AppWeather.vueをinportし、template内に明示することでサイトに組み込みます。
<template>
  <div id="app">
    <AppWeather />
  </div>
</template>

<script>
import AppWeather from "./components/AppWeather.vue";

export default {
  components: {
    AppWeather,
  },
};
</script>

<style>
/* 省略 */
</style>
まとめ
今回はVueを手軽に 実践できました。
Vueの公式ドキュメント見やすかったです。次はもっとコンポーネントの数を増やして色々やりたくなりました。Vuetify やら nuxt.jsも試したい所存。
下記が続きになります。
この記事では、AJAX通信を行うにあたってブラウザの制約に苦戦した中で学んだことをまとめました。
