GSAP ScrollTriggerとは?
以下のようなスクロールアニメが爆速実装できるライブラリ。
コーポレートサイトとかLP製作に良さそう。
日本語のドキュメントが少なかったので解説記事を書きます。
実装コード
適当にHTMLファイルを作って以下をコピペしましょう。解説は後ほど
<!DOCTYPE html>
<html lang="ja">
<head>
    <meta charset="UTF-8">
    <title>ScrollTrigger DEMO</title>
    <script src="https://cdnjs.cloudflare.com/ajax/libs/gsap/3.4.2/gsap.min.js"></script>
    <script src="https://cdnjs.cloudflare.com/ajax/libs/gsap/3.4.2/ScrollTrigger.min.js"></script>
</head>
<body style="background-color: #EEE; margin: 0;">
    <header style="height: 100px; background-color: #FFF; display: flex; align-items: center; justify-content: space-between; padding: 0 26px; position: sticky; top: 0;">
        <span style="font-weight: bold; font-size: 30px; letter-spacing: 2px;">SITE-LOGO</span>
        <span style="font-weight: bold; font-size: 20px; margin-right: 30px; letter-spacing: -10px;">・・・</span>
    </header>
    <div>
        <div style="margin: 80px 120px 40px;">
            <div style="font-weight: bold; font-size: 70px;">Title</div>
            <div style="font-weight: bold; font-size: 20px; color: #888;">タイトル</div>
        </div>
        <div id="bg01" style="margin-bottom: 200px; position: relative; background-size: cover; width: 100%; height: 400px; background-image: url('https://s3-ap-northeast-1.amazonaws.com/onseo/uploads/article/thumbnail/9/1623193_s.jpg'); filter: saturate(10%) contrast(70%) brightness(200%);">
            <div id="pop01" style="padding: 60px; width: 500px; position: absolute; background-color: #FFF;">
                <div style="font-weight: bold; font-size: 40px; margin-bottom: 40px;">POP-Title</div>
                <div>Lorem Ipsum is simply dummy text of the printing and typesetting industry. Lorem Ipsum has been the industry's standard dummy text ever since the 1500s, when an unknown printer took a galley of type and scrambled it to make a type specimen book. It has survived not only five centuries, but also the leap into electronic typesetting, remaining essentially unchanged. It was popularised in the 1960s with the release of Letraset sheets containing Lorem Ipsum passages, and more recently with desktop publishing software like Aldus PageMaker including versions of Lorem Ipsum.</div>
            </div>
        </div>
    </div>
    <div>
        <div style="margin: 80px 120px 40px;">
            <div style="font-weight: bold; font-size: 70px;">Title</div>
            <div style="font-weight: bold; font-size: 20px; color: #888;">タイトル</div>
        </div>
        <div id="bg02" style="margin-bottom: 200px; position: relative; background-size: cover; width: 100%; height: 400px; background-image: url('https://s3-ap-northeast-1.amazonaws.com/onseo/uploads/article/thumbnail/12/3019301_s.jpg'); filter: saturate(10%) contrast(70%) brightness(200%);">
            <div id="pop02" style="padding: 60px; width: 500px; position: absolute; background-color: #FFF;">
                <div style="font-weight: bold; font-size: 40px; margin-bottom: 40px;">POP-Title</div>
                <div>Lorem Ipsum is simply dummy text of the printing and typesetting industry. Lorem Ipsum has been the industry's standard dummy text ever since the 1500s, when an unknown printer took a galley of type and scrambled it to make a type specimen book. It has survived not only five centuries, but also the leap into electronic typesetting, remaining essentially unchanged. It was popularised in the 1960s with the release of Letraset sheets containing Lorem Ipsum passages, and more recently with desktop publishing software like Aldus PageMaker including versions of Lorem Ipsum.</div>
            </div>
        </div>
    </div>
    <footer style="height: 200px; background-color: #333; display: flex; align-items: center; padding: 0 26px;">
        <span style="color: #FFF;font-weight: bold; font-size: 30px; letter-spacing: 2px;">SITE-LOGO</span>
    </footer>
    <script>
        const bg01 = '#bg01'
        const pop01 = '#pop01'
        const start01 = 40

        gsap.set(bg01, {
            opacity: 0
        })
        gsap.to(bg01, {
            scrollTrigger: {
                trigger: bg01,
                start: start01
            },
            duration: 1,
            opacity: 1
        })

        gsap.set(pop01, {
            opacity: 0,
            top: '20%',
            left: '60%'
        })
        gsap.to(pop01,{
            scrollTrigger: {
                trigger: pop01,
                start: start01
            },
            duration: 1,
            opacity: 1,
            left: '50%'
        })

        const bg02 = '#bg02'
        const pop02 = '#pop02'
        const start02 = 570

        gsap.set(bg02, {
            opacity: 0
        })
        gsap.to(bg02, {
            scrollTrigger: {
                trigger: bg02,
                start: start02
            },
            duration: 1,
            opacity: 1
        })
        gsap.set(pop02, {
            opacity: 0,
            top: '20%',
            right: '60%'
        })
        gsap.to(pop02,{
            scrollTrigger: {
                trigger: pop02,
                start: start02
            },
            duration: 1,
            opacity: 1,
            right: '50%'
        })
    </script>
</body>
</html>
実装手順
1. CDNを2つほど読み込む
<script src="https://cdnjs.cloudflare.com/ajax/libs/gsap/3.4.2/gsap.min.js"></script>
<script src="https://cdnjs.cloudflare.com/ajax/libs/gsap/3.4.2/ScrollTrigger.min.js"></script>
2. DOMを作る
<div id="bg01">
    <div id="pop01">
        テキスト等
    </div>
</div>
3. JavaScriptを書く
const bg01 = '#bg01'
const pop01 = '#pop01'
const start01 = 40

gsap.set(bg01, {
    opacity: 0
})
gsap.to(bg01, {
    scrollTrigger: {
        trigger: bg01,
        start: start01
    },
    duration: 1,
    opacity: 1
})

gsap.set(pop01, {
    opacity: 0,
    top: '20%',
    left: '60%'
})
gsap.to(pop01,{
    scrollTrigger: {
        trigger: pop01,
        start: start01
    },
    duration: 1,
    opacity: 1,
    left: '50%'
})
**gsap.set(セレクタ, { プロパティ })**で初期状態を指定できます。
**gsap.to(セレクタ, { scrollTrigger: { trigger: セレクタ, start: スタート位置 }, { プロパティ } })**でスクロール時のアニメーションを指定できます。
セレクタ
jQueryと同じセレクタの指定方式。
- id指定なら頭にシャープ(#id_name)
- クラス指定なら頭にドット(.class_name)
セレクタ名は**.set()と.to()**でどうせ2回書くので変数にまとめておくと良いです。
プロパティ
| プロパティ名 | 内容 |
|---|---|
| opacity | 透明度 |
| top | 上下位置(上から数える) |
| bottom | 上下位置(下から数える) |
| left | 左右位置(左から数える) |
| right | 左右位置(右から数える) |
| duration | アニメーション開始から完了までの時間(秒) |
他にも色々あるみたいですが、CSSの@keyframesで使うプロパティと大体同じっぽい?
正確な情報は**公式ドキュメント**を参考にしてください。
スタート位置
**start: 40**みたいに直接数字を入れるとページ全体の絶対位置指定になります。
**start: '40px'**みたいに書くと親要素に対する相対位置。
(おまけ)動作解説
一例として、**#pop01**の要素について見ていきましょう。
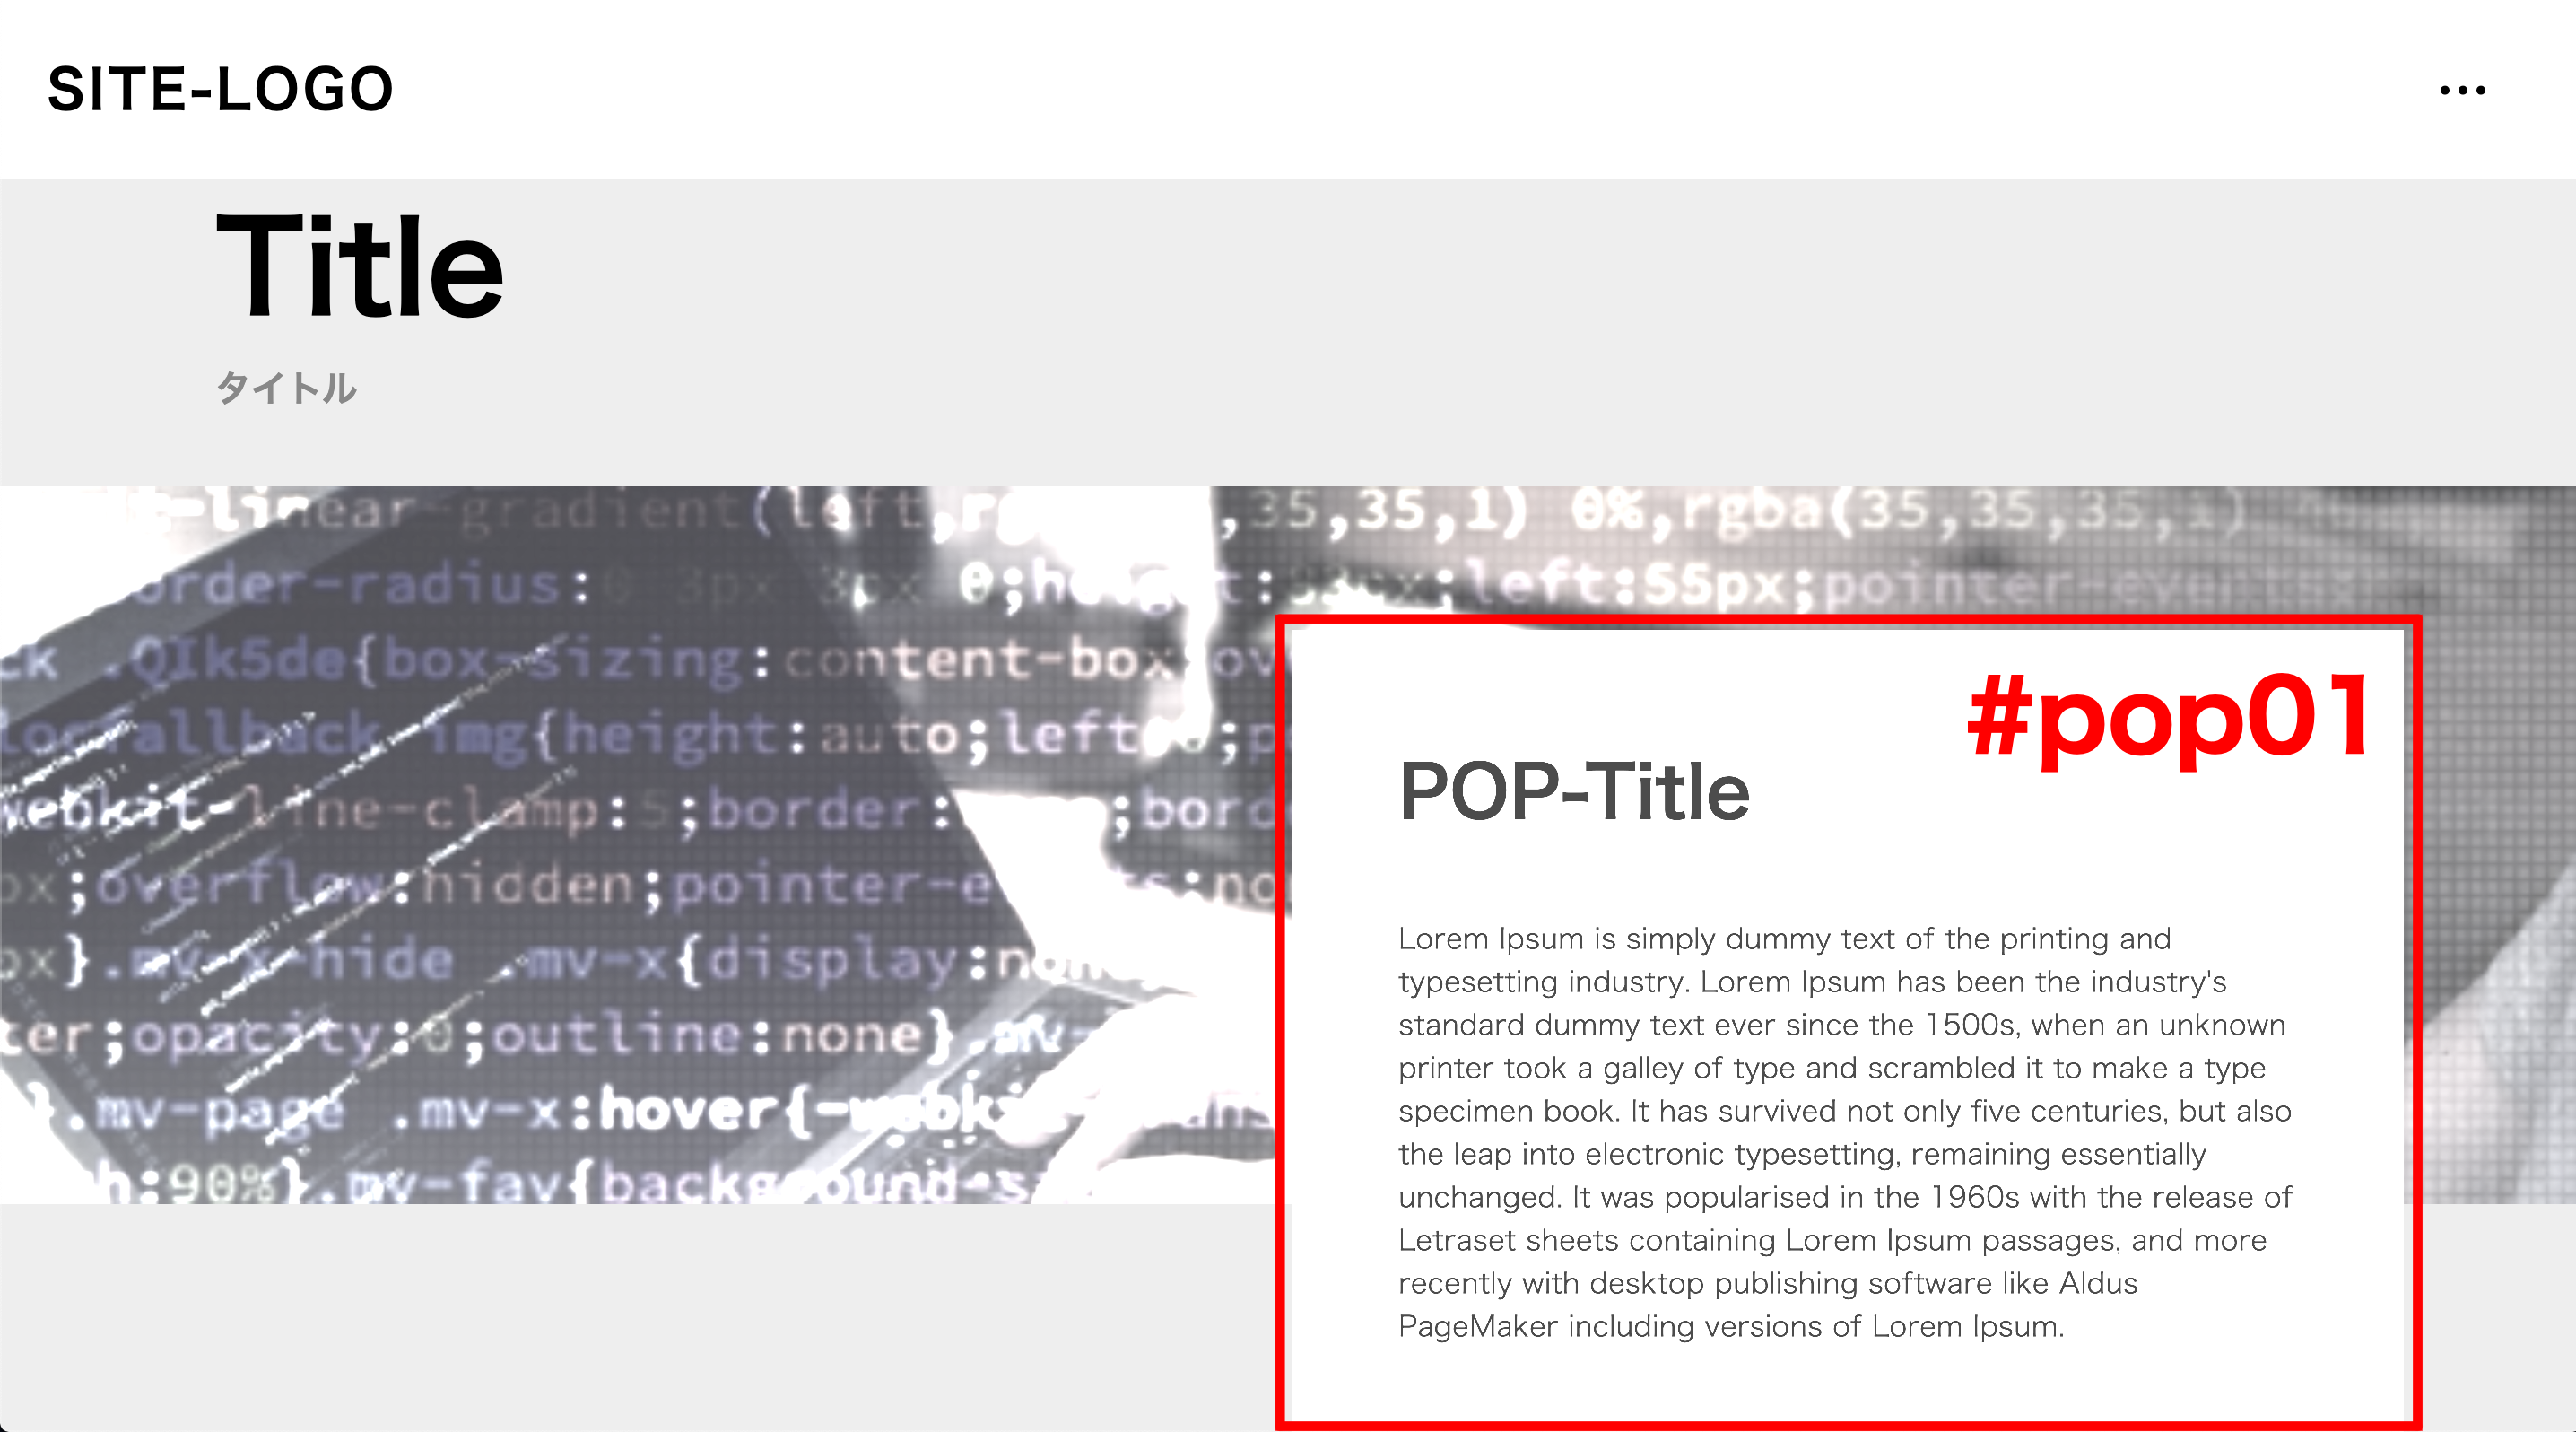
#pop01は40pxほど画面を下にスクロールするとフェードインしながら右側からスライドインします。この動作については、以下の2つの動作の組み合わせで成り立っています。
フェードイン動作
.set()でopacity: 0 にした上で、
**.to()**で opacity: 1 にしてるので、
要素がフェードインするように見えています。
右側からスライドインする動作
**.set()でleft: '60%'**した上で、
**.to()**で left: '50%' してるので、
要素が少し左側にスライド移動しているように見えます。
const pop01 = '#pop01'
const start01 = 40

gsap.set(pop01, {
    opacity: 0,
    top: '20%',
    left: '60%'
})
gsap.to(pop01,{
    scrollTrigger: {
        trigger: pop01,
        start: start01
    },
    duration: 1,
    opacity: 1,
    left: '50%'
})
以上、GSAP ScrollTriggerを使ったスクロールアニメーションの実装方法でした。
所感
私はフロントの経験が少ないのですが、モダンな感じのスクロールアニメが非常に簡単に実装できて大変便利に感じました。環境の依存もなく使い勝手も抜群なので、しばらくコーポレートサイトやLPの制作業務ではこちらを使用していこうと思います。
まとめ
- スクロールアニメーション実装にはGSAP ScrollTriggerというライブラリが便利
- JavaScriptでセレクタとプロパティ指定だけで簡単にスクロールアニメーションを実装できる
- ライブラリの環境依存も少なく、CDNで簡単に使用できる
筆者プロフィール
26歳現役フルスタックエンジニア。Ruby/PHP/JSVue/AWS/nginxなどが主です。プログラミングの教材執筆やメンターしてます。VTuberとしてプログラミング解説雑談配信等もします。
Twitter : https://twitter.com/soeno_onseo
Github : https://github.com/Fumiya-Soeno
HP : http://www.onseo.info/