Azure SAS(Shared Access Signatures)とは
協力会社や他ベンダーなどの外部のパートナーに対して安全に自前のAzure Storageにアクセスさせるために払い出す制限付きキーのことです。トークンを利用するAzure DocumentDBとは異なり、Azure Storageに対してはSASの利用が提案されています。Azure Storageバージョン"2015-04-05"以降、特定のコンテナ内にのみ効果がある「サービスSAS」と、コンテナ自体も操作ができるようなAdmin向けの「アカウントSAS」という2種類のSASが用意されています。
本記事の概要
Microsoft社のチュートリアルは謎構造となっている場合がありまして、御多分に洩れずAzure Storage資料も謎構造となっています。そのため本記事では改めて一通り動かしてドキュメント化しています。特にAzure Storageへのセキュアなアクセス方法について調査し、実際に動かした流れをまとめています。本記事では主に「サービスSAS」を利用します。Microsoftより提供されているドキュメントは以下です。本記事はメンテされずに古い資料となってしまうことが予想されるので、必ず、大元の最新版の資料を御参照ください。
Using Shared Access Signatures (SAS)
https://docs.microsoft.com/en-us/azure/storage/storage-dotnet-shared-access-signature-part-1
段階を踏んで上記の記事に到達するためのサンプルプログラムなども記載してあります。
結論から言えば、謎構造の正体は「Azure Storage自体のアップデートによるバージョン毎の差異」によるものでした。
まずはバージョン関係の資料をサッと読んで頂き、上手くプログラム等が動かない場合には当該資料に立ち戻って頂ければ良いかと存じます。
2016年11月時点での最新バージョンは"2015-12-11"です。
目次
前提
- すでにAzureアカウントを作成済みであること
- すでに課金アカウント設定、リソースグループの作成など済ませており、ストレージアカウントを作成可能な状態であること
ストレージアカウントとコンテナーの作成、BLOB Storageにデータ保存
ササっと作成します。

こんな右端にクイックスタートが…。
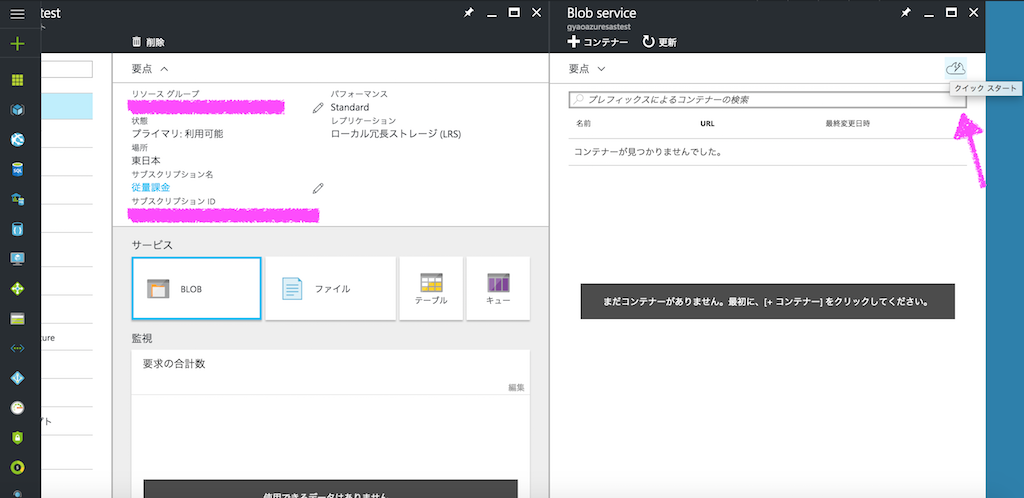
AWSで用意されているサンプルデータを利用してみます。BLOBにアップロードしてください。アクセスポリシーをコンテナーにしておくと公開、プライベートにすれば非公開です。
AWS Documentation » Amazon DynamoDB » 入門ガイド
http://docs.aws.amazon.com/ja_jp/amazondynamodb/latest/gettingstartedguide/GettingStarted.NodeJs.02.html
2016年11月時点で3.7MBありました。
下記の画像の右側の「URL」をコピーして、ブラウザからアクセスすると、公開状態の場合は保存したファイルの内容が表示されます。
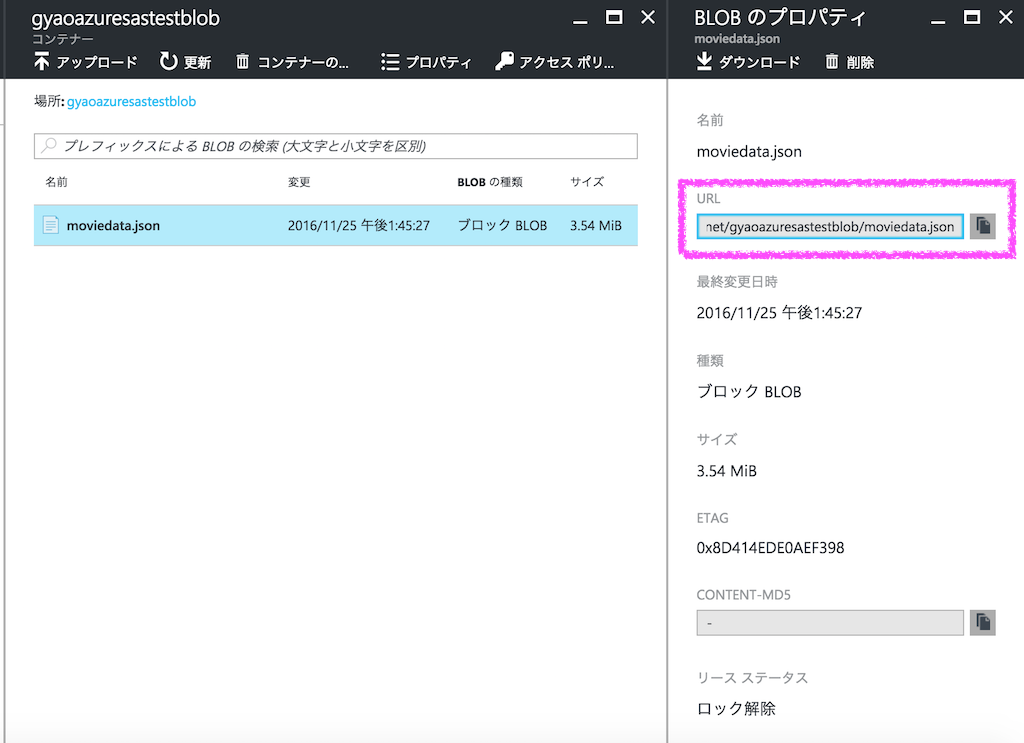
非公開の場合は以下のエラーメッセージが表示されているかと思います。
The specified resource does not exist.
ちなみに、誰でも使えるGUIのツールとして以下の純正 MicrosoftAzureストレージエクスプローラー がある模様。車輪の再開発は不要ですね。
http://storageexplorer.com/
※以下から、自力で捻り込んでURIを組み立てる方法と、ツールを使ってURIを得る方法を記載します。
※100%ツールを使った方が早くて簡単なので、ツールを使った方が良いです。
http://qiita.com/snomoto/items/c2793866dee81b4718e9#ツールで超簡単にsasを払い出す方法
#1.PHPでアクセス(without SAS)
AzureDocumentが思ったより不親切な感じなので、githubにあるREADMEを読みながら進めます。
VMの用意
ベースとなるVMはなんでも良いのですが、GCE(CentOS7)を使ってみます。
Apache webサーバのインストール
-
何はともあれApache webサーバをインストールします。
$sudo yum install httpd httpd-devel -y -
"httpd -v"でバージョンを確認します。2.4系。
$httpd -v
Server version: Apache/2.4.6 (CentOS)
Server built:   Jul 18 2016 15:30:14
その他必要なパッケージのインストール
- git,zip,unzipもインストールします。(全部sudo使うの?と思った方がいるかも知れませんが、流れが確認できたらこのVMは潰しましょう)
$sudo yum install -y git zip unzip
PHP7系のインストール
- PHPに関しては7系を入れたいので、EPELから入れていきます。
$sudo rpm -Uvh http://rpms.famillecollet.com/enterprise/remi-release-7.rpm```

- PHPの7系を探してみます。2016年11月時点でphp71が最新のようです。

```html:terminal
$sudo yum search --enablerepo=remi php-devel
php-devel.x86_64 : Files needed for building PHP extensions
php54-php-devel.x86_64 : Files needed for building PHP extensions
php55-php-devel.x86_64 : Files needed for building PHP extensions
php56-php-devel.x86_64 : Files needed for building PHP extensions
php70-php-devel.x86_64 : Files needed for building PHP extensions
php71-php-devel.x86_64 : Files needed for building PHP extensions
- php71をインストールします。
$sudo yum install --enablerepo=remi -y php71-php php71-php-devel php71-php-mbstring php71-php-pdo php71-php-pecl php71-php-pdo php71-php-pear
- PHPが入ったか確認します。
$php71 -v
PHP 7.1.0RC6 (cli) (built: Nov  9 2016 08:59:00) ( NTS )
Copyright (c) 1997-2016 The PHP Group
Zend Engine v3.1.0-dev, Copyright (c) 1998-2016 Zend Technologies
- Apache webサーバと連携できているか確認します。
/var/www/html に移動し、index.phpファイルを作成しましょう。
$sudo vi index.php```

```php:index.php
<?php

phpinfo();
- ブラウザ経由でアクセスしてみます。これでPHPはOK。

Composerのインストール
- Composerをインストールします。
公式ドキュメントに沿ってインストールすればOKです。
$sudo php71 -r "copy('https://getcomposer.org/installer', 'composer-setup.php');"
$sudo php71 -r "if (hash_file('SHA384', 'composer-setup.php') === '※※期限ありのハッシュ値が入ります。ページ更新で最新版が表示されます
$sudo php71 composer-setup.php
$sudo php71 -r "unlink('composer-setup.php');"
- Composerがインストールできたか確認します。
$ php71 composer.phar
   ______
  / ____/___  ____ ___  ____  ____  ________  _____
 / /   / __ \/ __ `__ \/ __ \/ __ \/ ___/ _ \/ ___/
/ /___/ /_/ / / / / / / /_/ / /_/ (__  )  __/ /
\____/\____/_/ /_/ /_/ .___/\____/____/\___/_/
                    /_/
Composer version 1.2.2 2016-11-03 17:43:15
VMの準備はここまで。
【2016年12月】一発スクリプトを追記しました。
$ sudo sh ./LAMP71.sh
echo "Author: snomoto (http://qiita.com/snomoto)"
echo "for CentOS7"

## Apache

sudo yum install -y git wget zip unzip
sudo yum install -y httpd httpd-devel

sudo systemctl start httpd
sudo systemctl stop httpd

## MariaDB

cat << EOS |sudo tee /etc/yum.repos.d/MariaDB.repo
[mariadb]
name = MariaDB
baseurl = http://yum.mariadb.org/10.1/centos7-amd64
gpgkey=https://yum.mariadb.org/RPM-GPG-KEY-MariaDB
gpgcheck=1
EOS

sudo yum install -y MariaDB-server MariaDB-client

sudo systemctl start mariadb
sudo systemctl stop mariadb

## PHP71

sudo yum install -y epel-release
sudo yum install -y epel-release
sudo rpm -Uvh http://rpms.famillecollet.com/enterprise/remi-release-7.rpm
sudo yum install --enablerepo=remi -y php71-php php71-php-devel php71-php-mbstring php71-php-pdo php71-php-pecl php71-php-pdo php71-php-pear

## Composer

php71 -r "copy('https://getcomposer.org/installer', 'composer-setup.php');"
php71 composer-setup.php
php71 -r "unlink('composer-setup.php');"
php71 composer.phar

## ReSTART
sudo systemctl start httpd
sudo systemctl start mariadb
Azure SDK for PHPのインストール
上述のgithubリンクを参照してください。
- 公式ドキュメントに記載のあるリポジトリからクローンします。
https://azure.microsoft.com/en-us/develop/php/
$sudo git clone https://github.com/Azure/azure-sdk-for-php.git
- /var/www/html配下にcomposer.jsonファイル作成します。
$sudo vi composer.json
{
    "require": {
        "microsoft/windowsazure": "^0.4"
    }
}
- Composerを利用してプロジェクト整備します。
$sudo php71 composer.phar install
- 公式docからサンプルコードをコピペして動かしてみます。
ん?
Azureの自分のアカウントへの紐つけ、エンドポイント設定などがサンプルに書いてないですね。
stackoverflowに答えがありました。
http://stackoverflow.com/questions/13930880/connect-to-azure-blob-through-azure-website-with-php
$connectionString として設定せよと。
そして公式docに書式が書いてありました。
DefaultEndpointsProtocol=[http|https];AccountName=[yourAccount];AccountKey=[yourKey]
ここのyourAccountと、yourKeyはどこで見つけられるんだ?と思っていたら、やはりstackoverflowに答えがありました。
http://stackoverflow.com/questions/6985921/where-can-i-find-my-azure-account-name-and-account-key
Azureポータルから、アクセスキーを開いてみましょう。ここに「アカウント」と「キー」があります。
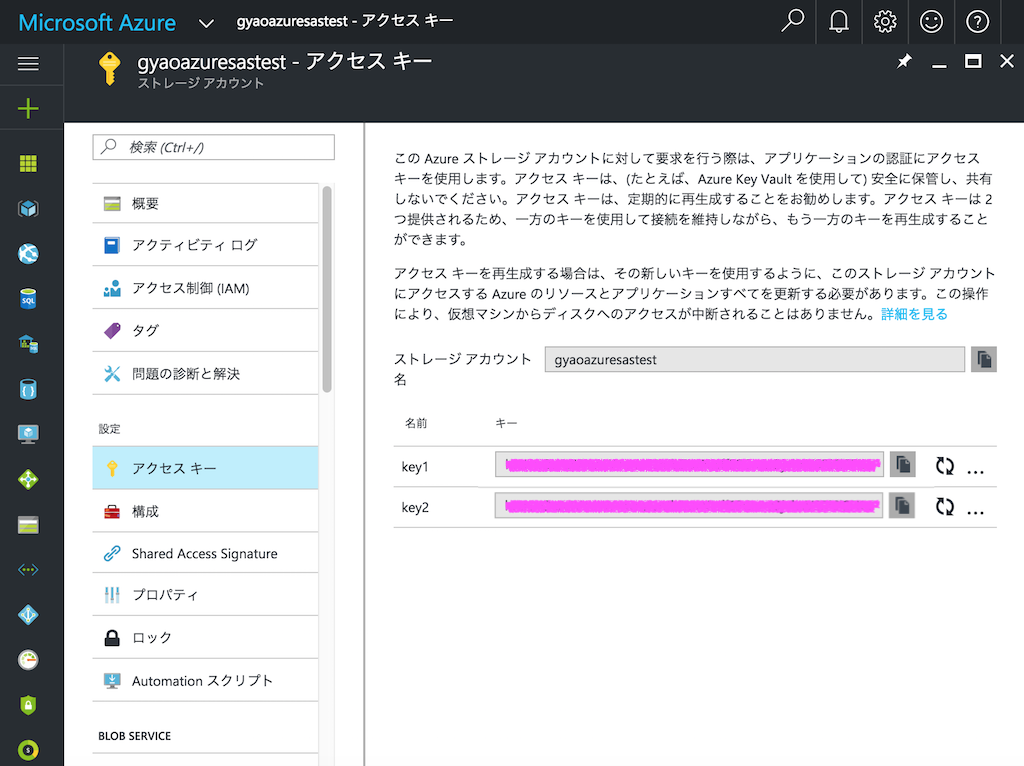
また、自分が作成したコンテナーのIDを確認してください。
サンプルコードを以下のように、自分の環境に沿って3点書き換えます。(①、②、③としてあります。)
<?php


    require_once 'vendor/autoload.php';

    use WindowsAzure\Common\ServicesBuilder;
    use MicrosoftAzure\Storage\Common\ServiceException;

    //Endpoint
    $connectionString = "DefaultEndpointsProtocol=http;AccountName=①ストレージアカウント;AccountKey=②プライマリキー";

    // Create blob REST proxy.
    $blobRestProxy = ServicesBuilder::getInstance()->createBlobService($connectionString);


    try    {
        // List blobs.
        $blob_list = $blobRestProxy->listBlobs("③自分が作ったコンテナーのID");
        $blobs = $blob_list->getBlobs();

        foreach($blobs as $blob)
        {
            echo $blob->getName().": ".$blob->getUrl()."<br />";
        }
    }
    catch(ServiceException $e){
        // Handle exception based on error codes and messages.
        // Error codes and messages are here:
        // http://msdn.microsoft.com/library/azure/dd179439.aspx
        $code = $e->getCode();
        $error_message = $e->getMessage();
        echo $code.": ".$error_message."<br />";
    }
- Webブラウザか、コマンドで挙動を確認してみる。
Webブラウザからphpファイルにアクセスしても良いですし、コマンドで動かしても良いです。確認してみましょう。
`$php71 listblob.php'
この記事の上の方でコンテナーの中に保存した、moviedata.jsonが保存されていることが表示されればOKです。
$ php71 listblob.php
moviedata.json: http://自分のストレージアカウント.blob.core.windows.net/gyaoazuresastestblob/moviedata.json<br />
Azure Storageからダウンロード
引き続き「アカウントキー」を利用してアクセスします。
ダウンロードするサンプルコードを編集します。ダウンロード対象は自分で保存したmoviedata.jsonだったり、上記のリストアップ用サンプルコードの結果から読み替えてください。
<?php

    require_once 'vendor/autoload.php';

    use WindowsAzure\Common\ServicesBuilder;
    use MicrosoftAzure\Storage\Common\ServiceException;

    //Endpoint
    $connectionString = "DefaultEndpointsProtocol=http;AccountName=自分のストレージアカウント;AccountKey=プライマリキー";


    // Create blob REST proxy.
    $blobRestProxy = ServicesBuilder::getInstance()->createBlobService($connectionString);


    try    {
        // Get blob.
        $blob = $blobRestProxy->getBlob("自分が作ったコンテナーのID", "moviedata.json");
        fpassthru($blob->getContentStream());
    }
    catch(ServiceException $e){
        // Handle exception based on error codes and messages.
        // Error codes and messages are here:
        // http://msdn.microsoft.com/library/azure/dd179439.aspx
        $code = $e->getCode();
        $error_message = $e->getMessage();
        echo $code.": ".$error_message."<br />";
    }
- 実行すると fpassthru によりターミナル上に書き出されるだけですが、下記のコマンドによりテキストとして保存できます。
$sudo php71 getblob.php | sudo tee -a ./moviedata.txt
Azure Storageにアップロード
基本的にはlistblob.phpのコピペから作成してます。
ダウンロードしたばかりのファイルを、別名で保存しています。
<?php
    require_once 'vendor/autoload.php';

    use WindowsAzure\Common\ServicesBuilder;
    use MicrosoftAzure\Storage\Common\ServiceException;

    //Endpoint
    $connectionString = "DefaultEndpointsProtocol=http;AccountName=ストレージアカウント;AccountKey=プライマリキー";

    // Create blob REST proxy.
    $blobRestProxy = ServicesBuilder::getInstance()->createBlobService($connectionString);

    $content = fopen("/var/www/html/moviedata.txt", "r");
    $blob_name = "movieuploadeddata";

    try    {
        //Upload blob
        $blobRestProxy->createBlockBlob("自分が作ったコンテナーのID", $blob_name, $content);
    }
    catch(ServiceException $e){
        // Handle exception based on error codes and messages.
        // Error codes and messages are here:
        // http://msdn.microsoft.com/library/azure/dd179439.aspx
        $code = $e->getCode();
        $error_message = $e->getMessage();
        echo $code.": ".$error_message."<br />";
    }
ここまでで、SASではなく「アクセスキー」を利用して、Azure Storageからデータをダウンロード/アップロード出来るようになりました。
#1-1.PHPでアクセス(with SAS)
アクセスキーではなく、SASを利用してデータをダウンロード/アップロードするようにしたいと思います。
MicrosoftAzureストレージエクスプローラーを利用すると、簡単にSASを払い出せます。
ちなみに、誰でも使えるGUIのツールとして以下の純正 MicrosoftAzureストレージエクスプローラー がある模様。車輪の再開発は不要ですね。
http://storageexplorer.com/
しかし該当ツールが弊社の社内利用可能ソフトウェア一覧に無い!OMG!
自力で捻り込んで払い出します。
自力でSASを払い出す方法
サンプルとなるSASを見てみます。
https://myaccount.blob.core.windows.net/sascontainer/sasblob.txt?sv=2015-04-05&st=2015-04-29T22%3A18%3A26Z&se=2015-04-30T02%3A23%3A26Z&sr=b&sp=rw&sip=168.1.5.60-168.1.5.70&spr=https&sig=Z%2FRHIX5Xcg0Mq2rqI3OlWTjEg2tYkboXr1P9ZUXDtkk%3D
- 各パラメータを紐解く
頭のBLOBのURLについてはGUI画面から取得可能。
https://ストレージアカウント.blob.core.windows.net/コンテナーID/moviedata.json
パラメータの意味については、別のドキュメントを見た方がわかりやすいかもです。。
https://docs.microsoft.com/en-us/rest/api/storageservices/fileservices/constructing-a-service-sas
| サンプル | 概要 | 書き換え例 |
|---|---|---|
| sv=2015-04-05 | Azure Strageのバージョン† | sv=2015-12-11 |
| st=2015-04-29T22%3A18%3A26Z | Unicode化したSASの有効開始時刻(UTC)†† | (省略可能) |
| se=2015-04-30T02%3A23%3A26Z | Unicode化したSASの有効期限 | se=2016-12-31T00%3A00%3A00Z |
| sr=b | 対象リソース。bはBLOB,cはコンテナ | sr=c |
| sp=rw | 権限。Read&Write | sp=rw |
| sip=168.1.5.60-168.1.5.70 | アクセス許可IP範囲 | (省略可能) |
| spr=https | 許可プロトコル | spr=https,http |
| sig=Z%2FRHI...kk%3D | 署名 | 次のパートで説明 |
† Azure Storageのバージョン"2015-04-05"については以下。
https://docs.microsoft.com/ja-jp/rest/api/storageservices/fileservices/version-2015-04-05
†† Unicodeで「%3A」は「:」を意味する。T22%3A18%3A26Zは「T22:18:26Z」となる
sigパラメータの作成
サンプルURIの記載あるページには以下のような説明があります。
"Used to authenticate access to the blob. The signature is an HMAC computed over a string-to-sign and key using the SHA256 algorithm, and then encoded using Base64 encoding."
https://docs.microsoft.com/en-us/azure/storage/storage-dotnet-shared-access-signature-part-1#examples-of-sas-uris
各パラメータを説明しているページには以下のような説明があります。
"The string-to-sign is a unique string constructed from the fields that must be verified in order to authenticate the request. The signature is an HMAC computed over the string-to-sign and key using the SHA256 algorithm, and then encoded using Base64 encoding.
Constructing the Signature String
To construct the signature string of a shared access signature, first construct the string-to-sign from the fields comprising the request, then encode the string as UTF-8 and compute the signature using the HMAC-SHA256 algorithm. Note that fields included in the string-to-sign must be URL-decoded."
https://docs.microsoft.com/en-us/rest/api/storageservices/fileservices/constructing-a-service-sas#specifying-the-signature
つまり。
SHA256アルゴリズムを使いつつ string-to-signとkey をHMACに通し、そしてそれをBase64円コードしたものがSignatureだ。ということになるのですが、意味がわからないですね。各パラメータを説明しているページにおいてはUTF-8でエンコードせよ、とも書いてあります。
別のドキュメントに正解が書いてありました。
https://docs.microsoft.com/en-us/rest/api/storageservices/fileservices/service-sas-examples
※このページのサンプルコード、versionの指定が適当のようなので読み替え能力が必要そうです。
signedstart=2013-08-16
signedexpiry=2013-08-17
signedresource=c
signedpermissions=r
signature=dD80ihBh5jfNpymO5Hg1IdiJIEvHcJpCMiCMnN/RnbI=
signedidentifier=YWJjZGVmZw==
signedversion=2013-08-15
responsecontent-disposition=file; attachment
responsecontent-type=binary


StringToSign = r + \n
               2013-08-16 + \n
               2013-08-17 + \n
               /myaccount/pictures + \n
               YWJjZGVmZw== + \n
               2013-08-15 + \n
               + \n
               file; attachment + \n
               + \n
               + \n
               binary

HMAC-SHA256(URL.Decode(UTF8.Encode(StringToSign))) = a39+YozJhGp6miujGymjRpN8tsrQfLo9Z3i8IRyIpnQ=
唐突に出てくる"/myaccount/pictures"。これは"canonicalizedResource"を意味する模様。
- 取り敢えず、最新バージョンの"2015-12-11"の形式に書き換えてみたverがこちら。
ご参考:https://docs.microsoft.com/en-us/rest/api/storageservices/fileservices/constructing-a-service-sas#specifying-the-signature
$signedexpiry="2016-12-31T01:01:01Z";
$signedresource="c";
$signedpermissions="rwl";
$signedversion="2015-12-11";

$canonicalizedresource = '/blob/ストレージアカウント名/作成したコンテナーID'

$StringToSign = $signedpermissions."\n".
                ''."\n".
                $signedexpiry."\n".
                $canonicalizedresource."\n".
                ''."\n".
                ''."\n".
                ''."\n".
                $signedversion."\n".
                ''."\n".
                ''."\n".
                ''."\n".
                ''."\n".
                '';
- 改めて各パラメータを説明しているページを見直すと、signatureの記載が無い。また、sampleSigをよくよく見て見るとsignatureの値を使っていない。。。
- signedidentifierについてはこちら。
- hash_hmacで利用するキーはアクセスキーをBase64_decodeしたものらしい。
"Base64_decode azure sas"で検索すると 最近のIoT系のドキュメントが出てくるのだが、最初に発見した人はどうやったのだろう。。。
https://docs.microsoft.com/ja-jp/azure/iot-hub/iot-hub-devguide-security
- sigを払い出しつつ、URIを組み立てます。
まず、特に何もせずにBlobへアクセスすると、以下のようなエラーメッセージが出ると思います。
https://自分のストレージ.blob.core.windows.net/コンテナーID/moviedata.json
This XML file does not appear to have any style information associated with it. The document tree is shown below.
<Error>
<Code>ResourceNotFound</Code>
<Message>
The specified resource does not exist. RequestId:a380b3c7-0001-000d-7637-4a18a7000000 Time:2016-11-29T11:53:05.8184599Z
</Message>
</Error>
PHPwithSASサンプルコード
以下のサンプルコードで、sigを生成しつつ、moviedata.jsonの中身にアクセスするURIを表示します。
大切なお知らせ:このサンプルコードは"2015-12-11"向けのものです
<?php
/**
  * Sample code, for Azure Storage Version 2015-12-11.
  * @author snomoto
*/

$key = 'accessKey'; //copy&paste from Azure Portal

$azureStorageAccount = "azureStorageAccount";  //copy&paste from Azure Portal
$azureContainerID    = "azureContainerID";     //copy&paste from Azure Portal
$azureBlobName       = "moviedata.json";
$azureURL = "https://".$azureStorageAccount.".blob.core.windows.net/".$azureContainerID."/".$azureBlobName."?";

$sasEnd = "2016-12-03T19:43:58Z"; //sample.
$sasIP  = "xxx.xxx.xxx.xxx";      //your IP address

$sigStr20151211 =        "rwl"."\n". //permission.Read,Write,List
                         ""."\n".    //start
                         $sasEnd."\n".    //end
                         "/blob/".$azureStorageAccount."/".$azureContainerID."/".$azureBlobName."\n". //canonicalizedresource
                         ""."\n".    //identifier
                         $sasIP."\n".   //IP address
                         "https,http"."\n".     //protocol
                         "2015-12-11"."\n".     //VERSION
                         ""."\n".    //rscc
                         ""."\n".    //rscd
                         ""."\n".    //rsce
                         ""."\n".    //rscl
                         "";         //rsct

$sig20151211 = base64_encode(
     hash_hmac('sha256', urldecode(utf8_encode($sigStr20151211)), base64_decode($key), true)
     );

$URI = $azureURL."se=".urlencode($sasEnd)."&sr=b&sp=rwl&sip=".$sasIP."&spr=https,http&sig=".urlencode($sig20151211)."&sv=2015-12-11";

echo $URI."\n";
ドキュメントによってはsipとsprが"Optional"だとあるのですが、バージョン資料には"must"と記載あります。入れておいたほうがよさそうです。
When constructing the string-to-sign for an account SAS or a service SAS in version 2015-04-05, you must include the signed IP and signed protocol in the signature string.
https://docs.microsoft.com/en-us/rest/api/storageservices/fileservices/version-2015-04-05
★謎
Beginning with version 2015-04-05, the optional signed IP (sip) field
https://docs.microsoft.com/en-us/rest/api/storageservices/fileservices/constructing-a-service-sas#specifying-ip-address-or-ip-range
ツールで超簡単にSASを払い出す方法
会社環境ではインストールできないので、
個人で利用しているAzureアカウントとPCで、Microsoft Azure Storage Explorerを利用してみます。
- ログインできたら、自分が作ったコンテナーを右クリックし、"Get Shared Access Signatures"をクリックしてください。

- SASの有効期間と、権限を設定します。

- SASが作成されました。上の方でかなり捻り込んだ自力作業が、2分くらいで完了しました。。

ブラウザから叩く場合は、'comp=list&restype=container'というパラメータを追加すればアクセスできます。
http://stackoverflow.com/questions/25038429/azure-shared-access-signature-signature-did-not-match
EOF
あまりに長くなったので、PART分けすることにしました・・・
NEXT: please check bellow link...