やりたいこと
- slackにyahoo!天気予報のスクリーンショットを毎日表示させたい
方針
- hubotにやらせる
- nightmareでスクリーンショットを撮る
- 画像はgyazoにアップする
- pm2でデーモン化する
実装
nodeインストール
nodebrewを使用します。
8系を選んだのはなんとなくです。
nodebrew ls-remote
nodebrew install v8.11.3
nodebrew use v8.11.3
node -v
hubotインストール&セットアップ
npm i -g hubot yo generator-hubot coffee-script

mkdir slack_hubot
cd slack_hubot
yo hubot
あとでpm2使ってデーモン化するとき用に
bin/hubot を bin/hubot.sh にリネームしておきます。
参考1
参考2
mv bin/hubot bin/hubot.sh
nightmareインストール
npm i coffee-script
npm i electron
npm i nightmare
nightmareが使用しているerectronのために
xvfbを用意しておきます。
sudo yum -y install gtk2
sudo yum -y install libXScrnSaver
sudo yum -y install GConf2

sudo yum -y install xorg-x11-server-Xvfb

sudo yum -y install xorg-x11-server-Xorg xterm
sudo yum -y install xorg-x11-drv-vesa xorg-x11-drv-evdev xorg-x11-drv-evdev-devel
そのほかインストール
npm i gyazo-api
npm i cron
スクリプト
script/weather.coffee
# Description:
#   weather.
#

Nightmare = require 'nightmare'
Gyazo = require 'gyazo-api'
cron = require('cron').CronJob

url = 'https://weather.yahoo.co.jp/weather/13/4410.html'
filename = "/tmp/_weather.png"
client = new Gyazo(process.env.GYAZO_TOKEN)

module.exports = (robot) ->
  job = new cron '0 0 10 * * *', () =>
    nightmare = new Nightmare({ show: true })

    nightmare
      .viewport(1000,1000)
      .goto(url)
      .wait("body")
      .evaluate ()=>
        rect = document.querySelector('.forecastCity').getBoundingClientRect()
        return {
          left:   Math.round(rect.left)
          top:    Math.round(rect.top)
          right:  Math.round(rect.right)
          bottom: Math.round(rect.bottom)
          width:  Math.round(rect.width)
          height: Math.round(rect.height)
        }
      .then (rect)=>
        return nightmare
          .screenshot(filename, {
            x: rect.left,
            y: rect.top - 38,
            width: rect.width,
            height: rect.height + 38
          })
          .end()
      .then () =>
        client.upload(filename)
          .then (res) =>
             robot.send {room: "random"}, "東京の天気:" + res.data.permalink_url
  job.start()
動作テスト
テスト前にスクリプトのcron設定は
job = new cron '0 * * * * *', () => などにしておいて下さい。
export HUBOT_LOG_LEVEL=debug
export HUBOT_SLACK_TOKEN=xxxxxxxxxxxxxxxxxxxxxxxx
export GYAZO_TOKEN=xxxxxxxxxxxxxxxxxxxxxxxx

xvfb-run ./bin/hubot.sh -a slack -n [bot名]
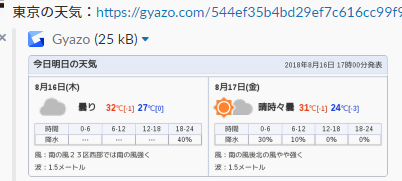
#randomにこんな感じの絵が表示されれば成功です。
pm2を使ってデーモン化する
このままだと
コンソールを落とすとスクリプトが止まってしまうので
pm2を使用します。
npm i -g pm2

pm2 start --interpreter xvfb-run -f ./bin/hubot.sh -x --name [pm2プロセス名] -- -a slack -n [bot名]
簡単な補足
- 毎朝10時にpostされます。
-
.forecastCityが天気予報部分に当たってるstyleです。38というマジックナンバーは「今日明日の天気」分の高さです。 - styleに対して
getBoundingClientRect()して切り出し位置を算出しているので、yahoo!天気予報がstyle名変えたりすると対応が必要になります。
激闘の記録
- 最初はcentos6上で実装しようとしていたが、electronが動作しないことが判明
- nightmare1.x系だとelectronを使用しないので、そちらで実装しようとしたが、screenshotを行う時にcropができなかったので、諦めてcentos7系に移行
- pm2上でxvfb-runさせる方法にたどり着くまでの長く険しい道のり
あとがき
「こうすればもっと簡単にできる」とか
あれば是非教えて下さるとうれしいです。