GitHubで公開してます。
何か間違いとかあれば pull request ください。
UnityGCMPlugin とは?
Unity Android アプリで GCM(Google Cloud Messaging) サービスを利用した PUSH通知 を受け取るためのプラグインです。
使用例としてデモアプリもGitHubに上げてます。
できること
- アプリが起動していない状態でもPUSH通知を受け取ることができる。
- 通知をタップするとアプリを起動することができる。
インストール
Step1. jar ファイルをダウンロード
Step2. jar ファイルをプロジェクトにコピー
先ほどダウンロードした unitygcmplugin.jar を{あなたのUnityプロジェクト}/Assets/Plugins/Android 配下にコピーします。
Step3. その他の依存する jar ファイルをプロジェクトにコピー
以下の jar ファイルを{YourUnityProject}/Assets/Plugins/Androidフォルダ配下にコピーします。
- android-support-v4.jar (コピー元: {AndroidSDK}/sdk/extras/android/support/v7/appcompat/libs/android-support-v4.jar)
- google-play-services.jar (コピー元: {AndroidSDK}/sdk/extras/google/google_play_services/libproject/google-play-services_lib/libs/google-play-services.jar)
Step4. AndroidManifest.xml の編集
AndroidManifest.xml ファイルを{YourUnityProject}/Assets/Plugins/Androidに用意して以下のように内容を編集します。
<?xml version="1.0" encoding="utf-8"?>
<manifest
    xmlns:android="http://schemas.android.com/apk/res/android"
    package="info.snaka.unitygcmplugin.demo"
	android:installLocation="preferExternal"
	android:theme="@android:style/Theme.NoTitleBar"
    android:versionCode="1"
    android:versionName="1.0">
    <supports-screens
        android:smallScreens="true"
        android:normalScreens="true"
        android:largeScreens="true"
        android:xlargeScreens="true"
        android:anyDensity="true"/>

    <uses-permission android:name="android.permission.INTERNET" />
    <uses-permission android:name="android.permission.GET_ACCOUNTS" />
    <uses-permission android:name="com.google.android.c2dm.permission.RECEIVE" />
    <uses-permission android:name="android.permission.WAKE_LOCK" />

    <permission android:name="info.snaka.unitygcmplugin.permission.C2D_MESSAGE" android:protectionLevel="signature" />
    <uses-permission android:name="info.snaka.unitygcmplugin.permission.C2D_MESSAGE" />

    <application
		android:icon="@drawable/app_icon"
        android:label="@string/app_name"
        android:debuggable="true">

        <activity android:name="info.snaka.unitygcmplugin.CustomUnityPlayerActivity"
            android:label="@string/app_name"
            android:configChanges="fontScale|keyboard|keyboardHidden|locale|mnc|mcc|navigation|orientation|screenLayout|screenSize|smallestScreenSize|uiMode|touchscreen">
            <intent-filter>
                <action android:name="android.intent.action.MAIN" />
                <category android:name="android.intent.category.LAUNCHER" />
                <category android:name="android.intent.category.LEANBACK_LAUNCHER" />
            </intent-filter>
            <meta-data android:name="unityplayer.UnityActivity" android:value="true" />
            <meta-data android:name="unityplayer.ForwardNativeEventsToDalvik" android:value="false" />
        </activity>

        <receiver android:name="info.snaka.unitygcmplugin.GcmBroadcastReceiver" android:exported="true">
            <intent-filter>
                <action android:name="com.google.android.c2dm.intent.RECEIVE" />
                <category android:name="info.snaka.unitygcmplugin" />
            </intent-filter>
        </receiver>

        <service android:name="info.snaka.unitygcmplugin.GcmIntentService" />

        <meta-data android:name="apiProjectNumber" android:value="!{Your project number}" />
    </application>
</manifest>
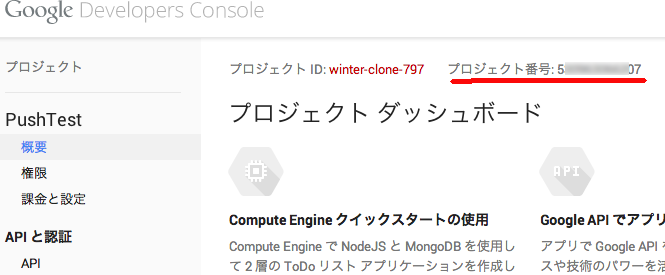
注意: {Your project number} は Google Developer Console に表示されている「プロジェクト番号」に置き換えてください。 (その前の "!" は必要なので削除しないように!)
以上でインストール完了
使い方
"_GcmEvents"を作成
新規シーンを作成して 空のGameObjectを"_GcmEvents" という名前で作成します。
"_GcmEvents"にスクリプトをアタッチする
"_GcmEvents" を作成したら、以下のようなスクリプトをアタッチします。
using System.Collections;

public class GcmEvents : MonoBehaviour {
	string m_regid = "";

	/// <summary>
	/// Get registration ID from cache.
	/// </summary>
	void Start () {
		Debug.Log ("***** Start UnityGCMPluginSample");
		var unityPlayer = new AndroidJavaClass("com.unity3d.player.UnityPlayer");
		var activity = unityPlayer.GetStatic<AndroidJavaObject>("currentActivity");
		var appContext = activity.Call<AndroidJavaObject>("getApplicationContext");

		Debug.Log ("***** get RegistrationId");
		var registrar = new AndroidJavaClass ("info.snaka.unitygcmpluginlib.GcmRegistrar");

		registrar.CallStatic ("clearCache", new object[] { appContext });

		string registrationId = registrar.CallStatic<string> ("getRegistrationId", new object[] { appContext });

		if (!string.IsNullOrEmpty (registrationId))
		{
			Debug.Log ("***** RegistrationId:[" + registrationId + "]");
		}
		else
		{
			// Invoke background thread to get registration ID
			Debug.Log ("***** id empty");
			registrar.CallStatic("registerInBackground", new object[]{ appContext });
		}
	}


	/// <summary>
	/// Callback from background thread if register completed.
	/// </summary>
	/// <param name="registerId">Registration ID</param>
	public void OnRegister(string registerId) {
		Debug.Log ("##### RegisterId: " + registerId);
		m_regid = registerId;
	}


	/// <summary>
	/// Display registration ID.
	/// </summary>
	void OnGUI() {
		GUILayout.TextArea(m_regid, GUILayout.ExpandWidth(true));
	}
}
通知用アイコンの用意
以下の場所に通知用のアイコンを配置します。
Assets/Plugins/Android/res/drawable/notify.png
アイコンのサイズとかは以下を参照
Androidのアイコンサイズ(2013.12更新)
http://greety.sakura.ne.jp/redo/2012/02/android201202.html
PUSH 通知のテスト
ターミナルからcurlを使って以下のようにPUSH通知のテスト配信が行えます。
$ curl --header "Authorization: key=(put your API key here)" \
--header Content-Type:"application/json" \
https://android.googleapis.com/gcm/send \
-d "{\"registration_ids\":[\"(put your Registration ID here)\"],\"data":{\"message\":\"Hello\"}}"
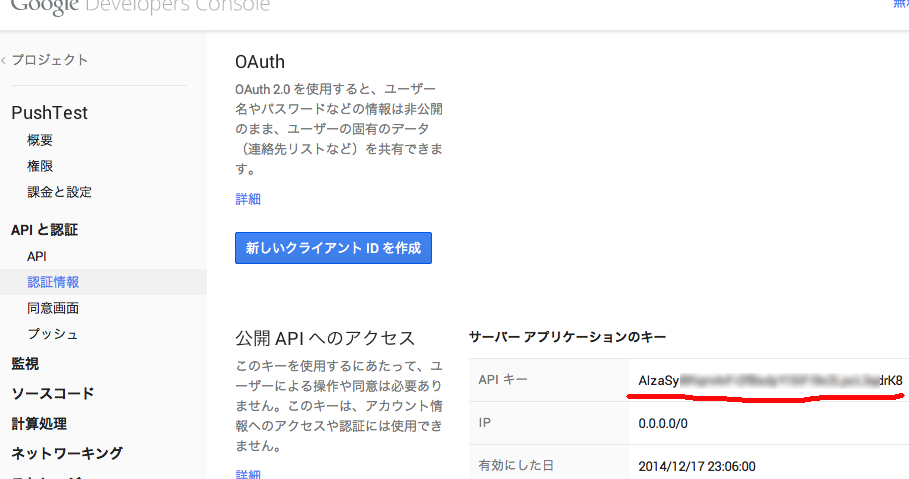
(put your API key here) は Google Developer Console の [APIと認証情報]-[認証情報]に表示されている「APIキー」に置き換えます。
APIキーの取得方法については以下の公式ページなどを参考にしてください。
(put your Registration ID here) はデバイスでアプリを起動したときに表示される Registration ID に置き換えてください。
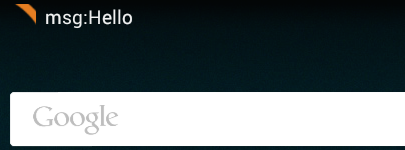
通知が成功するとデバイスのステータスバーに以下のように通知が表示されます。
通知をタップするとアプリが起動します。
Todo
- アイコンは通知用に最適化してないので見た目が良くない
- デバイスで Google Play Services が有効になっているかどうかチェックしていない。
- unitypackage 形式でパッケージ化してインストール手順を簡略化したい
- 通知のタイトルに表示する文字列をカスタマイズ可能に
LICENSE
The MIT License (MIT)


