環境構築
こちらのブログに従い、DevContainerで開発環境を整える。
{
  "name": "Terraform",
  "image": "mcr.microsoft.com/devcontainers/base:jammy",
  "features": {
    "ghcr.io/devcontainers/features/azure-cli:1": {},
    "ghcr.io/devcontainers-extra/features/terraform-asdf:2": {}
  },
  "customizations": {
    "vscode": {
      "extensions": [
        "HashiCorp.terraform",
        "ms-vscode.azurecli",
		    "ms-vscode.azure-account",
		    "ms-azuretools.vscode-azureterraform",
		    "ms-azuretools.vscode-docker"
      ]
    }
  }
}
Dev Containerが起動すると、Github Copilotを入れるように促されるので、有効にする。拡張機能は主にTerraform、Azure、Github Copilotが入る。

この状態でmain.tfを作成すると、Github CopilotやTerraformによって以下のように諸々がAuto Completeされるようになる。

参考サイト
こちらの動画に従ってやってみる。
Deploy Infrastructure to Azure with Terraform - Full Course
Terraformファイルを作ってみる
まずは細かいことを気にする前に実際に作ってみる。ここでは、Storage AccountでStatic Websiteをホストするようにしてみる。
provider "azurerm" {
  features {}
  subscription_id = "xxx"
}

# create a resource group in japan east
resource "azurerm_resource_group" "rg" {
  name     = "rg-terraform-simari"
  location = "Japan East"
}

# create a storage account in the resource group
resource "azurerm_storage_account" "sa" {
  name                     = "stterraformsimari"
  resource_group_name      = azurerm_resource_group.rg.name
  location                 = azurerm_resource_group.rg.location
  account_tier             = "Standard"
  account_replication_type = "LRS"
  account_kind             = "StorageV2"
}

resource "azurerm_storage_account_static_website" "static_website" {
  storage_account_id = azurerm_storage_account.sa.id
  index_document     = "index.html"
}

# create a container in the storage account
resource "azurerm_storage_container" "container" {
  name                  = "$web"
  storage_account_id    = azurerm_storage_account.sa.id
  container_access_type = "private"
}

# Add a index.html file to the storage account
resource "azurerm_storage_blob" "blob" {
  name                   = "index.html"
  storage_account_name   = azurerm_storage_account.sa.name
  storage_container_name = "$web"
  type                   = "Block"
  content_type           = "text/html"
  source_content         = "<html><head><title>Hello, World from Terraform!</title></head><body><h1>Hello, World from Terraform!</h1></body></html>"
  depends_on             = [azurerm_storage_account_static_website.static_website, azurerm_storage_container.container]
}
コマンドいライン上でaz loginしてからterraform initをするとこんな感じのフォルダ構造になる。
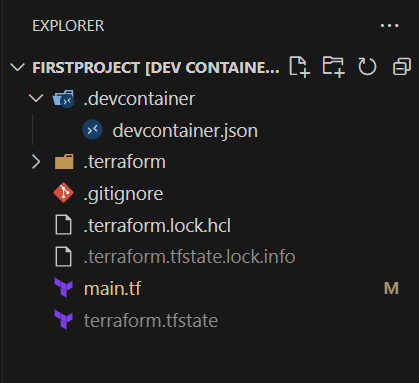
gitignoreはとりあえずここからとってきた。
Terraformを実行してみる
VSCodeのターミナルでaz loginした状態で以下を実行。
terraformファイルにエラーがある場合は、planでエラーになる。
ちなみにterraformをAzureに認証させるにはいろんな方法がある。今回は簡単に az loginしてしまったが、環境変数にService PrincipalのIDとパスワードを設定する方法などもある。
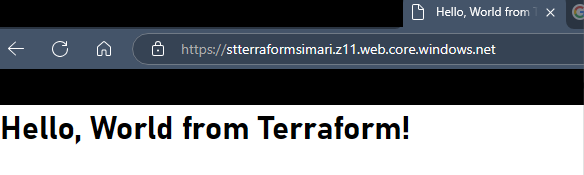
実際にAzure環境でStorage Accountができ、Websiteがホストされていることを確認できた。
Azure Provider
Azureとやりとりするよというための機能群。プログラミング言語でのライブラリのようなものと考える。
- 認証: Azure Providerは、AzureのAPIに対する認証を処理する
- リソース管理: ProviderはAzureリソースの実際の作成、更新、削除を行う
- API通信: ModuleはProviderを通じてAzureのAPIと通信する
variable "client_secret" {
}

# We strongly recommend using the required_providers block to set the
# Azure Provider source and version being used
terraform {
  required_providers {
    azurerm = {
      source  = "hashicorp/azurerm"
      version = "=4.1.0"
    }
  }
}

# Configure the Microsoft Azure Provider
provider "azurerm" {
  features {}
  version         = "=> 1.0"
  client_id       = "00000000-0000-0000-0000-000000000000"
  client_secret   = var.client_secret
  tenant_id       = "10000000-0000-0000-0000-000000000000"
  subscription_id = "20000000-0000-0000-0000-000000000000"
}
Remote StateにAzure Storage Accountを利用する
Azure StorageにTerraform Stateファイルを配置する。以下のMicrosoftの例によるとAccount Keyで接続しているが本番環境ではもっとセキュアにやるべきかもしれない。そもそもStateファイルには機密情報が入る可能性があるので、セキュアに扱うべき。
Microsoftのサンプルに従うと以下のようにキーを利用して接続することになる。
ACCOUNT_KEY=$(az storage account keys list --resource-group $RESOURCE_GROUP_NAME --account-name $STORAGE_ACCOUNT_NAME --query '[0].value' -o tsv)
export ARM_ACCESS_KEY=$ACCOUNT_KEY
export ARM_ACCESS_KEY=$(az keyvault secret show --name terraform-backend-key --vault-name myKeyVault --query value -o tsv)

terraform {
  required_providers {
    azurerm = {
      source  = "hashicorp/azurerm"
      version = "~>3.0"
    }
  }
  backend "azurerm" {
      resource_group_name  = "tfstate"
      storage_account_name = "<storage_account_name>"
      container_name       = "tfstate"
      key                  = "terraform.tfstate"
  }

}
Storage Accountの前準備
Storage Accountにtfstateを保管するうえで、セキュアに扱う手順については以下のyoutube動画が参考になった。
- Storage Account上のStateファイルをセキュアに扱う上での考慮事項
- アクセス
- RBAC権限でアクセスを絞る
- ContainerはPrivateにする
- Storqage AccountにはEntra ID認証(Service Principal)を使い、Storage Accountのキー認証を無効化する
- NW制限を実施しPrivate Endpoint経由でアクセスするようにする
- 暗号化
- Storage Account上のStateファイルを保存時、転送時に暗号化する
- 保護
- GRSにして冗長性を高める
- バージョニングを有効に
- アクセス
Storage Accountの設定のメインのところを抜き出してみる。
terraform {
  required_providers {
    azurerm = {
      source  = "hashicorp/azurerm"
      version = "~>3.0"
    }
    azuread = {
      source  = "hashicorp/azuread"
      version = "~>2.0"
    }
  }
  required_version = ">=1.5"
}


provider "azurerm" {
  features {}
  # Set storage access to use Azure AD instead of storage key SAS
  storage_use_azuread = true
}

# Create storage account
resource "azurerm_storage_account" "main" {
  name                = local.naming_string
  location            = azurerm_resource_group.main.location
  resource_group_name = azurerm_resource_group.main.name

  account_tier                      = "Standard"
  account_kind                      = "StorageV2"
  account_replication_type          = "GRS"
  enable_https_traffic_only         = true
  min_tls_version                   = "TLS1_2"
  shared_access_key_enabled         = false
  default_to_oauth_authentication   = true
  infrastructure_encryption_enabled = false
  blob_properties {
    versioning_enabled            = true
    change_feed_enabled           = true
    change_feed_retention_in_days = 90
    last_access_time_enabled      = true
    delete_retention_policy {
      days = 30
    }
    container_delete_retention_policy {
      days = 30
    }
  }
  sas_policy {
    expiration_period = "00.02:00:00"
    expiration_action = "Log"
  }
}

# Create a service principal to assign role to
data "azuread_client_config" "current" {}

resource "azuread_service_principal" "main" {
  client_id                    = azuread_application.main.client_id
  app_role_assignment_required = false
  owners                       = [data.azuread_client_config.current.object_id]
}

resource "azuread_service_principal_password" "main" {
  service_principal_id = azuread_service_principal.main.id
}

resource "azurerm_role_assignment" "main" {
  scope = azurerm_storage_account.main.id
  role_definition_name = "Storage Blob Data Contributor"
  principal_id         = azuread_service_principal.main.object_id

  skip_service_principal_aad_check = true
}

output "service_principal" {
  value = azuread_service_principal.main
}

output "subscription_id" {
  value = data.azurerm_subscription.main.subscription_id
}

output "service_principal_password" {
  value = nonsensitive(azuread_service_principal_password.main.value)
}
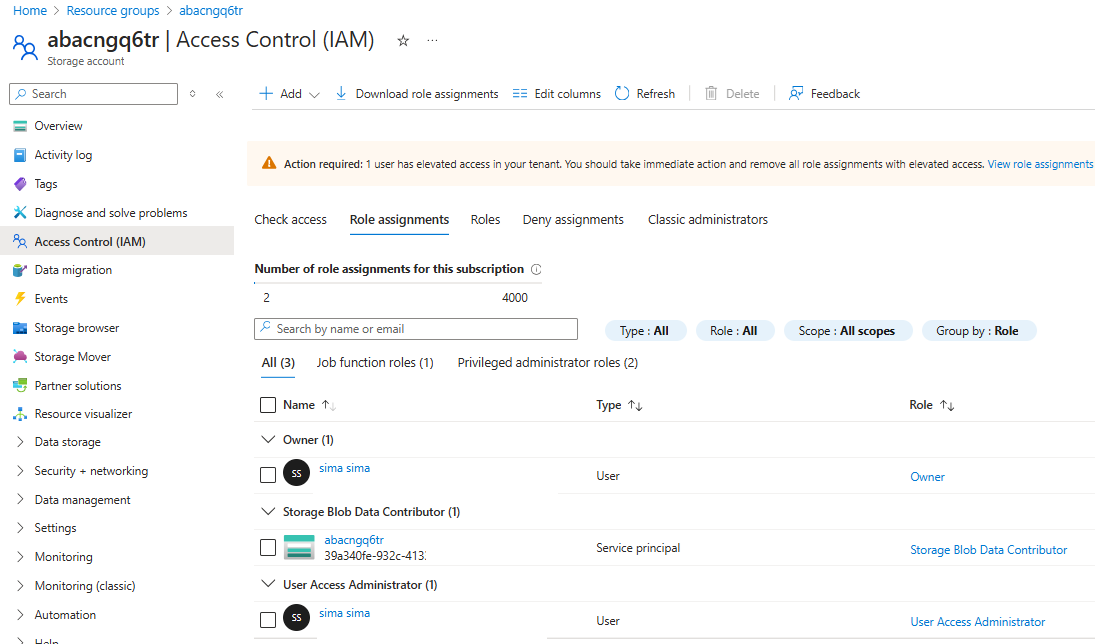
Terraform専用のService Principalが作成された。

Storage Accountに対してService PrincipalがStorage Blob Data Contributor権限をもっている。更にセキュアにやるなら、カスタムロールを利用すればコンテナレベルで権限を絞れる。
BackendをService PrinciplでInitializeする
terraformブロックでuse_azuread_authをtrueにする。
terraform {
  backend "azurerm" {
    storage_account_name = "STORAGE_ACCOUNT_NAME"
    container_name       = "tfstate"
    key                  = "tacowagon/terraform.tfstate"
    use_azuread_auth     = true
    client_id            = "client_ID"
    client_secret        = "CLIENT_SECRET"
    tenant_id            = "TENANT_ID"
    subscription_id      = "SUBSCRIPTION_ID"
  }

  required_providers {
    azurerm = {
      source  = "hashicorp/azurerm"
      version = "~>3.0"
    }
  }
}
設定をbackend.tfに保持する。
これはService PrincipalのClient Secretが入っているので、gitignoreに定義してチェックインしないようにする。
storage_account_name="stname"
container_name="tfstate"
client_id="xxxxxx-xxxx-xxxx-xxxx-xxxxxxxx"
client_secret="TiR8Q~I2xxxxxxxx"
key="tacowagon/terraform.tfstate"
tenant_id="xxxxxx-xxxx-xxxx-xxxx-xxxx"
subscription_id="xxxxxx-xxxx-xxxx-xxxx-xxxxxxxx"
terraform init -backend-config="backend.tfbackend"
tfstateがStorage Account上に作成された。
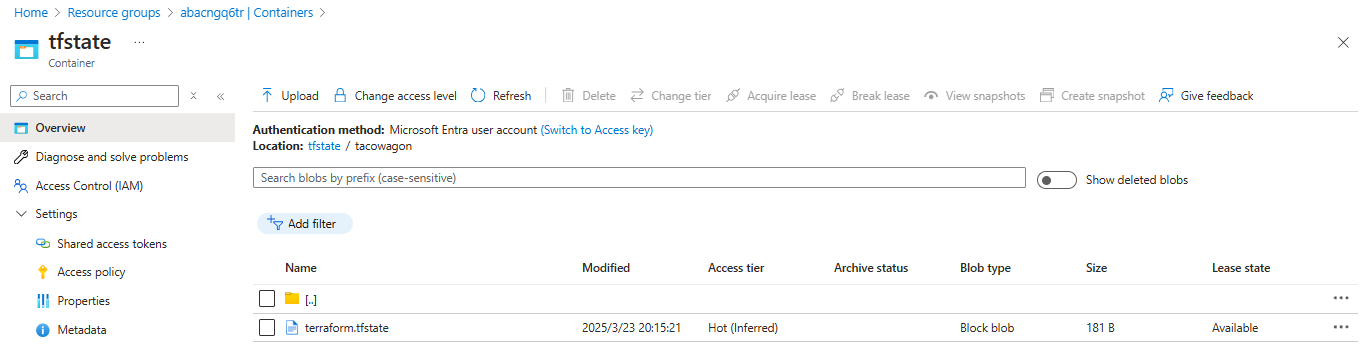
このService PrincipalはCICDなどでも使うことができる。