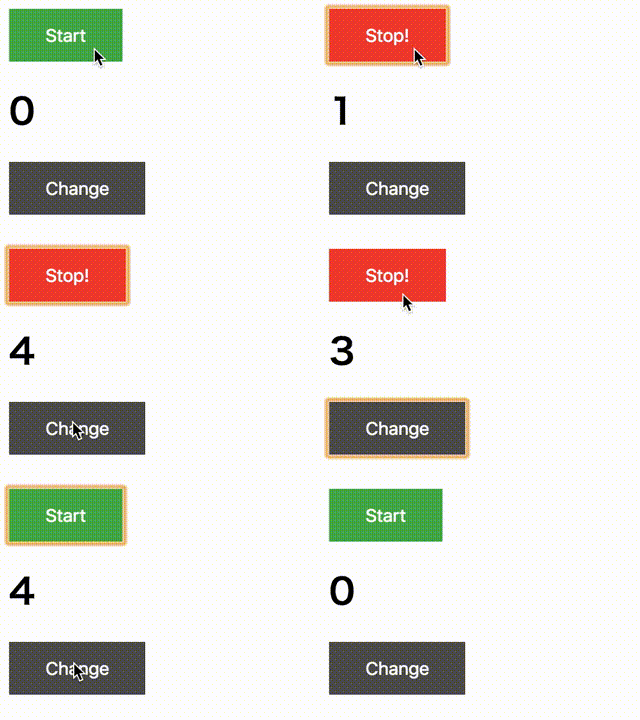
Elm入門がてら、最低限動くアプリケーション作ってみました。
それがこちら
ユースケースとしては、思考系の対戦で
消費時間を測りながらしたいときに使えればなと。
モチベーション
- Elm-jpに一応入れてもらっているので何かしらアウトプットだしたい
- Elm入門ハンズオンで実際に手を動かして面白かったので熱が冷めないうちに勉強しときたい
Elm入門ハンズオン には当日使った資料も公開されているので開発環境整えたい方の参考になると思います
コード
これだけ、とてもシンプル。
僕が初心者なので上級者はもっとシンプルに書くのだろうと思いますが
それでも100行程度で済みました。
module Main exposing (Model, Msg(..), init, main, subscriptions, update, view)

import Browser
import Html exposing (Html, div, h1, img, input, text)
import Html.Attributes exposing (class, src, type_, value)
import Html.Events exposing (onClick)
import Task
import Time


-- MODEL


type alias Model =
    { zone : Time.Zone
    , time : Time.Posix
    , counter : Int
    , limit : Int
    , isStart : Bool
    }


init : () -> ( Model, Cmd Msg )
init _ =
    ( Model Time.utc (Time.millisToPosix 0) 0 30 False
    , Task.perform AdjustTimeZone Time.here
    )


-- UPDATE


type Msg
    = Tick Time.Posix
    | AdjustTimeZone Time.Zone
    | DoTimer
    | ChangePlayer


update : Msg -> Model -> ( Model, Cmd Msg )
update msg model =
    case msg of
        Tick newTime ->
            let
                c =
                    if model.isStart then
                        model.counter + 1

                    else
                        model.counter
            in
            ( { model | counter = c }
            , Cmd.none
            )

        AdjustTimeZone newZone ->
            ( { model | zone = newZone }
            , Cmd.none
            )

        DoTimer ->
            let
                r =
                    if model.isStart then
                        False

                    else
                        True
            in
            ( { model | isStart = r }, Cmd.none )

        ChangePlayer ->
            ( { model | counter = 0 }
            , Cmd.none
            )


-- SUBSCRIPTIONS


subscriptions : Model -> Sub Msg
subscriptions model =
    Time.every 1000 Tick


-- VIEW


view : Model -> Html Msg
view model =
    let
        c =
            String.fromInt model.counter

        l =
            String.fromInt model.limit

        bt =
            if model.isStart then
                "Stop!"

            else
                "Start"

        btClass =
            if model.isStart then
                "bt stop-bt"

            else
                "bt"
    in
    div [ class "grid-container" ]
        [ div [ class "start" ]
            [ div
                [ class "area-overlap start-bt" ]
                [ input [ type_ "button", value bt, onClick DoTimer, class btClass ] []
                ]
            ]
        , div
            [ class "counter" ]
            [ h1 [] [ text c ]
            ]
        , div
            [ class "change" ]
            [ input [ type_ "button", value "Change", onClick ChangePlayer, class "bt change-bt" ] []
            ]
        ]


main =
    Browser.element
        { init = init
        , update = update
        , subscriptions = subscriptions
        , view = view
        }
これをわざわざreact-reduxでやろうと思うと大変ですよね。
store作って、reducer, action分けて。。などなど
勉強会LT聞いてた感じだと、実際にアプリケーション作られた方でも
Main.elmにつらつら書いたということで
今回は僕もその方針に従ってみました。
コード大枠の説明
elmでは、アプリケーションで扱う状態をModelで定義します。
アプリケーション内部で定義されたイベント(Msg)は、updateに入り
このときにModelの状態を書き換えます。
Model は view を使って描画されます。
redux の仕組みを理解されてるかたは、あー同じ仕組みじゃんと感じるかと思います
そもそもreduxがこのelm architectureを参考に作られたようなのでそれもそのはずですね。
ハマったこと
if の使い方
returnが不要なので以下のように書く
bt =
        if model.isStart then
            "Stop!"

        else
            "Start"
Modelの初期化
Modelのfieldを宣言しなくてもかけるので
fieldの順に値渡せばよい
type alias Model =
    { zone : Time.Zone
    , time : Time.Posix
    , counter : Int
    , limit : Int
    , isStart : Bool
    }

init : () -> ( Model, Cmd Msg )
init _ =
    ( Model Time.utc (Time.millisToPosix 0) 0 30 False
    , Task.perform AdjustTimeZone Time.here
    )
よいところ
- ちょっとしたもの作りたいときにすぐ始められる
- データフロー定義されていて、型もあるので申し分ない
- 公式のlinterがあるのでcode formatもしっかりできる
- コンパイラが賢い
- 公式のここ見ろとかリンクまで出してくれる、すごい
気になるところ
- 副作用の扱い
- spaとかにしたらコードがごちゃついてくるのか
- oss読んでみる
