はじめに
一昔前にさくらVPSを借りてCentOS上にApache2を構築し、Webサイトを公開したことがあるが、Ubuntuはconfファイル名などが異なっていたり少し手間取ったので、動かすまでのメモを残しておく。
実行環境
Ubuntu20.04 LTS(GCP上)
※VMインスタンスの作成時に、「HTTP トラフィックを許可する」のチェックを付けておく。
メモ内容
1.Apacheのインストールと起動確認
2.Apacheの設定ファイルを確認
3.DocumentRootの変更
1.Apacheのインストールと起動確認
SSHで接続したら、以下のコマンドよりパッケージのアップデート&インストール。
# パッケージ管理ツールを最新にアップデート
$ sudo apt update
$ sudo apt -y upgrade

# Apacheのインストール
$ sudo apt install -y apache2
起動状態の確認をする
$ systemctl status apache2

● apache2.service - The Apache HTTP Server
     Loaded: loaded (/lib/systemd/system/apache2.service; enabled; vendor preset: enabled)
     Active: active (running) since Tue 2020-10-06 01:15:54 UTC; 21s ago
       Docs: https://httpd.apache.org/docs/2.4/
   Main PID: 17933 (apache2)
      Tasks: 55 (limit: 2374)
     Memory: 5.6M
     CGroup: /system.slice/apache2.service
             ├─17933 /usr/sbin/apache2 -k start
             ├─17935 /usr/sbin/apache2 -k start
             └─17936 /usr/sbin/apache2 -k start
⇒[active(running)] となっているので起動はされている。
外部公開ができているか確認するため、ローカルPCで適当なブラウザを開き、http://【VMインスタンスの外部IP】/にアクセスして以下の画面が表示されればOK。
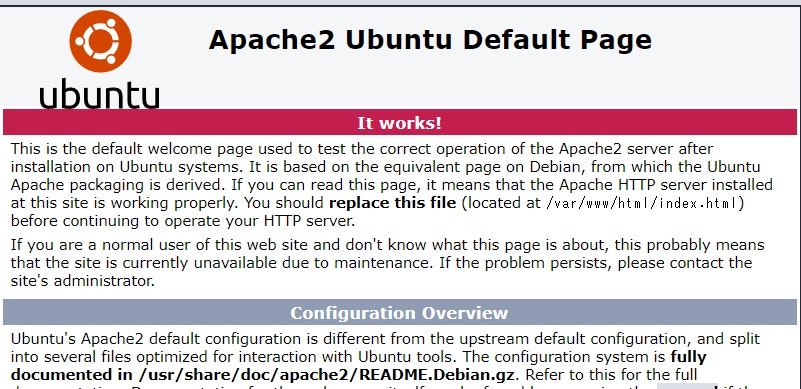
※ここで表示されない場合は、ポートが解放されていない可能性があるのでファイアウォールの80ポートの設定を確認してみる。
2.Apacheの設定ファイル確認
Apache2のconfファイルの場所を確認
$ find / -name 'apache2.conf'
/etc/apache2/apache2.conf
apache2.confの中身を確認してみると以下の様な記述がある。(全行は長いので抜粋)
# アクセス権限を設定するファイル名の定義
AccessFileName .htaccess

# .htaccess や .htpasswd などへのWebクライアントからのアクセス拒否
<FilesMatch "^\.ht">
        Require all denied
</FilesMatch>

# ポート情報が設定されているファイルを読み込み
Include ports.conf


# それぞれのフォルダにある `load`や`conf` ファイルを起動時に全て読み込む設定になっている

# Include module configuration:
IncludeOptional mods-enabled/*.load
IncludeOptional mods-enabled/*.conf

# Include generic snippets of statements
IncludeOptional conf-enabled/*.conf

# Include the virtual host configurations:
IncludeOptional sites-enabled/*.conf
ports.conf をいじってみる
試しにポートを変えて接続してみる。sudo nano /etc/apache2/ports.confで以下のように編集。
# 割り当てポート情報
# Listen 80
Listen 20080

# SSL関連のモジュールがある場合の割り当てポート
<IfModule ssl_module>
        Listen 443
</IfModule>

<IfModule mod_gnutls.c>
        Listen 443
</IfModule>
Apacheの再起動。
$ sudo systemctl restart apache2
当たり前だが、これでURLを入れてもアクセスできなくなった。
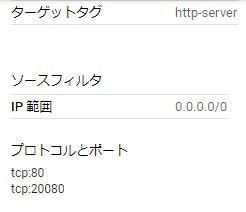
GCP上のファイルを設定にtcp:20080を追加すれば、http://【VMインスタンスの外部IP】:20080/で同じ画面にアクセスできる。
mods-enabled/ の中を確認
# 全部シンボリックリンクとなっていて、実態は /etc/apache2/mods-available/ にある

$ ls /etc/apache2/mods-enabled/
access_compat.load  authn_file.load  autoindex.load  env.load        mpm_event.load    setenvif.conf
alias.conf          authz_core.load  deflate.conf    filter.load     negotiation.conf  setenvif.load
alias.load          authz_host.load  deflate.load    mime.conf       negotiation.load  status.conf
auth_basic.load     authz_user.load  dir.conf        mime.load       reqtimeout.conf   status.load
authn_core.load     autoindex.conf   dir.load        mpm_event.conf  reqtimeout.load

$ readlink /etc/apache2/mods-enabled/dir.conf
../mods-available/dir.conf
適当に1つ中身を見てみる。
<IfModule mod_dir.c>
        DirectoryIndex index.html index.cgi index.pl index.php index.xhtml index.htm
</IfModule>
# vim: syntax=apache ts=4 sw=4 sts=4 sr noet
※ちなみに上記のモジュールはディレクトリインデックスの定義。
以下のコマンドより、mods-enabled/から削除することができ、こうするとApache起動時にそのモジュールは読み込まれなくなる。
$ sudo a2dismod 【モジュール名】
Module ~~~~~~ disabled.
To activate the new configuration, you need to run:
  systemctl restart apache2
再度シンボリックリンクを作成するコマンドはこれ。
$ sudo a2enmod 【モジュール名】
Enabling module ~~~~~~~~.
To activate the new configuration, you need to run:
  systemctl restart apache2
conf-enabled/ の中を確認
# 同じく全てシンボリックリンク。実態は /etc/apache2/conf-available/ にある

$ ls /etc/apache2/conf-enabled/
charset.conf  localized-error-pages.conf  other-vhosts-access-log.conf  security.conf  serve-cgi-bin.conf

$ readlink /etc/apache2/conf-enabled/charset.conf
../conf-available/charset.conf
設定ファイルの数が多くないので、一通り見てみる。
cat /etc/apache2/conf-enabled/charset.conf
⇒ 文字コード関連の設定。デフォルトは全てコメントアウトされている。
cat /etc/apache2/conf-enabled/localized-error-pages.conf
⇒ エラーコード関連の設定。デフォルトは全てコメントアウトされている。
cat /etc/apache2/conf-enabled/other-vhosts-access-log.conf
⇒ アクセスログ関連の設定。
cat /etc/apache2/conf-enabled/security.conf
⇒ Apacheのセキュリティ関連の設定。こちらの記事が分かりやすく整理されていた。
https://qiita.com/bezeklik/items/1c4145652661cf5b2271
cat /etc/apache2/conf-enabled/serve-cgi-bin.conf
⇒ CGI関連の設定
sites-enabled/ の中を確認
# デフォルトは1つのサイトのみ。同じ様に実態は /etc/apache2/sites-available/ にある

$ ls /etc/apache2/sites-enabled
000-default.conf

$ readlink /etc/apache2/sites-enabled/000-default.conf
../sites-available/000-default.conf
サイトのコンフィグファイルの中身は以下。
# コメントアウトされていない行のみ。
<VirtualHost *:80>
        ServerAdmin webmaster@localhost
        DocumentRoot /var/www/html
        ErrorLog ${APACHE_LOG_DIR}/error.log
        CustomLog ${APACHE_LOG_DIR}/access.log combined
</VirtualHost>
DocumentRootが『/var/www/html』ということなので、以下のコマンドより index.html の編集を行ってみる。
$ sudo nano /var/www/html/index.html
# タイトルタグの部分を変更

<!--    <title>Apache2 Ubuntu Default Page: It works</title> -->
    <title>Changed Title</title>
URLを更新して開き直して、変更されていることを確認。
※htmlの中身を更新しただけなので、apacheの再起動などは不要。
補足
${APACHE_LOG_DIR}の様な環境変数が設定されている箇所がいくつかあったが、これは /etc/apache2/envvars で設定されている。
3.DocumentRootの変更
デフォルトの設定ファイルをコピーし、DocumentRootを変更したものをenableしてみる。
$ sudo cp /etc/apache2/sites-available/000-default.conf /etc/apache2/sites-availa
ble/test-site.conf
test-site.conf の設定中身(DocumentRootのみ変更)
# コメントアウトされていない行のみ。
        ServerAdmin webmaster@localhost
        DocumentRoot /var/www/html-test/
        ErrorLog ${APACHE_LOG_DIR}/error.log
        CustomLog ${APACHE_LOG_DIR}/access.log combined
上記の『html-test』ディレクトリはデフォルトではないはずなので作成。
$ sudo mkdir /var/www/html-test/
# 現在のサイトコンフィグを一旦削除
$ sudo a2dissite 000-default

# 作成したサイトコンフィグを
$ sudo a2ensite test-site

# apacheの再起動
$ sudo systemctl restart apache2
『html-test』には index.html がないため、せっかくなので作成
$ sudo nano /var/www/html-test/index.html
<html>
 Hello Test-Site!
</html>
http://【VMインスタンスの外部IP】:20080/ を開き直して、上記のhtmlファイルの内容になっていれば設定は有効になっている。
補足
上記の様に /etc/apache2/sites-enabled/ の中に『test-site.conf』しかない所に sudo a2ensite 000-default を実行したら、外部からアクセスした際に『000-default』の設定が優先された。
また、/etc/apache2/sites-enabled/ に何も入ってない時は、『000-default(インストール時)』の設定になっている気がするが、ここの設定はどこでされているかは不明。