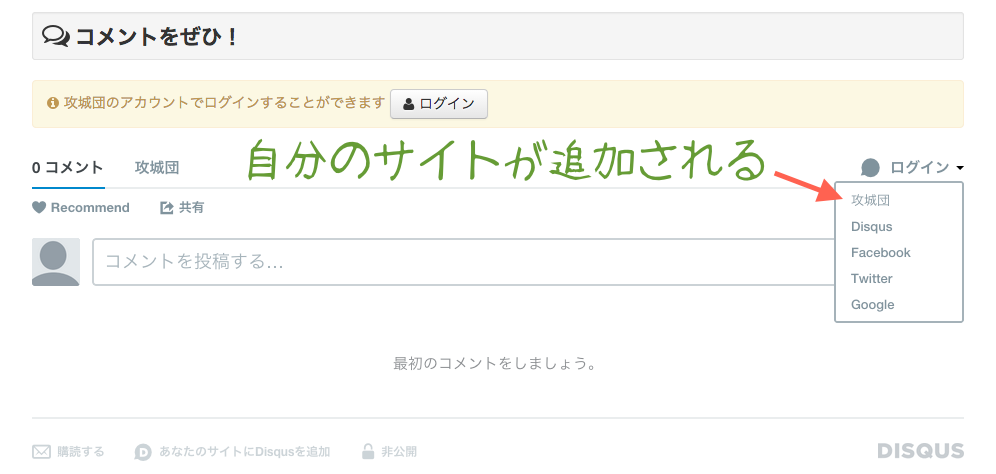
ブログやサイトのコメント欄に使われるDisqusですが、シングルサインオンに対応しているのでこれを利用すれば標準のソーシャルログイン(ツイッターやFacebook)以外に、自分のサイトで提供しているログイン情報を使ってコメントできるようになります。
Getting Started with Single Sign-On
攻城団で対応したときに日本語の情報が見つからなかったので書いておきます。
実装イメージ
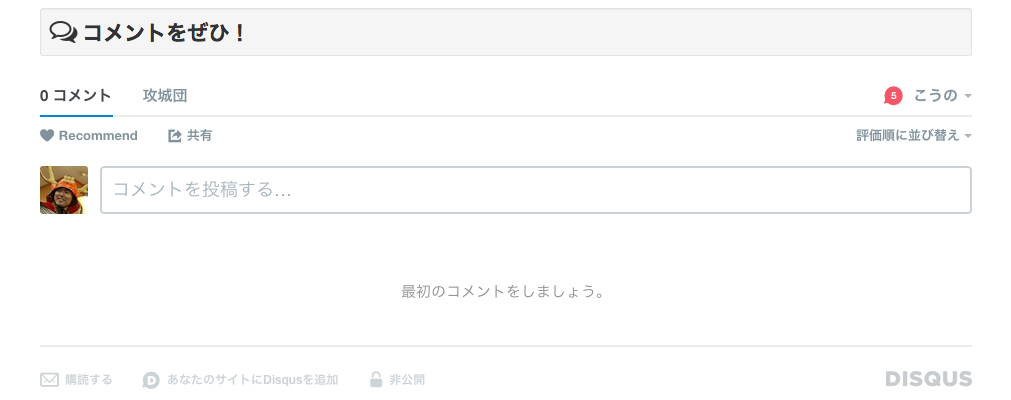
ログインするとこうなります。攻城団で登録しているアイコンや名前を表示できます。
Disqus シングルサインオン設定手順
こんな感じでやればわりと簡単にできます。
まずメールでお願いする
標準の状態では有効になっていないので、メールを送って設定を変更してもらいます。
英語に自信ないけど、こんなメールで大丈夫でした(ひどい英語だな)。
I already use DISQUS my blog ( http://kojodan.jp/blog/ ).
Please enable SSO.
ぼくのときは翌日OKの返事が届きました。
表示するページに設定を挿入する
Disqusのコメント欄を設置したページに設定情報を追加します(パブリックキーと、ハッシュ化したID情報)。
var disqus_config = function() {
    // The generated payload which authenticates users with Disqus
    this.page.remote_auth_s3 = "ABCabc123ABCabc123ABCabc123ABCabc123ABCabc123ABCabc123ABCabc123ABCabc123ABCabc123ABCabc123ABCabc123ABCabc123ABCabc123ABCabc123ABCabc123ABCabc123ABCabc123ABCabc123ABCabc123ABCabc123ABCabc123 0000000000";
    this.page.api_key = "XXXXXXXXXXXXXXXXXXXXXXXXXXXXXXXXXXXXXXXXXXXXXXXXXXXXXXX";
}
当然ここはユーザーごとに変わりますから(ログインしてるかどうかでも変わる)、動的に出力することになります。
デバッグ用のツールも用意されています。
https://disqus.com/api/sso/
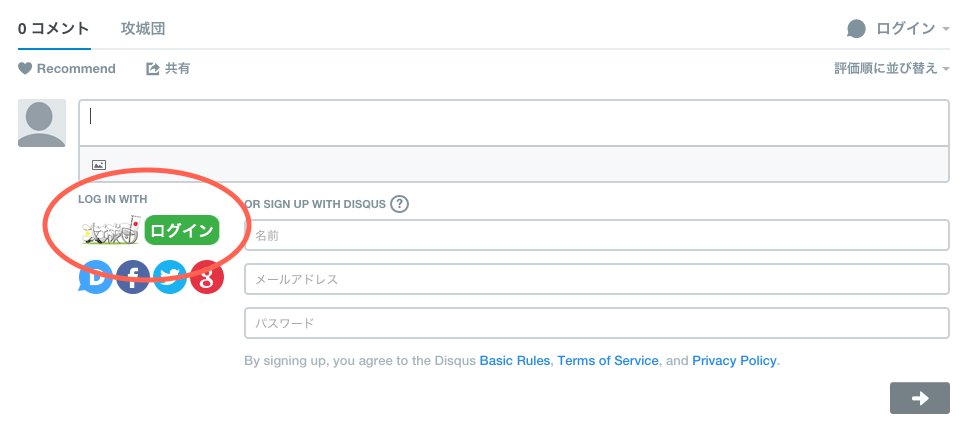
ログイン用のアイコンを用意する
ログイン用のボタンを表示することができます。
サイズは143×32pxです。
ハマったポイント
じつはすんなりいかなかったので、そこだけメモしておきます。
mod_pagespeedが鬼門 
速度向上のために mod_pagespeed を使ってるんですけど、ユーザーごとのログイン情報はキャッシュをさせちゃいけないので、これを回避するために <script src=“/Disqus_SSO.cgi”></script> と設定をCGI経由で呼び出すとSSO認証用のハッシュが消えました。
(mod_pagespeedを使ってないサイトだと外部JSとして呼び出せました)
SSIで呼び出すとうまくいったので、いまどきSSIかーと思いつつも採用しました。なにはともあれ動くことが大事ですね。
こんな感じで呼び出してます。
<div class="well well-small" id="comments"><i class="fa fa-comments-o fa-2x"></i> <b style="font-size: 1.5em;">コメントをぜひ!</b></div>

<div id="disqus_announce" class="alert"><i class="fa fa-info-circle"></i> 攻城団のアカウントでログインすることができます <a href="#loginForm" role="button" data-toggle="modal" class="btn"><i class="fa fa-user"></i> ログイン</a></div>
<div id="disqus_thread"></div>
<!--#exec cgi="../SSI_Disqus_SSO.cgi" —>
めちゃくちゃ恥ずかしいですけど、参考になる方もいるかもしれないのでコードも貼っておきますね。
# !/usr/bin/perl
use strict;
use warnings;
use CGI qw/:standard/;
use CGI::Session;
use JSON;
use MIME::Base64;
use Digest::SHA qw(hmac_sha1_hex);
require "function.pl"; # セッション復元の関数とかが定義されてます

# DISQUS シークレットキー
my $DISQUS_SECRET_KEY = 'XXXXXXXXXXXXXXXXXXXXXXXXXXXXXXXXXXXXXXXXXXXXXXXXXXXXXXXXXX';
my $DISQUS_PUBLIC_KEY = 'xxxxxxxxxxxxxxxxxxxxxxxxxxxxxxxxxxxxxxxxxxxxxxxxxxxxxxxxxxxxxxxxxxxxxxx';

# ログインチェック(セッション情報の復元)
my $is_login = 1;
my $session = getSession();
my ($user_id, $email, $handle, $icon, $mypage);
if ($session) {
	$user_id = $session->param('user_id');
	$email   = $session->param('email');
	$handle  = $session->param('handle');
	$icon    = "http://kojodan.jp/profile_images/".$session->param('icon');
	$mypage  = "http://kojodan.jp/profile/".$user_id;
}
$is_login = 0 unless($user_id);

# 可否フラグと差し替え用HTML
my $remote_auth_s3 = "___________Please_login_kojodan___________";
my $replace = "";
if ($is_login) {
	my %data = (
    	"id" => $user_id,
		"username" => $handle,
		"email" => $email,
		"avatar" => $icon,
		"url" => $mypage
	);
	my $json = JSON->new->encode(\%data);
	my $message = encode_base64($json);
	my $timestamp = time();

	$message =~ s/[\r|\n]//g;
	my $hmac = hmac_sha1_hex("$message $timestamp", $DISQUS_SECRET_KEY);

	$remote_auth_s3 = "$message $hmac $timestamp";
	$remote_auth_s3 =~ s/[\r|\n]//g;

	$replace = '$("#disqus_announce").remove();';
}

# 出力するJavaScript
my $output = <<__JS__;

<script type="text/javascript">
$replace
var disqus_config = function() {
  // The generated payload which authenticates users with Disqus
  this.page.remote_auth_s3 = '$remote_auth_s3';
  this.page.api_key = '$DISQUS_PUBLIC_KEY';

  // This adds the custom login/logout functionality
    this.sso = {
          name:   "攻城団",
          button:  "http://static.kojodan.jp/images/DISQUS_login.png",
          icon:    "http://kojodan.jp/favicon.ico",
          url:     "http://kojodan.jp/login_DISQUS.html",
          logout:  "http://kojodan.jp/logout",
          width:   "500",
          height:  "300"
    };
}

/* * * CONFIGURATION VARIABLES: EDIT BEFORE PASTING INTO YOUR WEBPAGE * * */
var disqus_shortname = 'kojodanjp'; // required: replace example with your forum shortname

/* * * DON'T EDIT BELOW THIS LINE * * */
(function() {
	var dsq = document.createElement('script'); dsq.type = 'text/javascript'; dsq.async = true;
	dsq.src = 'http://' + disqus_shortname + '.disqus.com/embed.js';
	(document.getElementsByTagName('head')[0] || document.getElementsByTagName('body')[0]).appendChild(dsq);
})();
</script>
    <noscript>Please enable JavaScript to view the <a href="http://disqus.com/?ref_noscript">comments powered by Disqus.</a></noscript>
    <a href="http://disqus.com" class="dsq-brlink">blog comments powered by <span class="logo-disqus">Disqus</span></a>

__JS__

# 出力開始
print "Content-Type: text/html\n\n";
print $output;
exit;


