初めに
ローカルでRailsの環境構築を行いCloud9(AWSの統合開発環境)の環境をローカルで再現したかったが、Rails5とRails6を切り替えて開発を行いたい・という背景と仮想環境はかっこいい!!という安直な発想からVagrantを用いて環境構築を行うこととした。
今回はRails6の環境構築を行います。
間違えたことをしていたらコメントにてご指摘いただけれると大変助かります。
使用環境
Windows 10
Vagrantで構築したい環境
大雑把に以下の構成で構築したいと考えています。
- ruby 2.6
- rails 6.1.4
- ImageMagick
- sqlite
- mysql(本番環境用)
- Node.js 16
またrailsではjavascriptランタイムが必要になるためNode.jsのインストールも行います。
手順
目次になっているので以下を参考にしてください
- VirtualboxとVagrantのダウンロード
- Vagrantを用いたCentOS7環境の構築
- Vagrantを起動する
-
Vagrantを用いてgit・rbenvなどを入れる
4-1. gitのインストール
4-2. rbenvのインストール
4-3. ruby-buildのインストール - Rubyのインストール
- Rails・Node.jsのインストール
- ImageMagickのインストール
-
動作確認
8-1. エラーの原因究明
1. VirtualBoxとVagrantのダウンロード
VirtualBoxとVagrantのダウンロードを行いました。
Vagrantは686のバージョンを用いました。
VirtialBoxはOSの中に仮想的に別のOSを作るツール、VagrantはVirtualBoxなどの操作をコマンドラインで操作するためのツールで様々なユーザーが同じ環境を構築するのを便利にするツールのようです。
インストールしたらvagrantがちゃんと入っているか確認しましょう。(僕はcmdで確認しました)

2. vagrantを用いたCentOS7環境の構築
Cloud9で使用されているOS(Amazon Linux AMI2)はCentOSの系譜を引き継いでいるためCentOS7にて仮想環境を構築する
とりあえず適当なディレクトリを作りその中が仮想環境であると宣言する(vagrant initのあとは使いたいOSを取得する)
今回はVagrantCloudというサービス内にあるbentoというOSファイルがパッケージ化されたものを使用します
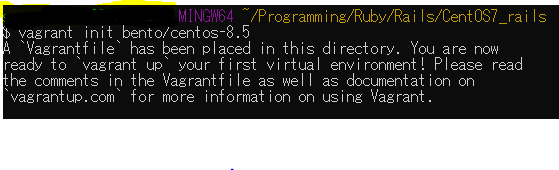
そうするとinitしたディレクトリ内にVagrantfileが作成されるため、そのファイルを編集する
26・34行目を編集してローカルからアクセスできるようにする(今回だとlocalhost:3000で接続できるようになっている)
# -*- mode: ruby -*-
# vi: set ft=ruby :

# All Vagrant configuration is done below. The "2" in Vagrant.configure
# configures the configuration version (we support older styles for
# backwards compatibility). Please don't change it unless you know what
# you're doing.
Vagrant.configure("2") do |config|
  # The most common configuration options are documented and commented below.
  # For a complete reference, please see the online documentation at
  # https://docs.vagrantup.com.

  # Every Vagrant development environment requires a box. You can search for
  # boxes at https://vagrantcloud.com/search.
  config.vm.box = "bento/centos-7.9"

  # Disable automatic box update checking. If you disable this, then
  # boxes will only be checked for updates when the user runs
  # `vagrant box outdated`. This is not recommended.
  # config.vm.box_check_update = false

  # Create a forwarded port mapping which allows access to a specific port
  # within the machine from a port on the host machine. In the example below,
  # accessing "localhost:8080" will access port 80 on the guest machine.
  # NOTE: This will enable public access to the opened port
  # 下のコメントアウトを外すのとhostの番号を変更(エラーが出なければ何番でもOK今回は3000番とした)
  config.vm.network "forwarded_port", guest: 3000, host: 3000

  # Create a forwarded port mapping which allows access to a specific port
  # within the machine from a port on the host machine and only allow access
  # via 127.0.0.1 to disable public access
  # config.vm.network "forwarded_port", guest: 80, host: 8080, host_ip: "127.0.0.1"

  # Create a private network, which allows host-only access to the machine
  # using a specific IP.
 # 下をコメントアウトしないとhostOS(自分のPC)からrubyにアクセスできない
  config.vm.network "private_network", ip: "192.168.33.10"

  # Create a public network, which generally matched to bridged network.
  # Bridged networks make the machine appear as another physical device on
  # your network.
  # config.vm.network "public_network"

  # Share an additional folder to the guest VM. The first argument is
  # the path on the host to the actual folder. The second argument is
  # the path on the guest to mount the folder. And the optional third
  # argument is a set of non-required options.
  # config.vm.synced_folder "../data", "/vagrant_data"

  # Provider-specific configuration so you can fine-tune various
  # backing providers for Vagrant. These expose provider-specific options.
  # Example for VirtualBox:
  #
  # config.vm.provider "virtualbox" do |vb|
  #   # Display the VirtualBox GUI when booting the machine
  #   vb.gui = true
  #
  #   # Customize the amount of memory on the VM:
  #   vb.memory = "1024"
  # end
  #
  # View the documentation for the provider you are using for more
  # information on available options.

  # Enable provisioning with a shell script. Additional provisioners such as
  # Ansible, Chef, Docker, Puppet and Salt are also available. Please see the
  # documentation for more information about their specific syntax and use.
  # config.vm.provision "shell", inline: <<-SHELL
  #   apt-get update
  #   apt-get install -y apache2
  # SHELL
end
3.Vagrantを起動する
vagrant upをコマンドラインに打ち込むとVagrantを用いてvirtualboxが起動するvagrant statusでちゃんと起動しているか確認(runningなら問題なし)
またこのときに該当のファイルに.vagrantという名前の隠しファイルが生成される
$ vagrant status
Current machine states:

default                   running (virtualbox)

The VM is running. To stop this VM, you can run `vagrant halt` to
shut it down forcefully, or you can run `vagrant suspend` to simply
suspend the virtual machine. In either case, to restart it again,
simply run `vagrant up`.
4.Vagrantを用いてgit・rbenvなどを入れる
4.1 gitのインストール
yumコマンドを使用してgitをインストールした。UbuntuなどのOSを使用しているかたはyumをapt-getに置き換えてみてください。また(CentOS8はサービスが終了した)[https://japan.zdnet.com/article/35180965/]ためこれ以降の作業をしようとするとエラーが出てしまうため、気を付けましょう。vagrant sshコマンドを打つとターミナルの左側の表記が変わるはずなのでその部分を参考にしましょう。gitのバージョンが出れば大丈夫です。
$ vagrant ssh
$ sudo yum -y update
$ sudo yum install git
$ git --version
git version 1.8.3.1
4.2 rbenvのインストール
rbenvはバージョン管理ツールです。
こちらはgitを使ってインストールします。
またコマンドで使えるように.bash-profileにコマンドを追加し、さらにコマンド実行時にrbenv initを実行するようにします
$ git clone https://github.com/rbenv/rbenv.git ~/.rbenv
$ echo 'export PATH="$HOME/.rbenv/bin:$PATH"' >> ~/.bash_profile
$ echo 'eval "$(rbenv init -)"' >> ~/.bash_profile
すべておわったらrbenv -vでversionを確認しましょう。ただその前にbashを再起動する必要があるのでexitで接続を切って再度vagrant sshでログインしましょう
4.3 ruby-buildのインストール
ruby-buildはrbenv installコマンドを使えるようにするツールでrbenv同様rubyのインストールに必要です。
rbenvと同様に入れていきます。
$ git clone https://github.com/rbenv/ruby-build.git "~/.rbenv/plugins/ruby-build"
$ echo 'export PATH="$HOME/.rbenv/plugins/ruby-build/bin:$PATH"' >> ~/.bash_profile
ここまできたらruby-buildを打ち込み使用できるか確認しましょう。コマンドが見つからなかったらrbenvと同様sshの再接続を行いbashを再起動しましょう。
5. Rubyのインストール
まずrubyをインストールするために必要なツールをインストールしましょう
$ sudo yum install -y gcc-c++ openssl-devel readline-devel zlib-devel
次にrbenvでインストールできるrubyのバージョンを確認し、インストールします。今回は2.6.9を選択しました。またrailsでgemの管理を行うbundlerもここでインストールします。
$ rbenv install -l
2.6.9
2.7.5
3.0.3
3.1.1
jruby-9.3.4.0
mruby-3.0.0
rbx-5.0
truffleruby-22.0.0.2
truffleruby+graalvm-22.0.0.2
$ rbenv install 2.6.9
$ rbenv global 2.6.9
$ rbenv rehash
$ rbenv exec gem install bundler
$ ruby -v
ruby 2.6.9p207 (2021-11-24 revision 67954) [x86_64-linux]
6. rails・Node.jsのインストール
まずrubyをインストールしたときと同様に必要なツールのインストールを行います。今回はSQLite、MySQL用のツールもまとめてインストールしました。
$ sudo yum -y install patch libyaml-devel zlib zlib-devel libffi-devel make automake libcurl-devel sqlite-devel mysql-devel
6.1 Node.jsのインストール
次にRailsを入れる前段階としてNode.jsをインストールします。
Node.jsも特定のバージョンを入れたかったためcurlコマンドにてNodeSourceからインストールします。
加えてJSの管理パッケージであるyarnもインストールしました。
$ curl -sL https://rpm.nodesource.com/setup_16.x | sudo bash -
$ sudo yum install -y nodejs
$ curl -sL https://dl.yarnpkg.com/rpm/yarn.repo | sudo tee /etc/yum.repos.d/yarn.repo
$ sudo yum install yarn
$ node -v
v16.14.2
6.2 Railsのインストール
Node.jsがインストールできたのでRailsをインストールします。
$ gem install rails -v -6.1.4
$ rails -v
Rails 6.1.4
7. ImageMagickのインストール
最後にrailsで画像を処理するときに使用するImageMagickをインストールします。
ImageMagickはgithubから取得します。
$ sudo yum -y install libpng-devel libjpeg-devel libtiff-devel gcc git
$ git clone https://github.com/ImageMagick/ImageMagick.git ImageMagick-7.0.11
$ cd ImageMAgick-7.0.11
$ ./configure
$ make
$ sudo make install
$ convert --version
Version: ImageMagick 7.1.0-30 Q16-HDRI x86_64 347b82801:20220327 https://imagemagick.org
Copyright: (C) 1999 ImageMagick Studio LLC
License: https://imagemagick.org/script/license.php
Features: Cipher DPC HDRI OpenMP(3.1)
Delegates (built-in): jng jpeg png tiff zlib
Compiler: gcc (4.8)
8. 動作確認
最後にちゃんと動くか確認してみましょう。
新しいアプリケーション(今回はsample_app)を制作し、rails sしたのちにlocalhost:3000(数字の部分は2.で決めた数字)でアクセスできるか確認してみましょう。

.........なぜ???????
8.1 原因究明
以下のコマンドを打ってまず仮想マシン内からアクセスできるか確認
#バックグラウンドでrailsを動かす
$ rails s -d
# 該当のURLにレスポンスを投げる
$ curl localhost:3000
<html>
・
・
</html>
ローカルではアクセスできていそう。となると原因になってくるのはvagrant内のセキュリティで弾かれている可能性がありそう…?
解決策
これを参照にvagrantfileを修正したら直りました。
解決策としては
$ rails s -b (vagrantfileで指定したIPアドレス)
として'(vagrantfileで指定したIPアドレス):3000(自分で設定したポート番号)'とすればアクセスできるようです。
そうすると…
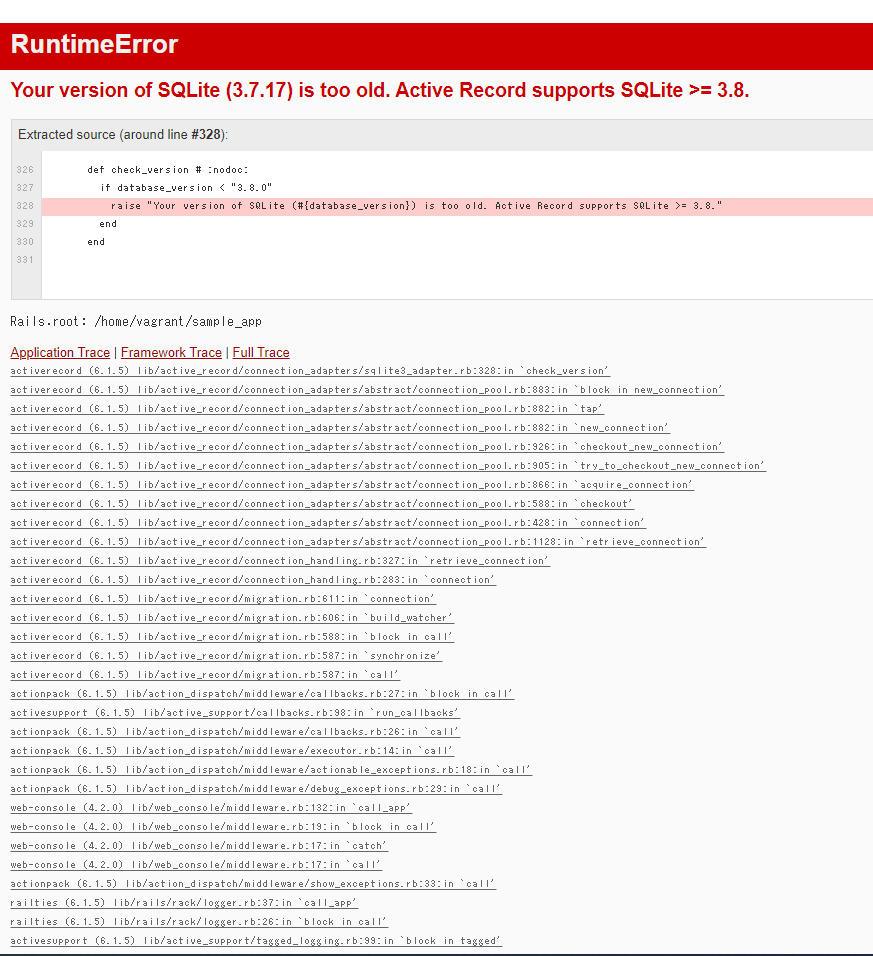
SQLiteのversionを上げなくてはいけないようです。
これをみてSQLiteのversionを上げました。
そうすると…
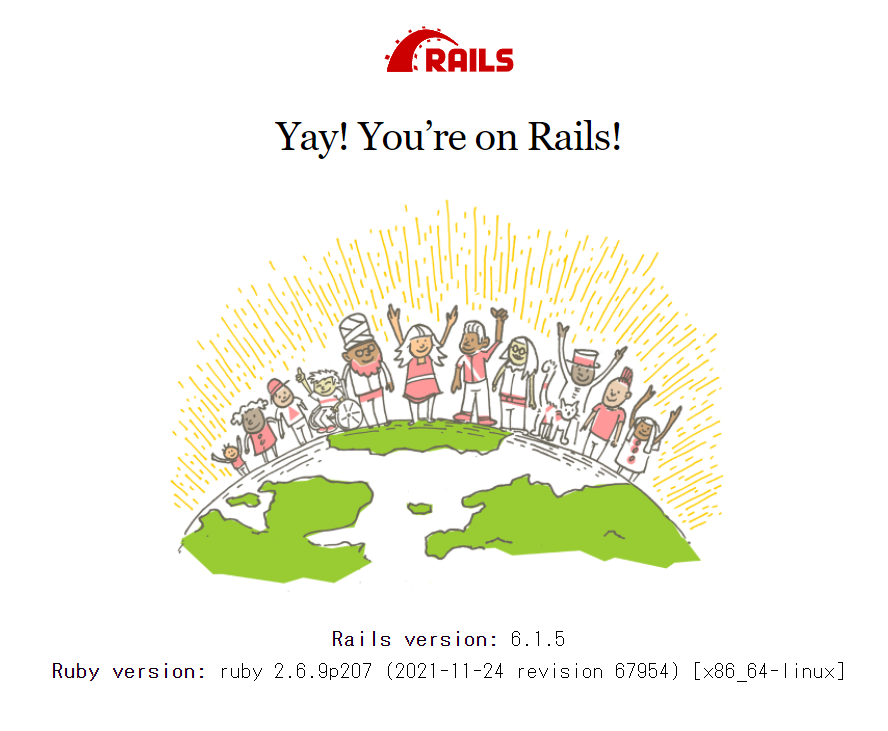
できました!!!
終わりに
今回作成したことで仮想環境に関する理解などが少し深まりました。
もし環境作成していてお困りのことがあれば私のTwitterなどにご連絡いただければと思います。返信します(多分…忙しくなければ…)
参考にした記事