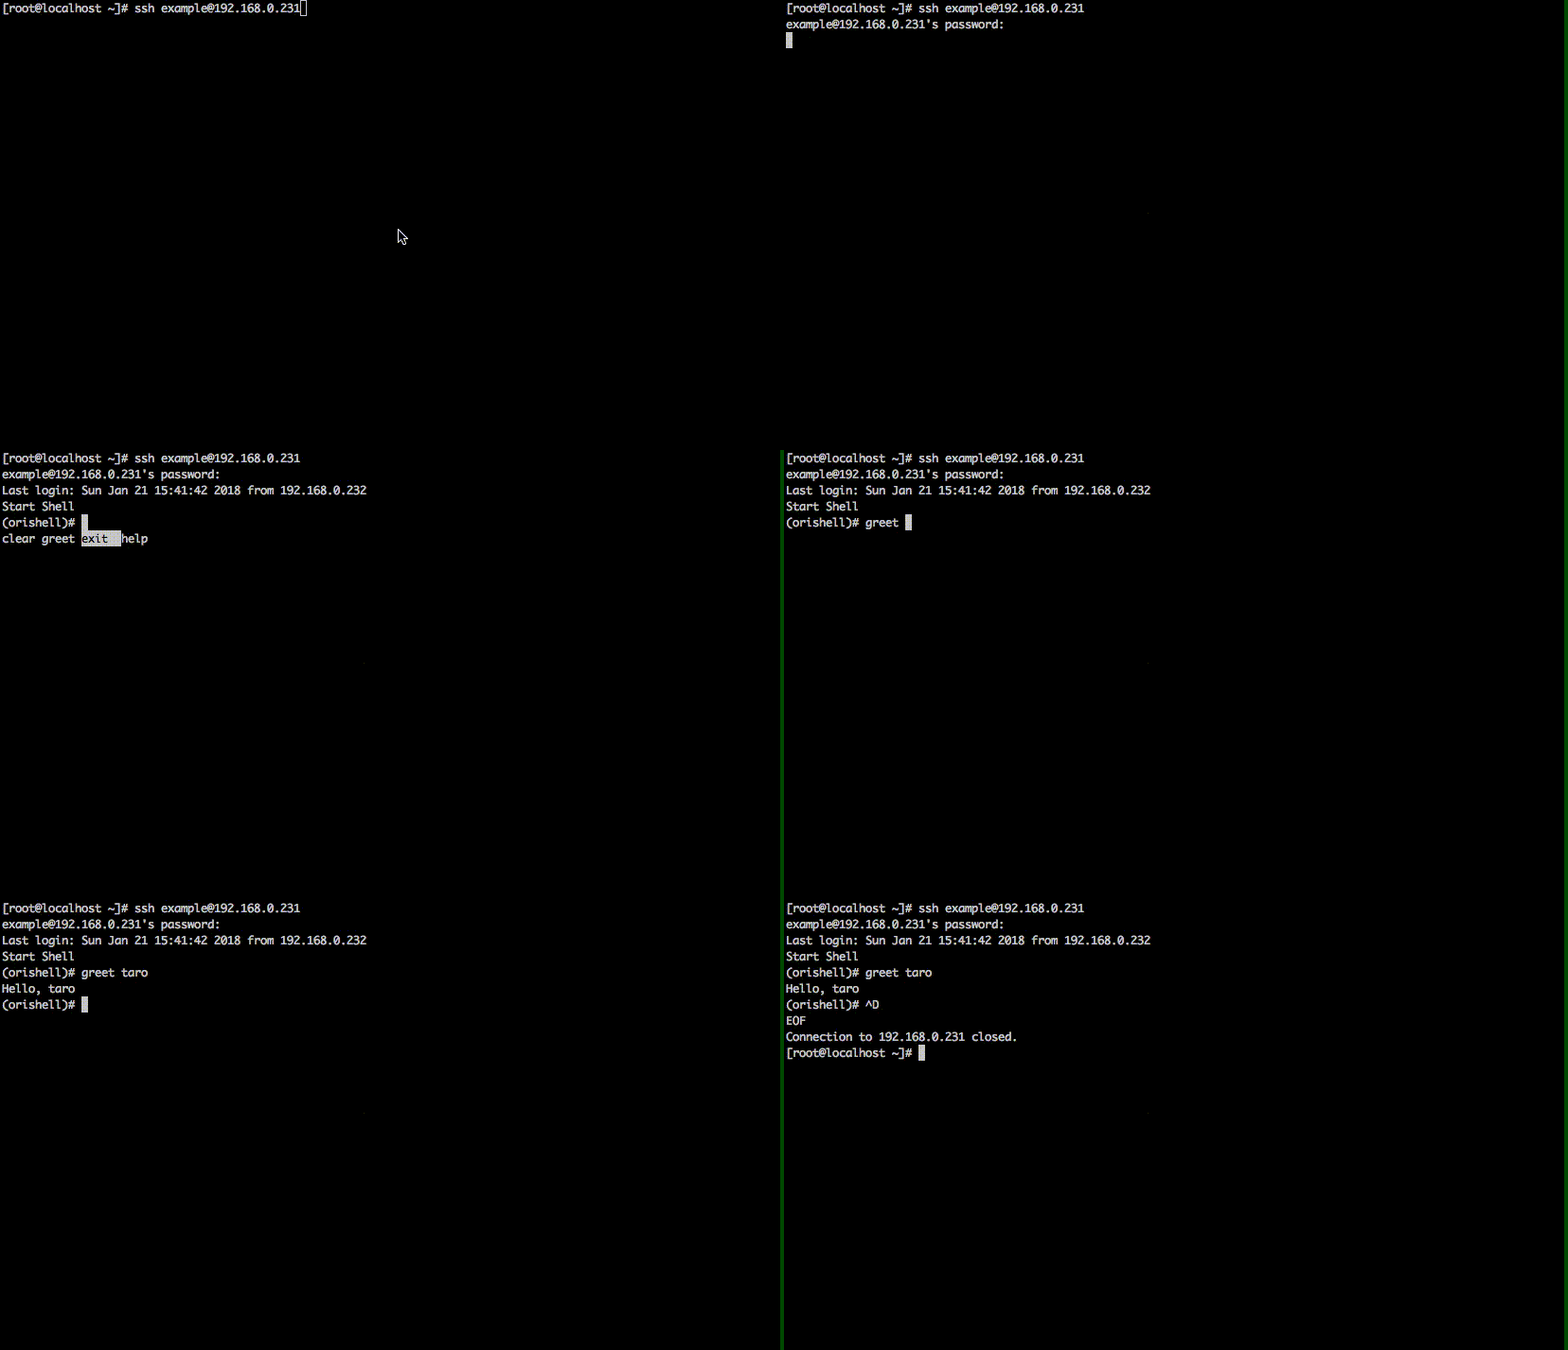
誰もがみな幼い頃はアプライアンスのようなオリジナルのコンソールを作りたいと夢見たものです。
と、言うことでGoを使ってオリジナルのコンソールを作ってみる方法を簡単にメモっておきます。
目的
- Goを使ってインタラクティブシェルを作成する
- Linuxユーザーのデフォルトをシェルを変更してSSH接続する
- Goで作ったシェルでオリジナルコマンドが叩けることを確認する
環境
| 項目 | 内容 |
|---|---|
| CentOS | 7.4 |
| Go | 1.9.2 |
ishell
ここでは、Goでインタラクティブなシェルを作成できる ishell を使ってみたいと思います。
GitHub
https://github.com/abiosoft/ishell
ドキュメント
https://godoc.org/github.com/abiosoft/ishell
やってみる
ソース
package main

import (
    "fmt"

    "github.com/abiosoft/ishell"
)

func hello(a []string) {
    for _, i := range a {
        fmt.Printf("Hello, %s\n", i)
    }
}

func main() {
    // create new shell.
    shell := ishell.New()

    // shell prompt. default: ">>>"
    shell.SetPrompt("(orishell)# ")

    // display message.
    shell.Println("Start Shell")

    // command
    shell.AddCmd(&ishell.Cmd{
        Name: "greet",
        Help: "greet user",
        Func: func(c *ishell.Context) {
            hello(c.Args)
        },
    })
    shell.Run()
}
ビルドする
[root@localhost ~]# go build orishell.go
[root@localhost ~]# mv orishell /usr/local/bin
ユーザーを作成してデフォルトのシェルにする
ここでは example と言うユーザーを作成してデフォルトシェルを orishell にします。
[root@localhost ~]# useradd example
[root@localhost ~]# passwd example
[root@localhost ~]# chsh example
example のシェルを変更します。
新しいシェル [/bin/bash]: /usr/local/bin/orishell
chsh: Warning: "/usr/local/bin/orishell" is not listed in /etc/shells.
シェルを変更しました。
動作確認
こんな感じにログインするとorishellが起動して入力待ちになります。
Tabを押すことで補完が効きます。
モード変更という概念を取り入れてみる
イメージとしてはスイッチとかだと特権モードへ移行する enable です。
ここでは greet モードを作ってみます。
簡単に言うと greet の Func で同じようにコマンドを作ります。
ネストしていくイメージですね。
ソース
package main

import (
    "fmt"

    "github.com/abiosoft/ishell"
)

func goodMorning(a []string) {
    for _, i := range a {
        fmt.Printf("Good Morning, %s\n", i)
    }
}

func hello(a []string) {
    for _, i := range a {
        fmt.Printf("Hello, %s\n", i)
    }
}

func goodEvening(a []string) {
    for _, i := range a {
        fmt.Printf("Good Evening, %s\n", i)
    }
}

func main() {
    // create new shell.
    shell := ishell.New()

    // shell prompt. default: ">>>"
    shell.SetPrompt("(orishell)# ")

    // display message.
    shell.Println("Start Shell")

    // command
    shell.AddCmd(&ishell.Cmd{
        Name: "greet",
        Help: "greet user",
        Func: func(c *ishell.Context) {
            //hello(c.Args)
            subshell := ishell.New()
            subshell.SetPrompt("(greet)# ")
            subshell.Print("greet mode\n")

            // sub commands
            subshell.AddCmd(&ishell.Cmd{
                Name: "goodMorning",
                Help: "print Good Morning",
                Func: func(c *ishell.Context) {
                    goodMorning(c.Args)
                },
            })
            subshell.AddCmd(&ishell.Cmd{
                Name: "hello",
                Help: "print hello.",
                Func: func(c *ishell.Context) {
                    hello(c.Args)
                },
            })
            subshell.AddCmd(&ishell.Cmd{
                Name: "goodEvening",
                Help: "print Good Evening.",
                Func: func(c *ishell.Context) {
                    goodEvening(c.Args)
                },
            })
            subshell.Run()
        },
    })
    shell.Run()
}
動作確認
こんな感じです。
まとめ
ishell を使うことで簡単にインタラクティブシェルな環境を作ることができました。
他にもマルチ選択やチェックリスト、プログレスバーなど実装されているので使える範囲は広いと思います。
これで、コマンドの制御やオリジナルアプライアンスのコンソール実装など面白い事ができそうです。
pythonとかであれば標準の code cmd モジュールとか python-prompt-toolkit とか使えばインタラクティブな環境はすぐ作れそうです。(今度やってみよう)
ただ python-prompt-toolkit のドキュメントをパッと見た限りコマンドのパース処理などはなさそう...

