はじめに
DBサービスのSupbaseが便利だったのでこちらにフォーカスして開発の手順を紹介します。特にテーブルを作成するだけでAPIを自動生成してくれるのが手間を減らせて良かったです。
他でも大丈夫ですが今回はNext.jsを使います。
※ローカル環境のみです。デプロイの手順については後日追加する可能性があります
前提条件
ローカルに以下インストール済み
- nodejs・npm
- docker
※今回はローカル環境のみなのでsupabaseの会員登録なしでも問題ないはずです
Next.jsプロジェクト作成
コマンドを実行すると質問されるので今回はtypescriptとtailwindcss使用 + srcディレクトリなしにしている
npx create-next-app todo-list
プロジェクトディレクトリに移動
cd todo-list
開発サーバー起動
npm run dev
SupbaseのDockerコンテナ作成
supabase CLIインストール
npm install supabase --save-dev
supabase初期設定コマンド実行。Denoは今回なし。コマンド実行後、プロジェクトルートにsupbaseディレクトリが作成される
npx supabase init
Generate VS Code settings for Deno? [y/N] n
Generate IntelliJ Settings for Deno? [y/N] n
Finished supabase init
ローカル開発用のsupbaseコンテナ作成・起動する
※自分の場合dockerコンテナのビルドにかなり時間かかった
完了するとターミナル上に後ほど使用する各URLとキーが表示される
❯ npx supabase start
WARN: no seed files matched pattern: supabase/seed.sql
Started supabase local development setup.

         API URL: http://127.0.0.1:54321
     GraphQL URL: http://127.0.0.1:54321/graphql/v1
  S3 Storage URL: http://127.0.0.1:54321/storage/v1/s3
          DB URL: postgresql://postgres:postgres@127.0.0.1:54322/postgres
      Studio URL: http://127.0.0.1:54323
    Inbucket URL: http://127.0.0.1:54324
      JWT secret: [実際の値]
        anon key: [実際の値]
service_role key: [実際の値]
   S3 Access Key: [実際の値]
   S3 Secret Key: [実際の値]
       S3 Region: local
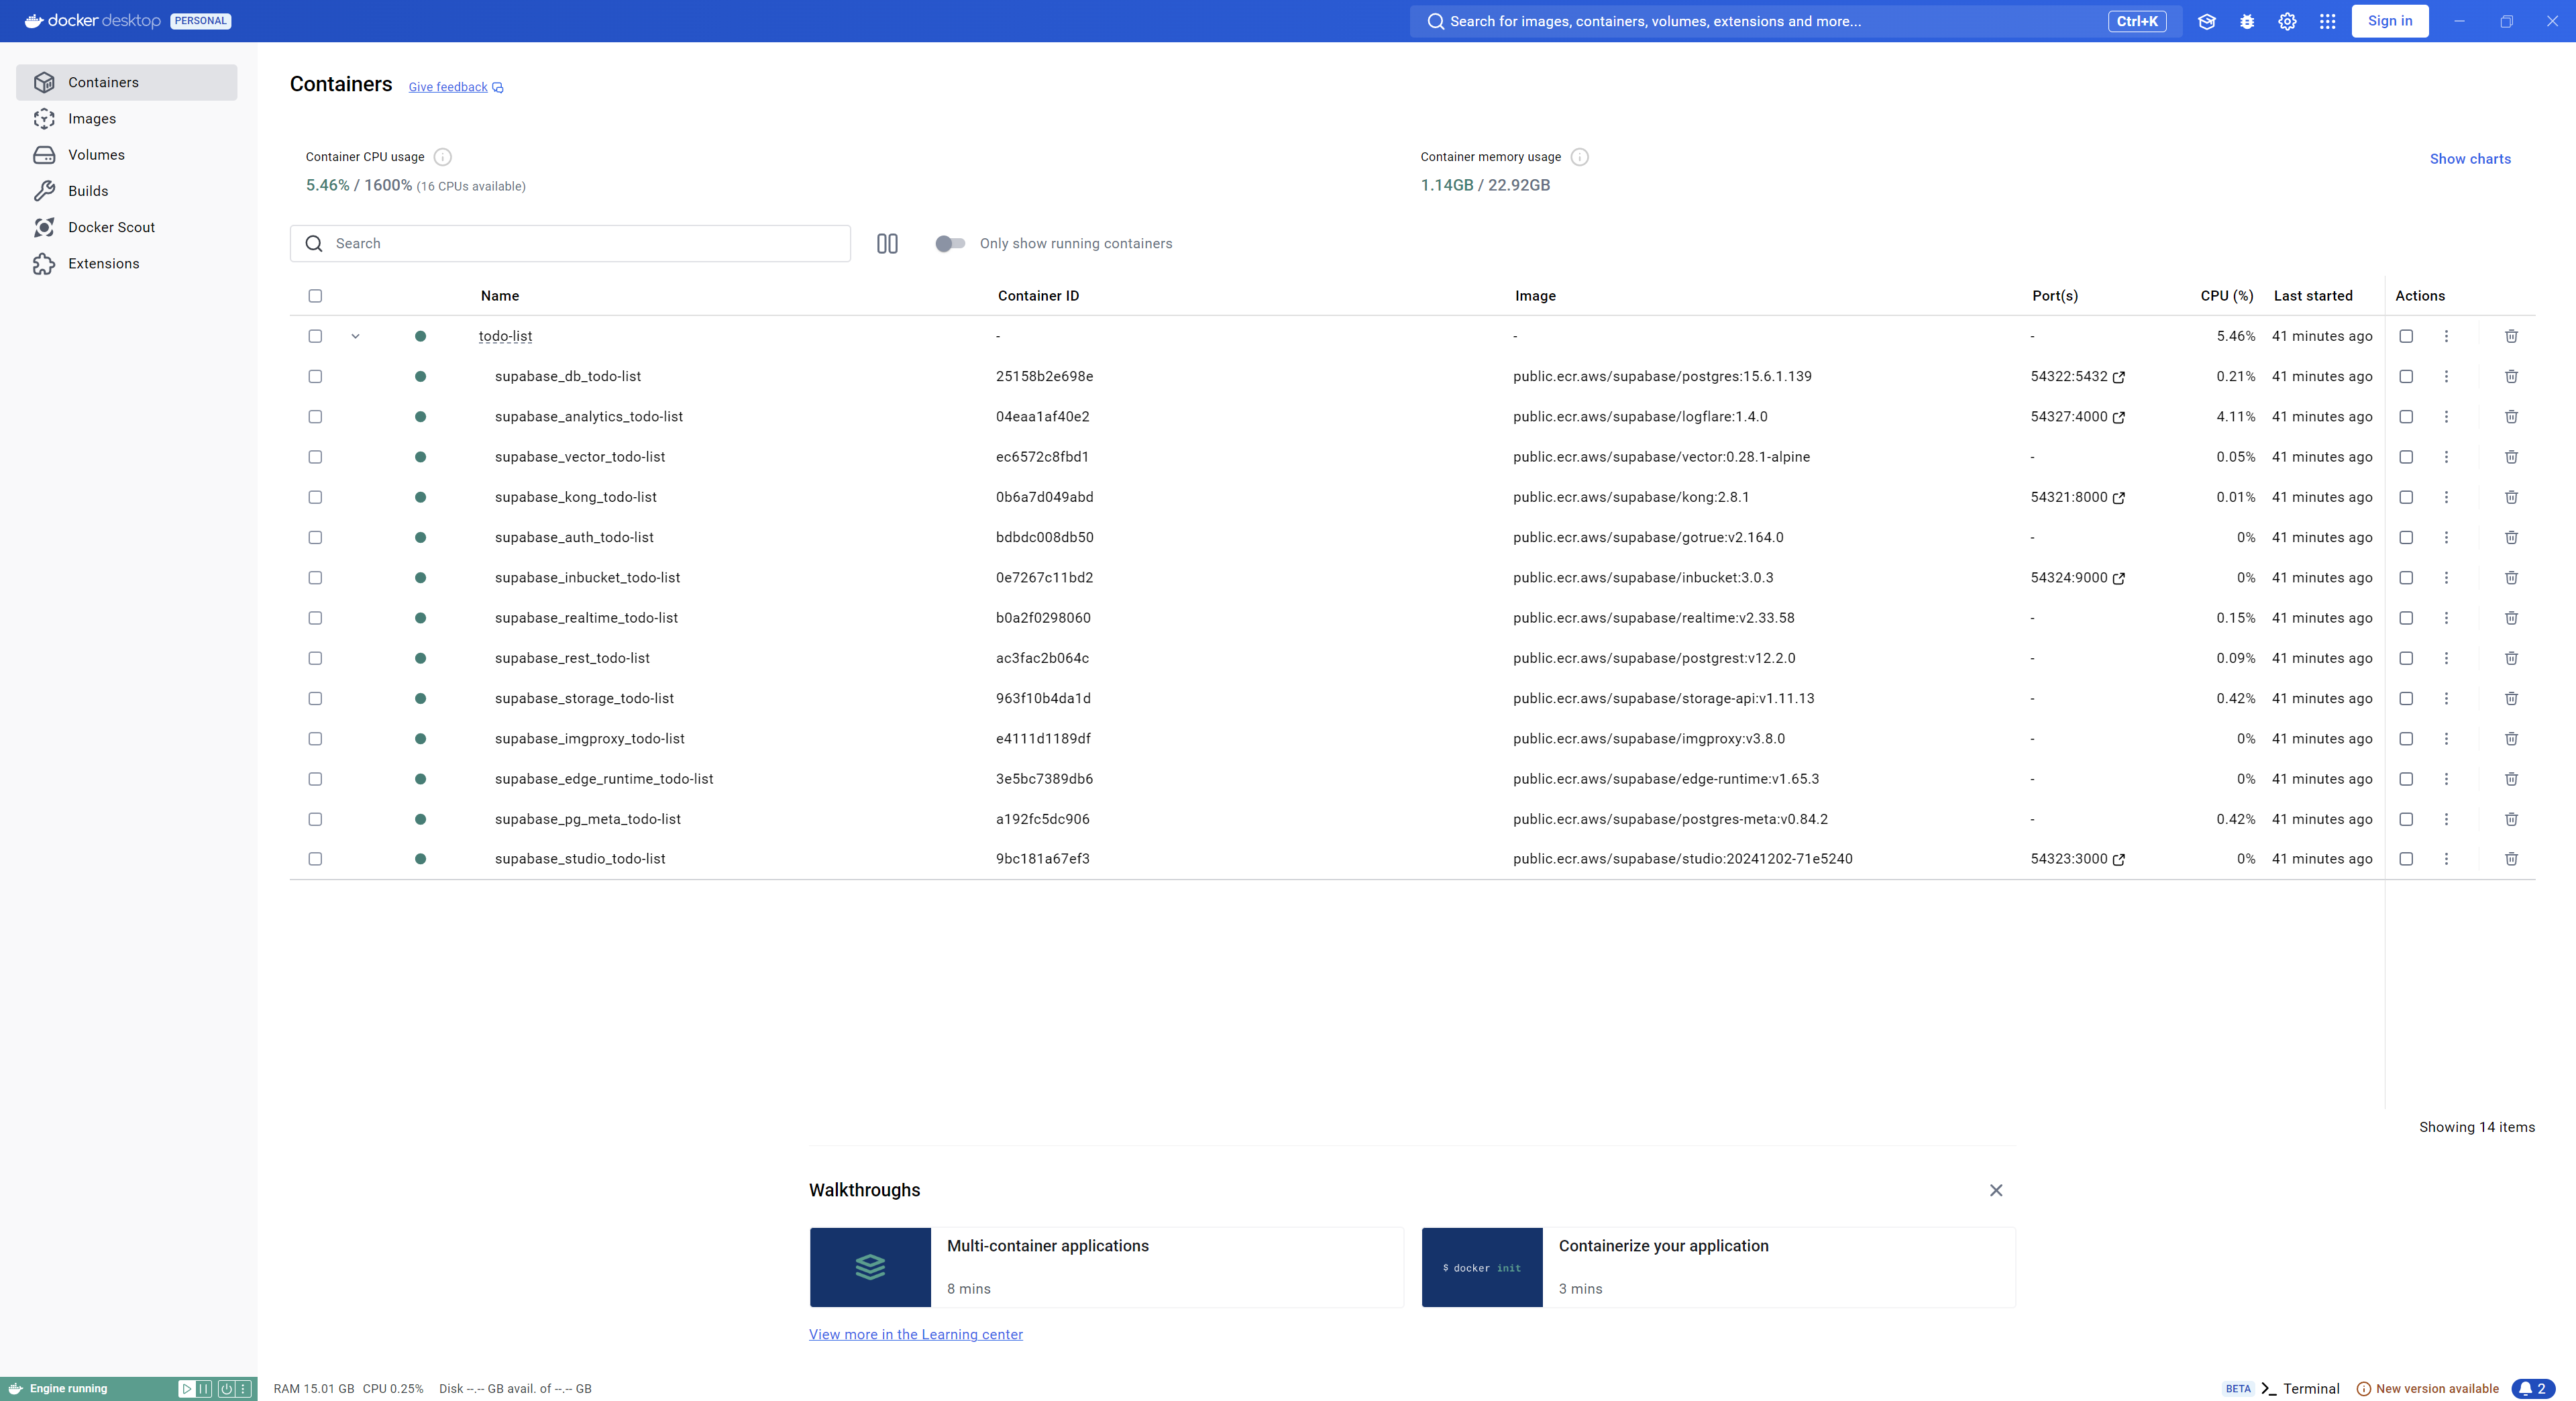
Docker Desktopを見てもsupbaseのコンテナが起動していることがわかる
Supbaseブラウザ画面の操作
テーブル作成
先ほど表示されたStudio URLでローカルのブラウザ画面にアクセス
Studio URL: http://127.0.0.1:54323
ブラウザからテーブル作成
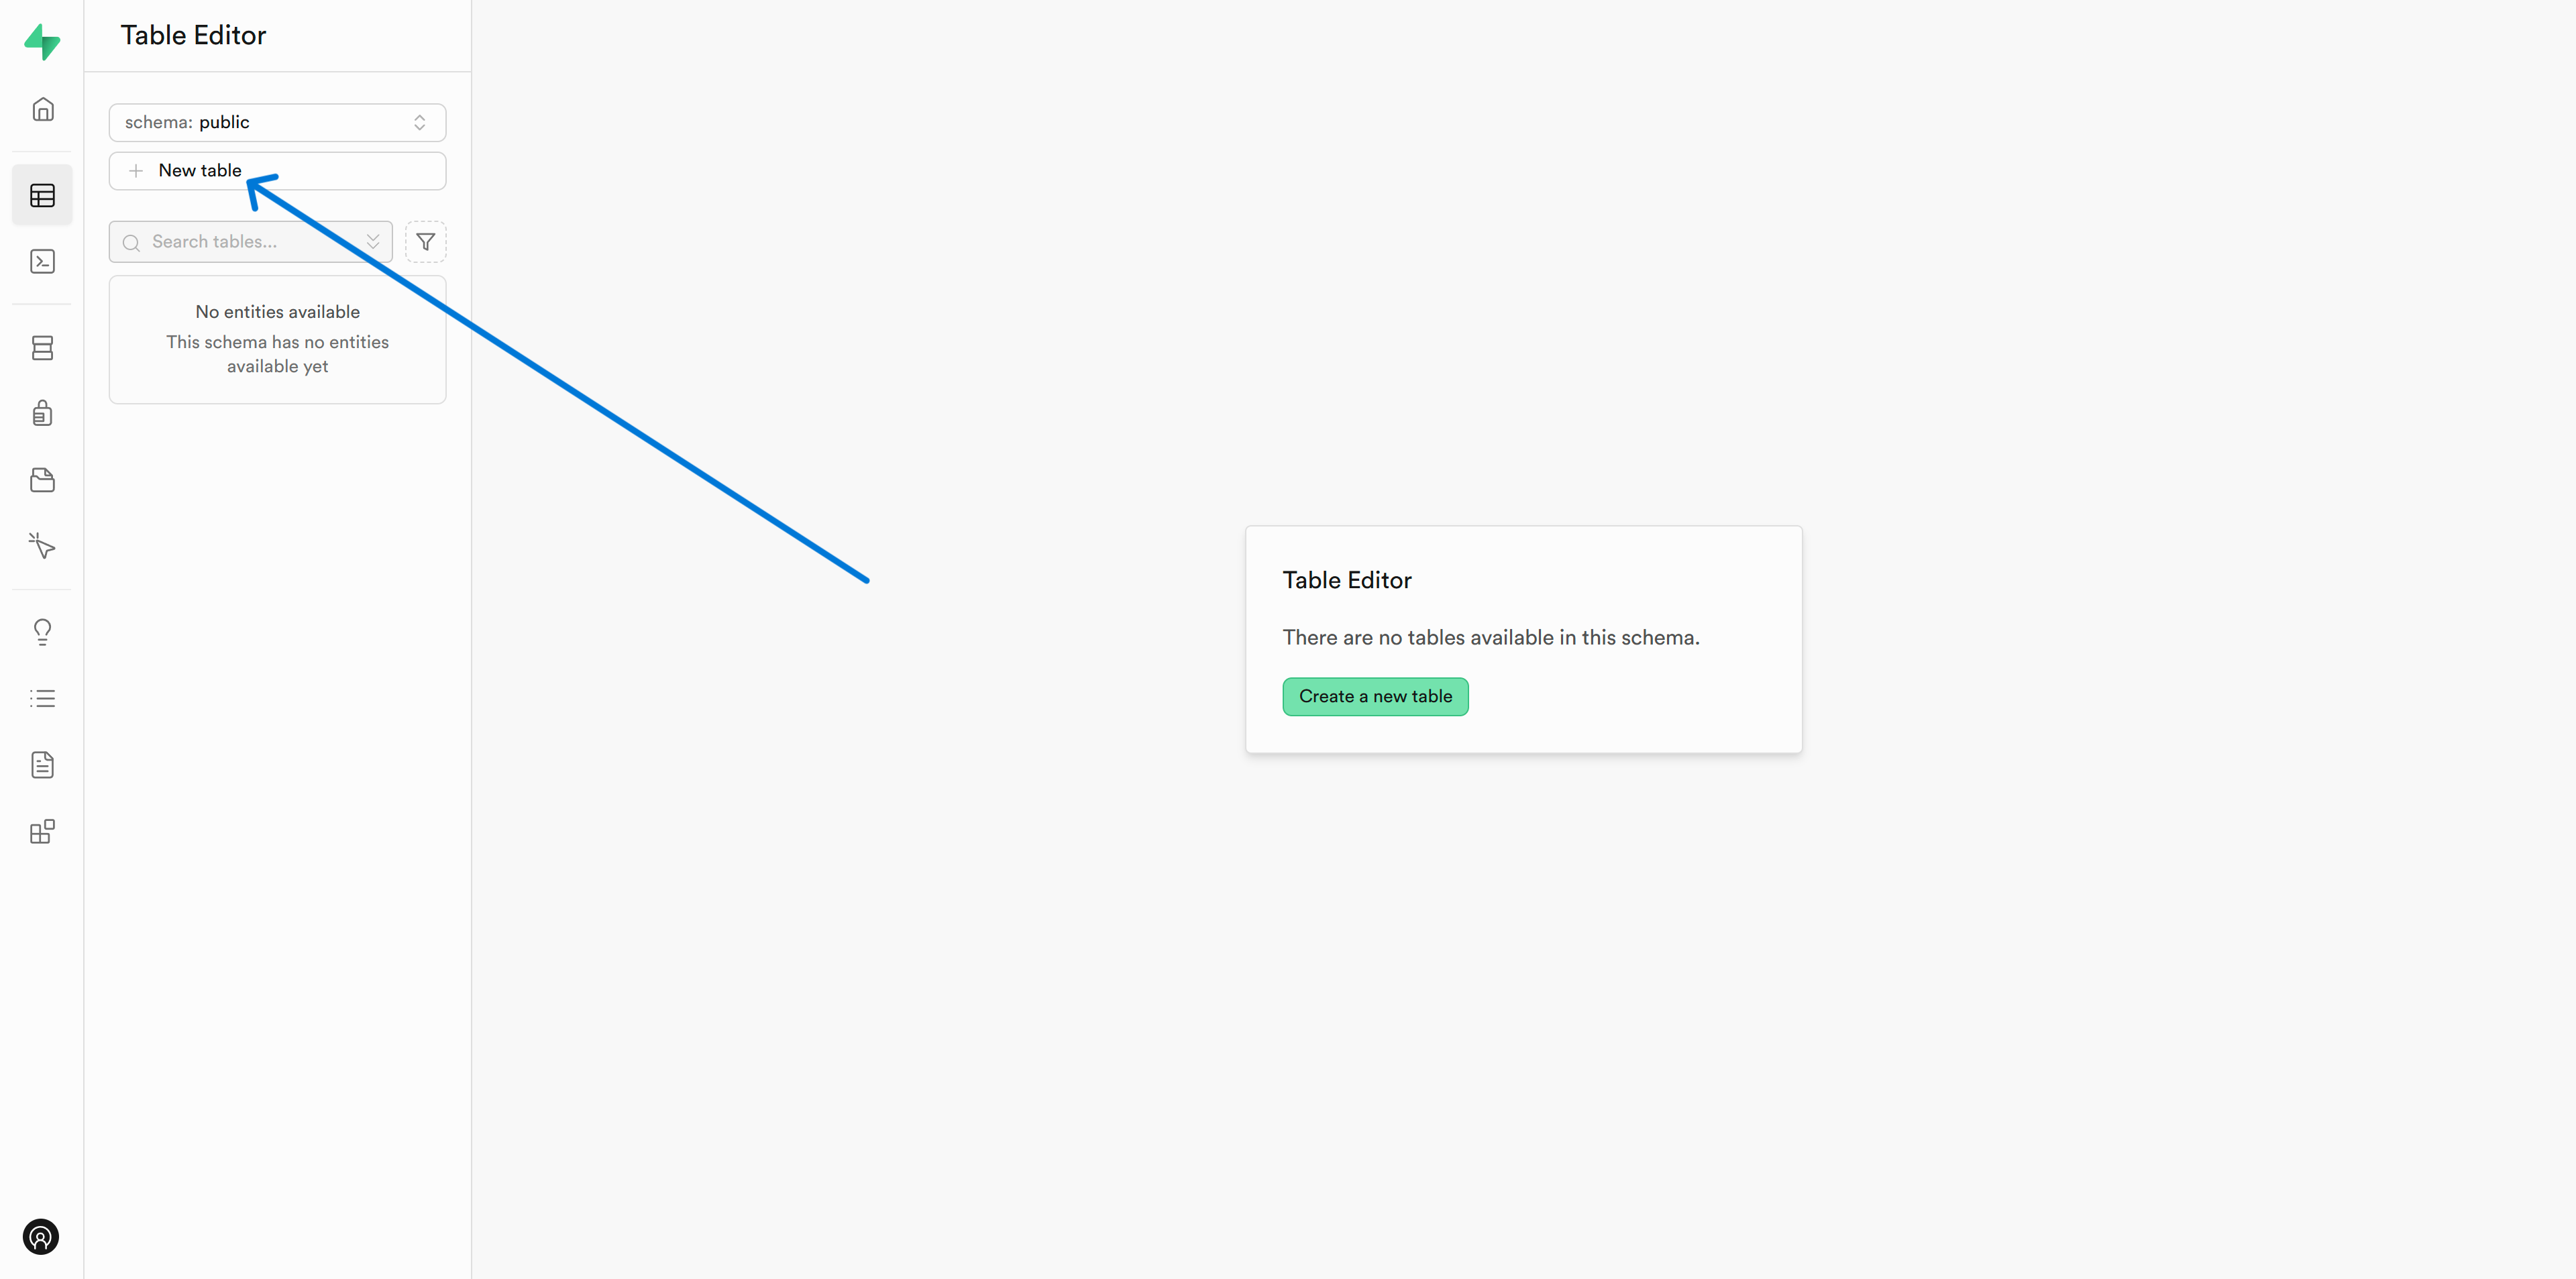
サイドバーのTable Editor > New Tableボタンをクリック
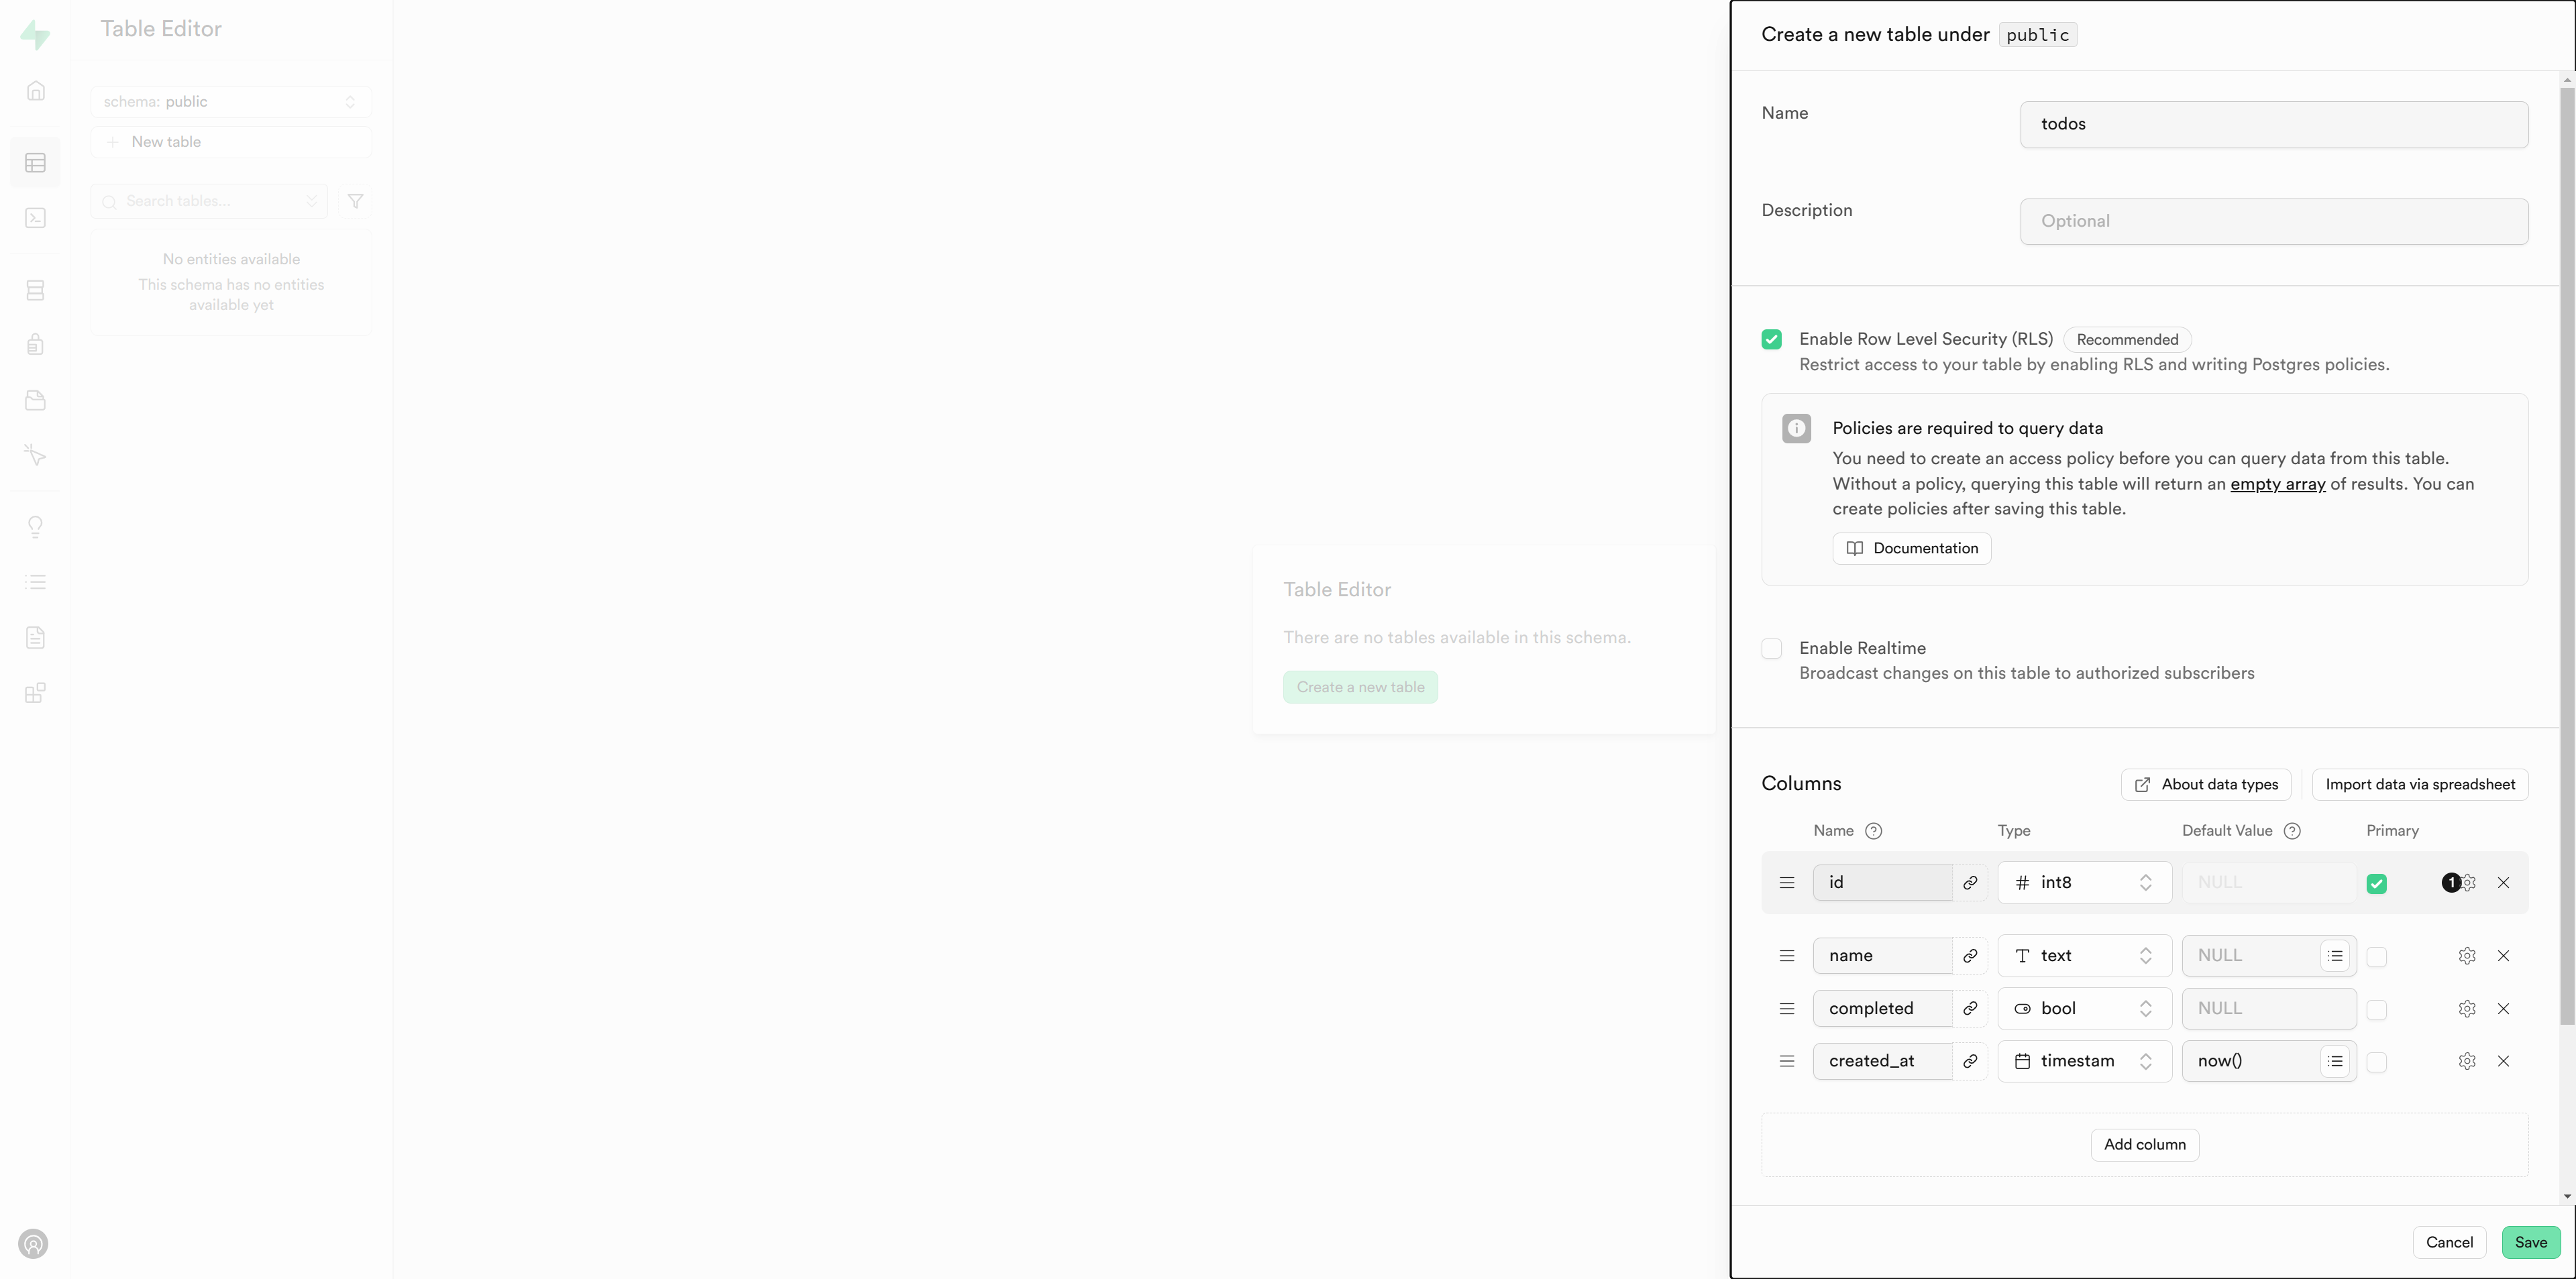
テーブル定義を記述してSaveする。今回は簡易なのでuser_idはなし
データ作成
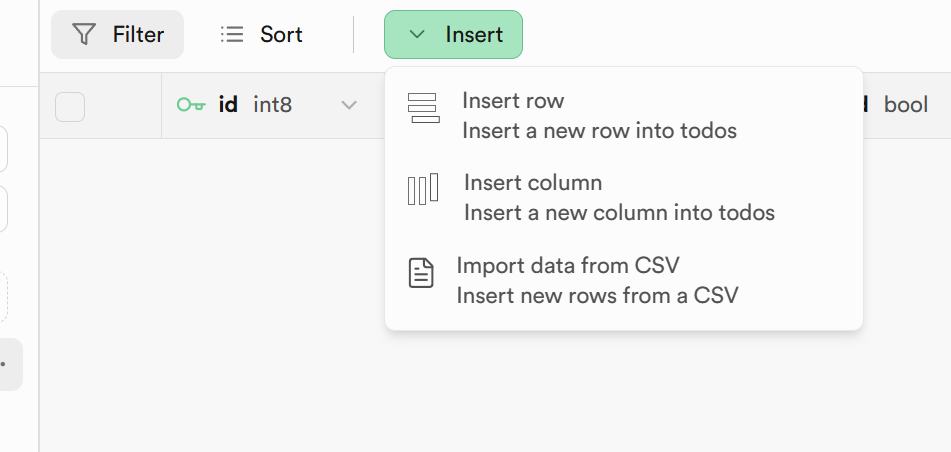
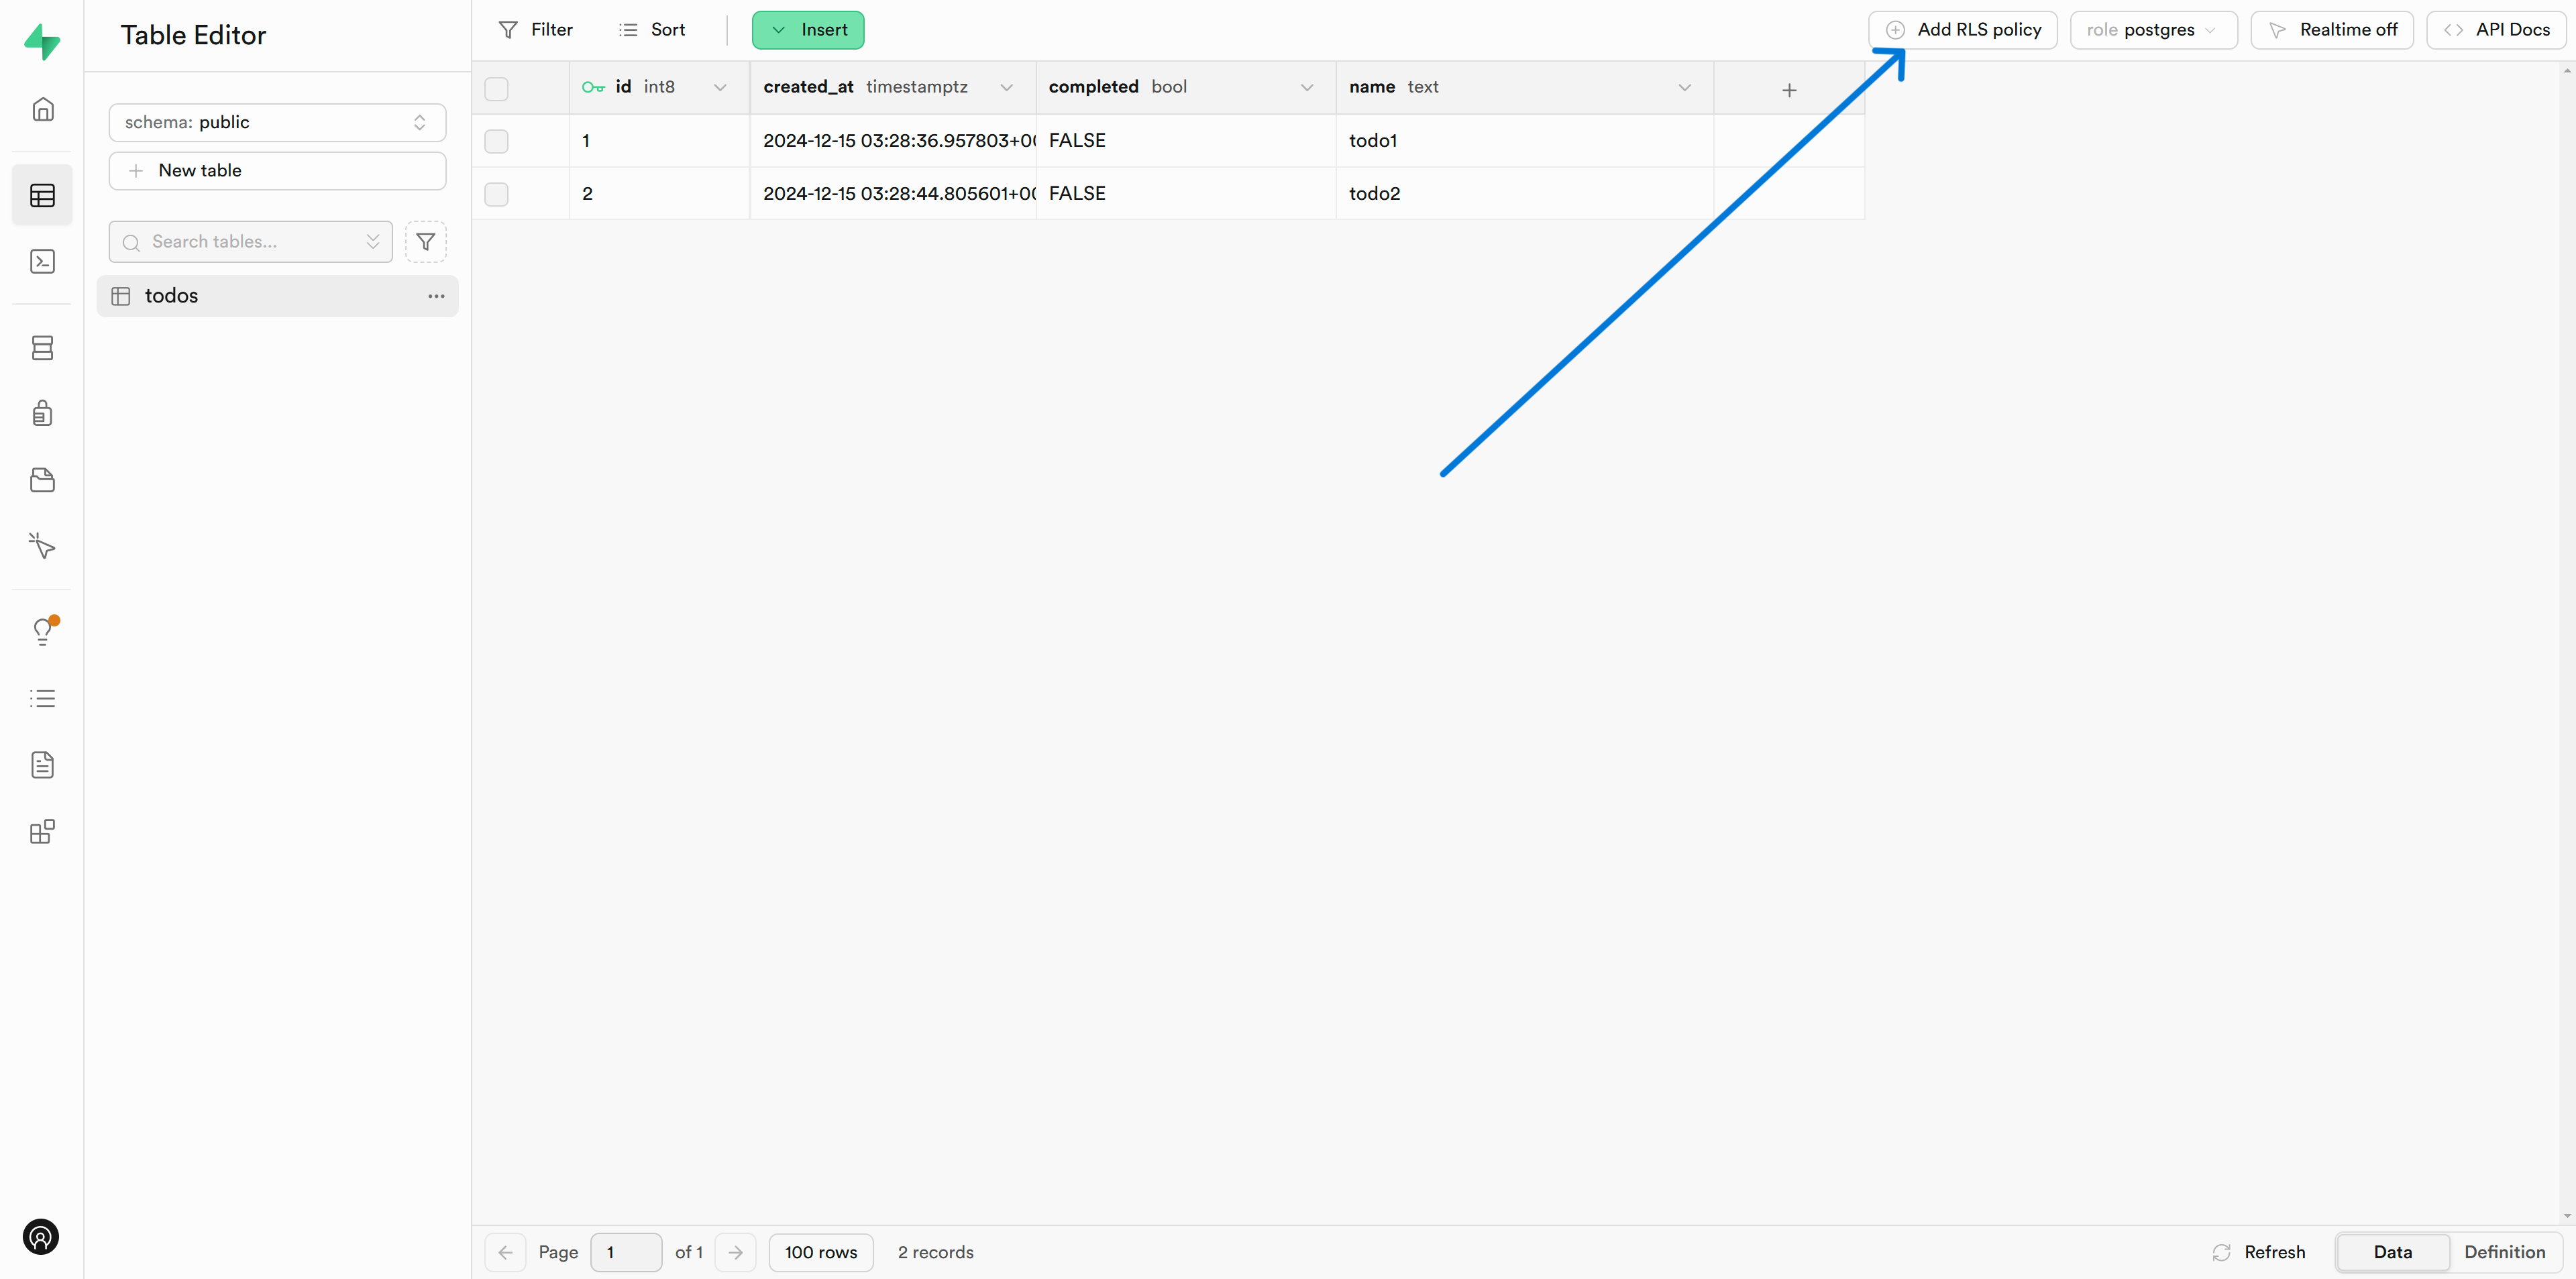
Insertボタン > Insert rowボタンからtodosテーブルにデータ投入
RLSの設定
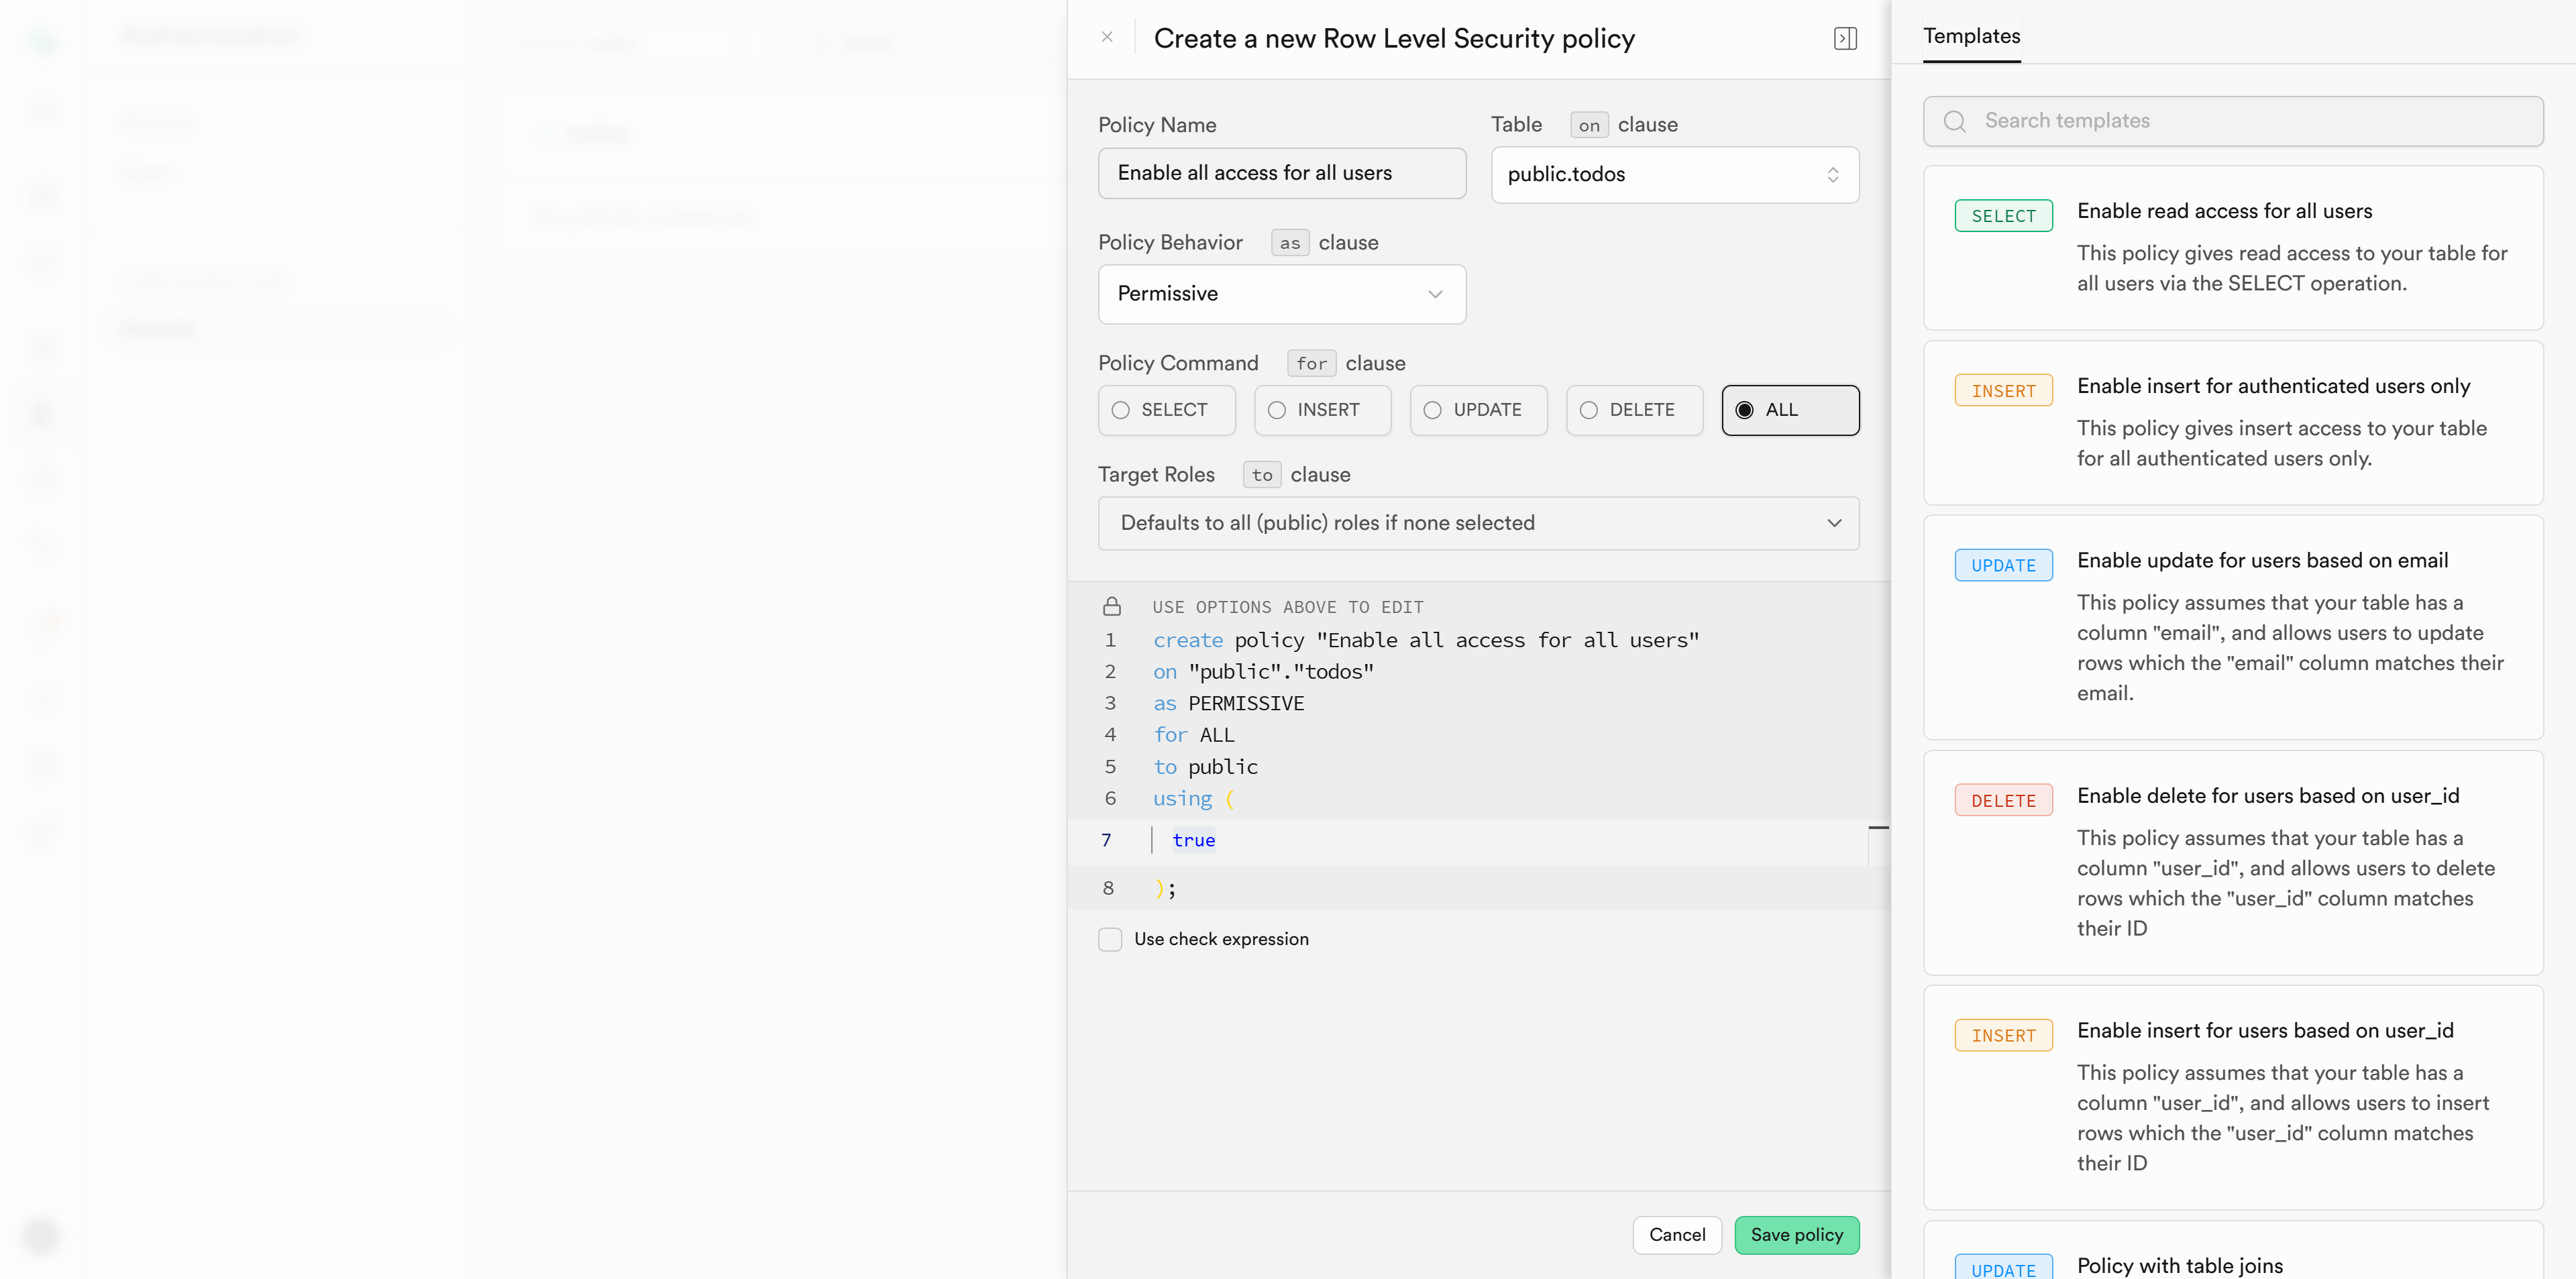
このままだとセキュリティからデータをアプリ上で表示できないので、todosテーブルにRLS(Row Level Security)を設定する。画面右上のAdd RLS Policyボタンをクリック
今回は全てユーザーの全ての操作を許可。実際のアプリでは適切な設定にする
プロジェクトでsupabaseクライアントの作成
プロジェクトのルートに.envファイルを作成
先述のnpx supabase startでターミナル上に表示されたAPI URLとanon keyを記述する
NEXT_PUBLIC_SUPABASE_URL=[API URL]
NEXT_PUBLIC_SUPABASE_ANON_KEY=[anon key]
supbasejsインストール
npm install @supabase/supabase-js
supabaseクライアント作成。ファイルはどこでも大丈夫だが、今回はsupbaseディレクトリ配下にclient.tsを作成する。先程.envに記述した環境変数を呼び出している
import { createClient } from "@supabase/supabase-js";

export const supabase = createClient(
  process.env.NEXT_PUBLIC_SUPABASE_URL!,
  process.env.NEXT_PUBLIC_SUPABASE_ANON_KEY!
);
supbabaseはtypescriptにも対応している
型作成、supabaseディレクトリに型ファイルを作成する
npx supabase gen types typescript --local > supabase/database.types.ts
supbaseクライアントに型追加。createClientメソッドに対してDababaseの型情報を追加している
import { createClient } from "@supabase/supabase-js";
import { Database } from "./database.types";

export const supabase = createClient<Database>(
  process.env.NEXT_PUBLIC_SUPABASE_URL!,
  process.env.NEXT_PUBLIC_SUPABASE_ANON_KEY!
);
todoアプリのコード記述
app/page.tsxを以下のように編集して基本的なtodoの操作ができるようにする。
- todoの一覧表示
- todoの完了・未完了の切り替え
- todoの追加
- todoの削除
今回はNextjsのサーバーアクションを使用している。サーバーアクションを使わずクライアントコンポーネントで実装することも可能
import { supabase } from '@/supabase/client';
import { revalidatePath } from 'next/cache';

export default async function Home() {
  const { data: todos, error } = await supabase
    .from('todos')
    .select('*')
    .order('created_at', { ascending: false });

  if (error) {
    console.error('Error fetching todos:', error);
    return <div>Error loading todos</div>;
  }

  async function addTodo(formData: FormData) {
    'use server';

    const name = formData.get('name') as string;
    if (!name.trim()) return;

    await supabase.from('todos').insert([{ name, completed: false }]);

    revalidatePath('/');
  }

  async function toggleTodo(formData: FormData) {
    'use server';

    const id = formData.get('id') as string;
    const completed = formData.get('completed') === 'true';

    await supabase.from('todos').update({ completed: !completed }).eq('id', id);

    revalidatePath('/');
  }

  async function deleteTodo(formData: FormData) {
    'use server'

    const id = formData.get('id') as string

    await supabase
      .from('todos')
      .delete()
      .eq('id', id)

    revalidatePath('/')
  }

  return (
    <div className="max-w-4xl mx-auto p-4">
      <h1 className="text-2xl font-bold mb-4">Todo List</h1>

      <form action={addTodo} className="mb-6">
        <div className="flex gap-2">
          <input
            type="text"
            name="name"
            placeholder="新しいTodoを入力..."
            className="flex-1 px-4 py-2 border rounded focus:outline-none focus:ring-2 focus:ring-blue-500"
            required
          />
          <button
            type="submit"
            className="px-4 py-2 bg-blue-500 text-white rounded hover:bg-blue-600 focus:outline-none focus:ring-2 focus:ring-blue-500"
          >
            追加
          </button>
        </div>
      </form>

      <ul className="space-y-2">
        {todos.map((todo) => (
          <li key={todo.id} className="p-4 bg-white rounded shadow flex items-center justify-between gap-2">
            <span className={todo.completed ? 'line-through' : ''}>
              {todo.name}
            </span>
            <div className="flex gap-2">
              <form action={toggleTodo}>
                <input type="hidden" name="id" value={todo.id} />
                <input type="hidden" name="completed" value={todo.completed.toString()} />
                <button
                  type="submit"
                  className={`px-3 py-1 rounded ${
                    todo.completed
                      ? 'bg-gray-500 hover:bg-gray-600'
                      : 'bg-green-500 hover:bg-green-600'
                  } text-white`}
                >
                  {todo.completed ? '未完了に戻す' : '完了'}
                </button>
              </form>
              <form action={deleteTodo}>
                <input type="hidden" name="id" value={todo.id} />
                <button
                  type="submit"
                  className="px-3 py-1 bg-red-500 hover:bg-red-600 text-white rounded"
                >
                  削除
                </button>
              </form>
            </div>
          </li>
        ))}
      </ul>
    </div>
  );
}
http://localhost:3000/ にアクセスして実際にアプリを動かしたら以下のようになる
githubリポジトリ
本記事の手順通りに行ったコードは以下です
おわりに
supbaseには無料プランがあるので、気になった方は是非使用してみてください
参考資料
