お題
表題の通り。
前提
- GCPプロジェクト作成済み
- ローカル開発マシンに
gcloudコマンド実行環境が既にある。
開発環境
# OS - Linux(Ubuntu)
$ cat /etc/os-release
NAME="Ubuntu"
VERSION="18.04.4 LTS (Bionic Beaver)"
# Terraform
$ terraform version
Terraform v0.12.25
# gcloud
$ gcloud version
Google Cloud SDK 294.0.0
実践
Terraformを使えるようにする。
terraform 自体は下記より「Linux 64-bit」を選択してダウンロード。
https://www.terraform.io/downloads.html
zip を解答して /bin に移動。
バージョンをチェック
$ terraform version
Terraform v0.12.25
GCP環境のTerraformによる操作前のセットアップを行う。
https://learn.hashicorp.com/terraform/gcp/build#setting-up-gcp
上記を参考にしている。
GCPプロジェクトIDを環境変数にセットしておく。
仮に、今回Terraformによる環境構築対象となるGCPプロジェクトのIDを「my-gcp-prj-01」としておく。
ローカル開発マシン上で、対象GCPプロジェクトに接続する設定になっていることを確認。
※ gcloud auth login による認証も終わっている前提。
$ gcloud config list
  〜〜〜
project = my-gcp-prj-01
上記プロジェクトIDを環境変数にセットしておく。
$ export GCP_PROJECT_ID=$(gcloud config get-value project)
Your active configuration is: [my-gcp-prj-01]
$
$ env | grep GCP_PROJECT_ID
GCP_PROJECT_ID=my-gcp-prj-01
Terraform専用のサービスアカウントを作る。
IAMに関することなので、コマンドメニューを調べてみる。
$ gcloud iam
ERROR: (gcloud.iam) Command name argument expected.

Available groups for gcloud iam:

      roles                   Create and manipulate roles.
      service-accounts        Create and manipulate service accounts.

Available commands for gcloud iam:

      list-grantable-roles       List IAM grantable roles for a resource.
      list-testable-permissions  List IAM testable permissions for a resource.

For detailed information on this command and its flags, run:
  gcloud iam --help
service-accounts サブコマンドでいけそう。最終的に以下でいけた。
$ gcloud iam service-accounts create terraform
Created service account [terraform].
GCPコンソールでもサービスアカウントが出来ていることを確認。

Terraform専用のサービスアカウントにエディターロールを付与する。
このままじゃ何もできない(?)サービスアカウントなので権限を付与する。
チュートリアル記事によると「For the Role, choose "Project -> Editor".」とのこと。
基本ロールから「roles/editor」を選択すればいいかな。
https://cloud.google.com/iam/docs/understanding-roles?hl=ja#primitive_roles
コマンドの使い方は以下にならう。
https://cloud.google.com/iam/docs/granting-changing-revoking-access?hl=ja#granting-gcloud-manual
$ gcloud projects add-iam-policy-binding ${GCP_PROJECT_ID} --member serviceAccount:terraform@${GCP_PROJECT_ID}.iam.gserviceaccount.com --role roles/editor
Updated IAM policy for project [my-gcp-prj-01].
bindings:
- members:
  - serviceAccount:terraform@my-gcp-prj-01.iam.gserviceaccount.com
  role: roles/editor
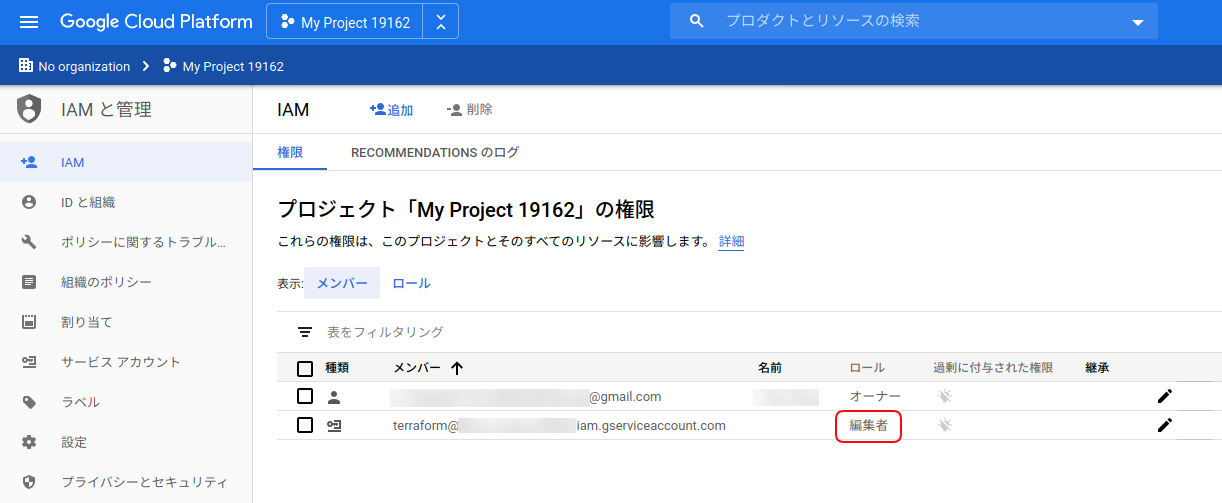
エディターロールが付与されているかどうかはIAMの設定を見る。

エディターロールを持つサービスアカウントのクレデンシャルJSONを取得
サービスアカウントに関することなので先ほどの gcloud iam service-accounts のメニューにありそう。
$ gcloud iam service-accounts
ERROR: (gcloud.iam.service-accounts) Command name argument expected.

Available groups for gcloud iam service-accounts:

      keys                    Manage service account keys.

Available commands for gcloud iam service-accounts:

      add-iam-policy-binding     Add an IAM policy binding to an IAM service
                                 account.
      create                     Create a service account for a project.
      delete                     Delete a service account from a project.
      describe                   Show metadata for a service account from a
                                 project.
     〜〜〜
keys を使う感じかな。
$ gcloud iam service-accounts keys
ERROR: (gcloud.iam.service-accounts.keys) Command name argument expected.

Available commands for gcloud iam service-accounts keys:

      create                  Create a private key for a service account.
      delete                  Delete a user-managed key from a service account.
      list                    List the keys for a service account.
$ gcloud iam service-accounts keys create
ERROR: (gcloud.iam.service-accounts.keys.create) argument OUTPUT-FILE --iam-account: Must be specified.
Usage: gcloud iam service-accounts keys create OUTPUT-FILE --iam-account=IAM_ACCOUNT [optional flags]
出力先ファイル名と、どのサービスアカウントのものかを指定すればいい様子。
$ gcloud iam service-accounts keys create ~/.config/gcloud/my-gcp-prj-01-terraform-credential.json --iam-account terraform@my-gcp-prj-01.iam.gserviceaccount.com
created key [532a~~~~~~~~5802~~~~~~~~f30b~~~~~~~~e7uy9] of type [json] as [/home/sky0621/.config/gcloud/my-gcp-prj-01-terraform-credential.json] for [terraform@my-gcp-prj-01.iam.gserviceaccount.com]
作成されたJSONの中身は、こんな感じ。
$ cat ~/.config/gcloud/my-gcp-prj-01-terraform-credential.json
{
  "type": "service_account",
  "project_id": "my-gcp-prj-01",
  "private_key_id": "xxxxxxxxxx33580xxxxxxxxxx30b99xxxxxxxxxx",
  "private_key": "-----BEGIN PRIVATE KEY-----\nXX【鍵の中身】XXXX=\n-----END PRIVATE KEY-----\n",
  "client_email": "terraform@my-gcp-prj-01.iam.gserviceaccount.com",
  "client_id": "11111111111111111111",
  "auth_uri": "https://accounts.google.com/o/oauth2/auth",
  "token_uri": "https://oauth2.googleapis.com/token",
  "auth_provider_x509_cert_url": "https://www.googleapis.com/oauth2/v1/certs",
  "client_x509_cert_url": "https://www.googleapis.com/robot/v1/metadata/x509/terraform%40my-gcp-prj-01.iam.gserviceaccount.com"
}
準備は出来た。
今度は、以下に従いながら、GCP上にリソースを作るお試し tf ファイルを書いてみる。
https://learn.hashicorp.com/terraform/gcp/build#configuration
provider "google" {
  version = "3.5.0"

  region = "asia-northeast1"
  zone = "asia-northeast1-c"
}

resource "google_compute_network" "vpc_network" {
  name = "terraform-network"
}
参考にしたページに記載の内容から以下を省いている。
- credentials
- project
上記2つは暗黙的に使われる環境変数で指定することにした。
以下、参考。
https://www.terraform.io/docs/providers/google/guides/provider_reference.html#full-reference
では、実行。
はじめてやる場合は、まず、terraform init を実行。
$ terraform init

Initializing the backend...

Initializing provider plugins...
- Checking for available provider plugins...
- Downloading plugin for provider "google" (hashicorp/google) 3.5.0...

Terraform has been successfully initialized!

You may now begin working with Terraform. Try running "terraform plan" to see
any changes that are required for your infrastructure. All Terraform commands
should now work.

If you ever set or change modules or backend configuration for Terraform,
rerun this command to reinitialize your working directory. If you forget, other
commands will detect it and remind you to do so if necessary.
すると、.terraform というディレクトリが出来る。
中身は↓
$ ls -la .terraform/plugins/linux_amd64/
合計 50484
drwxr-xr-x 2 sky0621 sky0621     4096  5月 28 23:47 .
drwxr-xr-x 3 sky0621 sky0621     4096  5月 28 23:47 ..
-rwxrwxr-x 1 sky0621 sky0621       82  5月 28 23:47 lock.json
-rwxr-xr-x 1 sky0621 sky0621 51679232  5月 28 23:47 terraform-provider-google_v3.5.0_x5
続いて、「実行したら、こんな感じになるよ」を知るため terraform plan を実行。
なのだけど、その前に。
そもそも terraform コマンドには、どんなサブコマンドがあるのか。
サブコマンド
$ terraform
Usage: terraform [-version] [-help] <command> [args]

The available commands for execution are listed below.
The most common, useful commands are shown first, followed by
less common or more advanced commands. If you're just getting
started with Terraform, stick with the common commands. For the
other commands, please read the help and docs before usage.

Common commands:
    apply              Builds or changes infrastructure
    console            Interactive console for Terraform interpolations
    destroy            Destroy Terraform-managed infrastructure
    env                Workspace management
    fmt                Rewrites config files to canonical format
    get                Download and install modules for the configuration
    graph              Create a visual graph of Terraform resources
    import             Import existing infrastructure into Terraform
    init               Initialize a Terraform working directory
    login              Obtain and save credentials for a remote host
    logout             Remove locally-stored credentials for a remote host
    output             Read an output from a state file
    plan               Generate and show an execution plan
    providers          Prints a tree of the providers used in the configuration
    refresh            Update local state file against real resources
    show               Inspect Terraform state or plan
    taint              Manually mark a resource for recreation
    untaint            Manually unmark a resource as tainted
    validate           Validates the Terraform files
    version            Prints the Terraform version
    workspace          Workspace management

All other commands:
    0.12upgrade        Rewrites pre-0.12 module source code for v0.12
    debug              Debug output management (experimental)
    force-unlock       Manually unlock the terraform state
    push               Obsolete command for Terraform Enterprise legacy (v1)
    state              Advanced state management
よく使う(というかチュートリアルレベルでよく載ってる)のは、 apply、destroy、init、plan ぐらいかな。
せっかくなので(?)、無害な以下2つもやっておく。
fmtvalidate
あえて、ちょっとフォーマットを変にして terraform fmt を実行。
$ cat main.tf
provider "google"{
  version = "3.5.0"
    region = "asia-northeast1"
  zone= "asia-northeast1-c"
}
resource "google_compute_network" "vpc_network"   {
  name = "terraform-network"
}
$
$ terraform fmt
main.tf
$
$ cat main.tf
provider "google" {
  version = "3.5.0"
  region  = "asia-northeast1"
  zone    = "asia-northeast1-c"
}
resource "google_compute_network" "vpc_network" {
  name = "terraform-network"
}
おー、整った。
お次は、バリデート。
通常なら、
$ terraform validate
Success! The configuration is valid.
version2 とか xyz = 123 とか、ちょっと変なのを与えてみると、
$ cat main.tf
provider "google" {
  version2 = "3.5.0"
  region  = "asia-northeast1"
  zone    = "asia-northeast1-c"
}
resource "google_compute_network" "vpc_network" {
  name = "terraform-network"
  xyz = 123
}
$
$ terraform validate

Error: Unsupported argument

  on main.tf line 2, in provider "google":
   2:   version2 = "3.5.0"

An argument named "version2" is not expected here.

$
xyz = 123 は怒られない。version2 を直して再実行すると、
$ terraform validate

Error: Unsupported argument

  on main.tf line 8, in resource "google_compute_network" "vpc_network":
   8:   xyz = 123

An argument named "xyz" is not expected here.
むぅ、問題が見つかった時点でバリデーションは打ち切られるのね。。。
ようやく、plan
お遊びはここまでにして、terraform plan を実行。
$ terraform plan
Refreshing Terraform state in-memory prior to plan...
The refreshed state will be used to calculate this plan, but will not be
persisted to local or remote state storage.


------------------------------------------------------------------------

An execution plan has been generated and is shown below.
Resource actions are indicated with the following symbols:
  + create

Terraform will perform the following actions:

  # google_compute_network.vpc_network will be created
  + resource "google_compute_network" "vpc_network" {
      + auto_create_subnetworks         = true
      + delete_default_routes_on_create = false
      + gateway_ipv4                    = (known after apply)
      + id                              = (known after apply)
      + ipv4_range                      = (known after apply)
      + name                            = "terraform-network"
      + project                         = (known after apply)
      + routing_mode                    = (known after apply)
      + self_link                       = (known after apply)
    }

Plan: 1 to add, 0 to change, 0 to destroy.

------------------------------------------------------------------------

Note: You didn't specify an "-out" parameter to save this plan, so Terraform
can't guarantee that exactly these actions will be performed if
"terraform apply" is subsequently run.
main.tf に書いた内容がネットワークリソース1つ作るだけの薄いものだから、こんな感じで済む。
ある程度の規模のサービス開発用に必要なGCPリソースすべてを定義したら、すごいことになりそう。
ようやくGCP環境に適用
$ terraform apply

An execution plan has been generated and is shown below.
Resource actions are indicated with the following symbols:
  + create

Terraform will perform the following actions:

  # google_compute_network.vpc_network will be created
  + resource "google_compute_network" "vpc_network" {
      + auto_create_subnetworks         = true
      + delete_default_routes_on_create = false
      + gateway_ipv4                    = (known after apply)
      + id                              = (known after apply)
      + ipv4_range                      = (known after apply)
      + name                            = "terraform-network"
      + project                         = (known after apply)
      + routing_mode                    = (known after apply)
      + self_link                       = (known after apply)
    }

Plan: 1 to add, 0 to change, 0 to destroy.

Do you want to perform these actions?
  Terraform will perform the actions described above.
  Only 'yes' will be accepted to approve.

  Enter a value: yes

google_compute_network.vpc_network: Creating...

Error: Error creating Network: googleapi: Error 403: Access Not Configured. Compute Engine API has not been used in project 691957547651 before or it is disabled. Enable it by visiting https://console.developers.google.com/apis/api/compute.googleapis.com/overview?project=691957547651 then retry. If you enabled this API recently, wait a few minutes for the action to propagate to our systems and retry., accessNotConfigured

  on main.tf line 6, in resource "google_compute_network" "vpc_network":
   6: resource "google_compute_network" "vpc_network" {
はい、失敗。
使うリソースのAPIを有効にしていないゆえ。GCEのだと言われている。
で、ご丁寧にここを訪れろとエラーメッセージ中にリンクまで載せてくれている。
https://console.developers.google.com/apis/api/compute.googleapis.com/overview?project=xxxxxxxxxx
で、まあ、ここで「有効にする」押下でもいいんだけど、
terraform 実行結果の確認以外は、なるだけ gcloud コマンドでやっておきたい。
APIの有効化
以下を参考に、有効にできるサービス一覧を表示
https://cloud.google.com/endpoints/docs/openapi/enable-api?hl=ja
$ gcloud services list --available
NAME                                                  TITLE
abusiveexperiencereport.googleapis.com                Abusive Experience Report API
acceleratedmobilepageurl.googleapis.com               Accelerated Mobile Pages (AMP) URL API
  〜〜〜
composer.googleapis.com                               Cloud Composer API
compute.googleapis.com                                Compute Engine API
computescanning.googleapis.com                        Compute Scanning API
contacts.googleapis.com                               Contacts API
container.googleapis.com                              Kubernetes Engine API
  〜〜〜
youtubereporting.googleapis.com                       YouTube Reporting API
zync.googleapis.com                                   Zync Render API
どばっと出てくるのだけど、エラーメッセージにあったのはGCEなので「compute.googleapis.com」だとあたりをつける。
で、「gcloud services enable SERVICE_NAME」で有効にできるそうなので叩いてみる。
$ gcloud services enable compute.googleapis.com
ERROR: (gcloud.services.enable) FAILED_PRECONDITION: Billing must be enabled for activation of service '[compute.googleapis.com, compute.googleapis.com, compute.googleapis.com]' in project 'xxxxxxxxxx' to proceed.
- '@type': type.googleapis.com/google.rpc.PreconditionFailure
  violations:
  - description: "billing-enabled: Project's billing account is not found. https://console.developers.google.com/project/xxxxxxxxxx/settings"
    subject: 'xxxxxxxxxx'
    type: serviceusage/billing-enabled
あれっ?
あ〜、とりあえずGoogleアカウント用意してGCPのプロジェクトは作ったけど、まだ課金設定してなかった。
無料トライアルでいいので↓の「有効化」を押す。
設定の過程でクレカが必要になるけど、$300 分は無料で使える、かつ、自分で設定しなければ自動でクレカから課金されることはない。
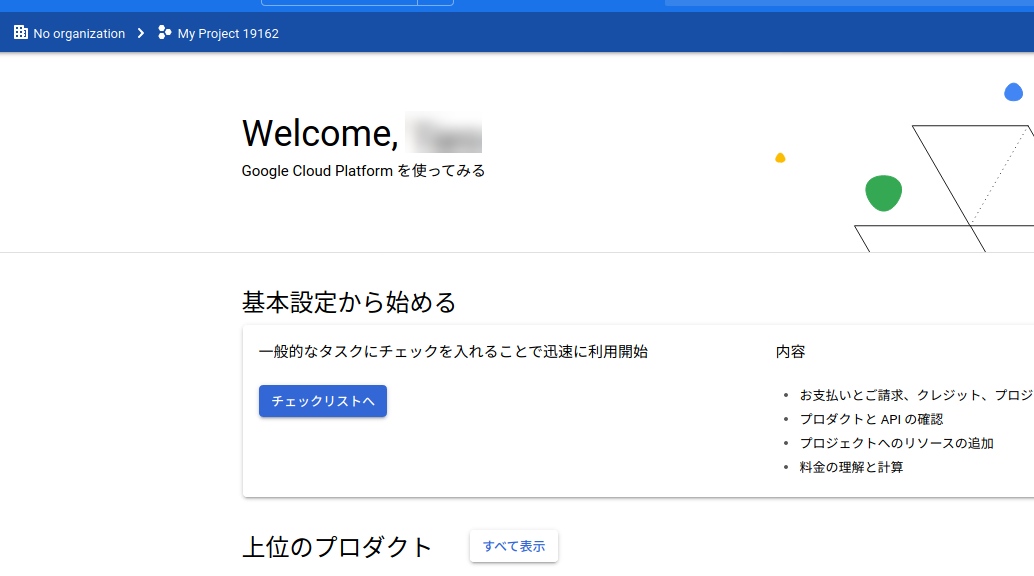
で、こんな感じになると、無料トライアルスタート。
ということで、先ほど失敗したAPIの有効化にリトライ。
$ gcloud services enable compute.googleapis.com
Operation "operations/xxx.xxxxxxxx-xxxx-xxxx-xxxx-xxxxxxxxxxxx" finished successfully.
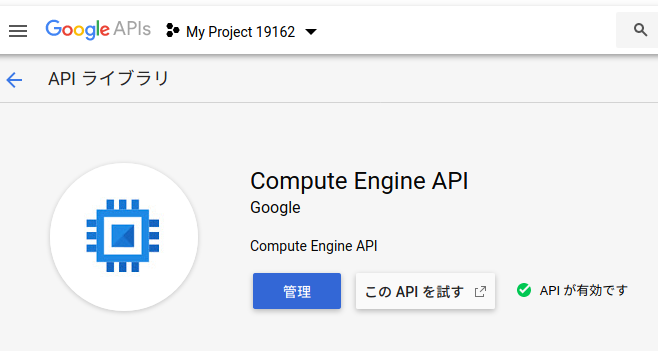
数分(?)くらい時間がかかったけど、無事終了。うん、有効になった。

あらためて、terraform apply
$ terraform apply

An execution plan has been generated and is shown below.
Resource actions are indicated with the following symbols:
  + create

Terraform will perform the following actions:

  # google_compute_network.vpc_network will be created
  + resource "google_compute_network" "vpc_network" {
      + auto_create_subnetworks         = true
      + delete_default_routes_on_create = false
      + gateway_ipv4                    = (known after apply)
      + id                              = (known after apply)
      + ipv4_range                      = (known after apply)
      + name                            = "terraform-network"
      + project                         = (known after apply)
      + routing_mode                    = (known after apply)
      + self_link                       = (known after apply)
    }

Plan: 1 to add, 0 to change, 0 to destroy.

Do you want to perform these actions?
  Terraform will perform the actions described above.
  Only 'yes' will be accepted to approve.

  Enter a value: yes

google_compute_network.vpc_network: Creating...
google_compute_network.vpc_network: Still creating... [10s elapsed]
google_compute_network.vpc_network: Still creating... [20s elapsed]
google_compute_network.vpc_network: Still creating... [30s elapsed]
google_compute_network.vpc_network: Still creating... [40s elapsed]
google_compute_network.vpc_network: Creation complete after 50s [id=projects/my-gcp-prj-01/global/networks/terraform-network]

Apply complete! Resources: 1 added, 0 changed, 0 destroyed.
今度は、無事終了。
出来栄えを確認してみる。
あらためて、main.tf の内容を確認。
$ cat main.tf
provider "google" {
  version = "3.5.0"
  region  = "asia-northeast1"
  zone    = "asia-northeast1-c"
}
resource "google_compute_network" "vpc_network" {
  name = "terraform-network"
}
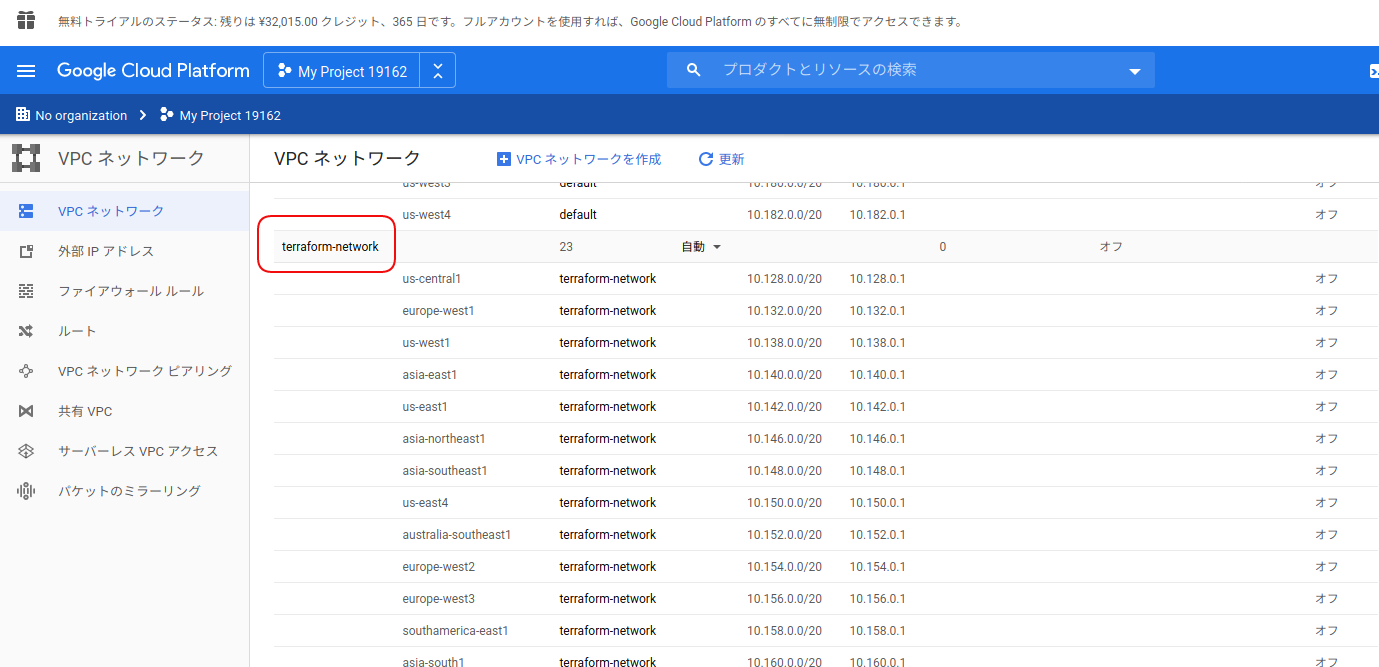
うん、terraform-network という名のVPCネットワークが作られてる。
TerraformによるGCP環境構築状況
Terraformではtfstateという拡張子のファイルでコマンド実行による今の状況を管理している。
なので、このファイルがないと、今が知れない。
というわけで、デフォルトだと terraform コマンド実行時の環境に出力されるこのファイルを、AWSだとS3、GCPだとCloud Storageに格納して(誰がどのマシンで terraform コマンドを叩いても)同じ状況を共有できるようにするのが、実際の運用時のスタンダードな方法となっている。
はい、後始末。
お試しなので、せっかく作ったVPCネットワークだけど、消してしまう。
$ terraform destroy
google_compute_network.vpc_network: Refreshing state... [id=projects/my-gcp-prj-01/global/networks/terraform-network]

An execution plan has been generated and is shown below.
Resource actions are indicated with the following symbols:
  - destroy

Terraform will perform the following actions:

  # google_compute_network.vpc_network will be destroyed
  - resource "google_compute_network" "vpc_network" {
      - auto_create_subnetworks         = true -> null
      - delete_default_routes_on_create = false -> null
      - id                              = "projects/my-gcp-prj-01/global/networks/terraform-network" -> null
      - name                            = "terraform-network" -> null
      - project                         = "my-gcp-prj-01" -> null
      - routing_mode                    = "REGIONAL" -> null
      - self_link                       = "https://www.googleapis.com/compute/v1/projects/my-gcp-prj-01/global/networks/terraform-network" -> null
    }

Plan: 0 to add, 0 to change, 1 to destroy.

Do you really want to destroy all resources?
  Terraform will destroy all your managed infrastructure, as shown above.
  There is no undo. Only 'yes' will be accepted to confirm.

  Enter a value: yes

google_compute_network.vpc_network: Destroying... [id=projects/my-gcp-prj-01/global/networks/terraform-network]
google_compute_network.vpc_network: Still destroying... [id=projects/my-gcp-prj-01/global/networks/terraform-network, 10s elapsed]
google_compute_network.vpc_network: Still destroying... [id=projects/my-gcp-prj-01/global/networks/terraform-network, 20s elapsed]
google_compute_network.vpc_network: Still destroying... [id=projects/my-gcp-prj-01/global/networks/terraform-network, 30s elapsed]
google_compute_network.vpc_network: Destruction complete after 39s

Destroy complete! Resources: 1 destroyed.
まとめ
という感じで、さわりだけなら、ちょっとしたハマりポイントを抜ければ、あとはよしなに。
ここから先は、そもそもGCPのサービスについて知ってないとだし、その上でGCPプロバイダーが提供する設定の仕方を調べる必要があるし、そして、Terraform としてのベストプラクティスな書き方なんてのも知っていく必要があるし。
まあ、とにかく触っていくしかない。


