SQL Databaseへの定期的なクエリ発行を、Azure Automationで実現しました。
指定したテーブルの件数を取得して、メール or Slack に通知する手順です。
メール通知はSendGridを使用しています。
SendGridアカウント作成
-
以下の記事が分かりやすかったので引用させて頂きました。
Azureのメール送信はSendGrid -
今回の手順ではAPIキーの発行は不要です。
Automationアカウント作成
-
以下の記事が分かりやすかったので引用させて頂きました。
Azure Automation で VM を自動停止する -
アカウントの作成と、Azureモジュールのアップデートまで実施しましょう。
Automation資格情報追加
Runbookの中でSendGridとSQL Databaseの認証にAutomation資格情報を利用します。
SendGrid資格情報を追加する
-
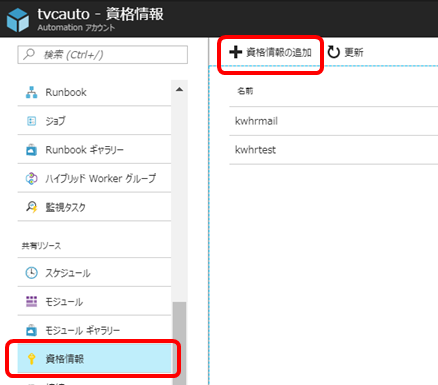
Automationアカウントを選択し、[資格情報の追加]をクリックします。
-
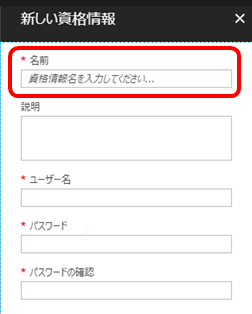
名前には、任意の値を入力します。
-
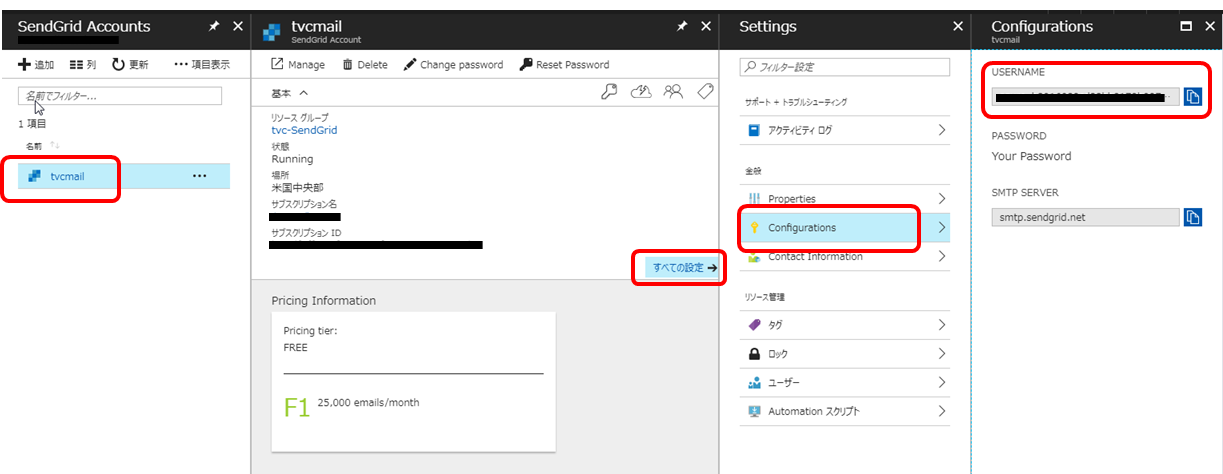
ユーザ名には、SendGridアカウント情報より取得したUSERNAMEを入力します。
-
パスワードには、SendGridアカウント作成時に指定したパスワードを入力します。
SQL Database資格情報を追加する
- 上記手順と同様にSQL Databaseの資格情報を追加します。ユーザ名とパスワードには、SQL Databaseのユーザ情報を入力してください。
Email通知用Runbook作成
-
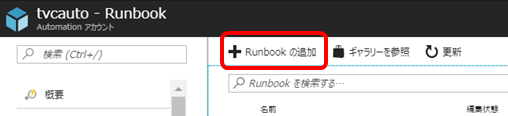
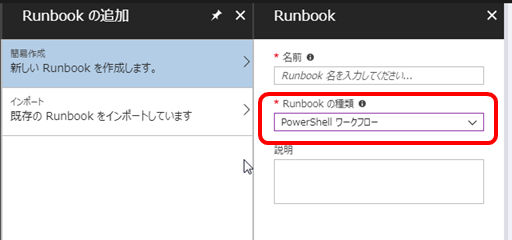
Automationアカウントより、[Runbook]→[Runbookの追加]を選択します。
-
名前には、任意の値を入力します。Runbookの種類には、[PowerShell ワークフロー]を選択します。
-
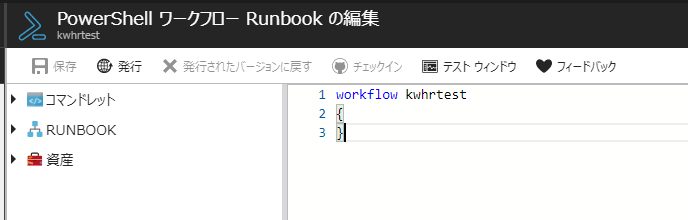
Runbook編集が画面が表示されます。
-
以下のコードを貼り付けます。workflow名はRunbookの名称と合わせるようにして下さい。
workflow kwhrtest
{

    param(
        [parameter(Mandatory=$True)]
        [string] $SqlServer,

        [parameter(Mandatory=$False)]
        [int] $SqlServerPort = 1433,

        [parameter(Mandatory=$True)]
        [string] $Database,

        [parameter(Mandatory=$True)]
        [string] $Table,

        [parameter(Mandatory=$True)]
        [PSCredential] $SqlCredName,

        [parameter(Mandatory=$True)]
        [String] $SmtpCredName,

        [parameter(Mandatory=$True)]
        [string] $MailTo
    )

    # Get the username and password from the SQL Credential
    $SqlUsername = $SqlCredName.UserName
    $SqlPass = $SqlCredName.GetNetworkCredential().Password

    # Get the username and password from the SMTP Credential
    $SmtpCredential = Get-AutomationPSCredential -Name $SmtpCredName

    inlinescript {
        # Define the connection to the SQL Database
        $Conn = New-Object System.Data.SqlClient.SqlConnection("Server=tcp:$using:SqlServer,$using:SqlServerPort;Database=$using:Database;User ID=$using:SqlUsername;Password=$using:SqlPass;Trusted_Connection=False;Encrypt=True;Connection Timeout=30;")

        # Open the SQL connection
        $Conn.Open()

        # Define the SQL command to run. In this case we are getting the number of rows in the table
        $Cmd=new-object system.Data.SqlClient.SqlCommand("SELECT COUNT(*) from dbo.$using:Table", $Conn)
        $Cmd.CommandTimeout=120

        # Execute the SQL command
        $Ds=New-Object system.Data.DataSet
        $Da=New-Object system.Data.SqlClient.SqlDataAdapter($Cmd)
        [void]$Da.fill($Ds)
        $html = $Ds.Tables[0].Rows[0][0]

        # Close the SQL connection
        $Conn.Close()

        function EncodeSubject($s) {
            $enc = [Text.Encoding]::GetEncoding("csISO2022JP")
            $s64 = [Convert]::ToBase64String($enc.GetBytes($s), [Base64FormattingOptions]::None)
            return [String]::Format("=?{0}?B?{1}?=", $enc.HeaderName, $s64)
        }

        $From = "[任意の送信元メールアドレス]"
        $Subject = EncodeSubject(EncodeSubject("[メール件名]"))

        Send-MailMessage `
            -To $using:MailTo  `
            -Subject $Subject  `
            -Body "$html 件 <br /> です" `
            -UseSsl `
            -Port 587 `
            -SmtpServer 'smtp.sendgrid.net' `
            -From $From `
            -BodyAsHtml `
            -Encoding ([System.Text.Encoding]::UTF8) `
            -Credential $using:SmtpCredential
    }
}
-
入力したら[保存]を選択し、[テストウィンドウ]を選択する。

-
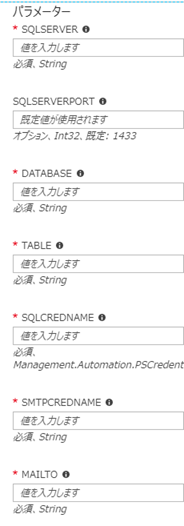
パラメータ入力画面を以下の内容で入力します。
-
SQLSERVER : SQL Databaseサーバー名
-
SQLSERVERPORT : 1433
-
DATABASE : データベース名
-
TABLE : テーブル名
-
SQLCREDNAME : 前手順で任意の名前で作成した資格情報名を入力する
-
SMTPCREDNAME : 前手順で任意の名前で作成した資格情報名を入力する
-
MAILTO : メール送付先アドレス
- [開始]を選択する。
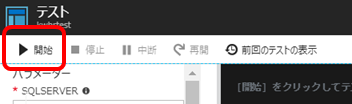
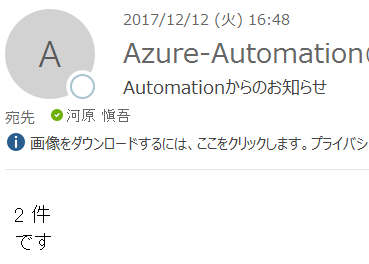
- メールがくれば成功
Runbookスケジュール設定
-
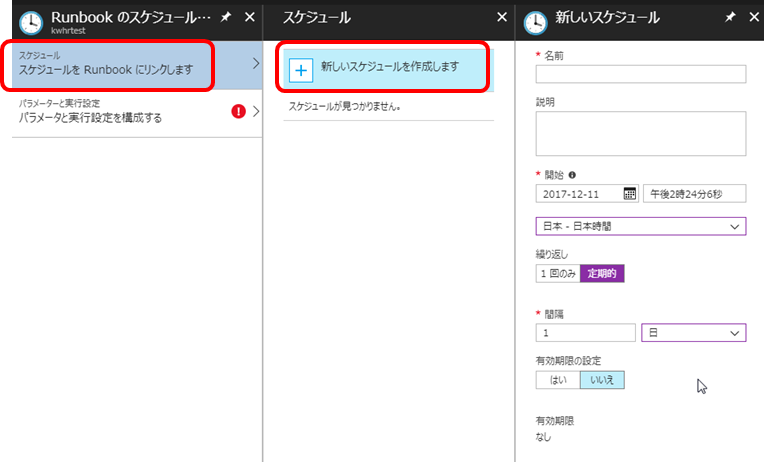
Runbook概要ページより、[スケジュール]を選択する。

-
[スケジュール]→[新しいスケジュールを作成します]の順に選択し、任意の値を入力する。
-
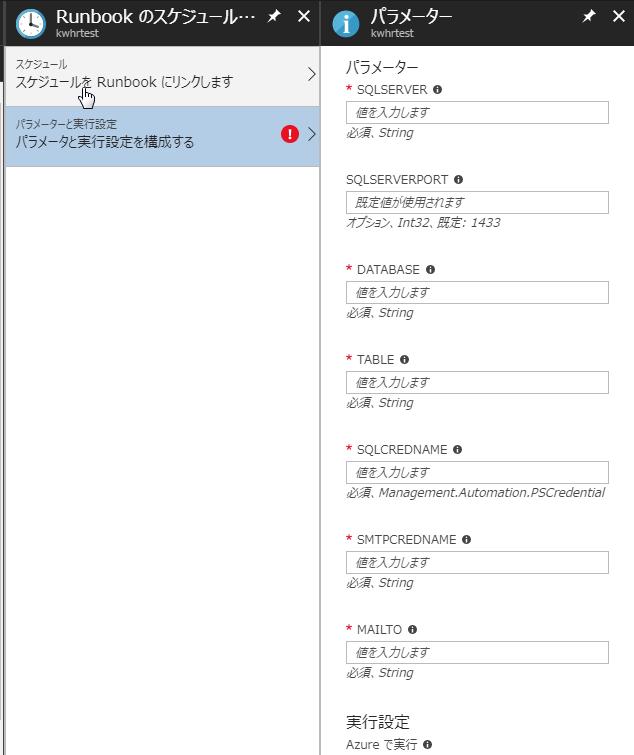
[パラメータと実行設定]を選択し、以下のように入力する。
-
SQLSERVER : SQL Databaseサーバー名
-
SQLSERVERPORT : 1433
-
DATABASE : データベース名
-
TABLE : テーブル名
-
SQLCREDNAME : 前手順で任意の名前で作成した資格情報名を入力する
-
SMTPCREDNAME : 前手順で任意の名前で作成した資格情報名を入力する
-
MAILTO : メール送付先アドレス
-
指定した時間に実行されていれば成功
Slack通知用Runbook作成
-
E-Mail通知部分をSlack通知に置き換えてみます。
-
SlackのIncoming WebHooksを使っていますので事前にSlackでURLを取得しておいてください。
workflow kwhrtest-slack
{

    param(
        [parameter(Mandatory=$True)]
        [string] $SqlServer,

        [parameter(Mandatory=$False)]
        [int] $SqlServerPort = 1433,

        [parameter(Mandatory=$True)]
        [string] $Database,

        [parameter(Mandatory=$True)]
        [string] $Table,

        [parameter(Mandatory=$True)]
        [PSCredential] $SqlCredName
    )

    # Get the username and password from the SQL Credential
    $SqlUsername = $SqlCredName.UserName
    $SqlPass = $SqlCredName.GetNetworkCredential().Password

    inlinescript {
        # Define the connection to the SQL Database
        $Conn = New-Object System.Data.SqlClient.SqlConnection("Server=tcp:$using:SqlServer,$using:SqlServerPort;Database=$using:Database;User ID=$using:SqlUsername;Password=$using:SqlPass;Trusted_Connection=False;Encrypt=True;Connection Timeout=30;")

        # Open the SQL connection
        $Conn.Open()

        # Define the SQL command to run. In this case we are getting the number of rows in the table
        $Cmd=new-object system.Data.SqlClient.SqlCommand("SELECT COUNT(*) from dbo.$using:Table", $Conn)
        $Cmd.CommandTimeout=120

        # Execute the SQL command
        $Ds=New-Object system.Data.DataSet
        $Da=New-Object system.Data.SqlClient.SqlDataAdapter($Cmd)
        [void]$Da.fill($Ds)
        $html = $Ds.Tables[0].Rows[0][0]

        # Close the SQL connection
        $Conn.Close()

        $msg = "$html 件です"
        $enc = [System.Text.Encoding]::GetEncoding('ISO-8859-1')
        $utf8Bytes = [System.Text.Encoding]::UTF8.GetBytes($msg)
        $payload = @{
                text = $enc.GetString($utf8Bytes);
                username = "Azure Automation";
                icon_emoji = ":azure:"
        }
        Invoke-RestMethod -Uri "[Slack WebHook URL]" -Method Post -Body (ConvertTo-Json $payload)
    }
}
- Slackに通知されれば成功

補足
メールの件名に日本語が使えない?
通常はSend-MailMessageで-Encodingを付与すると、日本語で件名・本文を指定することが可能ですが、Automationで実行すると以下のエラーを吐きます。
Send-MailMessage : String contains invalid Unicode code points.
Parameter name: strInput
Automation側の問題のようで以下のように2重エンコードすると回避できました。
function EncodeSubject($s) {
    $enc = [Text.Encoding]::GetEncoding("csISO2022JP")
    $s64 = [Convert]::ToBase64String($enc.GetBytes($s), [Base64FormattingOptions]::None)
    return [String]::Format("=?{0}?B?{1}?=", $enc.HeaderName, $s64)
}
$Subject = EncodeSubject(EncodeSubject("Automationからのお知らせ"))
以上