LookerのCustom Actionについての知るため、GCPのCloud funcstionsで実際に触ってみたので、その内容を書いていきます。
目次
1. Custom Actionを作成する方法
方法としては、公式のドキュメントやこちらの記事(Looker Custom Actionを作成する)で記載されているとおり、3つのやり方があります。
今回はAction APIについて知るため、公式のフレームワークは使わず、Action用のエンドポイントを直接つくるやり方で試してみたいと思います。
2. Cloud functionsで開発してみる
作るべきエンドポイントは、以下の3つです。
- Actions List Endpoint
- Action Execute Endpoint
- Action Form Endpoint
この3つのAPIをCloud funtions(nodejs)を使って作っていきます。
2-1. Actions List Endpointを作る
Actionを定義した情報を返すエンドポイントを作ります。具体的にはActionの名前や送信できるファイルフォーマットなど。
今回はとりあえず動かすことを目的としているので、コードの良し悪しは置いておいて、以下のように必要な情報を返してあげます。
app.post('/', (req, res) => {
  res.type("json");
  res.send({
    "label": "Looker Custom Action Sample",
    "integrations": [
      {
        "name": "sample_action",
        "label": "Looker Custom Action Sample",
        "supported_action_types": ["cell","query", "dashboard"],
        "url": "https://xxxxx.cloudfunctions.net/lookersample/actions/execute",
        'form_url': "https://xxxxx.cloudfunctions.net/lookersample/actions/form",
        "icon_data_uri": "https://xxxx/xxxx.png",
        "params": [
          {"name": "api_key", "label": "API Key", "required": true}
        ]
      }
    ]
  });
});
2-2. Lookerへ登録する
Lookerの管理画面から、作成したエンドポイントを登録します。[管理]->[Action]から登録していきます。
https://xxxxx.cloudfunctions.net/lookersample/ を設定します。

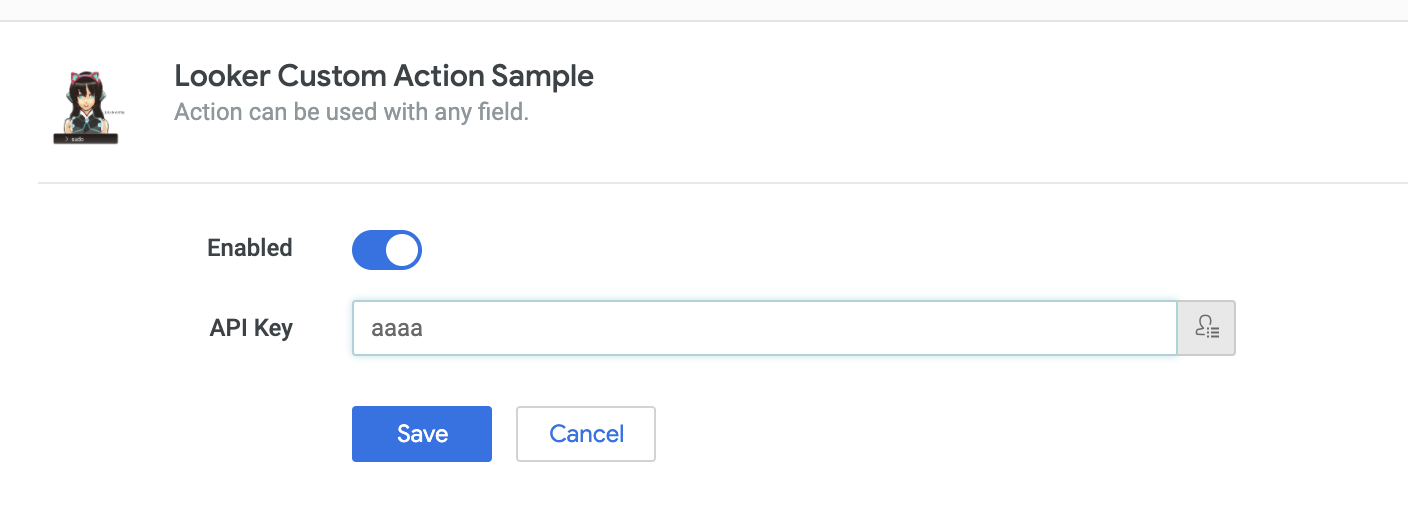
無事に登録できました。
アクティベートする際に設定したパラメータ(api_key)の入力もあります。
2-3. Action Execute Endpointを作る
これだけだと実際にアクションが実行されても何もならないので、Executeのエンドポイント(/lookersample/actions/execute)を作っていきます。
作るといっても、POSTされた情報をログに出すだけです。
app.post('/actions/execute', (req, res) => {
  console.log(JSON.stringify(req.body));
  res.send('')
});
2-4. Action Form Endpointを作る
次に、Actionを実行する際に、必要なパラメータを定義するFormのエンドポイント(/lookersample/actions/form)を作ります。
app.post('/actions/form', (req, res) => {
  res.type("json");
  res.send([
    {
      "name": "param1",
      "label": "パラメータ1",
      "description": "パラメータ1を登録してください",
      "type": "text",
      "required": true
    },
    {
      "name": "param2",
      "label": "パラメータ2",
      "description": "パラメータ2を登録してください",
      "type": "text",
      "required": true
    }
  ]);
});
3. 実際にLookerから送信してみる
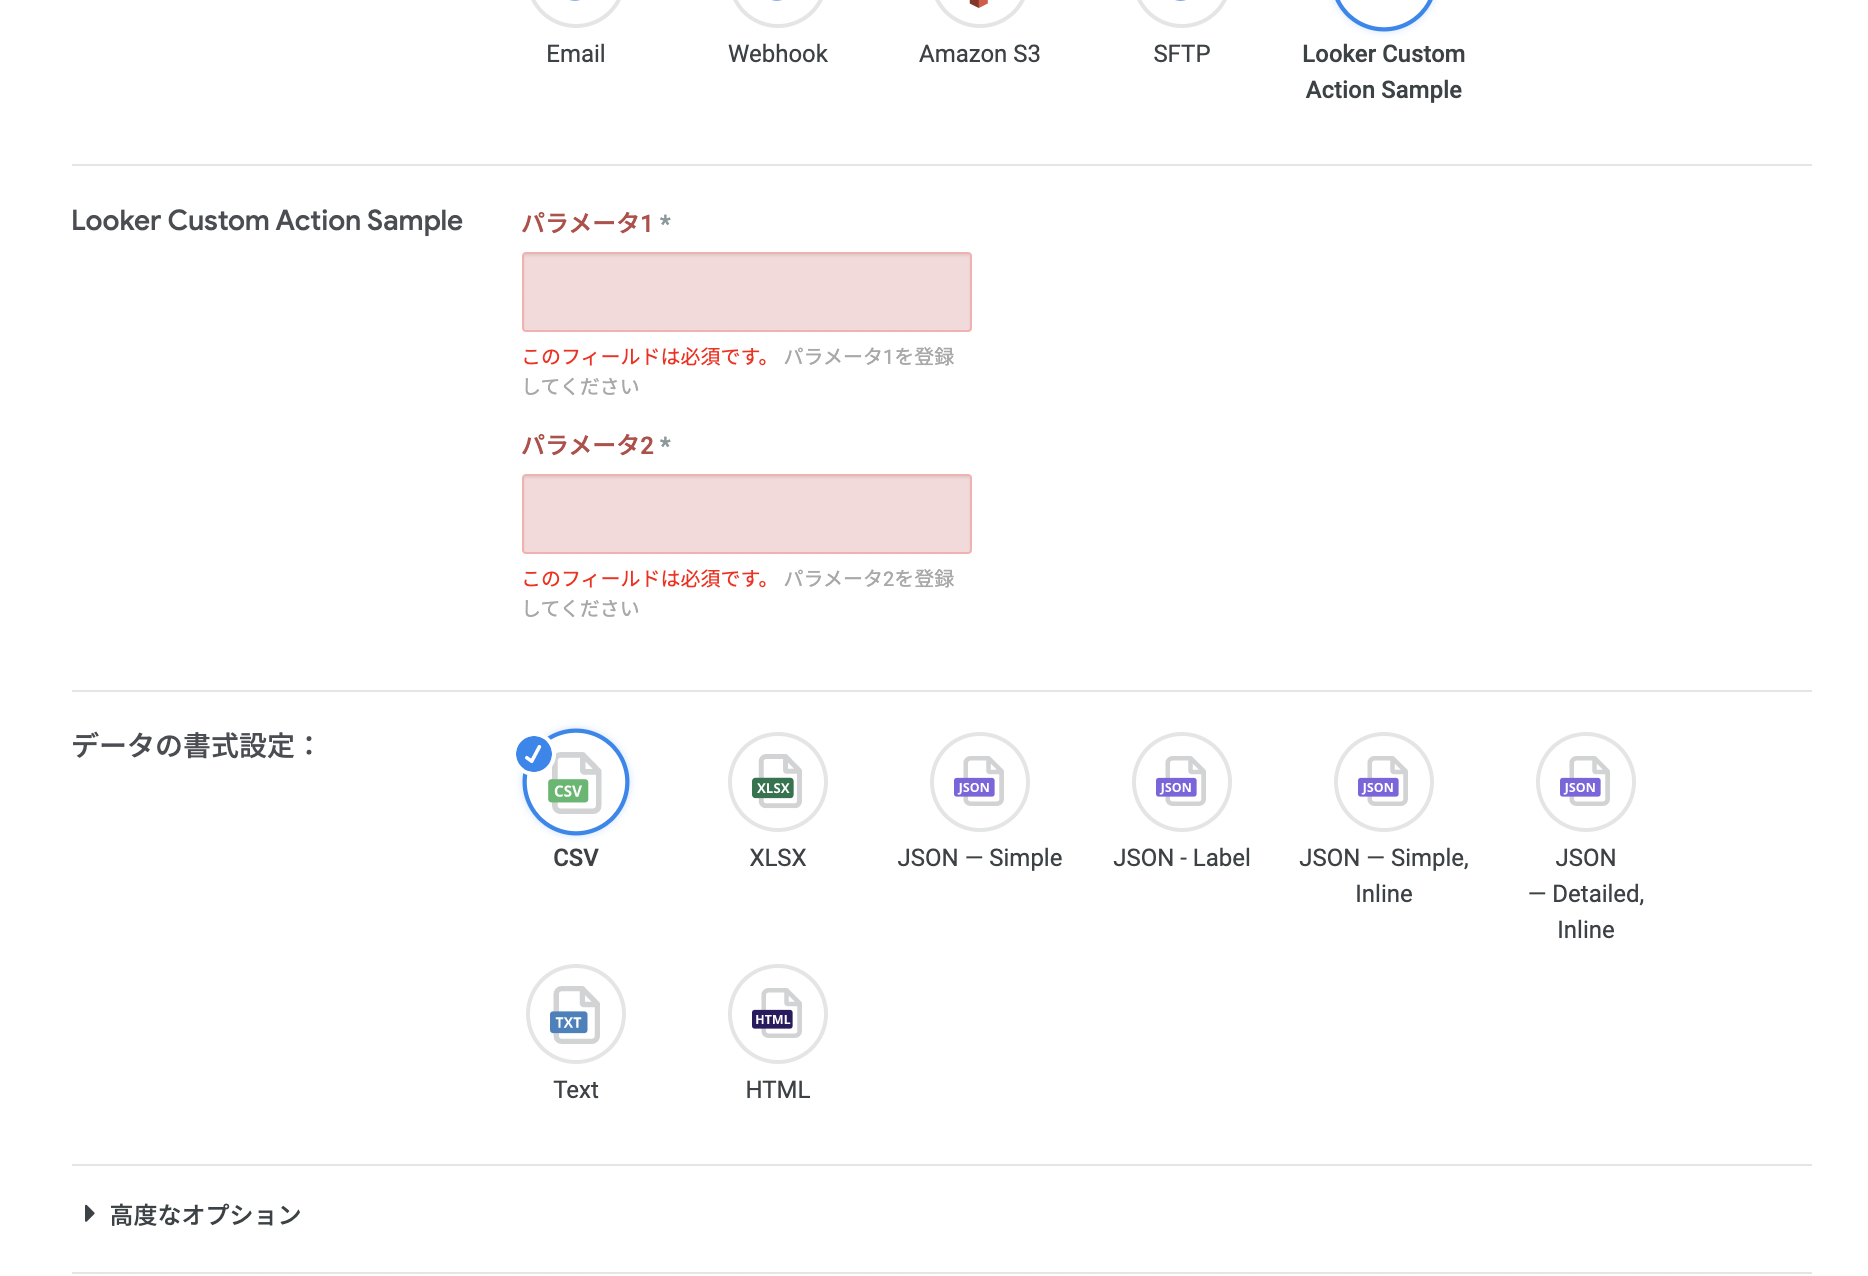
送信先として、今回追加したActionが追加されています。
formエンドポイントで設定したパラメータも入力可能になっていることが確認できます。
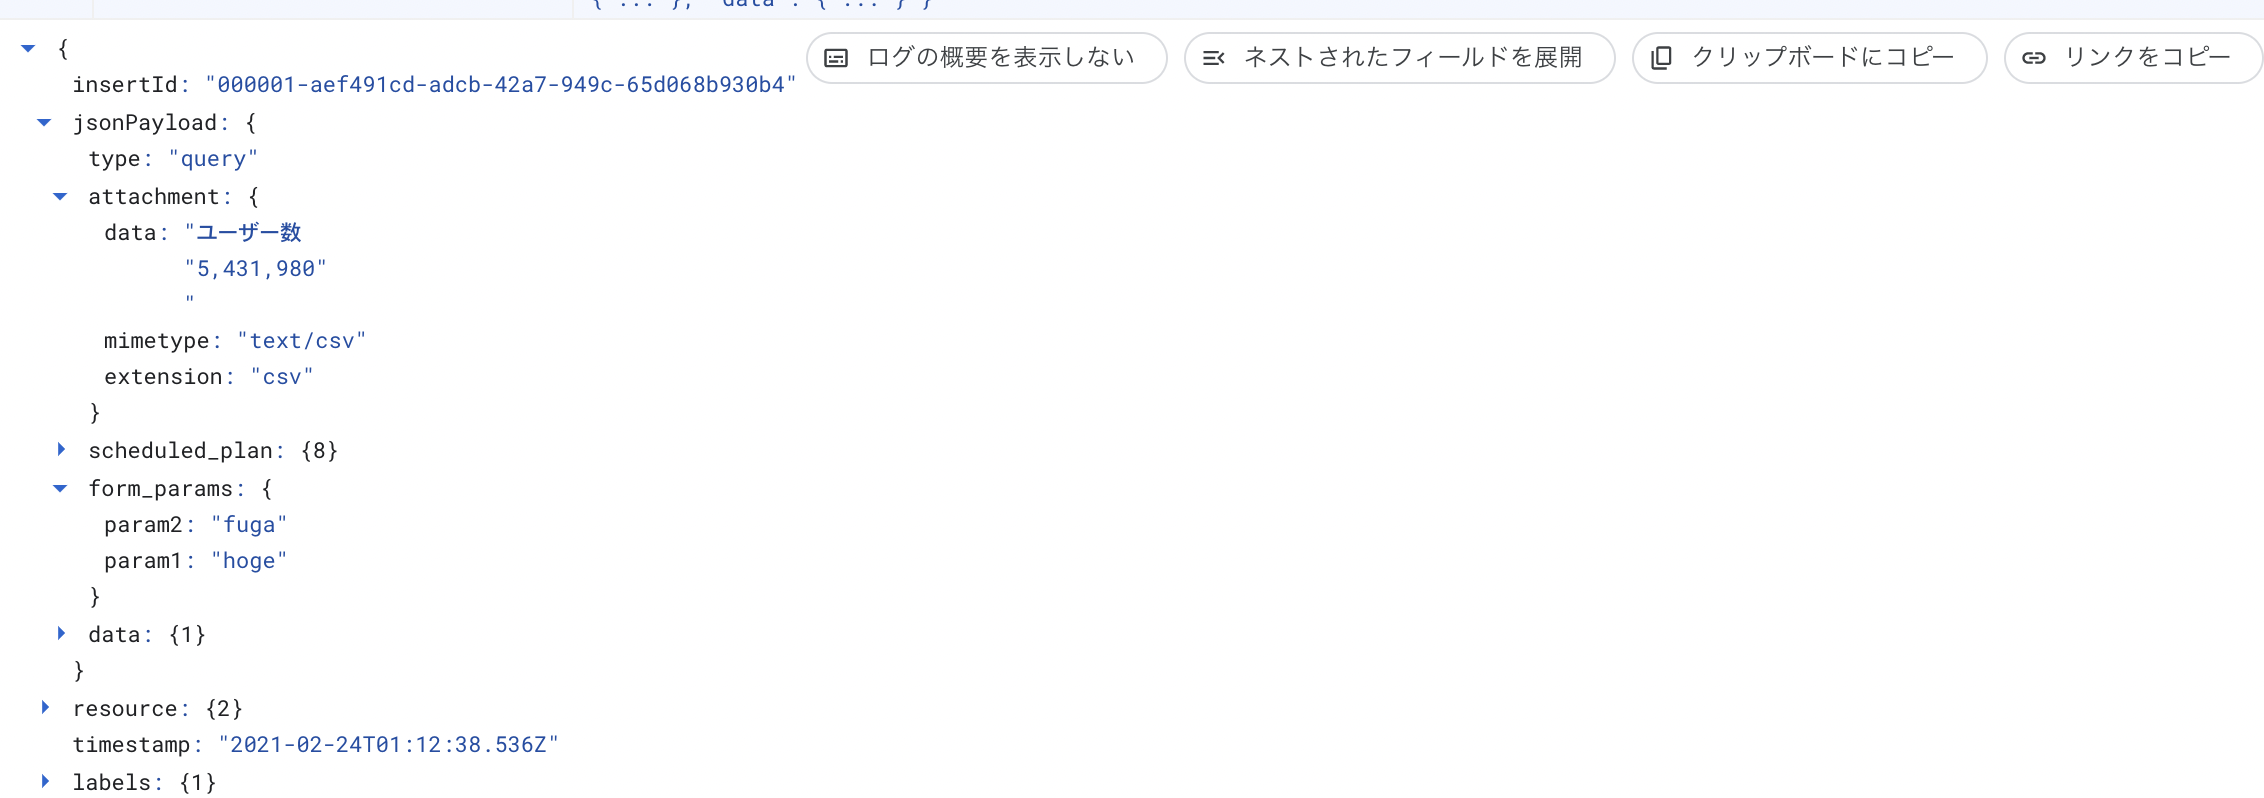
3-1. Cloud functions送られたデータを確認する
ログから、実際に送信されたデータを確認してみます。
4. 認証について
こちらでも記載されている通り、Lookerからエンドポイントへリクエストを送る際に、Authorizationのヘッダーを設定することができます。
この値は、Looker管理画面から任意の値を登録することができ、この値を持ってLookerからのリクエストかどうかをチェックすることができます。

5. 今回検証したコード
今回の検証で利用したコードを貼っておきます。
const express = require("express");
const app = express();

const PORT = 5555;
app.listen(PORT, () => {
  console.log(`Server running on port ${PORT}`);
});
app.use(express.json());

app.post('/', (req, res) => {
  res.type("json");
  res.send({
    "label": "Looker Custom Action Sample",
    "integrations": [
      {
        "name": "sample_action",
        "label": "Looker Custom Action Sample",
        "supported_action_types": ["cell","query", "dashboard"],
        "url": "https://xxxxx.cloudfunctions.net/lookersample/actions/execute",
        'form_url': "https://xxxxx.cloudfunctions.net/lookersample/actions/form",
        "icon_data_uri": "https://xxxx/xxxx.png",
        "params": [
          {"name": "api_key", "label": "API Key", "required": true}
        ]
      }
    ]
  });
});

app.post('/actions/execute', (req, res) => {
  console.log(JSON.stringify(req.body));
  res.send('')
});

app.post('/actions/form', (req, res) => {
  res.type("json");
  res.send([
    {
      "name": "param1",
      "label": "パラメータ1",
      "description": "パラメータ1を登録してください",
      "type": "text",
      "required": true
    },
    {
      "name": "param2",
      "label": "パラメータ2",
      "description": "パラメータ2を登録してください",
      "type": "text",
      "required": true
    }
  ]);
});

module.exports = {
  app
};