モダンな環境を学習したかった
目に留まったNext.js+NestJSを学習する。
Next.jsによるフロントエンドができているのが前提。下記記事:
今回のステップはNest.jsでバックエンドAPIを構築するところ
✅ 目的: GET /profile APIをNest.jsで構築し、自己紹介データを返す
🎯 最終ゴール: Next.jsがRenderのNest.js APIから実データを取得して表示
🧠 学習コスト全体(目安:6〜8時間)
🧱 Nest.js バックエンド構築(最小構成)
① プロジェクト作成
すでにフロントエンド(Next.js)でも npm を使っているのでnpmを選択
idtrm@otaskacyba MINGW64 ~/vscode/scacyba/profiledemo (main)
$ npm i -g @nestjs/cli

added 248 packages in 1m

45 packages are looking for funding
  run `npm fund` for details
✨  We will scaffold your app in a few seconds..

✔ Which package manager would you ❤️  to use? npm
CREATE backend/.prettierrc (54 bytes)
CREATE backend/eslint.config.mjs (869 bytes)
CREATE backend/nest-cli.json (179 bytes)
CREATE backend/package.json (2106 bytes)
CREATE backend/README.md (5126 bytes)
CREATE backend/tsconfig.build.json (101 bytes)
CREATE backend/tsconfig.json (565 bytes)
CREATE backend/src/app.controller.ts (286 bytes)
CREATE backend/src/app.module.ts (259 bytes)
CREATE backend/src/app.service.ts (150 bytes)
CREATE backend/src/main.ts (236 bytes)
CREATE backend/src/app.controller.spec.ts (639 bytes)
CREATE backend/test/jest-e2e.json (192 bytes)
CREATE backend/test/app.e2e-spec.ts (699 bytes)

$ nest new backend

✔ Installation in progress... ☕

🚀  Successfully created project backend
👉  Get started with the following commands:

$ cd backend
$ npm run start


                          Thanks for installing Nest 🙏
                 Please consider donating to our open collective
                        to help us maintain this package.


               🍷  Donate: https://opencollective.com/nest
② APIルートを追加
idtrm@otaskacyba MINGW64 ~/vscode/scacyba/profiledemo (main)
$ cd backend

idtrm@otaskacyba MINGW64 ~/vscode/scacyba/profiledemo/backend (master)
$ nest g controller profile
CREATE src/profile/profile.controller.ts (107 bytes)
CREATE src/profile/profile.controller.spec.ts (517 bytes)
UPDATE src/app.module.ts (344 bytes)
src/profile/profile.controller.ts を開いて以下のように編集:
import { Controller, Get } from '@nestjs/common';

@Controller('profile')
export class ProfileController {
  @Get()
  getProfile() {
    return {
      name: 'オオタスカシバコンサルタント',
      title: 'ITコンサルタント / エンジニア',
      bio: '製造業DXやアプリ開発(NestJS)、ネットワークインフラまで幅広く対応しています。',
    };
  }
}
③ CORSを許可(Next.jsからのアクセス用)
src/main.ts に以下を追加:
async function bootstrap() {
  const app = await NestFactory.create(AppModule);
  app.enableCors(); // ← これを追加
  await app.listen(3000);
}
④ 実行テスト
npm run start:dev
ブラウザで http://localhost:3000/profile にアクセスしてJSONが返ったのでOK
ちなみに、http://localhost:3000/ はHello worldが出る。
ここまで30分
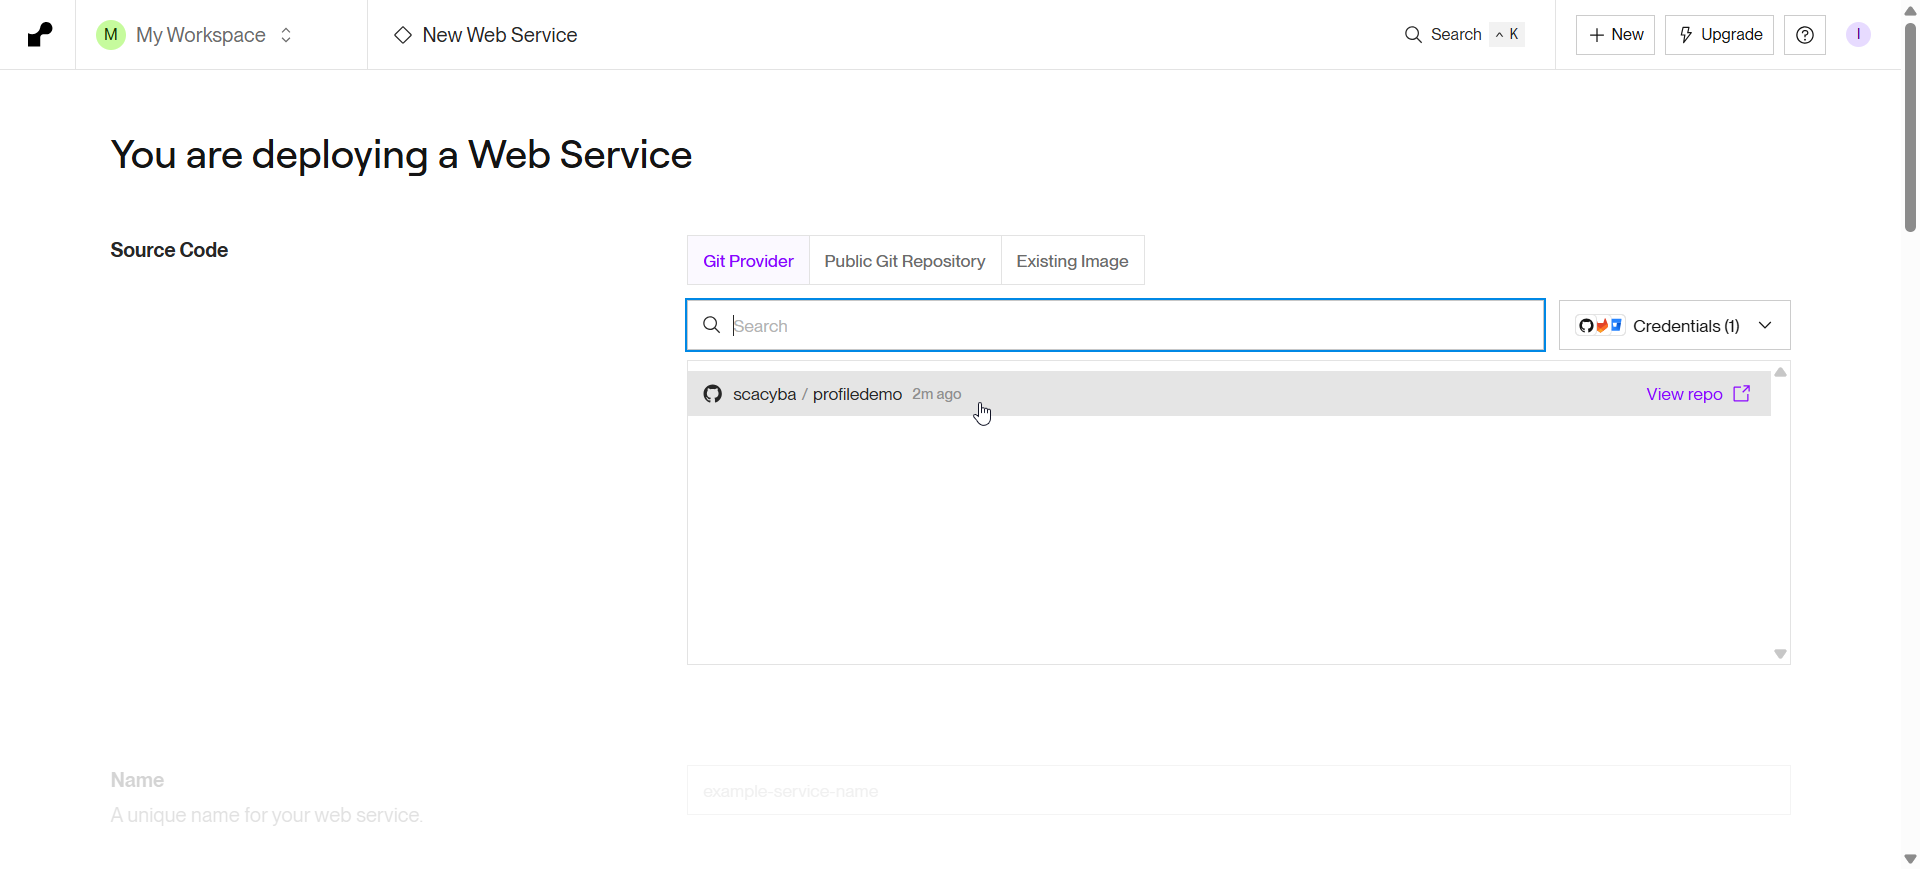
⑤ Renderへデプロイ(Web Service)
GitHubに backend/ をpush。(profiledemo/backend)
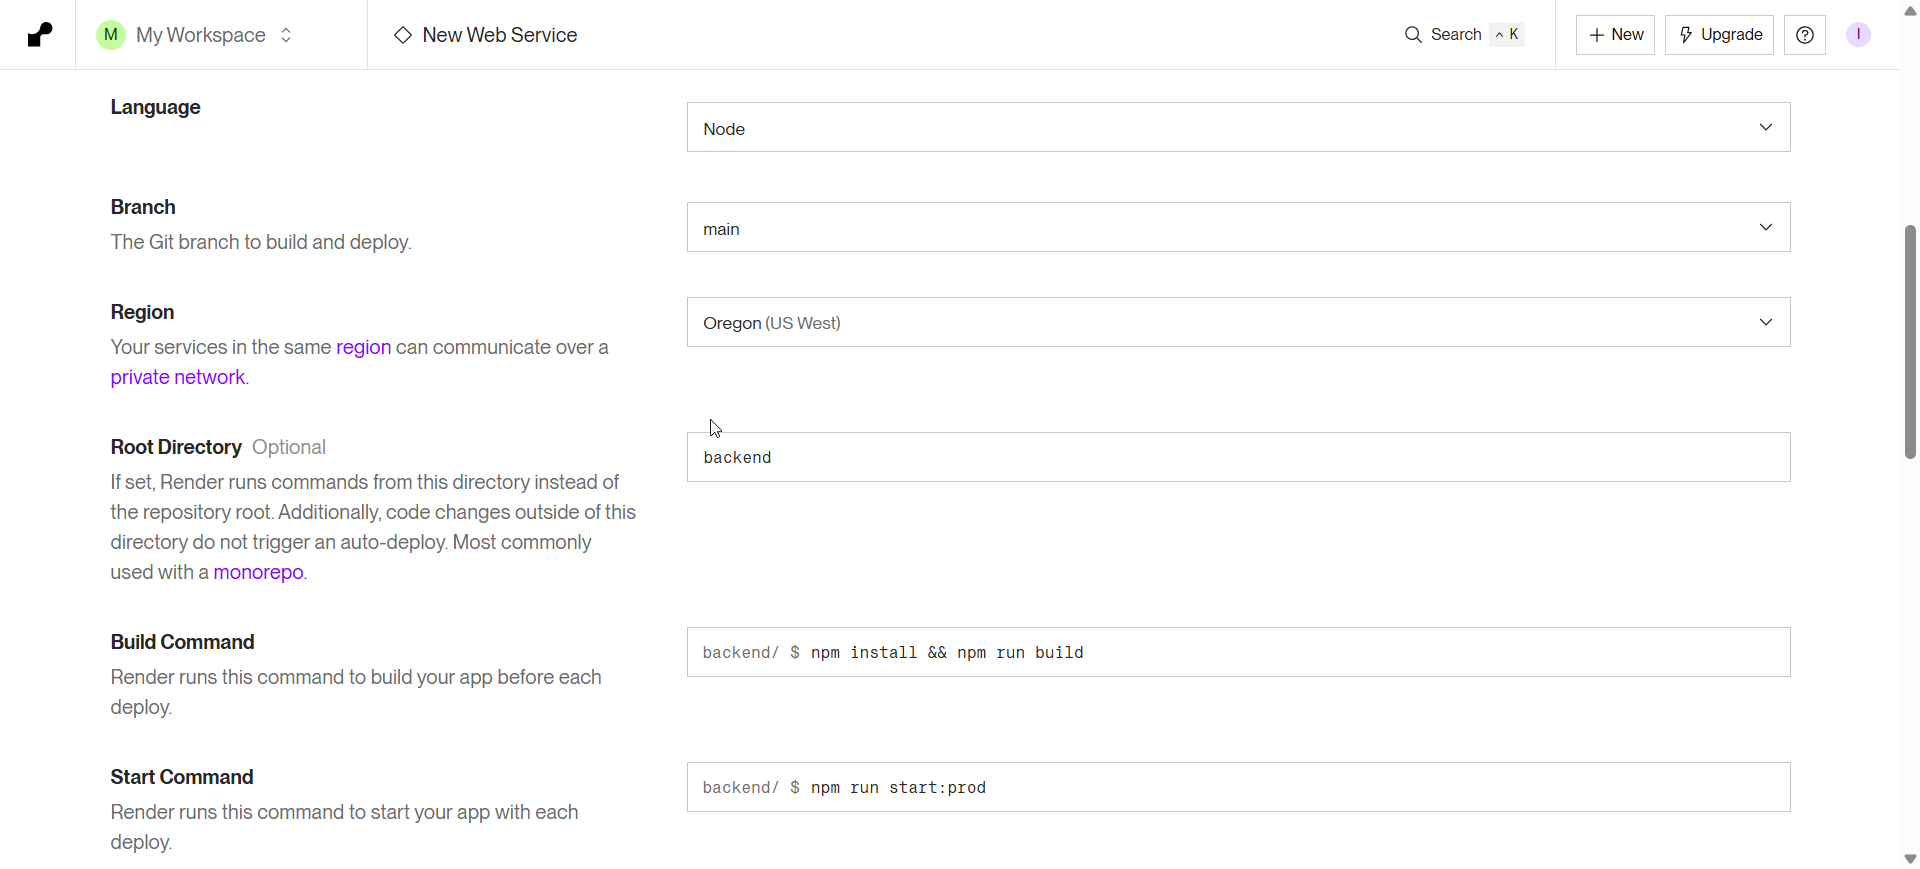
Renderの「New → Web Service」で以下を指定して、Deploy web service:
項目 内容
language: Node
Root Directory: backend
Start Command: npm run start:prod
Build Command: npm install && npm run build
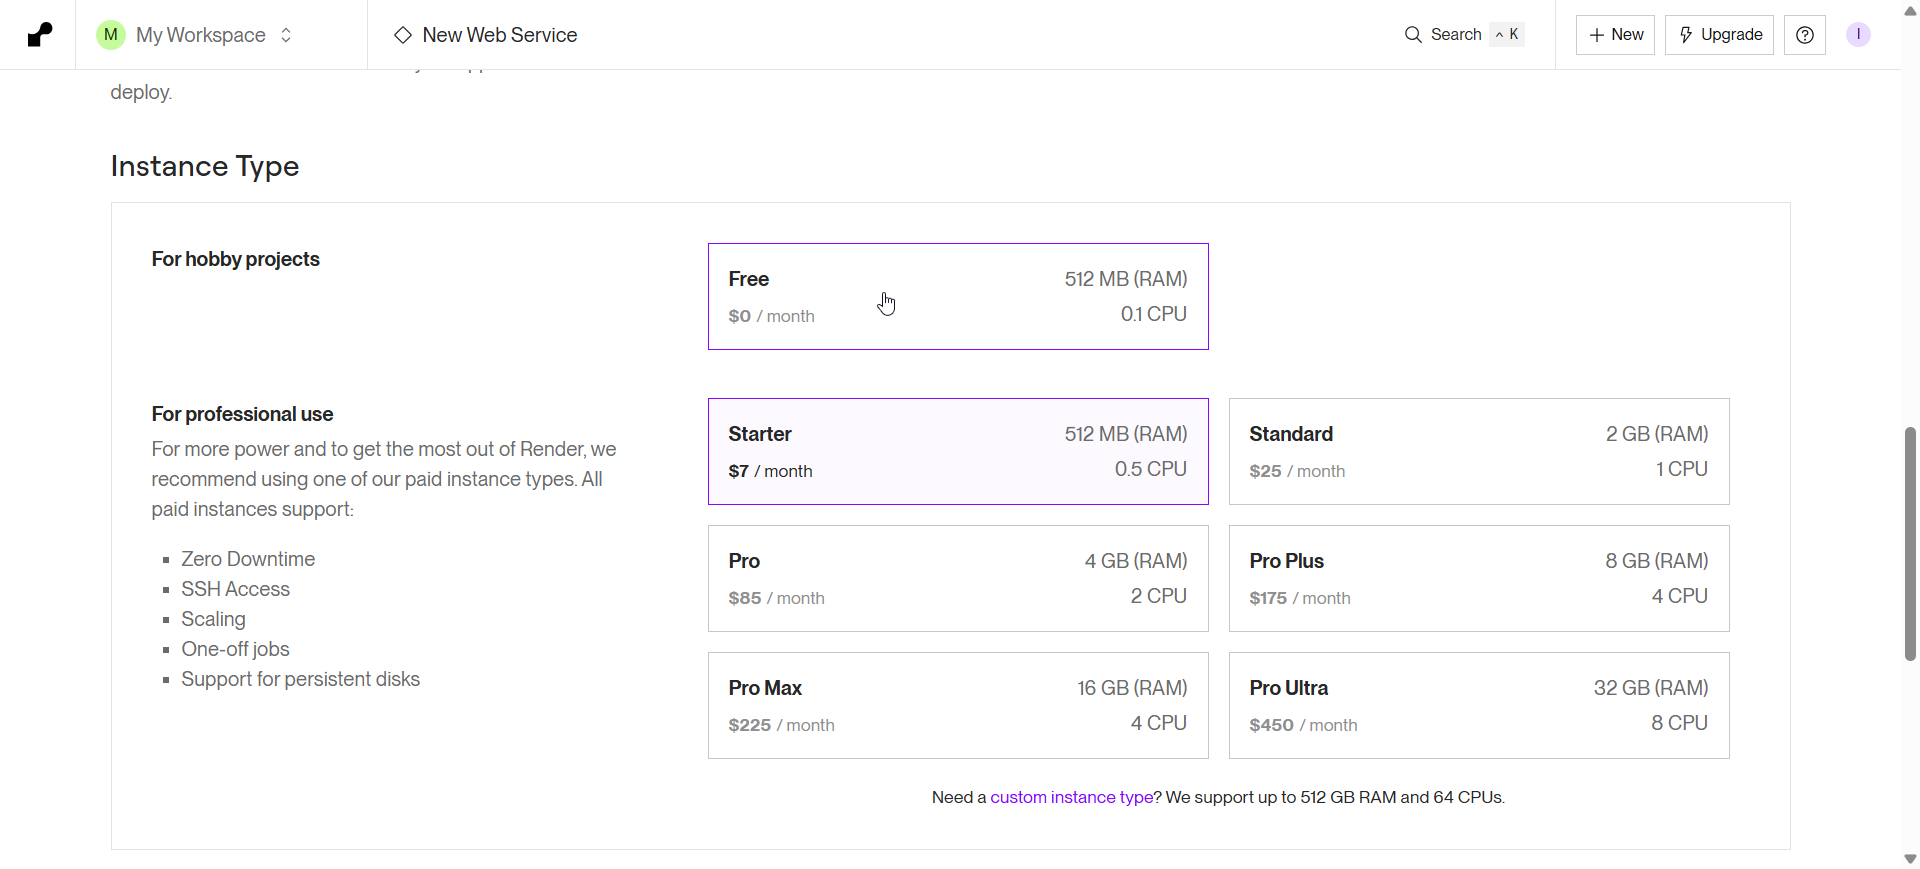
無料にしたいのでhobby projectsで。
下記はブラウザ上のコンソールログ
==> Cloning from https://github.com/scacyba/profiledemo
==> Checking out commit 96c618a59a406b3bb9e54a0285a8254a9319c6ab in branch main
==> Using Node.js version 22.14.0 (default)
==> Docs on specifying a Node.js version: https://render.com/docs/node-version
==> Using Bun version 1.1.0 (default)
==> Docs on specifying a bun version: https://render.com/docs/bun-version
==> Running build command 'npm install && npm run build'...
added 841 packages, and audited 842 packages in 10s
155 packages are looking for funding
  run `npm fund` for details
found 0 vulnerabilities
> backend@0.0.1 build
> nest build
==> Uploading build...
==> Uploaded in 6.0s. Compression took 5.3s
==> Build successful 🎉
==> Deploying...
==> Running 'npm run start:prod'
> backend@0.0.1 start:prod
> node dist/main
[Nest] 109  - 05/14/2025, 4:34:05 AM     LOG [NestFactory] Starting Nest application...
[Nest] 109  - 05/14/2025, 4:34:05 AM     LOG [InstanceLoader] AppModule dependencies initialized +9ms
[Nest] 109  - 05/14/2025, 4:34:05 AM     LOG [RoutesResolver] AppController {/}: +88ms
[Nest] 109  - 05/14/2025, 4:34:05 AM     LOG [RouterExplorer] Mapped {/, GET} route +2ms
[Nest] 109  - 05/14/2025, 4:34:05 AM     LOG [RoutesResolver] ProfileController {/profile}: +1ms
[Nest] 109  - 05/14/2025, 4:34:05 AM     LOG [RouterExplorer] Mapped {/profile, GET} route +0ms
[Nest] 109  - 05/14/2025, 4:34:05 AM     LOG [NestApplication] Nest application successfully started +1ms
==> Your service is live 🎉
https://profiledemo-backend.onrender.com/profile
でJSON返ってきたのでOK
NestJS側が完成したので、
Next.js 側のURLを差し替えて、pushしてfrontendを再デプロイして確認。
RenderがAutoDeploy設定になっているので、push後に自動でデプロイされていた。
・・・
const res = await fetch('https:/profiledemo-backend.onrender.com/profile');
・・・
ここまで1時間
Prisma + PostgreSQL でのDB連携 に構成変更
上記までではハードコードしているJSONを返しているだけ。
🔧 ゴール:
自己紹介データをハードコーディングではなくDBに保存
GET /profile → DBから取得
将来的に POST /profile で編集できるように
✅ ステップ2:編集画面追加(Next.js側)
✏️ ゴール:
/edit ページを作成
フォームで name/title/bio を編集
POST or PUT でNest.jsのAPIに送信
おすすめの順番:
PrismaでNest.jsからDB接続
GET /profile → DBから取得
Next.jsで編集ページ追加
PUT /profile(Nest.js)で更新処理
認証つけたければその後でOK
✅ ステップ1:RenderでPostgreSQLを作成
Renderダッシュボードで「New → Postgres」を選択。下記を設定して、Create Database
・プランは Free を選択(256MB、10Kレコードまで無料)
・名前:profile-db


作成後、Connection Info(接続情報) を控えておく(重要)
DATABASE_URL=postgresql://user:password@host:5432/dbname
✅ ステップ2:Nest.js(profile/backend)にPrisma導入
idtrm@otaskacyba MINGW64 ~/vscode/scacyba/profiledemo/backend (main)
$ npm install prisma --save-dev

added 10 packages, and audited 850 packages in 27s

155 packages are looking for funding
  run `npm fund` for details

found 0 vulnerabilities

idtrm@otaskacyba MINGW64 ~/vscode/scacyba/profiledemo/backend (main)
$ npm install @prisma/client

added 1 package, and audited 851 packages in 18s

155 packages are looking for funding
  run `npm fund` for details

found 0 vulnerabilities

idtrm@otaskacyba MINGW64 ~/vscode/scacyba/profiledemo/backend (main)
$ npx prisma init

✔ Your Prisma schema was created at prisma/schema.prisma
  You can now open it in your favorite editor.

warn You already have a .gitignore file. Don't forget to add `.env` in it to not commit any private information.

Next steps:
1. Set the DATABASE_URL in the .env file to point to your existing database. If your database has no tables yet, read https://pris.ly/d/getting-started
2. Set the provider of the datasource block in schema.prisma to match your database: postgresql, mysql, sqlite, sqlserver, mongodb or cockroachdb.
3. Run prisma db pull to turn your database schema into a Prisma schema.
4. Run prisma generate to generate the Prisma Client. You can then start querying your database.
5. Tip: Explore how you can extend the ORM with scalable connection pooling, global caching, and real-time database events. Read: https://pris.ly/cli/beyond-orm

More information in our documentation:
https://pris.ly/d/getting-started
これで profile/prisma/schema.prisma と .env が作成されます。
✅ ステップ3:スキーマ定義とマイグレーション
prisma/schema.prisma を編集:
datasource db {
  provider = "postgresql"
  url      = env("DATABASE_URL")
}

generator client {
  provider = "prisma-client-js"
}

model Profile {
  id     Int    @id @default(autoincrement())
  name   String
  title  String
  bio    String
}
.env ファイルに接続情報を記入(ローカル用)
DATABASE_URL=postgresql://ユーザー:パスワード@ホスト:5432/DB名
マイグレーション(=テーブル作成)+データ挿入(初期データをスクリプトで入れたい場合)
#Renderの外部から実行する場合は接続文字列に注意。
idtrm@otaskacyba MINGW64 ~/vscode/scacyba/profiledemo/backend (main)
$ npx prisma migrate dev --name init
Environment variables loaded from .env
Prisma schema loaded from prisma\schema.prisma
Datasource "db": PostgreSQL database "profile_db_xxxx", schema "public" at "xxxx.oregon-postgres.render.com"

Applying migration `20250514052805_init`

The following migration(s) have been created and applied from new schema changes:

migrations/
  └─ 20250514052805_init/
    └─ migration.sql

Your database is now in sync with your schema.

✔ Generated Prisma Client (v6.7.0) to .\generated\prisma in 122ms
Prismaの初期データ投入(seed.ts)
🧱 ステップ1:seed.ts を作成
backend/prisma/ フォルダ内に seed.ts ファイルを作成
// Prisma Client のパス('../generated/prisma'で出力先変更できるが、実体はdist 配下とか、不整合が起きてnpm run start:dev時にエラーになる。上級者向け)
import { PrismaClient } from '@prisma/client';

const prisma = new PrismaClient();

async function main() {
  await prisma.profile.create({
    data: {
      name: 'オオタスカシバコンサルタント',
      title: 'ITコンサルタント / エンジニア',
      bio: 'ミニマムITサポーター。製造業DX、アプリ開発、ネットワーク支援など幅広く対応しています。',
    },
  });
  console.log('✅ 初期データ投入完了');
}

main()
  .catch((e) => {
    console.error('❌ 初期データ投入失敗:', e);
    process.exit(1);
  })
  .finally(async () => {
    await prisma.$disconnect();
  });
ステップ2:backend/package.json に seed スクリプトを行追加
"scripts": {
  "seed": "ts-node prisma/seed.ts"
}
※ts-node がまだインストールされていない場合は:
npm install ts-node --save-dev
🚀 ステップ3:初期データ投入を実行
npm run seed
✅ ステップ4:GET /profile をDBから返すようにする
backend/src/profile/profile.service.tsを作成し、PrismaClient を使うようにします。
import { Injectable } from '@nestjs/common';
// Prisma Client のパス('../../generated/prisma'で出力先変更できるが、実体はdist 配下とか、不整合が起きてnpm run start:dev時にエラーになる。上級者向け)
import { PrismaClient } from '@prisma/client';

@Injectable()
export class ProfileService {
  private prisma = new PrismaClient();

  async getProfile() {
    try {
      const profile = await this.prisma.profile.findFirst();
      if (profile) return profile;

      return this.defaultProfile();
    } catch (error) {
      console.error('DB接続エラー:', error);
      return this.defaultProfile();
    }
  }

  private defaultProfile() {
    return {
      name: 'オオタスカシバコンサルタント',
      title: 'ITコンサルタント / エンジニア',
      bio: '(DB接続に失敗したため仮データを表示しています。不明点はお問い合わせからご連絡ください。https://refootaskacyba.com/)',
    };
  }
}
profile.controller.ts を以下のように修正:
import { Controller, Get } from '@nestjs/common';
import { ProfileService } from './profile.service';

@Controller('profile')
export class ProfileController {
  constructor(private readonly profileService: ProfileService) {}

  @Get()
  async getProfile() {
    return this.profileService.getProfile();
  }
}
app.module.ts にサービス登録:
import { Module } from '@nestjs/common';
import { ProfileController } from './profile/profile.controller';
import { ProfileService } from './profile/profile.service';

@Module({
  imports: [],
  controllers: [ProfileController],
  providers: [ProfileService], // ← これを忘れず追加
})
export class AppModule {}
✅ ステップ5:Renderへの環境変数設定+ビルド
Render の Web Service の画面に戻り:
「Environment」タブを開く
DATABASE_URL に接続文字列を追加。Render内部用の接続文字列を指定。

pushしてビルド後に動作確認。
ビルドでエラーになった。
Error: Cannot find module '/opt/render/project/src/backend/dist/main'
https://zenn.dev/cykinso/articles/3c7d590ca1dab1
tsconfig.build.json に build 対象外にする設定 exclude がありますのでそちらに prisma ディレクトリを追加します。
確かにこれで動いた。
なにもいじったつもりはないのですよ。。。前回のビルドでは行けてた。
ChatGPTに確認すると、
seed.ts は CLI実行前提で PrismaClient を呼び出すなど、Nestのライフサイクル外で動く処理
なので、除外しないとビルドがおかしなことになるんだって。
確かに、seed.tsを追加する前のビルドは動いていた気もする。
ここまで2H
学習コスト
休憩含めて3.5時間
次はデータ編集できるようにする。