概要
ここにあるように簡単なTypescriptの環境設定を行った後、次にTypescriptからThree.jsの機能を使えるように設定して簡単な3Dプログラムを実行してみました。 その記録です。 今回もほとんどコマンドラインからの操作で作業を行っています。 WebGLの機能を使用しているので要WebGLです。
使用したPCの環境は64bit版のWindows7ですが、ここから先は主にnpmから使える機能とJavascript・HTMLといった技術しか使用していないので、他の環境でも参考になるかもです。
Typingsのインストールと、TypingsによるThree.jsのtsd設定
TypescriptからThree.jsを使用できるようにするためにThree.jsの型の定義を取得・設定しています。 Typescript用の型定義の取得・設定には、前は tsd というものが使用されていたようですが、最近は Typings というものが使用されるようなのでそちらを使うようにしてみました。
まずTypingsの機能をnpmでインストール後、まだTypingsへ対応しきれていないということらしいので、Typings機能で古いtsdによる型定義を取得・設定するということを行っています。
以下コマンドでTypingsの機能をグローバルインストール(自PCのどこからでも使えるように)しました。
npm install -g typings
以下の型定義を検索するコマンドはどちらも使えましたが、実際に型定義をインストールするときはは --ambient を使用したものしか使えませんでした。 --ambient は古い tsd による型定義を検索したりインストールする場合に使用するようです。
typings search three
または
typings search three --ambient
次に、作業用のフォルダ(自分の場合は...\Typescript\TypingAppTest)で、以下のコマンドでtsdによる型定義をインストールしました。
typings install three --save --ambient
型定義は three.js r74 のものがインストールされました。
TypescriptによるThree.js機能の使用
作業用のフォルダを作成して、ソースコードを書いて実行させます。
すでに上記の型定義インストールのところにでてきましたが、自分の環境では以下のように作業フォルダを作成し、
mkdir Typescript
cd Typescript
mkdir TypingAppTest
cd TypingAppTest
そのフォルダに型定義インストール後、Typescriptファイル、Typescriptファイルから生成されたJavascriptファイル、そのJavascriptを取込・表示するHTMLファイル、の3つのソースコードを作成・配置しました。
インストールされた型定義情報は ...\Typescript\TypingAppTest 内に作成される typings フォルダに収められています。 また typings.json というファイルも関連して作成されます。
まとめると作業用フォルダ ...\Typescript\TypingAppTest は以下のものを含んでいる状態です。
型定義関連:
フォルダ typings
ファイル typings.json
ソースコード:
ファイル threeJSTypingTest.ts
ファイル threeJSTypingTest.js
ファイル index.html
以下ソースコードの内容です。
threeJSTypingTest.tsは
/// <reference path="./typings/main.d.ts" />
表記で型定義ファイルを読み込んでいます。
/// <reference path="./typings/main.d.ts" />

class ThreeJSTest {

    private scene: THREE.Scene;
    private camera: THREE.Camera;
    private renderer: THREE.WebGLRenderer;
    private geometry: THREE.Geometry;
    private material: THREE.Material;
    private cube: THREE.Mesh;

    constructor() {

        // レンダラーを作成
        this.createRenderer();
        // シーンを作成
        this.createScene();

    }

    private createRenderer(){
        // WebGL レンダラーを作成
        this.renderer = new THREE.WebGLRenderer();
        // サイズの設定
        this.renderer.setSize( window.innerWidth, window.innerHeight );
        document.body.appendChild( this.renderer.domElement );

    }

    private createScene(){

        // シーン (空間) を作成
        this.scene = new THREE.Scene();

        // 立方体のジオメトリーを作成
        this.geometry = new THREE.BoxGeometry( 1, 1, 1 );
        // 緑のマテリアルを作成
        this.material = new THREE.MeshBasicMaterial( { color: 0x00ff00 } );
        // 上記作成のジオメトリーとマテリアルを合わせてメッシュを生成
        this.cube = new THREE.Mesh( this.geometry, this.material );
        // メッシュをシーンに追加
        this.scene.add( this.cube );

        // カメラを作成
        this.camera = new THREE.PerspectiveCamera( 75, window.innerWidth/window.innerHeight, 0.1, 1000 );
        // カメラ位置を設定
        this.camera.position.z = 5;

    }

    public render(){
        requestAnimationFrame(this.render.bind(this));

        // 立方体メッシュを自転
        this.cube.rotation.x += 0.1;
        this.cube.rotation.y += 0.1;

        // レンダリング
        this.renderer.render(this.scene, this.camera);
    }

}

// ウィンドウがロードされた時
window.addEventListener("load",function(){

    // アプリケーションの起動
    var threeJSTest = new ThreeJSTest();
    threeJSTest.render();

},false);
threeJSTypingTest.ts を tsc コマンドでコンパイルして threeJSTypingTest.js を生成
tsc threeJSTypingTest.ts
/// <reference path="./typings/main.d.ts" />
var ThreeJSTest = (function () {
    function ThreeJSTest() {
        // レンダラーを作成
        this.createRenderer();
        // シーンを作成
        this.createScene();
    }
    ThreeJSTest.prototype.createRenderer = function () {
        // WebGL レンダラーを作成
        this.renderer = new THREE.WebGLRenderer();
        // サイズの設定
        this.renderer.setSize(window.innerWidth, window.innerHeight);
        document.body.appendChild(this.renderer.domElement);
    };
    ThreeJSTest.prototype.createScene = function () {
        // シーン (空間) を作成
        this.scene = new THREE.Scene();
        // 立方体のジオメトリーを作成
        this.geometry = new THREE.BoxGeometry(1, 1, 1);
        // 緑のマテリアルを作成
        this.material = new THREE.MeshBasicMaterial({ color: 0x00ff00 });
        // 上記作成のジオメトリーとマテリアルを合わせてメッシュを生成
        this.cube = new THREE.Mesh(this.geometry, this.material);
        // メッシュをシーンに追加
        this.scene.add(this.cube);
        // カメラを作成
        this.camera = new THREE.PerspectiveCamera(75, window.innerWidth / window.innerHeight, 0.1, 1000);
        // カメラ位置を設定
        this.camera.position.z = 5;
    };
    ThreeJSTest.prototype.render = function () {
        requestAnimationFrame(this.render.bind(this));
        // 立方体メッシュを自転
        this.cube.rotation.x += 0.1;
        this.cube.rotation.y += 0.1;
        // レンダリング
        this.renderer.render(this.scene, this.camera);
    };
    return ThreeJSTest;
}());
// ウィンドウがロードされた時
window.addEventListener("load", function () {
    // アプリケーションの起動
    var threeJSTest = new ThreeJSTest();
    threeJSTest.render();
}, false);
変換した threeJSTypingTest.js を取込・表示する index.html を作成
<!DOCTYPE html>
<html>
  <head>
    <meta charset="UTF-8">
    	<title>My first Three.js app by Typescript</title>
		<style>
			body { margin: 0; }
			canvas { width: 100%; height: 100% }
		</style>
  </head>
  <body>
    <h1>Hello Typescript Three.js!</h1>
    <script src="https://cdnjs.cloudflare.com/ajax/libs/three.js/r74/three.min.js"></script>
    <script type="text/javascript" src="threeJSTypingTest.js">
    </script>
  </body>
</html>
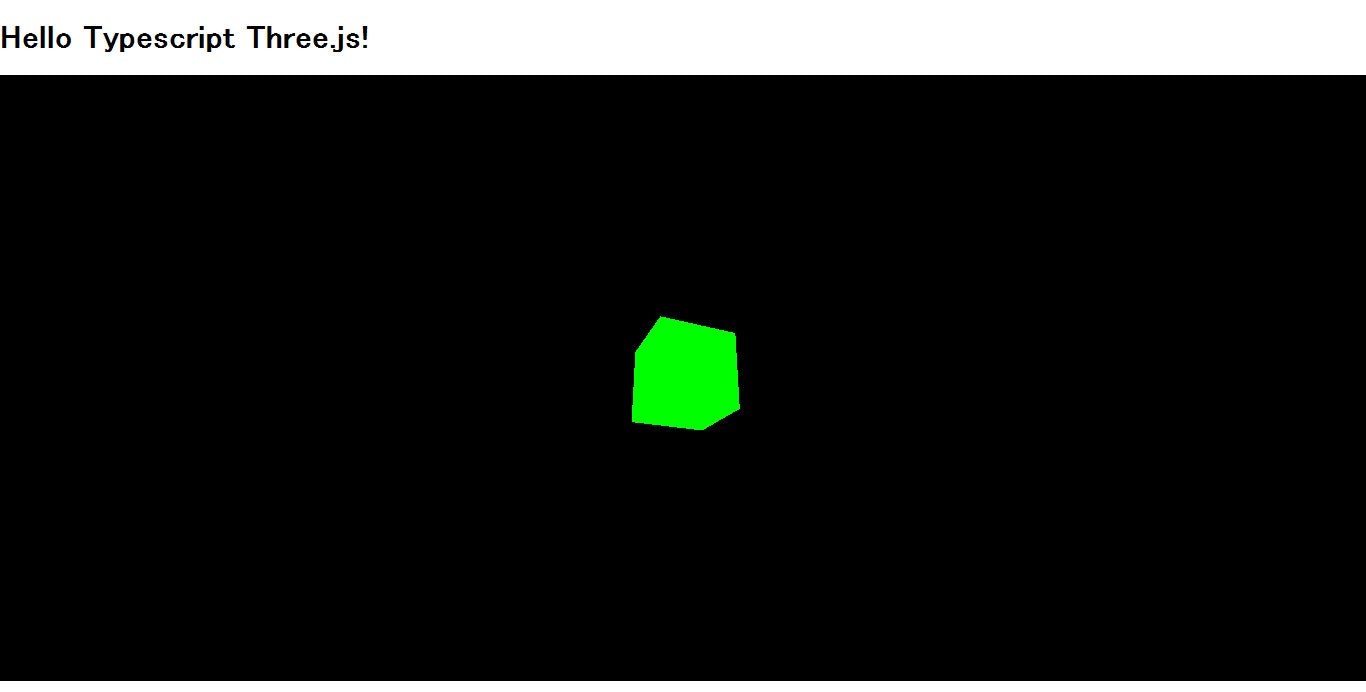
あとはindex.htmlを開くと以下のように表示されました。 表示に使用したブラウザはFirefoxのVer.45.0.1です。
少し改変しつつ、以下のコード投稿サイトにソースコードを置いてみました。 ソースコードが実際に実行されたものを見ることができると思います。
「typings」と「tsd」について参考にさせていただいたサイト
TypeScriptのtsdが非推奨になったので、typingsへ移行
TypeScriptの型定義管理ツールTypingsについて
TypeScriptのtsdがオワコンになったのでtypingsを使ってみた
TypeScriptの型定義はtsdからtypingsへ?
npmモジュールをTypeScriptで利用する(tsdによる型ファイル管理)
ソースコード作成時に参考にさせていただいたサイト
3D で遊ぼう ~C#er も TypeScript で楽々 WebGL~ ― 準備編
TypeScriptでthree.js
TypeScriptでThree.jsことはじめ
three.js / docs > Manual > Introduction
旧石器時代のJavaScriptを書いてる各位に告ぐ、現代的なJavaScript超入門 Section1 ~すぐにでも現代っぽく出来るワンポイントまとめ~
Plunkerについて参考にさせていただいたサイト
Plunkerでゲームをつくってブログに貼るよ
ブラウザでjavascriptを書いて実行できるオープンソースの jsbin と plunker について調べたのでまとめたよ ヽ(゚ー゚ヽ)(ノ゚ー゚)ノわぁい
Plunkerでフロントエンド学習
腕をアピール。オンラインでHTML/JavaScript/スタイルシートを編集、実行「Plunker」
サンドボックス評価:PlunkerとAngularJS
HTML5 開発環境の紹介
Plunker Twitter
