Cisco CMLで疎通確認に使用するAlpineサーバの設定方法です。
-
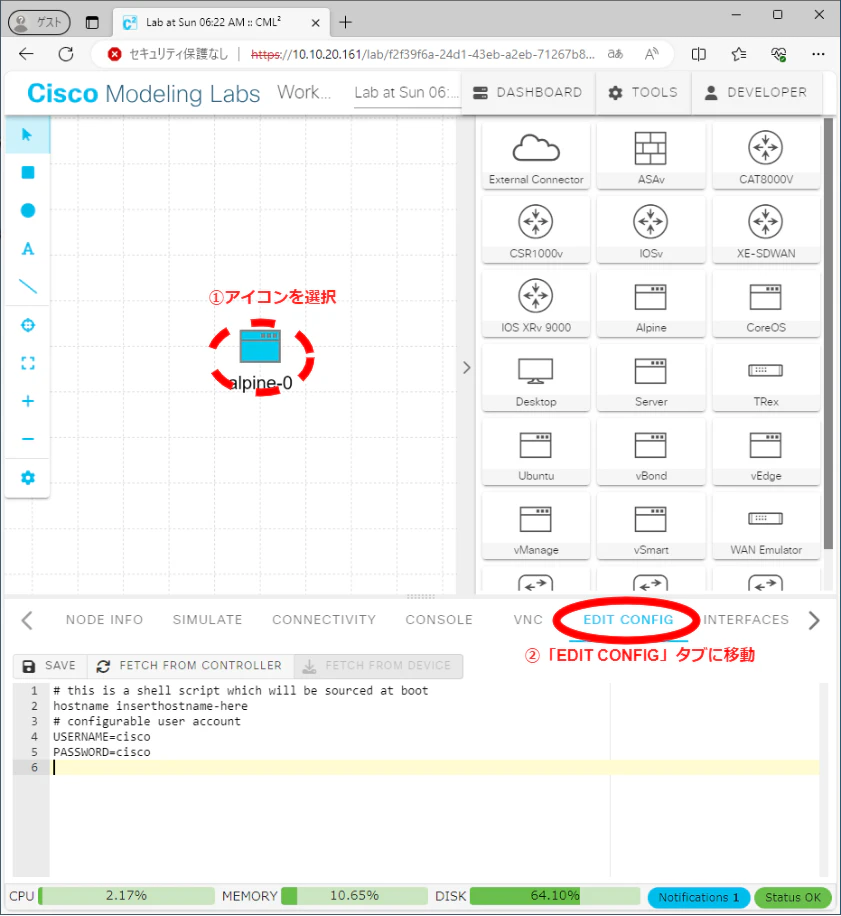
Alpineサーバを選択しLab上にドラッグ&ドロップ

-
ドラッグ&ドロップをしたAlpineを選択し、「EDIT CONFIG」タブに移動
-
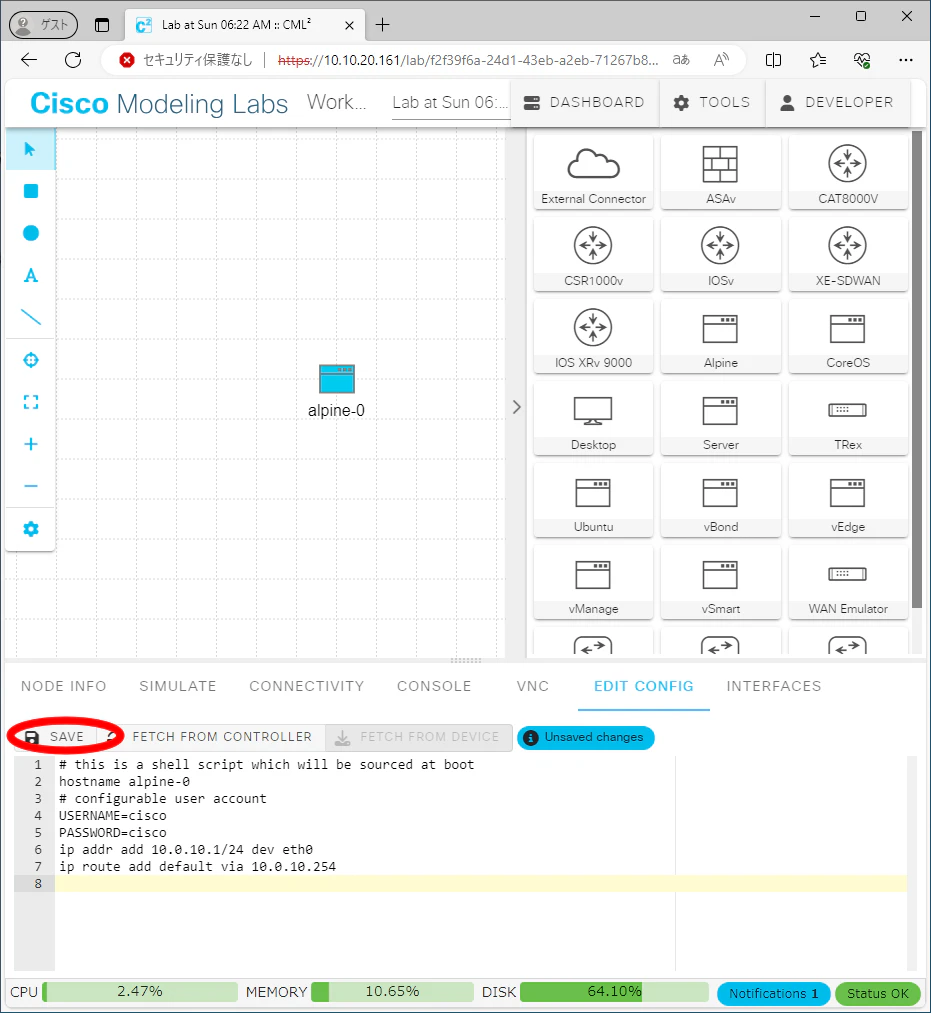
下部のEDIT CONFIG内を編集
デフォルト# this is a shell script which will be sourced at boot hostname inserthostname-here # configurable user account USERNAME=cisco PASSWORD=cisco変更後# this is a shell script which will be sourced at boot hostname alpine-0 ← ※任意のホスト名に変更 # configurable user account USERNAME=cisco PASSWORD=cisco ip addr add 10.0.10.1/24 dev eth0 ← IPアドレスを設定 ip route add default via 10.0.10.254 ← デフォルトルートを設定設定変更後[SAVE]で保存
-
アイコンを右クリックして[Start]で起動すると設定したIPで立ち上がります
 IP設定確認
alpine-0:~$ ip address show eth0 2: eth0: <BROADCAST,MULTICAST,UP,LOWER_UP> mtu 1500 qdisc pfifo_fast state UP qlen 1000 link/ether 52:54:00:13:61:11 brd ff:ff:ff:ff:ff:ff inet 10.0.10.1/24 scope global eth0 valid_lft forever preferred_lft forever inet6 fe80::5054:ff:fe13:6111/64 scope link valid_lft forever preferred_lft foreverルーティング設定確認alpine-0:~$ ip route show default via 10.0.10.254 dev eth0 10.0.10.0/24 dev eth0 scope link src 10.0.10.1