本記事は趣味で作っている以下のPythonのフロントエンドライブラリのドキュメント整備用のSpinx関係について備忘録としてまとめた記事となります。
主に以下のような内容について触れていきます。
- Sphinxなどのインストール
- Sphinxの基本設定の反映
- ダークテーマの反映
- マークダウンの有効化
- マークダウンでの表の有効化
- GitHub Pagesの検証と利用
使う環境
ライブラリがPython3.6以降のサポートとしているため、python:3.6.12-busterのPythonバージョン + Linuxのイメージを利用しています。
Sphinxのインストール
Sphinxは本記事執筆時点で最新のPyPIの4.0.2のバージョンを使用していってみます。お仕事では3.4.0のバージョンを使っているためメジャーバージョンを上げた形での利用となりますのでどういった感じで変わっているかなど(躓く点など)も確認しつつ進めます。
Sphinx自体はpipでインストールが効きます。
$ pip install Sphinx==4.0.2
とくに引っかかることなくインストールされました。
Successfully installed Jinja2-3.0.1 MarkupSafe-2.0.1 Sphinx-4.0.2 alabaster-0.7.12 babel-2.9.1 imagesize-1.2.0 pytz-2021.1 snowballstemmer-2.1.0 sphinxcontrib-applehelp-1.0.2 sphinxcontrib-devhelp-1.0.2 sphinxcontrib-htmlhelp-2.0.0 sphinxcontrib-jsmath-1.0.1 sphinxcontrib-qthelp-1.0.3 sphinxcontrib-serializinghtml-1.1.5
リポジトリ直下にdocフォルダを追加する
Pandasなど含め他のライブラリリポジトリのように、リポジトリ直下にdocフォルダを追加しておきます。
また、そちらのディレクトリに移動しておきます。
$ cd doc
Sphinxのクイックスタートのコマンドを実行する
とても親切なことに、Sphixでクイックスタート用のコマンドが用意されていますのでそちらを実行します。なんだか使っているSphinxの影響なのか私の使っているPowershellとかコンテナの影響なのか、最後の質問の行(y/nとかの説明など)が表示されてなくない・・・?と思いましたがあまり気にせず進めます。
$ sphinx-quickstart
Welcome to the Sphinx 4.0.2 quickstart utility.

Please enter values for the following settings (just press Enter to
accept a default value, if one is given in brackets).

Selected root path: .

You have two options for placing the build directory for Sphinx output.
Either, you use a directory "_build" within the root path, or you separate
"source" and "build" directories within the root path.

>>> y
sourceと_buildのディレクトリ分ける?と聞かれるのでここは分ける形でyを入力しておきます。
The project name will occur in several places in the built documentation.

>>> apysc
ここはapyscと入れて進めました。何だか1度エラーになったのですが、再度入力したら普通に通ったのでそのまま進めます。
If the documents are to be written in a language other than English,
you can select a language here by its language code. Sphinx will then
translate text that it generates into that language.

For a list of supported codes, see
https://www.sphinx-doc.org/en/master/usage/configuration.html#confval-language.
ドキュメントの言語設定ですが、OSSのライブラリとなるので一旦普通に英語のままで進めます。
これで色々出力されてクイックスタートはひとまずは完了です。
Creating file /mnt/apysc/doc/source/conf.py.
Creating file /mnt/apysc/doc/source/index.rst.
Creating file /mnt/apysc/doc/Makefile.
Creating file /mnt/apysc/doc/make.bat.

Finished: An initial directory structure has been created.

You should now populate your master file /mnt/apysc/doc/source/index.rst and create other documentation
source files. Use the Makefile to build the docs, like so:
   make builder
where "builder" is one of the supported builders, e.g. html, latex or linkcheck.
とりあえずビルドしてみる
ルートディレクトリとして設定したdocディレクトリ直下にmake.batなどのファイルが出力されているのでdocディレクトリ内で以下のコマンドでHTMLファイルを出力できます。現状ではまだindex.rstからHTMLが生成されていますが、後でマークダウン対応します。
$ make html
Running Sphinx v4.0.2
making output directory... done
building [mo]: targets for 0 po files that are out of date
building [html]: targets for 1 source files that are out of date
updating environment: [new config] 1 added, 0 changed, 0 removed
reading sources... [100%] index
looking for now-outdated files... none found
pickling environment... done
checking consistency... done
preparing documents... done
writing output... [100%] index
generating indices... genindex done
writing additional pages... search done
copying static files... done
copying extra files... done
dumping search index in English (code: en)... done
dumping object inventory... done
build succeeded.
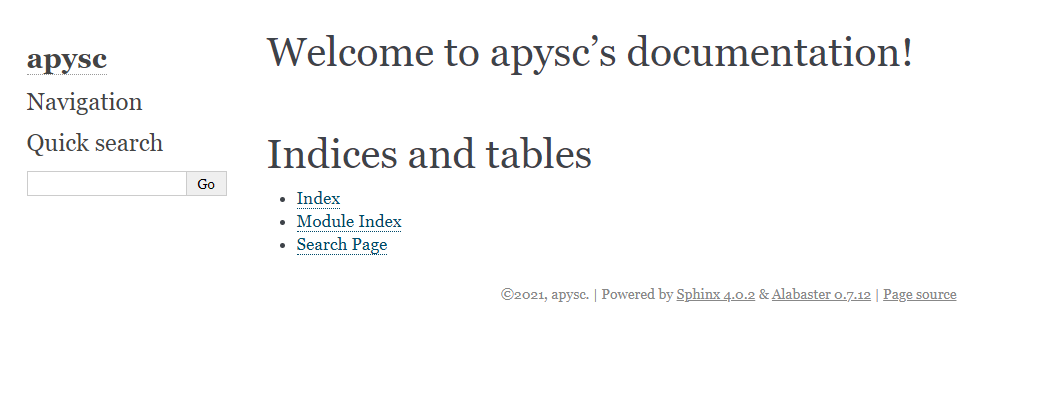
doc/build/html/以下にHTMLファイルなどが出力されます。index.htmlを開いてみると以下のようなページになっています。
まだこの段階だと非常にシンプルな内容ですね。
一旦GitHub Pagesで公開できるか確認してみる
出力されたドキュメントがGitHub Pagesで表示などができるか試していきます。mainブランチにビルド結果などの内容を反映しておきます。
続いてGitHub Pagesのガイドラインや制限事項などに目を通します。特に問題なさそうなので次に進みます。
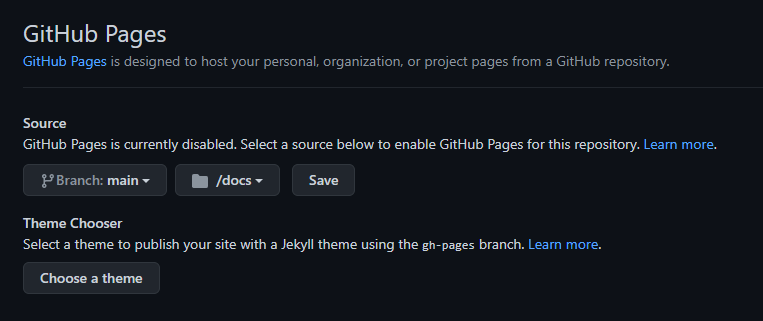
Pagesの設定をします。Settings -> PagesのメニューをクリックしてPages設定のページに移動します。
ブランチにmainを選んで、ディレクトリにdocsを選びます。テーマは後々調整するかもしれませんが一旦そのまま進めます。
なにやらActionsが追加・実行されているようですがエラーになりました。よくよく見るとPages的にdocではなくdocsという名前じゃないと駄目なようです。
docフォルダをdocsにリネームして再度mainブランチに反映して進めます。
今度はPagesに反映されました。
https://simon-ritchie.github.io/apysc/build/html/index.html といったページに現時点でアクセスすると以下のようになりました(このページは後の作業で削除します)。
見栄えがちょっと残念な感じですがとりあえず表示できました。以下のような問題があるので1つずつ修正していきます。
- CSSなどが反映されていない。
- URLがPagesに向いた形になっていない( https://simon-ritchie.github.io/apysc/index.html といったように無駄の無いパスにしたい)。
PagesのURL用に出力先などを調整する
URLがPagesに向いた形になっていないのを直していきます。
出力先のパス設定などを行うため、以下のような対応をしようと思います。
- 既存のdocsフォルダをdocs_srcにリネーム。
- 制御用のPythonスクリプトを追加する。
- スクリプトからSphinxのビルドコマンドの実行や、build/htmlディレクトリ以下をdocsディレクトリに配置する。
- build以下のディレクトリはGit管理外にしておく。
まずは既存のdocsフォルダはビルド結果のhtmlフォルダ以下の内容を直接配置するようにするため、ドキュメントソースはdocs_srcという名前にリネームします。
続いて以下のようなPythonスクリプトを書いて、コマンドから実行できるようにします。
"""Documentations build script.

Command example:
$ python build_docs.py
"""

import os
import shutil
import subprocess as sp
from logging import Logger

from apysc.console import loggers

logger: Logger = loggers.get_info_logger()


def _main() -> None:
    """Entry point of this command.
    """
    logger.info(msg='Sphix build command started...')
    os.chdir('./docs_src/')
    complete_process: sp.CompletedProcess = sp.run(
        'make html', shell=True,
        stdout=sp.PIPE, stderr=sp.STDOUT)
    stdout: str = complete_process.stdout.decode('utf-8')
    print(stdout)

    logger.info(msg='Moving documentation to docs directory...')
    os.chdir('../')
    shutil.rmtree('./docs/', ignore_errors=True)
    shutil.copytree(src='./docs_src/build/html/', dst='./docs/')

    logger.info(msg='Build completed!')


if __name__ == '__main__':
    _main()
やっていることとしては
- Spinxのビルドコマンドを実行
- docsフォルダが存在(古いビルドファイルが残っている)すれば一旦削除
-
docs_src/build/html以下の内容なdocs以下に移動
とさせているだけです。実行するとdocs以下にindex.htmlなどが配置されるようになります。
あとは不要になった移動前のdocs_src/build/htmlを.gitignoreに無視フォルダとして追加しておきます。
これでmainリポジトリに反映すると https://simon-ritchie.github.io/apysc/index.html といったシンプルなURLでドキュメントにアクセスできるようになります。
GitHub Pages にCSSが反映されるようにする
SphinxでビルドしたものにGitHub PagesでCSSが反映されるようにしていきます。それ用のSphinxの拡張機能があるようなのでそちらを利用していきます。
docs_src/source/以下にconf.pyというSphinxの設定ファイルが生成されているのでそちらを編集していきます。extensionsという変数にGitHub Pages用のsphinx.ext.githubpagesという指定を追加してみます。
# Add any Sphinx extension module names here, as strings. They can be
# extensions coming with Sphinx (named 'sphinx.ext.*') or your custom
# ones.
extensions = [
    'sphinx.ext.githubpages',
]
この設定を追加した状態でbuild_docs.pyのビルドなどのためのスクリプトを再実行してみます。
そうすると出力結果にdocs/.nojekyllというファイルが追加になっていることが確認できます。これがどうやらGitHub Pages用に必要なようです。ただしこれでもなんだかうまくいきません(_staticなどのフォルダ以下が404になります)。
.nojekyllというファイルがあればアンダースコアが付いているパスも認識してくれる・・・と書かれている記事が見受けられるものの、今は変わったのでしょうか・・・?
参考 :
GitHub Pages では、アンダーバーを接頭辞として持つディレクトリを公開できない。
...
Sphinx は標準では _static/ などのディレクトリに CSSファイルを書き出すので、対策が必要。
しょうがないので、アンダースコアがそもそも設定されない形で対応する方向を試してみます。以下の記事のものを使ってもいいですし、やることは多くないので今回は自前で置換処理を書いてしまいます。
...

def _main() -> None:
    """Entry point of this command.
    """
    ...
    logger.info(msg='Replacing `_static` paths by `static`...')
    _replace_static_path()
    ...


def _replace_static_path() -> None:
    """
    Replace document `_static` paths by `static`.
    """
    shutil.move(src='./docs/_static/', dst='./docs/static/')
    _replace_static_path_recursively(dir_path='./docs/')


def _replace_static_path_recursively(dir_path: str) -> None:
    """
    Replace each files' `_static` paths by `static`.

    Parameters
    ----------
    dir_path : str
        Target directory path.
    """
    file_or_dir_names: List[str] = os.listdir(dir_path)
    file_extensions: List[str] = ['.html', '.js']
    for file_or_dir_name in file_or_dir_names:
        file_or_dir_path: str = os.path.join(dir_path, file_or_dir_name)
        if os.path.isdir(file_or_dir_path):
            _replace_static_path_recursively(dir_path=file_or_dir_path)
            continue
        extension: str = os.path.splitext(file_or_dir_path)[1]
        if extension not in file_extensions:
            continue
        with open(file_or_dir_path) as f:
            file_txt: str = f.read()
        file_txt = file_txt.replace('_static', 'static')
        with open(file_or_dir_path, 'w') as f:
            f.write(file_txt)
やっていることとしては
-
docs/_static/のフォルダをdocs/static/にリネーム -
docs/以下のhtmlとjsファイル内に記述されている_staticをstaticに置換
の処理だけです。これで再度ビルドしたのちにmainブランチに反映し、GitHub上のindex.html( https://simon-ritchie.github.io/apysc/index.html )を確認してみると正常にCSSが反映されていることが確認できました。
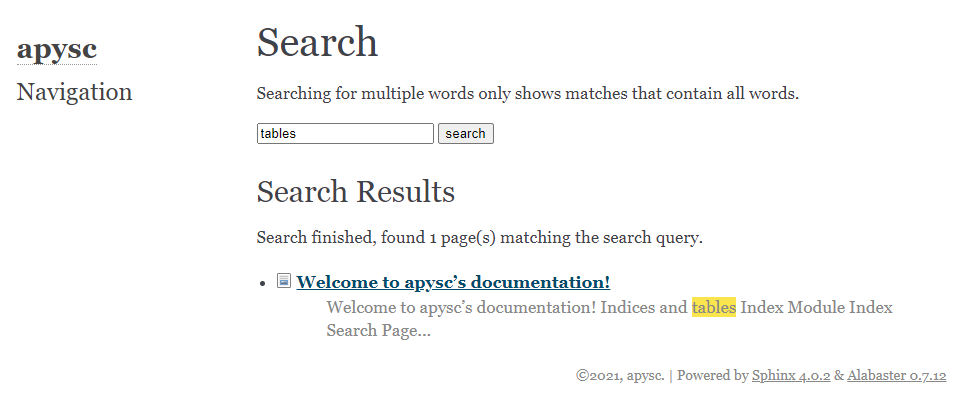
検索などをしてみても動いていることが確認できます。
テーマを反映する
ダークテーマが好きなので公開されているテーマを反映していきます。
今回はgroundwork-sphinx-themeというテーマを利用していきます。
まずはpipでインストールします。
$ pip install groundwork-sphinx-theme==1.1.1
続いてconf.pyのhtml_themeという設定値をgroundworkにします。
html_theme: str = 'groundwork'
再度ビルドするとテーマが反映されています。
※他のテーマは色々ギャラリーが公開されているのでdemoページなどをご確認ください。
マークダウンに対応する
ドキュメントはマークダウンで書けると慣れているので個人的に楽です。ということでSphinxでマークダウン対応していきましょう。
参考 :
まずは commonmark と recommonmark というライブラリが必要になるのでそれぞれインストールしていきます。
$ pip install commonmark==0.9.1
$ pip install recommonmark==0.7.1
インストールが終わったらconf.pyにマークダウン用の設定を追加していきます。
まずは必要なもののimportを加えます。
from recommonmark.parser import CommonMarkParser
拡張機能としてrecommonmarkの指定が必要になるので追加します。
extensions: List[str] = [
    'recommonmark',
]
また、マークダウン周りの設定とマークダウンのパーサーとしてCommonMarkParserを指定する必要があるのでそちらの設定を加えます。一部の設定が古くSphinxのバージョンだとリストだったものが辞書になったりはしているようです。
ource_suffix: Dict[str, str] = {
    '.rst': 'restructuredtext',
    '.md': 'markdown',
}

source_parsers: Dict[str, type] = {
    '.md': CommonMarkParser,
}
これでマークダウンを利用する準備整ったので実際に試してみます。index.rstを削除してindex.mdというファイルを追加し、以下の最低限のマークダウンの内容を記述します。
# apysc documentation

Welcome to apysc's documentation!
ビルドして内容を確認してみます。
マークダウンの内容が反映されていることが確認できました。
マークダウンの表を対応する
そのままだとマークダウンの表の記法が使えないので対応します。sphinx-markdown-tablesというライブラリを使います。
pipでインストールします。
$ pip install sphinx-markdown-tables==0.0.15
拡張機能の指定にsphinx_markdown_tablesを追加します。
extensions: List[str] = [
    'recommonmark',
    'sphinx_markdown_tables',
]
index.mdに適当を表を追加してビルドしてみます。
# apysc documentation

Welcome to apysc's documentation!

| a       | b    |
| ------- | ---- |
| aaa     | bbb  |
| ccccccc | dddd |
反映されました。大丈夫そうです。
参考文献・参考サイトまとめ


