やりたいことのイメージ
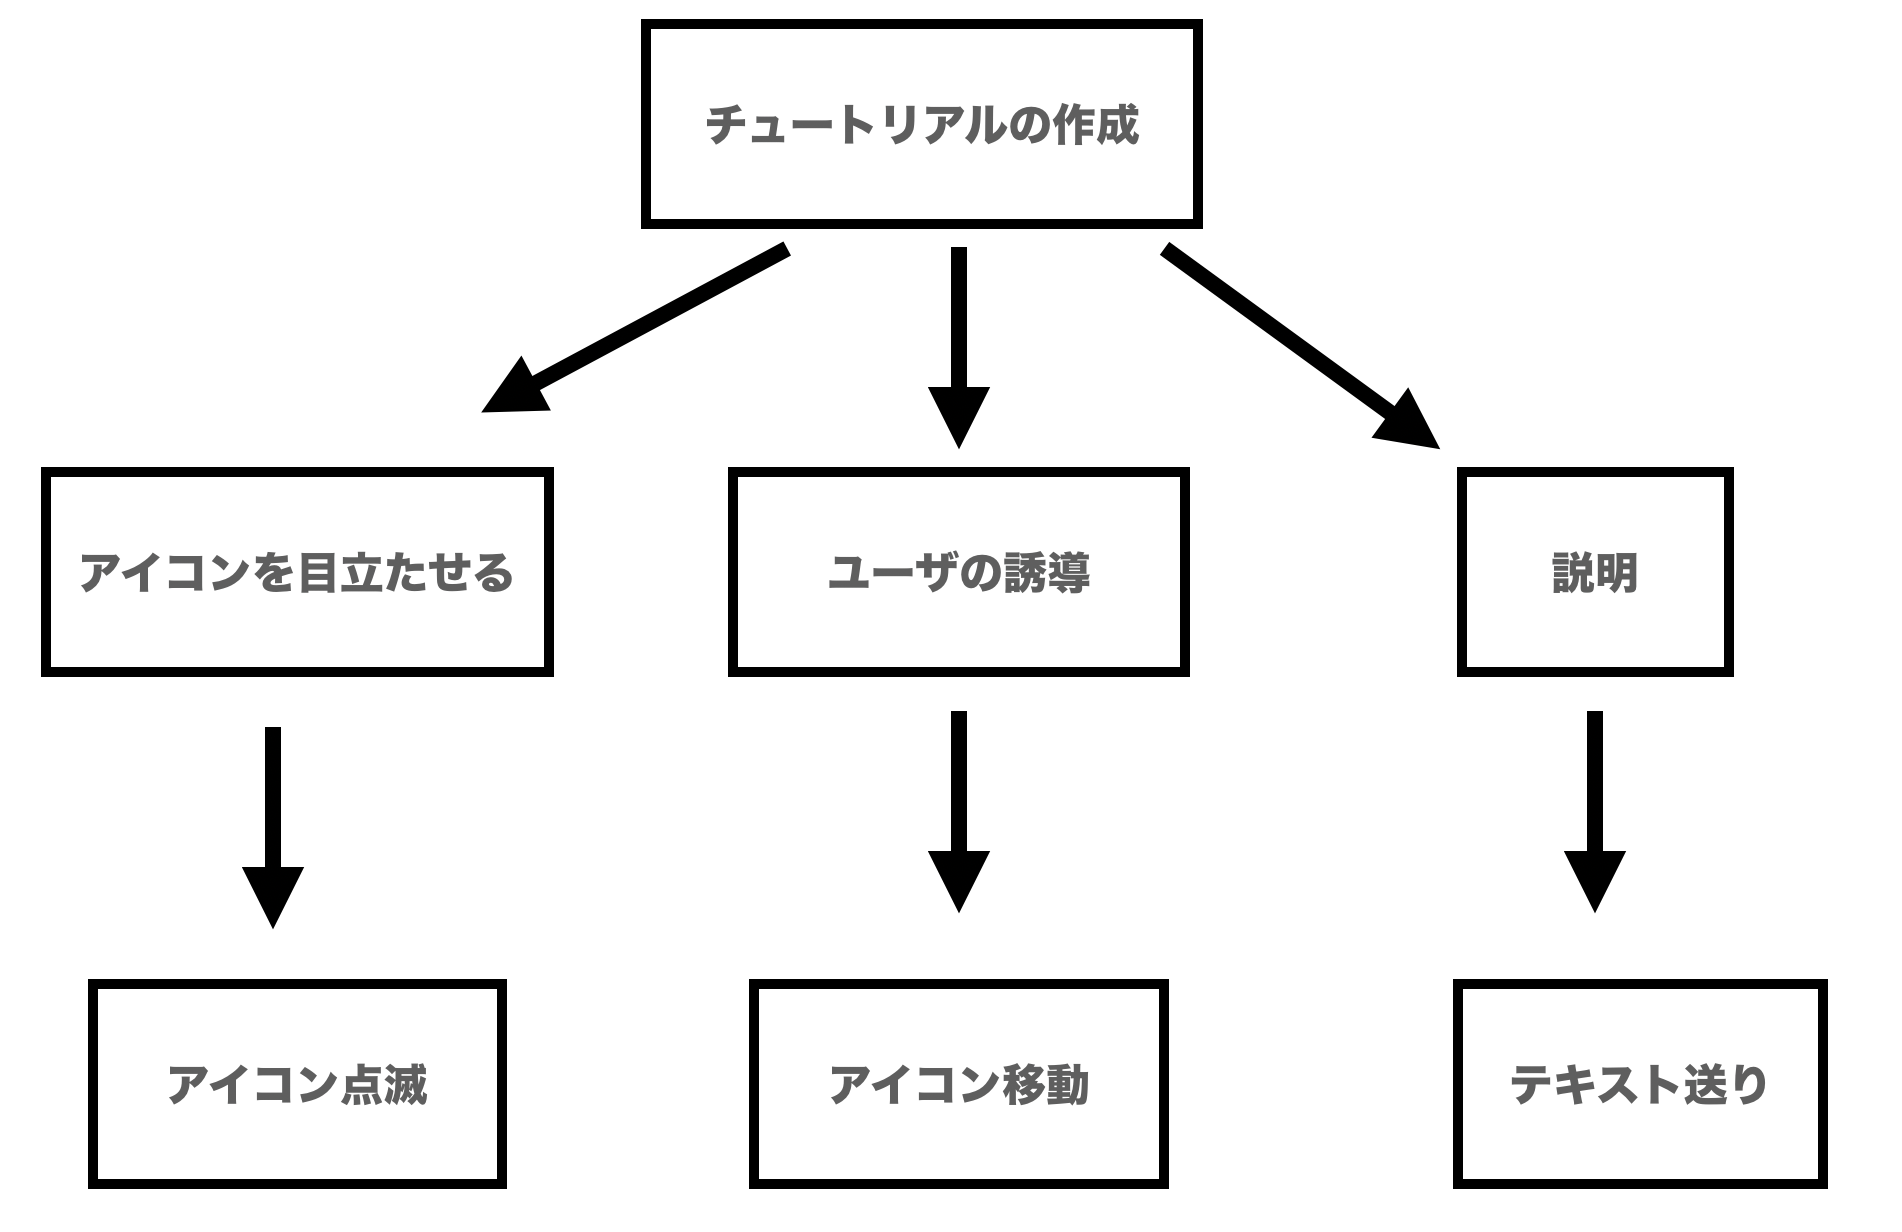
実装一覧
・テキスト送り
・テキスト送り後クリックアイコンを表示
・クリックアイコンの点滅
・ボタンを押せばクリックアイコンが移動
階層
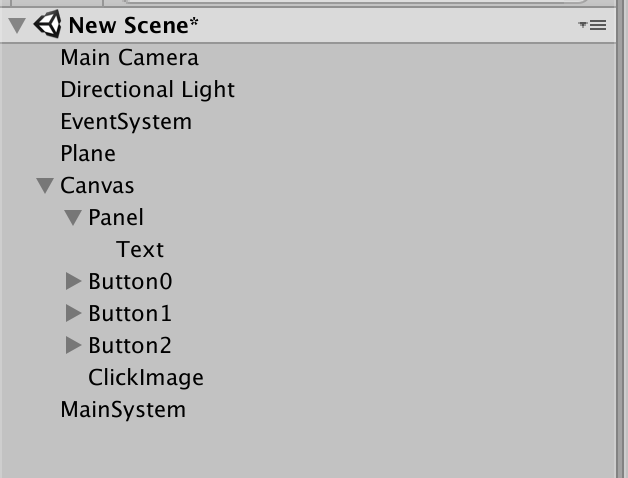
テキスト送り
・Panelを作成
・PanelにTextを作成
TextController.cs
using System.Collections;
using System.Collections.Generic;
using UnityEngine;
using UnityEngine.UI;

public class TextController : MonoBehaviour {

    string[] sentences; // 文章を格納する
    [SerializeField] Text uiText;   // uiTextへの参照

    [SerializeField][Range(0.001f, 0.3f)]
    float intervalForCharDisplay = 0.05f;   // 1文字の表示にかける時間

    private int currentSentenceNum = 0; //現在表示している文章番号
    private string currentSentence = string.Empty;  // 現在の文字列
    private float timeUntilDisplay = 0;     // 表示にかかる時間
    private float timeBeganDisplay = 1;         // 文字列の表示を開始した時間
    private int lastUpdateCharCount = -1;       // 表示中の文字数

    public bool finished;
    void Start () {
    	sentences = new string[]{
    		"みなさんこんにちは",
    		"スタジオしまづの嶋津です",
    	};
        SetNextSentence ();
    }


    public void TextUpdate(bool _IsPush) {
        // 文章の表示完了 / 未完了
        if (IsDisplayComplete ()) {
            //最後の文章ではない & ボタンが押された
            if (currentSentenceNum < sentences.Length && _IsPush) {
                SetNextSentence ();
            }
            else if(currentSentenceNum >= sentences.Length){
            	finished = true;
                currentSentenceNum = 0;
            }
        } else {
            if (_IsPush) {
                timeUntilDisplay = 0; //※1
            }
        }

        //表示される文字数を計算
        int displayCharCount = (int)(Mathf.Clamp01((Time.time - timeBeganDisplay) / timeUntilDisplay) * currentSentence.Length);
        //表示される文字数が表示している文字数と違う
        if (displayCharCount != lastUpdateCharCount) {
            uiText.text = currentSentence.Substring (0, displayCharCount);
            //表示している文字数の更新
            lastUpdateCharCount = displayCharCount;
        }
    }

    // 次の文章をセットする
    void SetNextSentence(){
        currentSentence = sentences [currentSentenceNum];
        timeUntilDisplay = currentSentence.Length * intervalForCharDisplay;
        timeBeganDisplay = Time.time;
        currentSentenceNum++;
        lastUpdateCharCount = 0;
    }

    bool IsDisplayComplete(){
        return Time.time > timeBeganDisplay + timeUntilDisplay; //※2
    }
}
以下のようにUiTextに表示したいTextを設定
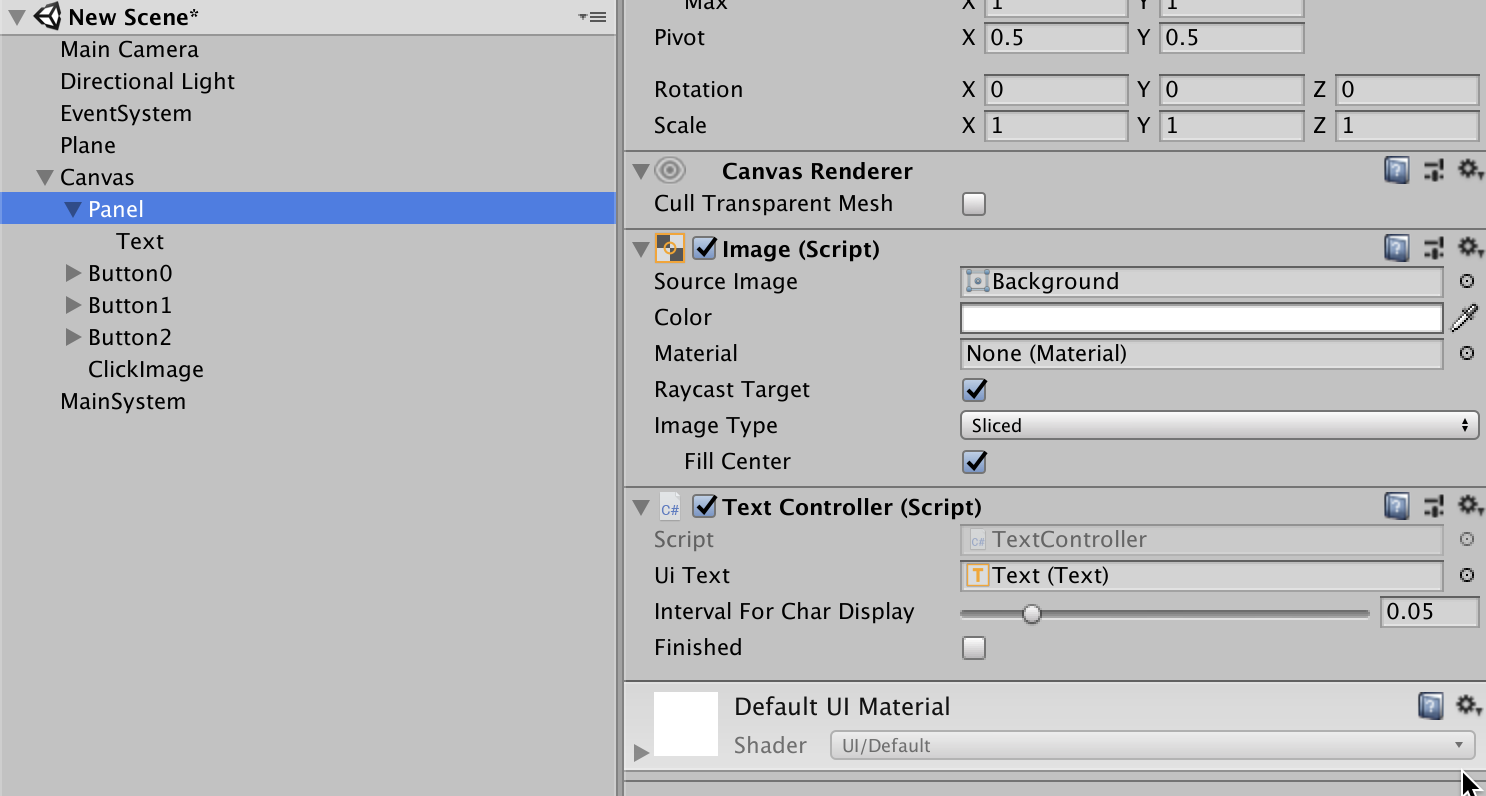
・Textにボタンを設定
クリックアイコン
・ClickImageを作成
ClickController.cs
using System.Collections;
using System.Collections.Generic;
using UnityEngine;
using UnityEngine.UI;

public class ClickController : MonoBehaviour {
	Image clickImage;
	int phase;
	List<Vector3> position = new List<Vector3>(){
		new Vector3(-330,147,0),
		new Vector3(0,147,0),
		new Vector3(330,147,0),
	};

	// Use this for initialization
	void Start () {
		phase = -1;
		clickImage = GetComponent<Image>();
		clickImage.enabled = false;
	}
	void Update(){
		clickImage.color = new Color(1,1,1, Mathf.PingPong(Time.time,1));
	}
	void ViewClickImage(int _phase){
		if(_phase>=position.Count){
			_phase = -1;
			clickImage.enabled = false;
			return;
		}
		this.transform.localPosition = position[_phase];
		clickImage.enabled = true;
	}

	public void ViewClickIcon(){
		phase = 0;
		ViewClickImage(phase);
	}
	public void PushButton(int _number){
		if(_number != phase){
			return;
		}
		phase++;
		ViewClickImage(phase);
	}
}
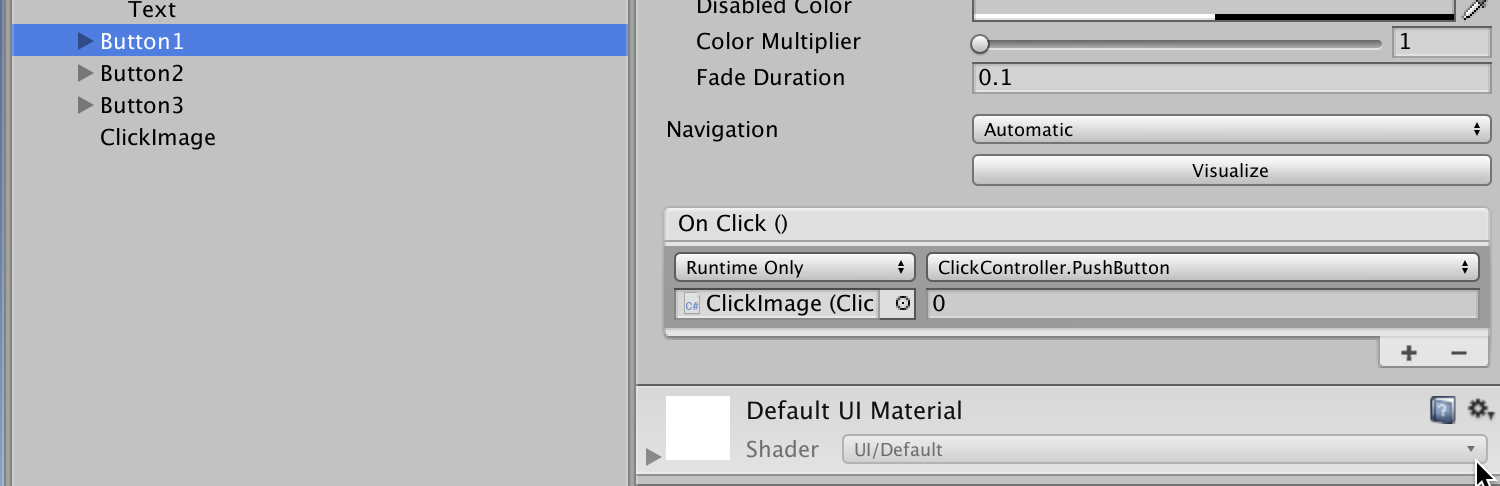
・ボタンを3つ作成
・それぞれのボタンのOnClickに設定
GameMainSystem
・テキスト送りの開始を管理
・クリックアイコンの表示タイミングを管理
GameMainSystem.cs
using System.Collections;
using System.Collections.Generic;
using UnityEngine;
using UnityEngine.UI;

public class GameMainSystem : MonoBehaviour {
    [SerializeField]
    TextController textController;
    bool IsTextPush = false;
    [SerializeField]
    ClickController clickController;
    void Update(){
    	if(textController.finished){
    		textController.finished = false;
    		clickController.ViewClickIcon();
    		return;
    	}
        textController.TextUpdate(IsTextPush);
        IsTextPush = false;
    }
    public void PushText(){
        IsTextPush = true;
    }
}
・それぞれ設定
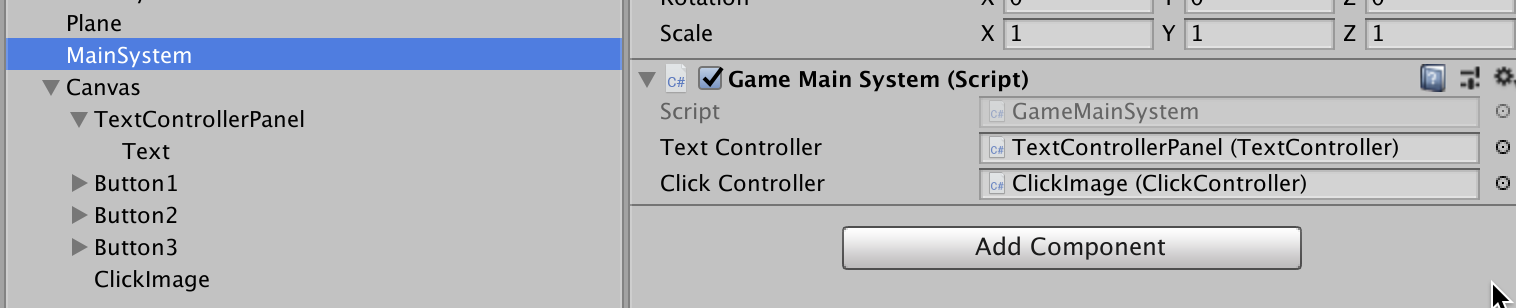
・Textに設定したボタンでPushTextが発動するように設定
おまけ
チュートリアルの作り方は色々あると思います。どれが正解かはわかりませんが、自分はコマンドクラフトというゲームでこれらのテクニックを使いました。その結果前作にあった「チュートリアルがひどい」というコメントは0件になりました。
何かの役に立てればと思います^^
スタジオしまづでゲームの作り方を学びたい人向けのサロン▶︎https://camp-fire.jp/projects/view/149191