背景
過去の自分記事で色々Cognitoを調べていたりしました。
その時には、他のQiita記事を参考にログイン画面を作成していましたが、どうやらAWS側で公式UIを提供している事を知りました。
ログイン画面ではパスワード再発行や初期パスワード入力した後の新パスワード入力など、何気に色々な制御が必要です。セキュリティを担う部分なのでオレオレ実装は避けたいです。公式のフロントモジュールを使って置き換えたいと思った事がきっかけになります。
この記事では、基本的な使い方の確認までをしていこうと思います。
内容確認
前述公式ページ「Get started – one-click hosting」にある「DEPLOY TO AMPLIFY HOSTING」のボタンを押すと、githubのアカウントにリポジトリを作ってAWSアカウント内にデプロイするっぽいです。さすがに内容解らずに作られるのは怖いので、出来るだけ確認してみます。
ボタンのリンクURLをみてみます。
https://console.aws.amazon.com/amplify/home#/deploy?repo=https://github.com/swaminator/cra-starter
下記リポジトリの内容をamplifyでデプロイするという事の様です。
さらっとソース見た限り、Reactプロジェクトの初期ページの様な感じです。
まずはAmplifyの概要確認
ちょっとまずはAmplifyがどの様な流れでアプリを構築するのか把握しておいた方が良さそうです。下記記事が参考になりました。チュートリアルの実体験記事です。
どうやら、まずはフロントのみでAmplifyアプリを作成していき、その後にAuthenticatorなど必要なモジュールを追加していく形の様です。こちらの記事で紹介されていた別チュートリアルでも、まずは簡単なAmplifyアプリをデプロイして、その後に必要な機能を追加していく流れのようです。
Vueのチュートリアル実行
今回の目的ではVueでAmplifyUIを使う事です。公式ページでのチュートリアルでVueを選択できるのでそれに沿ってやってみます。
まずAWSユーザー作成
aws-amplfyのインストールします。ちょっと環境汚染したくなかったのでチュートリアルにある-gオプション外します。
npm install @aws-amplify/cli
次にAWSアカウントで操作ができるユーザーを作成します。globalにインストールしなかったので、npxを頭につけてコマンド実行します。
※以後、チュートリアルにあるコマンドの頭にnpxをつけている場合が多いと思います。前述コマンドのやり方に応じて適宜読み替えて下さい。
npx amplify configure
ここで、ブラウザが起動し、AWSアカウントへのログインが求められます。ログイン終わったらコンソール画面に戻りEnterを押します。使用するリージョンを選択、Amplify用のユーザー名の入力と続きます。
またブラウザに戻り、IAMユーザーの作成に移ります。その際、以下の点を注意します。
- AWS アクセスの種類は
アクセスキー - プログラムによるアクセスを選択 - 作成後の画面に表示される
Access key ID、Secret access keyの情報をメモしたり、csvをダウンロードしておく
終わったらコンソール画面に戻り、Enterを押します。accessKeyId、secretAccessKeyの入力が求められるので入力します。プロファイル名の入力ができます。自分はamplifyとしました。
Vueのプロジェクト作成
npmとyarnのどちらでも出来そうです。今回はyarnでやってみます。
npx yarn add @vue/cli
npx vue create myamplifyproject
Vue3かVue2を聞かれるので、Vue3を選びます。今回使いたいAmplifyUIはVue3対応という事もあります。
プロジェクトフォルダに移動し、初期インストール、Vue開発モードでの起動を行います。
cd myamplifyproject
npx yarn
npx yarn serve --open
ブラウザが起動し、http://0.0.0.0:8080/にアクセスして、Vueの初期画面が表示されます。
コンソール画面で、Ctrl+Cを押してVue開発モードを修了します。
amplify初期設定
Vueプロジェクトルート(今回はmyamplifyprojectフォルダ以下)で初期化コマンドを打ちます。
色々選択できるようですが、今回はすべてデフォルトのままにします。
※使用するプロファイルを選択する際は先ほど使用したプロファイル名「amplify」を選択します。
npx amplify init
以下の様なログが出てきます。amplify-myamplifyproject-dev-XXXXXXXという名前のCloudFormationスタックが生成されました。認証用の2つのIAMロール及びS3バケットの作成が行われたようです。
? Please choose the profile you want to use amplify
Adding backend environment dev to AWS Amplify app: XXXXXXXXXX
⠴ Initializing project in the cloud...

CREATE_IN_PROGRESS amplify-myamplifyproject-dev-123049 AWS::CloudFormation::Stack Tue May 03 2022 12:30:51 GMT+0900 (GMT+09:00) User Initiated
CREATE_IN_PROGRESS UnauthRole                          AWS::IAM::Role             Tue May 03 2022 12:30:55 GMT+0900 (GMT+09:00)
CREATE_IN_PROGRESS DeploymentBucket                    AWS::S3::Bucket            Tue May 03 2022 12:30:55 GMT+0900 (GMT+09:00)
CREATE_IN_PROGRESS AuthRole                            AWS::IAM::Role             Tue May 03 2022 12:30:55 GMT+0900 (GMT+09:00)
⠴ Initializing project in the cloud...

CREATE_IN_PROGRESS DeploymentBucket AWS::S3::Bucket Tue May 03 2022 12:30:57 GMT+0900 (GMT+09:00) Resource creation Initiated
CREATE_IN_PROGRESS AuthRole         AWS::IAM::Role  Tue May 03 2022 12:30:58 GMT+0900 (GMT+09:00) Resource creation Initiated
CREATE_IN_PROGRESS UnauthRole       AWS::IAM::Role  Tue May 03 2022 12:30:58 GMT+0900 (GMT+09:00) Resource creation Initiated
⠹ Initializing project in the cloud...

CREATE_COMPLETE DeploymentBucket AWS::S3::Bucket Tue May 03 2022 12:31:19 GMT+0900 (GMT+09:00)
⠼ Initializing project in the cloud...

CREATE_COMPLETE AuthRole                            AWS::IAM::Role             Tue May 03 2022 12:31:21 GMT+0900 (GMT+09:00)
CREATE_COMPLETE UnauthRole                          AWS::IAM::Role             Tue May 03 2022 12:31:22 GMT+0900 (GMT+09:00)
CREATE_COMPLETE amplify-myamplifyproject-dev-XXXXXXX AWS::CloudFormation::Stack Tue May 03 2022 12:31:25 GMT+0900 (GMT+09:00)
✔ Successfully created initial AWS cloud resources for deployments.
✔ Initialized provider successfully.
✅ Initialized your environment successfully.

Your project has been successfully initialized and connected to the cloud!

Some next steps:
"amplify status" will show you what you've added already and if it's locally configured or deployed
"amplify add <category>" will allow you to add features like user login or a backend API
"amplify push" will build all your local backend resources and provision it in the cloud
"amplify console" to open the Amplify Console and view your project status
"amplify publish" will build all your local backend and frontend resources (if you have hosting category added) and provision it in the cloud

Pro tip:
Try "amplify add api" to create a backend API and then "amplify push" to deploy everything
中間デプロイ
チュートリアルではGraphQLやCognitoAuthの追加などを行うようですが、一旦ここまででAWSへデプロイしてみます。チュートリアルのデプロイページを一旦先にやります。
npx amplify add hosting
Amplify Console(AWSコンソール上だと思います)を使うか、CloudFrontとS3を使うかの選択が出てきます。今回の目的からすると後者の方が柔軟性が高そうなのでそちらを選びます。
? Select the plugin module to execute …  (Use arrow keys or type to filter)
  Hosting with Amplify Console (Managed hosting with custom domains, Continuous deployment)
❯ Amazon CloudFront and S3
次に環境設定を選択します。CloudFrontはデプロイ処理に時間かかったりするので、今回の目的ではDEVを選択します。
? Select the environment setup: (Use arrow keys)
❯ DEV (S3 only with HTTP)
  PROD (S3 with CloudFront using HTTPS)
後はデフォルトのままにします。
? hosting bucket name myamplifyproject-YYYYYYYYYYYY-hostingbucket
? index doc for the website index.html
? error doc for the website index.html
デプロイします。
npx amplify publish
終了するとブラウザが開き、アップロードされたバケットで、S3ホスティングが出来たようです。
ライブラリのインストールから再開
いったん中断した後の部分から再開します。
npx yarn add aws-amplify @aws-amplify/ui-vue
main.jsに記述追加します。最後のimport文の後に追加するとの事です。
import App from './App.vue'
// ここから追加部分
import { Amplify } from 'aws-amplify';
import awsExports from './aws-exports';
Amplify.configure(awsExports);
aws-exports.jsですが、ファイルの中に以下の記述がありました、Amplifyが自動的に更新する設定ファイルの様です。
// WARNING: DO NOT EDIT. This file is automatically generated by AWS Amplify. It will be overwritten.
graphqlの設定追加
npx amplify add api
REST Apiも選べるようですが、チュートリアル通りにGraphQLを選びます。後はデフォルトを使います。
? Select from one of the below mentioned services: GraphQL
? Here is the GraphQL API that we will create. Select a setting to edit or continue Continue
? Choose a schema template: Single object with fields (e.g., “Todo” with ID, name, description)

⚠️  WARNING: your GraphQL API currently allows public create, read, update, and delete access to all models via an API Key. To configure PRODUCTION-READY authorization rules, review: https://docs.amplify.aws/cli/graphql/authorization-rules

✅ GraphQL schema compiled successfully.

Edit your schema at /home/ubuntu/amplify/myamplifyproject/amplify/backend/api/myamplifyproject/schema.graphql or place .graphql files in a directory at /home/ubuntu/amplify/myamplifyproject/amplify/backend/api/myamplifyproject/schema
✔ Do you want to edit the schema now? (Y/n) · yes
Edit the file in your editor: /home/ubuntu/amplify/myamplifyproject/amplify/backend/api/myamplifyproject/schema.graphql
✅ Successfully added resource myamplifyproject locally

✅ Some next steps:
"amplify push" will build all your local backend resources and provision it in the cloud
"amplify publish" will build all your local backend and frontend resources (if you have hosting category added) and provision it in the cloud
メッセージから以下の事が解ります。
- 今の時点ではAPI Keyによる各種処理が公開されてしまっている
- データ構造を変更するには
amplify/backend/api/myamplifyproject/schema.graphqlを変更するか、backend/api/myamplifyproject/schemaフォルダに.graphqlを配置する -
amplify pushはローカルビルトとcloudへ反映する -
amplify publishはamplify pushに加え、frontendもビルドしてcloudへ反映する
以下のファイルが更新対象として表示されます。
type Todo @model {
  id: ID!
  name: String!
  description: String
}
graphqlの設定デプロイ
npx amplify push
GraphQLを選択した事で、AWSのリソースとしては、AppSyncによりAPIが構築されたようです。
フロントエンド(Vue)のソース変更
チュートリアル通りの対応して、結果として以下の内容になりました。
App.vue
<template>
  <div id="app">
    <h1>Todo App</h1>
    <input type="text" v-model="name" placeholder="Todo name">
    <input type="text" v-model="description" placeholder="Todo description">
    <button v-on:click="createTodo">Create Todo</button>
    <div v-for="item in todos" :key="item.id">
      <h3>{{ item.name }}</h3>
      <p>{{ item.description }}</p>
    </div>
  </div>
</template>

<script>
import { API } from 'aws-amplify';
import { createTodo } from './graphql/mutations';
import { listTodos } from './graphql/queries';
import { onCreateTodo } from './graphql/subscriptions';

export default {
  name: 'App',
  async created() {
    this.getTodos();
    this.subscribe();
  },
  data() {
    return {
      name: '',
      description: '',
      todos: []
    }
  },
  methods: {
    async createTodo() {
      const { name, description } = this;
      if (!name || !description) return;
      const todo = { name, description };
      this.todos = [...this.todos, todo];
      await API.graphql({
        query: createTodo,
        variables: {input: todo},
      });
      this.name = '';
      this.description = '';
    },
    async getTodos() {
      const todos = await API.graphql({
        query: listTodos
      });
      this.todos = todos.data.listTodos.items;
    },
    // other methods
    subscribe() {
      API.graphql({ query: onCreateTodo })
        .subscribe({
          next: (eventData) => {
            let todo = eventData.value.data.onCreateTodo;
            if (this.todos.some(item => item.name === todo.name)) return; // remove duplications
            this.todos = [...this.todos, todo];
          }
        });
    }
  },
}
</script>
<style>
#app {
  font-family: Avenir, Helvetica, Arial, sans-serif;
  -webkit-font-smoothing: antialiased;
  -moz-osx-font-smoothing: grayscale;
  text-align: center;
  color: #2c3e50;
  margin-top: 60px;
}
</style>
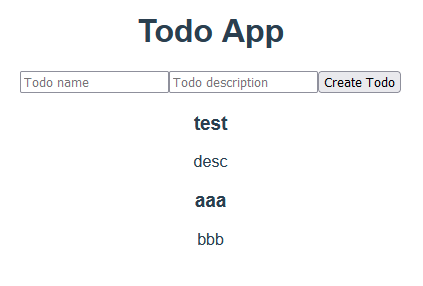
ちなみに、Vueだとcss記述が無く、こんな感じになっちゃいます。
本題のauth追加
npx amplify add auth
ユーザー名にはEmailを使用する様にしました。それ以外はデフォルトを使用しました。
※最初の選択肢でDefault configuration with Social Provider (Federation)というのも出てきます。試しにやってみた所、リダイレクトURLを求められました。選択する際には事前にCognitoと連携するソーシャルプロバイダ側の準備をしておきましょう。
Using service: Cognito, provided by: awscloudformation

 The current configured provider is Amazon Cognito.

 Do you want to use the default authentication and security configuration? Default configuration
 Warning: you will not be able to edit these selections.
 How do you want users to be able to sign in? Email
 Do you want to configure advanced settings? No, I am done.
✅ Successfully added auth resource myamplifyproject7a4f192a locally

✅ Some next steps:
"amplify push" will build all your local backend resources and provision it in the cloud
"amplify publish" will build all your local backend and frontend resources (if you have hosting category added) and provision it in the cloud
AWSへ反映します。Amplify用のCognitoが追加されたようです。
npx amplify push
一旦ローカルで起動します。チュートリアルではnpmでの起動しか書いていないですが、今回はyarnを使っているのでyarnで起動します。
npx yarn serve
こんなのが出てきました。チュートリアルでは追加部分しか書いてないですが、本来はrouterなどを使ってログイン前はログイン画面が出てきて、ログイン後はアプリの画面に推移するという事が必要なはずですが、チュートリアルのソースではそこまで面倒見ていない様です。Reactのサンプルではその点は対応しているようです。

どうやら、ログイン後に、authenticator > template内に記載されている画面が表示されるという事の様です。App.vueを改造します。
<template>
  <div id="app">
    <authenticator>
      <template v-slot="{ user, signOut }">
        <h1>Hello {{ user.username }}!</h1>
        <button @click="signOut">Sign Out</button>
        <h1>Todo App</h1>
        <input type="text" v-model="name" placeholder="Todo name">
        <input type="text" v-model="description" placeholder="Todo description">
        <button v-on:click="createTodo">Create Todo</button>
        <div v-for="item in todos" :key="item.id">
          <h3>{{ item.name }}</h3>
          <p>{{ item.description }}</p>
        </div>
      </template>
    </authenticator>
  </div>
</template>
フロント含めてAWSへデプロイします。画面の貼り付けはしませんが、ログイン前はログイン入力部分だけ表示され、ログイン後は、authenticator > template内の部分が表示されるようになりました。
npx amplify publish
ちなみに、authenticatorコンポーネントを使う以外の選択では、APIを駆使して自分で実装する事の様で、これは現在自分がやっている事と思われます。
Vueを使ってのAmplifyUIチュートリアルはここまでになります。
Next stepsとして色々出来そうなリンクも紹介されています。冒頭で確認した通り、一旦簡単なプロジェクトを作って、その後どんどん追加していく形の様です。とりあえず、今回は進めません。
AmplifyUI - Authenticatorの使いこなし
ログインに関わる色々なフローはパッケージングされているものを使いたい所ですが、細かい制御をするにはそのままでは難しそうです。専用ページを見てどんな事が出来るのか見ていきます。
日本語化
前述ページのInternationalization (I18n) を見ると、日本語化も簡単に出来そうです。
App.vueのscript setup部を変更します。
<script setup>
  import { Authenticator, translations } from '@aws-amplify/ui-vue';
  import '@aws-amplify/ui-vue/styles.css';

  import { I18n } from 'aws-amplify';
  I18n.putVocabularies(translations);
  I18n.setLanguage('ja');

</script>
出来ました。また日本語に変更した上で文言も変更出来る様です。

ログイン状況による制御
同Access Auth Stateを見ると、先ほどはtemplateの中に入れる事で行っていた表示制御を、Auth Stateを取得する事で制御出来そうです。ちょっとチュートリアルのままではうまく行かなかったのでちょこちょこ修正を入れて結果的に以下のソースになりました。Vue3用です。
App.vue
<template>
  <!-- authenticatorを追加した当初に戻します -->
  <authenticator>
    <template v-slot="{ user, signOut }">
      <h1>Hello {{ user.username }}!</h1>
      <button @click="signOut">Sign Out</button>
    </template>
  </authenticator>
  <div id="app">
    <!-- auth.routeによってログイン状況を判断します -->
    <div v-if="auth.route === 'authenticated'">
      <h1>Todo App</h1>
      <input type="text" v-model="name" placeholder="Todo name">
      <input type="text" v-model="description" placeholder="Todo description">
      <button v-on:click="createTodo">Create Todo</button>
      <div v-for="item in todos" :key="item.id">
        <h3>{{ item.name }}</h3>
        <p>{{ item.description }}</p>
      </div>
    </div>
  </div>
</template>

<script>
import { API } from 'aws-amplify';
import { createTodo } from './graphql/mutations';
import { listTodos } from './graphql/queries';
import { onCreateTodo } from './graphql/subscriptions';

// script部を分けていましたが、統合しました。
import { Authenticator, translations, useAuthenticator } from '@aws-amplify/ui-vue';
import '@aws-amplify/ui-vue/styles.css';

import { I18n } from 'aws-amplify';
I18n.putVocabularies(translations);
I18n.setLanguage('ja');

// `auth`を参照できる様にimportを追加します。
import { ref } from 'vue';

export default {
  name: 'App',
  // setup句を追加して、authをtemplateの中で使える様にしました
  setup() {
    const auth = ref(useAuthenticator());
    return {
      auth
    }
  },
  // Authenticatorを明示しました
  components: {
    Authenticator
  },
  // これ以降は既存のままです
  async created() {
    this.getTodos();
    this.subscribe();
  },
  data() {
    return {
      name: '',
      description: '',
      todos: []
    }
  },
  methods: {
    async createTodo() {
      const { name, description } = this;
      if (!name || !description) return;
      const todo = { name, description };
      this.todos = [...this.todos, todo];
      await API.graphql({
        query: createTodo,
        variables: {input: todo},
      });
      this.name = '';
      this.description = '';
    },
    async getTodos() {
      const todos = await API.graphql({
        query: listTodos
      });
      this.todos = todos.data.listTodos.items;
    },
    // other methods
    subscribe() {
      API.graphql({ query: onCreateTodo })
        .subscribe({
          next: (eventData) => {
            let todo = eventData.value.data.onCreateTodo;
            if (this.todos.some(item => item.name === todo.name)) return; // remove duplications
            this.todos = [...this.todos, todo];
          }
        });
    }
  },
}
</script>
<style>
#app {
  font-family: Avenir, Helvetica, Arial, sans-serif;
  -webkit-font-smoothing: antialiased;
  -moz-osx-font-smoothing: grayscale;
  text-align: center;
  color: #2c3e50;
  margin-top: 60px;
}
</style>
まとめ
Vueでチュートリアルをこなす事が主題になってしまった感があります。が、チュートリアルが終わった後に少しの修正で、今回の目的であるログイン制御が出来る事が解りました。
今回はAmplifyベースのプロジェクトで行いました。今回行った事を、Amplifyベースでないプロジェクトに適用するにはまた別の手順が必要かと思います。そちらに関しては後編記事で行おうと思います。