今更ながらReactに入門しました。
ということで、Reactでアプリケーションを開発していくときに、何をどうセットアップしていくかをまとめてみたいと思います。
宣伝
本題に入る前に少し宣伝させてください。
今回、Reactでタスクのトラッキングアプリを作ってみました。
もしよかったら、一度さわってみてもらえると嬉しいです。(すみません、PCのChromeでみてください)
https://tasktrack.web.app/tasks
こちらに紹介記事を書いているので、もしよかったらこちらも読んでみてください。
https://note.com/digitalshuufei/n/nf7e9d9644d13
この記事でやること
- create-react-appでプロジェクト作成
- eslintの設定
- formatter(Prettier)の設定
- eslintとPrettierの共存
- CSS in JSツール(Emotion)の導入
- Reduxの導入
実際のコードはこちらにあります。
https://github.com/shuufei/react-project-setup
create-react-appでプロジェクト作成
公式の手順を参考に作成していきます。
https://github.com/facebook/create-react-app#creating-an-app
Typescriptで開発したいので、 --typescript オプションをつけます。
> npx create-react-app test-app --typescript
プロジェクトの作成が終わったら、一度動かして確認してみます。
> cd test-app
> npm run start
localhost:3000でアクセスして下記のよう画面になっていれば問題ないかと思います。
問題なく起動できることが確認できたら、このタイミングでpackageを整理しておくと良いかもしれません。
create-react-appでプロジェクトを作ると、開発時にしか使わないpackageもdependenciesに入っているので、devDependenciesに移動してインストールしなおします。
修正後のpackage.jsonは下記です。
   "dependencies": {
-    "@testing-library/jest-dom": "^4.2.4",
-    "@testing-library/react": "^9.5.0",
-    "@testing-library/user-event": "^7.2.1",
-    "@types/jest": "^24.9.1",
-    "@types/node": "^12.12.37",
-    "@types/react": "^16.9.34",
-    "@types/react-dom": "^16.9.7",
     "react": "^16.13.1",
     "react-dom": "^16.13.1",
     "react-scripts": "3.4.1",
-    "typescript": "^3.7.5"
   },
+  "devDependencies": {
+    "@testing-library/jest-dom": "^4.2.4",
+    "@testing-library/react": "^9.5.0",
+    "@testing-library/user-event": "^7.2.1",
+    "@types/jest": "^24.9.1",
+    "@types/node": "^12.12.37",
+    "@types/react": "^16.9.34",
+    "@types/react-dom": "^16.9.7",
+    "typescript": "^3.7.5"
+ },
package.jsonを修正したら、installしなおします。
> rm -rf node_modules
> rm -f package-lock.json
> npm install
installしなおしたら念のため動作を確認しておきましょう。
> npm run start
eslintの設定
次にeslintを導入して設定していきます。
今回Typescriptを使って開発していきますが、tslintは非推奨になり、eslintの方に移行していく流れがあるらしいのでeslintを利用します。
https://github.com/palantir/tslint/issues/4534
こちらを参考に導入していきます。
https://github.com/typescript-eslint/typescript-eslint/blob/master/docs/getting-started/linting/README.md
> npm install -D eslint @typescript-eslint/parser @typescript-eslint/eslint-plugin
インストールできたら、.eslintrc.js と .eslintignore ファイルを作成します。
module.exports = {
  root: true,
  parser: '@typescript-eslint/parser',
  plugins: [
    '@typescript-eslint',
  ],
  extends: [
    'eslint:recommended',
    'plugin:@typescript-eslint/eslint-recommended',
    'plugin:@typescript-eslint/recommended',
  ],
};
# don't ever lint node_modules
node_modules
# don't lint build output (make sure it's set to your correct build folder name)
dist
# don't lint nyc coverage output
coverage
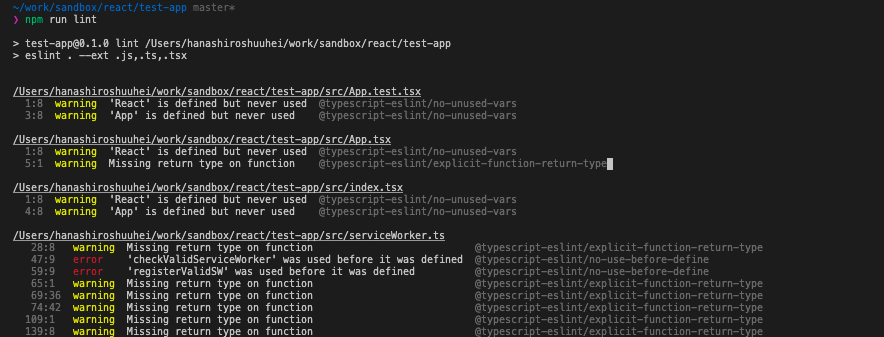
package.jsonにlintのscriptを追加し、実行してみましょう。
App.tsxなどでlintのエラーが発生するはずなので、エラーが発生したらうまく導入できると思います。
   "scripts": {
     "start": "react-scripts start",
     "build": "react-scripts build",
     "test": "react-scripts test",
     "eject": "react-scripts eject",
+    "lint": "eslint . --ext .js,.ts,.tsx",
+    "lint:fix": "npm run lint -- --fix",
   },
> npm run lint
発生するエラー↓
ここまで確認できたら、lintのルールを拡張しましょう。
eslint-config-airbnb-typescript を利用すると楽っぽいので、それを使ってみます。
公式の手順を参考に導入していきます。
https://www.npmjs.com/package/eslint-config-airbnb-typescript
> npm install -D \
    eslint-config-airbnb-typescript \
    eslint-plugin-import@2.20.1 \
    eslint-plugin-jsx-a11y@6.2.3 \
    eslint-plugin-react@7.19.0 \
    eslint-plugin-react-hooks@2.5.0 \
    @typescript-eslint/eslint-plugin@2.24.0
インストールできたら、.eslintrc.jsを書き換えます。
 module.exports = {
   root: true,
   parser: "@typescript-eslint/parser",
   plugins: [
     "@typescript-eslint"
   ],
   extends: [
-   'eslint:recommended',
-   'plugin:@typescript-eslint/eslint-recommended',
-   'plugin:@typescript-eslint/recommended',
+    "airbnb-typescript"
   ],
+  parserOptions: {
+    project: "./tsconfig.json",
+  },
 };
これで、reactやhooksまわりのlintのルール等が追加されました。
formatter(Prettier)の導入
次にformatterとしてPrettierを導入していきます。
これも公式の手順を参考に導入していきます。
https://prettier.io/docs/en/install.html
> npm install -D --save-exact prettier
インストールできたら、prettierの設定ファイルを作成し、設定を記述します(この辺は好みで)。
{
  "tabWidth": 2,
  "useTabs": false,
  "singleQuote": true,
  "semi": true
}
package.jsonにformatを実行するscriptを追加して実行してみましょう。
   "scripts": {
     "start": "react-scripts start",
     "build": "react-scripts build",
     "test": "react-scripts test",
     "eject": "react-scripts eject",
     "lint": "eslint . --ext .js,.ts,.tsx",
+    "format": "prettier --write \"./**/*.ts\" \"./**/*.tsx\""
   },
> npm run format
実行すると、App.tsxなどのファイルがformatされているかと思います。
eslintとPrettierの共存
eslintのfixを実行するとformatは実施されるので、prettierのformatと競合するケースがあります。
なので、 eslintのformat時に .prettierrc をみてもらうように設定し、prettierでのformatは実施しまないようにします。
まずはeslintのprettier puluginをインストールします。
> npm i -D eslint-plugin-prettier eslint-config-prettier
インストールできたら、.eslintrc.jsを下記のように修正します。
 module.exports = {
   root: true,
   parser: "@typescript-eslint/parser",
   plugins: ["@typescript-eslint"],
   extends: [
     "airbnb-typescript",
+    "plugin:prettier/recommended",
+    "prettier/react"
   ],
   parserOptions: {
     project: "./tsconfig.json",
   },
 };
vscodeでeslintのプラグインをインストールし、 settings.json で下記のように設定しておけば、ファイル保存時にformatを実施してくれるので便利です。
  "editor.codeActionsOnSave": {
    "source.fixAll.eslint": true
  }
※eslintの設定と競合するprettierの設定は修正しておかないといけないです。
※package.jsonに追加したformatのscriptはもう使わないと思うので、削除しておくとよいでしょう。
CSS in JS(Emotion)の導入
今回はStyleをあてていくツールとして、Emotionを利用しました。
emotionはCSS in JSになります。
styled-componentのようにも記述できますが、わざわざcomponentをwrapする書き方が煩しそうだったので、このemotionを利用しました。
ts側とstyle側で変数を共有できたり、styleの再利用が容易だったり、template側でクラス名を意識せずにすんだりと、とても開発しやすかったです。
普段Angularで開発してるんですが、Componentを作ることに関しては、ReactでtsxとCSS in JSを利用して作る方が楽しかったです。
これも公式の手順通りに導入していきます。
https://emotion.sh/docs/install
> npm install @emotion/core
インストールできたら、試しにstyleあててみます。
  import React from 'react';
+ /** @jsx jsx */
+ import { jsx, css } from '@emotion/core';
  import logo from './logo.svg';
  import './App.css';

  function App() {
    return (
      <div className="App">
        <header className="App-header">
          <img src={logo} className="App-logo" alt="logo" />
          <p>
            Edit <code>src/App.tsx</code> and save to reload.
          </p>
          <a
            className="App-link"
            href="https://reactjs.org"
            target="_blank"
            rel="noopener noreferrer"
+           css={css`
+             color: red;
+           `}
          >
            Learn React
          </a>
        </header>
      </div>
    );
  }

  export default App;
これで Learn React のテキストカラーが赤色になったかと思います。
Reduxの導入
最後にReduxを導入していきます。
まず必要なpackageをinstallします。
> npm install react-redux redux
> npm install -D @types/react-redux
reducerでstateをイミュータブルに更新しやすくするためにimmerも入れておきます。
> npm install immer
次に、store周りの実装を追加していきます。
今回はtodoのstoreを追加してみます。
export type Todo = {
  id: number;
  title: string;
  isDone: boolean;
};

export type State = {
  todos: Todo[];
};

export const initState: State = {
  todos: [],
};
import { Action } from 'redux';
import { Todo } from './state';

export interface AddTodoAction extends Action {
  type: 'ADD_TODO';
  payload: { todo: Todo };
}

export const addTodo = (payload: AddTodoAction['payload']): AddTodoAction => ({
  type: 'ADD_TODO',
  payload,
});

export type Actions = AddTodoAction;

export const actionCreator = {
  addTodo,
};
import produce from 'immer';

import { Actions } from './actions';
import { State, initState } from './state';

export const reducer = (state: State = initState, action: Actions) => {
  switch (action.type) {
    case 'ADD_TODO':
      return produce(state, (draft) => {
        draft.todos.push(action.payload.todo);
      });
    default:
      return state;
  }
};
export * from './actions';
export * from './reducer';
export * from './state';
次にRootStoreを作成し、そこにtodoStoreを追加します。
import { combineReducers, createStore } from 'redux';

import * as Todo from './todo';

export type RootState = {
  todo: Todo.State;
};

export const rootReducer = combineReducers({
  todo: Todo.reducer
});

export const actionCreator = {
  todo: Todo.actionCreator
};

export const store = createStore(rootReducer);
最終的なstoreのディレクトリ構成は下記のようになっていると思います。
src/store
├── root-store.ts
└── todo
    ├── actions.ts
    ├── index.ts
    ├── reducer.ts
    └── state.ts
これでstoreの実装ができたので、実際にComponentから使ってみます。
  import React from 'react';
  import ReactDOM from 'react-dom';
  import './index.css';
  import { Provider } from 'react-redux';
  import App from './App';
+ import * as serviceWorker from './serviceWorker';
+ import { store } from './store/root-store';

  ReactDOM.render(
    <React.StrictMode>
-     <App />
+     <Provider store={store}>
+       <App />
+     </Provider>
    </React.StrictMode>,
    document.getElementById('root')
  );

  // If you want your app to work offline and load faster, you can change
  // unregister() to register() below. Note this comes with some pitfalls.
  // Learn more about service workers: https://bit.ly/CRA-PWA
  serviceWorker.unregister();
最終的なApp.tsx ↓
import React from 'react';
import { useDispatch, useSelector } from 'react-redux';
/** @jsx jsx */
import { jsx, css } from '@emotion/core';

import { RootState } from './store/root-store';
import { actionCreator } from './store/todo';

const App: React.FC = () => {
  const dispatch = useDispatch();
  const todos = useSelector((state: RootState) => state.todo.todos);
  return (
    <div className="App">
      <button
        type="button"
        onClick={() =>
          dispatch(
            actionCreator.addTodo({
              todo: {
                id: 0,
                title: '牛乳買う',
                isDone: false,
              },
            })
          )
        }
      >
        Add todo
      </button>
      {todos.map((v) => (
        <p
          css={css`
            margin-top: 8px;
          `}
        >
          {v.title}
        </p>
      ))}
    </div>
  );
};

export default App;
画面に表示された Add todo ボタンを押下すと、追加されたtodoのタイトルが画面に表示されると思います。
これでアプリケーションにReduxの導入ができたので、これをベースに拡張していけばよいです。
最後に
これでReactで開発を進めていく準備が整いました。
あとはがりがり実装していくだけです!
そしてがりがり実装して作ったものを再掲しておきます。
https://tasktrack.web.app
https://note.com/digitalshuufei/n/nf7e9d9644d13
今回のソースコードはこちら。
https://github.com/shuufei/react-project-setup
参考
https://github.com/facebook/create-react-app#creating-an-app
https://github.com/palantir/tslint/issues/4534
https://github.com/typescript-eslint/typescript-eslint/blob/master/docs/getting-started/linting/README.md
https://www.npmjs.com/package/eslint-config-airbnb-typescript
https://prettier.io/docs/en/install.html
https://emotion.sh/docs/install
https://react-redux.js.org/introduction/quick-start