はじめに
R Markdownファイルを開始する際に毎回遭遇するデフォルトスクリプトを変更したいと思います。R Markdownのデフォルトスクリプトは初心者には便利かもしれませんが、経験を積むとその度に削除するのが面倒になることも。そこで、デフォルトスクリプトをカスタマイズして、分析をスムーズに開始できるようにします。
新しいRmdファイルを開いた時のデフォルトスクリプトは以下の通りです。
方法
デフォルトのスクリプトを変更するには、新しいRmdファイルが開かれたときにRstudioが引っ張ってくるスクリプトファイルを変更します。
それでは、R Studioのコンテンツファイルを見てみましょう。
Macの場合は右クリックでコンテンツを開けます。
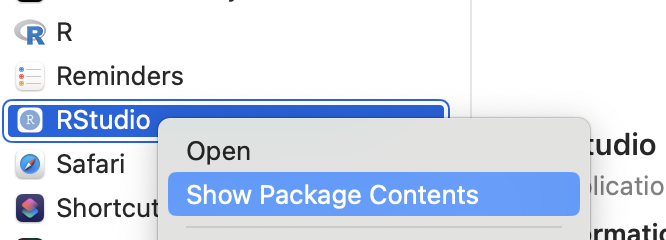
Contentsファイルを開くと以下のパス通りにフォルダを開いていきましょう。
/Applications/RStudio.app/Contents/Resources/app/resources/templates/document.Rmd
最下層にtemplatesという名前のフォルダがあり、その中にはRサービス用のすべてのテンプレートドキュメントがあります。Rmdのテンプレートはdocument.Rmdという名前です。
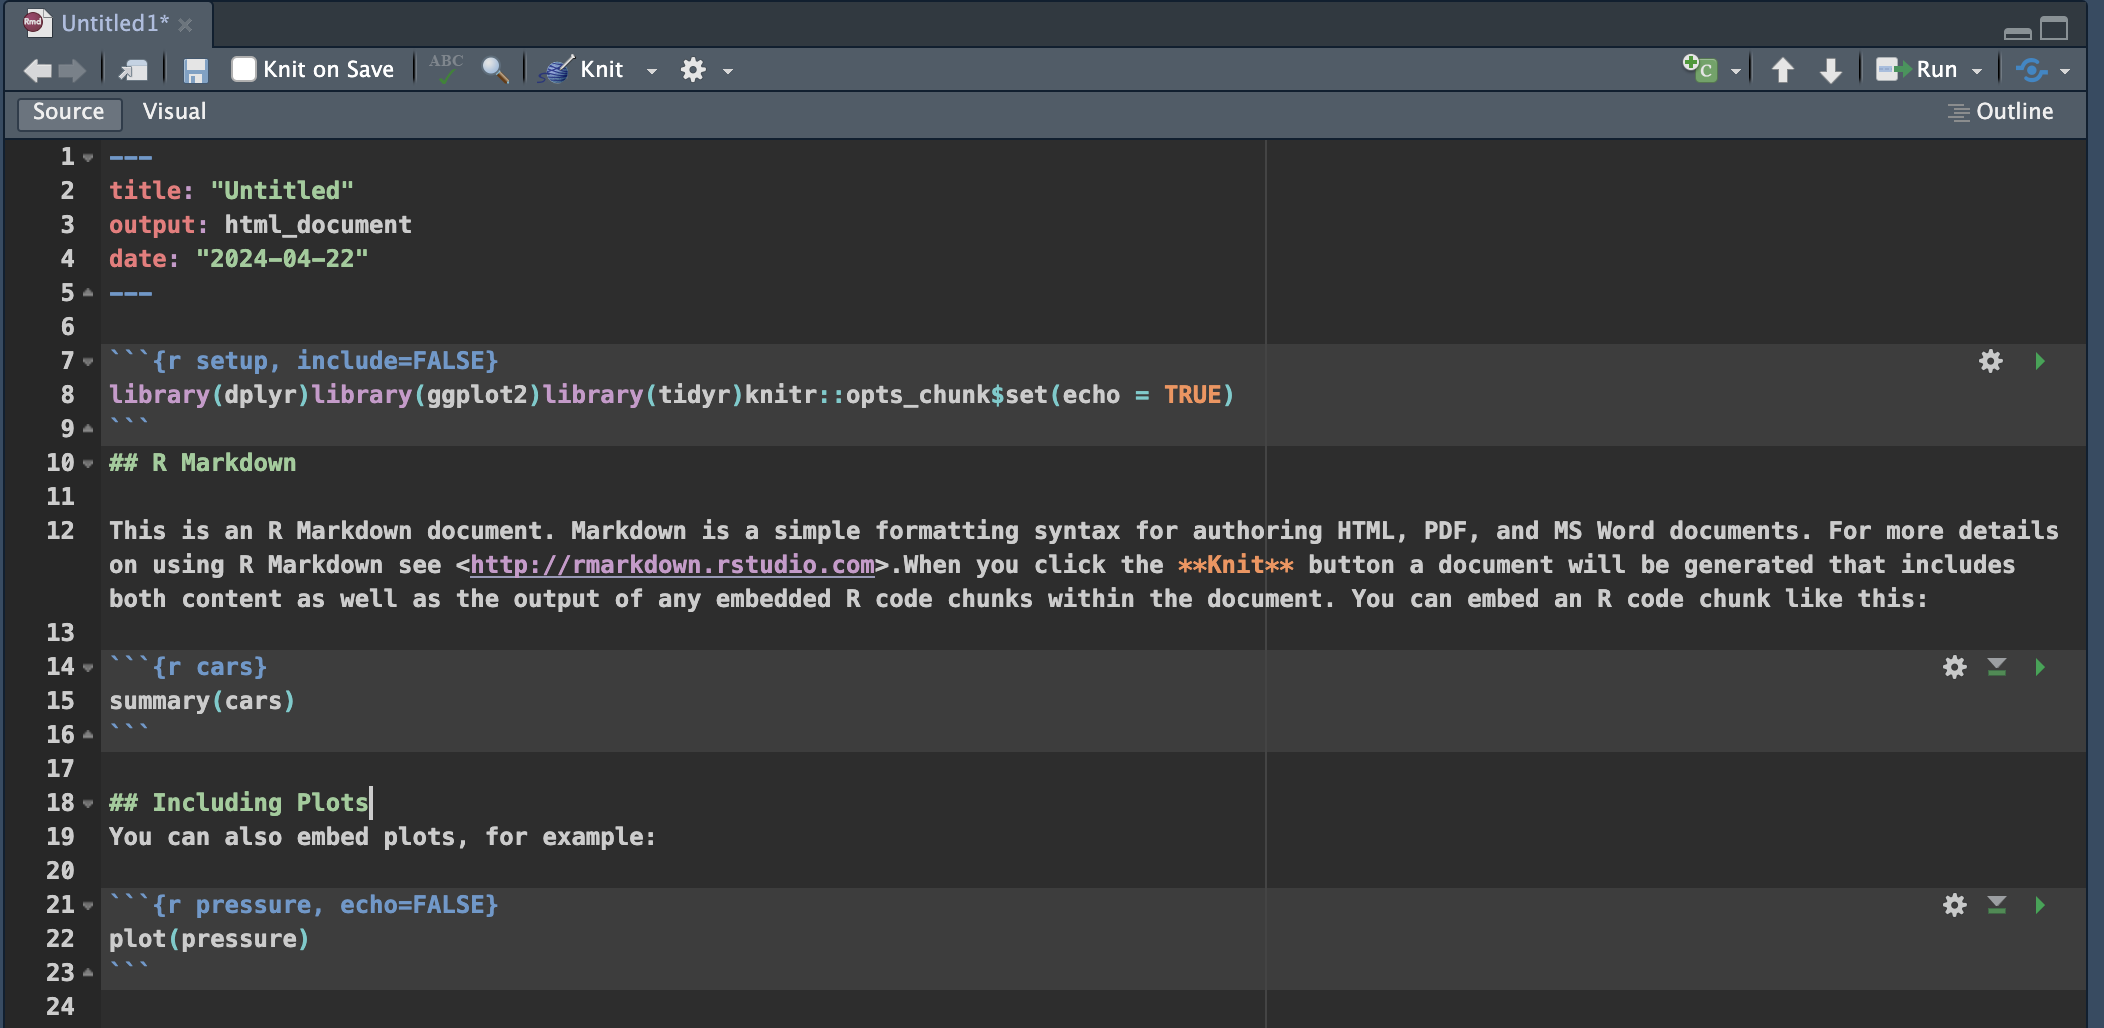
ファイルを開くとRmdを開いた時のスクプトが書いてありました。
このファイルを変更すればよさそうです。
    ```{r setup, include=FALSE}
    library(dplyr)library(ggplot2)library(tidyr)knitr::opts_chunk$set(echo = TRUE)
    ```
    ## R Markdown

    This is an R Markdown document. Markdown is a simple formatting syntax for authoring HTML, PDF, and MS Word documents. For more details on using R Markdown see <http://rmarkdown.rstudio.com>.When you click the **Knit** button a document will be generated that includes both content as well as the output of any embedded R code chunks within the document. You can embed an R code chunk like this:

    ```{r cars}
    summary(cars)
    ```

    ## Including Plots
    You can also embed plots, for example:

    ```{r pressure, echo=FALSE}
    plot(pressure)
    ```
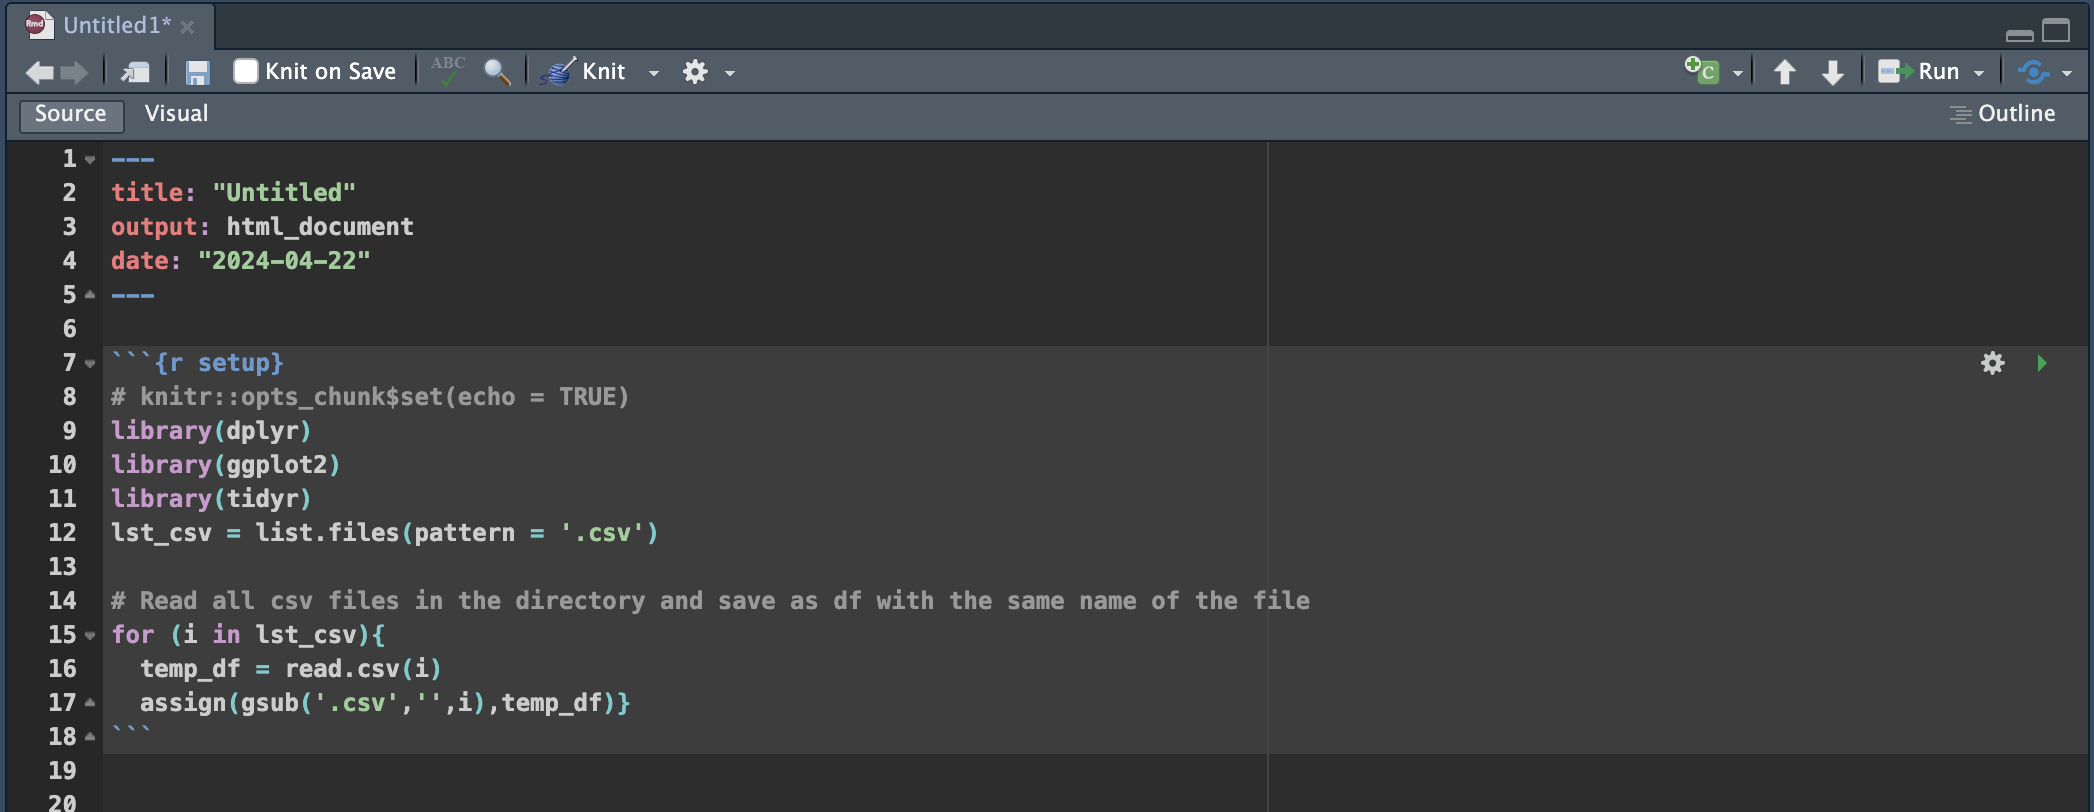
とりあえず、よく使うdplyr,ggplot2,tidyrとフォルダ内のCSVファイルを取得してdataframe型として保存するsetupチャンクを挿入しておきましょう。
    ```{r setup}
    # knitr::opts_chunk$set(echo = TRUE)
    library(dplyr)
    library(ggplot2)
    library(tidyr)

    # Read all csv files in the directory and save as df with the same name of the file
    lst_csv = list.files(pattern = '.csv')
    for (i in lst_csv) {
      temp_df = read.csv(i)
      assign(gsub('.csv','',i),temp_df)
      rm(temp_df) # Added
    }
    ```
上記をセーブし、RstudioからRMarkdownを開くと、、
毎回使うライブラリや処理はdocument.Rmdを変更しておいた方が便利ですね。
終わりに
今回はRmdファイルのデフォルトスクリプトを自分好みにカスタマイズする方法を解説しました。実際に自分のワークフローに合わせてスクリプトを調整することで、分析作業の効率が大いに向上しますね!