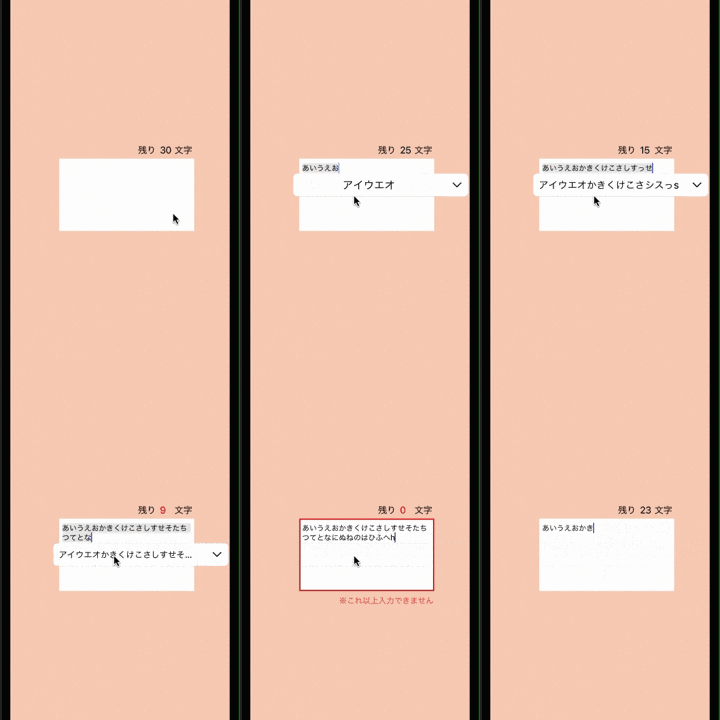
なんかややこしいタイトルで申し訳ございません。
要は、こんな感じのを作ります。
ここでやってること(やりたいこと)を大まかに言うと、
①TextView内の文字が打たれる度に、ラベルをカウントダウンさせる
②任意の最小値(ここでは0に設定)を下回ると、文字を打てなくする
③任意の最小値(ここでは0に設定)を下回ると、TextViewの枠線を赤色に変化
③任意の値(ここでは10に設定)を下回ると、文字を赤文字に変化
の4つです。
ではいきましょう!
はじめに
まずはコード全体から
import UIKit

class ViewController: UIViewController {

    //テキストビュー
    @IBOutlet weak var myTextView: UITextView!
    //残り文字数を表示するラベル
    @IBOutlet weak var anotherCountLabel: UILabel!
    //入力可能文字数を設定(任意の値)
    private var maxCount : Int = 30
    //「これ以上入力できません」のラベル
    @IBOutlet weak var cannotWriteMore: UILabel!

    override func viewDidLoad() {
        super.viewDidLoad()

        NotificationCenter.default.addObserver(self, selector: #selector(textViewDidChange(notification:)), name: UITextView.textDidChangeNotification, object: nil)

        //隠しておく
        cannotWriteMore.isHidden = true
    }

    deinit {
        NotificationCenter.default.removeObserver(self)
    }

    @objc private func textViewDidChange(notification:NSNotification){

        let textView = notification.object as! UITextView

        //残り文字数ラベルをInt型に変換しておく
        let toIntAnotherCountLabel = Int(anotherCountLabel.text!)
        //①カウントダウンさせる
        anotherCountLabel.text = String(maxCount - myTextView.text.count)
        //②残り10文字で赤文字にする
        if toIntAnotherCountLabel! <= 10{
            anotherCountLabel.textColor = UIColor.red
        }else if toIntAnotherCountLabel! >= 10{
            anotherCountLabel.textColor = UIColor.black
        }
        //③文字数制限(文字が30文字を超えたら入力出来なくする)
        if textView.text.count >= maxCount{
            textView.text = textView.text.prefix(maxCount).description
            //TextViewの枠線の色を赤にする
            textView.layer.borderColor = UIColor.red.cgColor
            textView.layer.borderWidth = 2.0
            //隠してた文字を出現させる
            cannotWriteMore.isHidden = false
        }else{
            textView.layer.borderColor = UIColor.clear.cgColor
            //また隠す
            cannotWriteMore.isHidden = true
        }
        //数合わせ
        if anotherCountLabel.text == "-1"{
            anotherCountLabel.text = "0"
        }
    }

}
cannotWiteMoreは、値が0以下になった際に表示したいため、初期値ではisHiddenをtrueにしてます。
コードの最後に数合わせとありますが、これは読んで字のごとく、ラベルに−1と表示されてしまうので、それ防ぐために0を代入させています。
ちなみに、自分の場合はオブザーバーを設置していますが、普通にUITextFieldが独自に持つメソッドを用いる方が楽かもしれないので、そこは柔軟にお願いします。
さいごに
お疲れ様でした!!!
