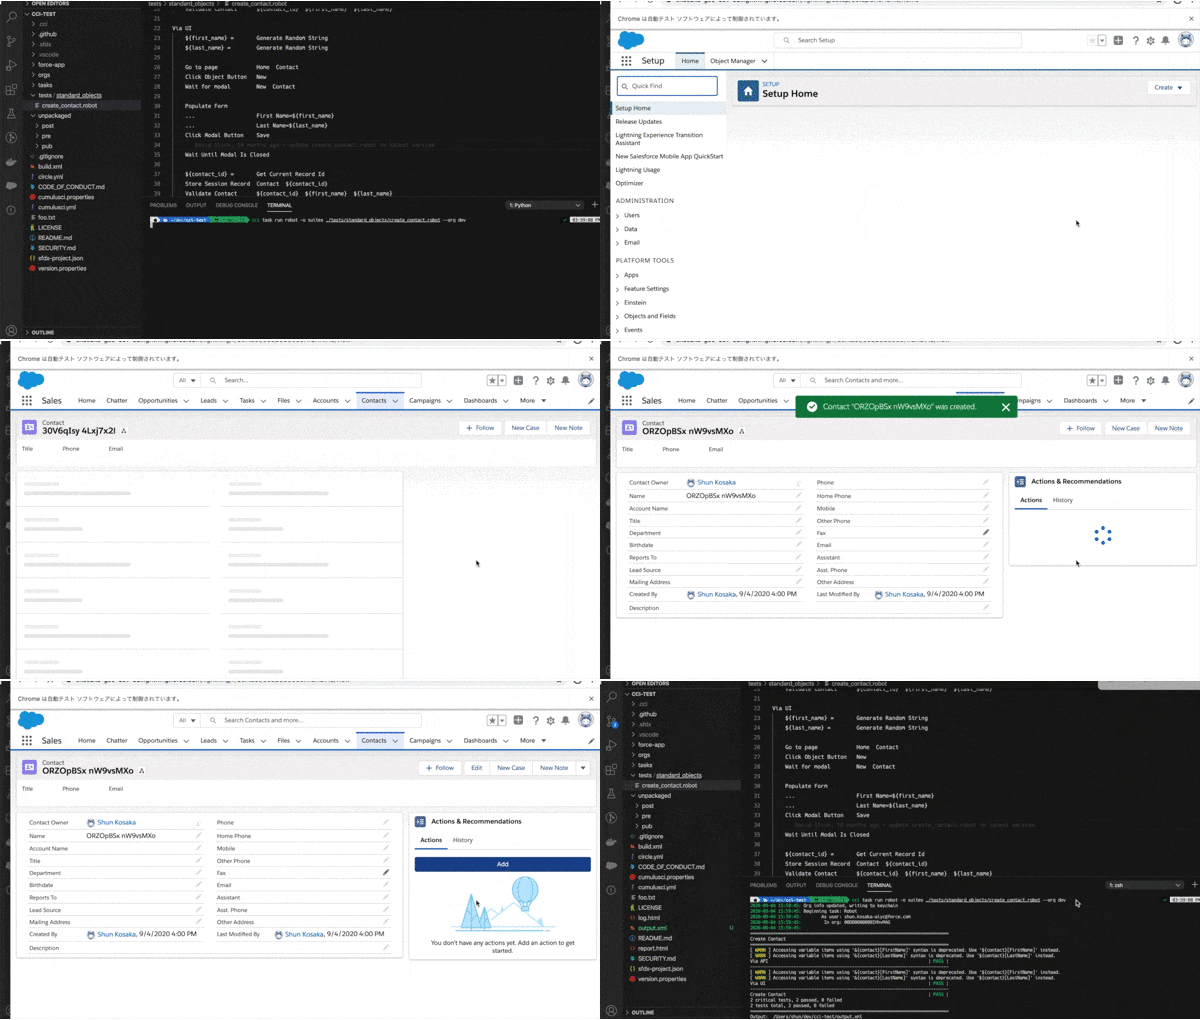
CumulusCI は、Salesforce.org のエンジニアリングチームが開発している、オープンソースの Salesforce 自動化ツールです。Git/GitHub および Salesforce CLI と連動し、パッケージのリリース管理を中心に様々な自動化機能を提供しています。Robot Framework は、直感的な DSL を特徴とする汎用的なテスト自動化フレームワークです。CumulusCI には、Salesforce の UI および API を操作・実行するための、Robot Framework のライブラリが組み込まれています。この記事では、これを用いて Salesforce の E2E ブラウザテストを実行する方法を紹介します。なお、Webdriver は事前にインストール済みのものとします。
CumulusCI のインストール
Mac
$ brew tap SFDO-Tooling/homebrew-sfdo && brew install cumulusci
Windows
Python3 および pipx をインストール後、以下を実行します。
$ pipx install cumulusci
プロジェクト設定
git リポジトリのある任意のSalesforce DX プロジェクトで cci project init を実行します。
$ sfdx force:project:create -n cci_demo
$ cd cci_demo
$ git init
$ cci project init
Project Info
The following prompts will collect general information about the project

Enter the project name.  The name is usually the same as your repository name.  NOTE: Do not use spaces in the project name!
Project Name [cci_demo]:

CumulusCI uses an unmanaged package as a container for your project's metadata.  Enter the name of the package you want to use.
Package Name [cci_demo]:

Is this a managed package project? [y/N]: N

Salesforce API Version [49.0]:

Salesforce metadata can be stored using Metadata API format or DX source format. Which do you want to use?
Source format (sfdx, mdapi) [sfdx]:
# Extend Project
CumulusCI makes it easy to build extensions of other projects configured for CumulusCI like Salesforce.org's NPSP and EDA.  If you are building an extension of another project using CumulusCI and have access to its Github repository, use this section to configure this project as an extension.
Are you extending another CumulusCI project such as NPSP or EDA? [y/N]: N

# Git Configuration
CumulusCI assumes the current git branch is your default branch, your feature branches are named feature/*, your beta release tags are named beta/*, and your release tags are release/*.  If you want to use a different branch/tag naming scheme, you can configure the overrides here.  Otherwise, just accept the defaults.
Default Branch [master]:
Feature Branch Prefix [feature/]:
Beta Tag Prefix [beta/]:
Release Tag Prefix [release/]:

# Apex Tests Configuration
The CumulusCI Apex test runner uses a SOQL where clause to select which tests to run.  Enter the SOQL pattern to use to match test class names.
Test Name Match [%_TEST%]:
Do you want to check Apex code coverage when tests are run? [Y/n]: n
Your project is now initialized for use with CumulusCI
続けて、プロジェクトと Salesforce 組織を接続します。CumulusCI は開発ライフサイクルに合わせて複数のスクラッチ組織を構成する仕組みを提供していますが、この記事では簡便のため、Developer Edition 組織を使用する前提で手順を記載します。
$ cci org connect (任意のエイリアス)
を実行すると、ブラウザが起動するため、ご自身の組織にログインし、CumulusCI からの接続を許可してください。接続先の組織の情報は cci org list で確認することができます。
テストファイルの作成
デフォルトでは robot/プロジェクト名/tests にテストファイルを配置します。サンプルのテストファイルとして create_contact.robot が格納されるため、まずはこの中身を確認してみましょう。
*** Settings ***

Resource        cumulusci/robotframework/Salesforce.robot
Library         cumulusci.robotframework.PageObjects

Suite Setup     Open Test Browser
Suite Teardown  Delete Records and Close Browser


*** Test Cases ***

Via API
    ${first_name} =       Get fake data  first_name
    ${last_name} =        Get fake data  last_name

    ${contact_id} =       Salesforce Insert  Contact
    ...                     FirstName=${first_name}
    ...                     LastName=${last_name}

    &{contact} =          Salesforce Get  Contact  ${contact_id}
    Validate Contact      ${contact_id}  ${first_name}  ${last_name}

Via UI
    ${first_name} =       Get fake data  first_name
    ${last_name} =        Get fake data  last_name

    Go to page            Home  Contact
    Click Object Button   New
    Wait for modal        New  Contact

    Populate Form
    ...                   First Name=${first_name}
    ...                   Last Name=${last_name}
    Click Modal Button    Save

    Wait Until Modal Is Closed

    ${contact_id} =       Get Current Record Id
    Store Session Record  Contact  ${contact_id}
    Validate Contact      ${contact_id}  ${first_name}  ${last_name}


*** Keywords ***

Validate Contact
    [Arguments]          ${contact_id}  ${first_name}  ${last_name}
    [Documentation]
    ...  Given a contact id, validate that the contact has the
    ...  expected first and last name both through the detail page in
    ...  the UI and via the API.

    # Validate via UI
    Go to page             Detail   Contact  ${contact_id}
    Page Should Contain    ${first_name} ${last_name}

    # Validate via API
    &{contact} =     Salesforce Get  Contact  ${contact_id}
    Should Be Equal  ${first_name}  ${contact}[FirstName]
    Should Be Equal  ${last_name}  ${contact}[LastName]
-
** Settings **セクションで Salesforce 用のライブラリをインポートしています。 -
** Test Cases **セクションでテストケースを定義します。ここでは、Via APIとVia UIという名前で2つのテストケースを定義しています。-
Salesforce Insertのように、REST API による操作が一通りキーワードとして提供されています。 -
Go to PageやClick Object Buttonのように、Salesforce の UI を操作するためのキーワードが使用されています。要素の特定にはラベルを用いているため、テストは日本語でも記載することができます。 -
Wait for Modalのように、Lightning Experience の UI に対応して自動的に画面描画を待つためのキーワードが提供されています。 - 利用できるすべてのキーワードについては、公式のドキュメントを参照してください。
- CumulusCI は Robot Framework の SeleniumLibrary を含んでいます。
Page Should Containなどのキーワードについては SeleniumLibrary のドキュメントも参照してください。
-
-
** Keywords **セクションでは再利用可能なキーワードを独自に定義しています。取引引先責任者の姓・名が正しく画面に含まれているか、加えて、Id でクエリした値と引数で指定した値が一致しているかを検証しています。
テスト実行
前述の通り、画面要素は表示ラベルにより特定されていますので、サンプルのテストケースを実行する場合は、接続を許可した組織のユーザの言語を英語にしてください。
$ cci task run robot --suites ./robot/cci_demo/tests/create_contact.robot --org (接続した組織のエイリアス)
実行結果のレポート・ログ・スクリーンショットが robot/プロジェクト名/results に格納されます。

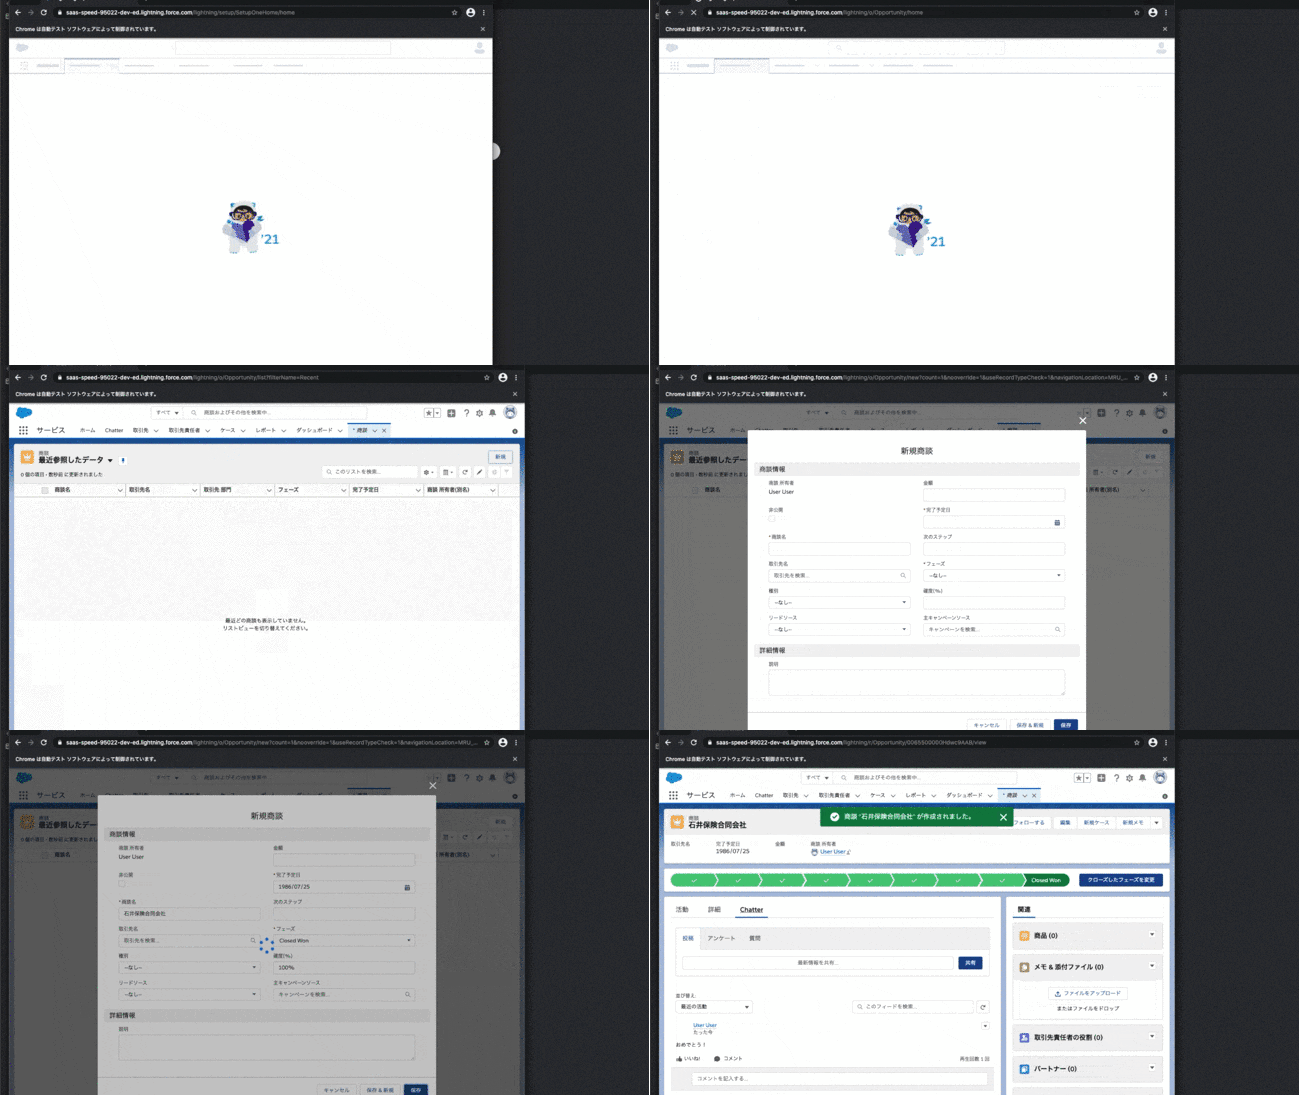
簡単な例をもう1つ挙げてみます。商談が成立した際に、Chatter 投稿とフォローアップ ToDo を作成する自動化プロセスがあるとします。その結果を UI で検証してみましょう。
*** Test Cases ***

商談成立後にお祝いのChatter投稿とフォローアップToDoが作成されている
    # テストデータの値
    Set Faker Locale            ja_JP
    ${name} =                   Get fake data  company
    ${closed_date} =            Get fake data  date  pattern=%Y-%m-%d

    # UIから新規商談をクローズで作成
    Go to page                  Home  Opportunity
    Click Object Button         新規
    Wait for modal              New  Opportunity
    Select Dropdown Value       フェーズ  Closed Won
    Populate Form
    ...                         商談名=${name}
    ...                         完了予定日=${closed_date}
    Click Modal Button          保存

    # レコード詳細画面への遷移を待つ
    Wait For Page Object        Detail  Opportunity

    Click Tab                   Chatter
    Page Should Contain         おめでとう!

    Click Tab                   活動
    Timeline Should Have Task   フォローアップToDo

*** Keywords ***

Click Tab
    [Arguments]           ${label}
    Click Element         //a[@role="tab" and text()='${label}']

Timeline Should Have Task
    [Arguments]                  ${subject}
    Page Should Contain Element  //a[contains(@class, subjectLink) and text()='${subject}']
- サンプルのテストファイルにも含まれる、
Get Fake Dataキーワードは Faker をラップしています。先にSet Faker Localeを呼び出すことで、ここでは日本語で企業名を生成しています。 - Lightning レコードページのタブをクリックするためのキーワードと、活動タイムラインに特定の行が含まれているかどうかを検証するキーワードを簡単な XPath で実装しています。
Click ElementやPage Should Contain Elementは SeleniumLibrary のキーワードです。
まとめ
CumulusCI は Python ベースのポータブルな Salesforce 自動化ツールです。Robot Framework との統合で、エンジニアではない方でもテストファイルや実行結果が比較的扱いやすくなります。Lightning UI で特に苦戦する待機時間の処理もライブラリ側に寄せられるのは嬉しい点です。CumulusCI には、Robot Framework のライブラリ以外にも様々なタスクが提供されていますので、ぜひ試してみてはいかがでしょうか。

