タブレット(iPad上のsafari)上でROS上のシステムと通信し、情報表示するシステムを作ってみたので備忘録として記事にしてみます。
前回はROS Topicを受信する部分を実装したので、今度はMQTTで通信する部分を実装します。
構成は引き続きdocker環境で動作させます。
構成

plantuml
@startuml
rectangle "Local Area" {

  rectangle "Master PC" {
    [roscore] as roscore
    Interface "Port11311" as ros_port11311
  }

  rectangle "Slave PC" {
    [Web Server1] as wsvr1
    Interface "Port80" as lnet_port80
    Interface "Port9090" as websocket_port9090

    rectangle "ROS node" {
      [rosbridge-server] as rosbridge
      [MQTT publisher] as mqtt_pub
      [MQTT subscriber] as mqtt_sub
    }
  }

  rectangle "Tablet1" {
    rectangle "Browser1" {
      [roslibjs] as roslibjs
    }
  }
}

cloud {
  rectangle "VPS" as vps {
    [MQTT Broker] as mqtt_broker
    [Web Server2] as wsvr2
    wsvr1 -down- lnet_port80
    Interface "Port80" as inet_port80
    Interface "Port1883" as mqtt_port1833
  }
}

rectangle "Tablet2" {
  rectangle "Browser2" {
    [MQTT.js] as mqttjs
  }
}

' layout
mqtt_port1833 -up- mqtt_broker
mqtt_sub -- mqtt_port1833
mqtt_pub -- mqtt_port1833
wsvr2 -- inet_port80
mqtt_port1833 -- mqttjs
inet_port80 -- Browser2
roscore -- ros_port11311
rosbridge -- websocket_port9090
ros_port11311 -- rosbridge
ros_port11311 -- mqtt_pub
ros_port11311 -- mqtt_sub
websocket_port9090 -- roslibjs
lnet_port80 -down- Browser1
@endum
MQTT通信
MQTT通信部分はbrokerサーバにmosquitto、ブラウザ側のライブラリとしてMQTT.jsを使用。
brokerサーバはmosquittoが公式提供しているdockerイメージをそのまま使用。
環境構築
前回作成した環境に以下を追加します。
- libmosquitto-dev
$ apt install -y libmosquitto-dev
MQTT通信用のROSパッケージの作成
publisherの作成
ROS Topic を受信してbrokerサーバへpublishするpublisherを作成します。
今回のdocker環境構成上、ROSのワークスペースの仕様上(?)、/root 以下にmqtt_wsのディレクトリを作成しパッケージを作成します。
/root/mqtt_wsで以下を実施。
$ mkdir -p /root/mqtt_ws/src
$ cd /root/mqtt_ws/src
$ catkin_init_workspac
$ cd ../
$ catkin_make
新規にパッケージを作成します。
$ cd /root/mqtt_ws/src
$ catkin_create_pkg mqtt_socket std_msgs roscpp
新規ノードのソースを/root/mqtt_ws/src/mqtt_socket/src 以下に保存し、
/root/mqtt_ws/src/mqtt_socket/CMakeLists.txt を修正します。
cmake_minimum_required(VERSION 2.8.3)
project(mqtt_socket)

## Compile as C++11, supported in ROS Kinetic and newer
add_compile_options(-std=c++11)

## Find catkin macros and libraries
## if COMPONENTS list like find_package(catkin REQUIRED COMPONENTS xyz)
## is used, also find other catkin packages
find_package(catkin REQUIRED COMPONENTS
  roscpp
  std_msgs
)

catkin_package(
)

###########
## Build ##
###########

## Specify additional locations of header files
## Your package locations should be listed before other locations
include_directories(
# include
  ${catkin_INCLUDE_DIRS}
)

## Declare a C++ library
add_library(${PROJECT_NAME}
  src/mqtt_publisher.cpp
)

## Declare a C++ executable
add_executable(mqtt_publisher src/mqtt_publisher.cpp)

## Add cmake target dependencies of the executable
## same as for the library above
add_dependencies(mqtt_publisher ${${PROJECT_NAME}_EXPORTED_TARGETS} ${catkin_EXPORTED_TARGETS})

## Specify libraries to link a library or executable target against
target_link_libraries(mqtt_publisher
  ${catkin_LIBRARIES}
  mosquitto
)
ノードのソースは以下のようになります。
処理としては、ROS Topic を受信した後、brokerサーバへpublishするだけです。
# include <mosquitto.h>

# include <string>
# include <ros/ros.h>
# include <std_msgs/Int32.h>

struct mosquitto* mqttclient = NULL;

void
connect_callback(
  struct mosquitto *mosq,
  void *obj,
  int result) {

  ROS_INFO("connect_callback: %d\n", result);
}

void
message_callback(
  struct mosquitto *mosq,
  void *obj,
  const struct mosquitto_message *message) {

  ROS_INFO("message_callback\n");

}

void
exampleCallback(
  const std_msgs::Int32::ConstPtr& msg) {

  ROS_INFO("[INFO]: %d", msg->data);

  if (NULL == mqttclient) return;

  const std::string topic = "/MQTTTopic";
  int ret = mosquitto_publish(mqttclient,
      NULL,
      topic.c_str(),
      sizeof(msg->data),
      &msg->data,
      0,
      false);

  ROS_INFO("[INFO] mosquitto_publish: %d\n", ret);
}

int
main(
  int argc,
  char **argv) {

  ros::init(argc, argv, "mqtt_publisher");
  ros::NodeHandle n;

  std::string clientid = "mqttclient1";
  mosquitto_lib_init();
  mqttclient = mosquitto_new(clientid.c_str(), true, NULL);
  if (NULL == mqttclient) {
    ROS_ERROR("fail to create mosquitto client\n");

  } else {
    mosquitto_connect_callback_set(mqttclient, connect_callback);
    mosquitto_message_callback_set(mqttclient, message_callback);
    int ret = mosquitto_connect(mqttclient, "cloud", 1883, 60);
    ROS_INFO("[INFO] mosquitto_connect: %d\n", ret);
    ret = mosquitto_loop_start(mqttclient);
  }

  ros::Subscriber sub = n.subscribe("/example", 1, exampleCallback);
  ros::spin();

  return 0;
}
ここまでできてたらビルドを実行します。
$ source /root/mqtt_ws/devel/setup.bash
$ catkin_make
ビルド後、以下のようにコマンドを実行し動けば完了です。
$ rosrun mqtt_socket mqtt_publisher
最終的なディレクトリ構成は以下のような感じになります。
/root
  └── mqtt_ws
      ├── build
      ├── devel
      └── src
          ├── CMakeLists.txt -> /opt/ros/kinetic/share/catkin/cmake/toplevel.cmake
          └── mqtt_socket
              ├── CMakeLists.txt
              ├── include
              │   └── mqtt_socket
              ├── package.xml
              └── src
                  └── mqtt_publisher.cpp
webアプリの作成
環境構築
前回と同様にvue でプロジェクトを作成。
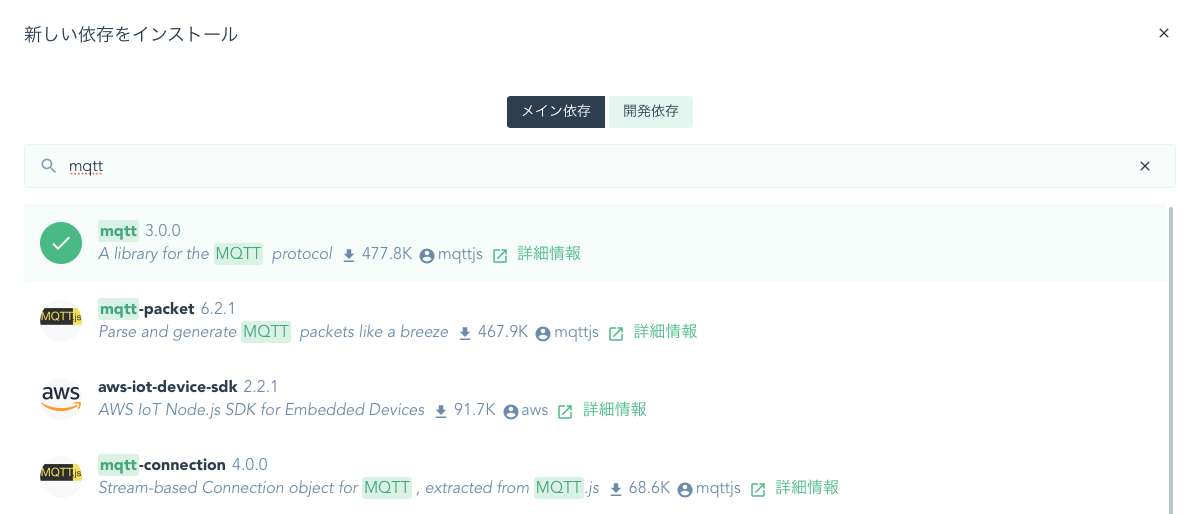
プロジェクト作成後、MQTT.jsをインストールするため、左のメニュー(?)の「依存」をクリック。
「依存をインストール」をクリックして「mqtt」を入力しインストール。
brokerサーバと接続するよう、以下のようにコードを修正。
 <template>
   <div id="app">
-    <img alt="Vue logo" src="./assets/logo.png">
-    <HelloWorld msg="Welcome to Your Vue.js + TypeScript App"/>
+    <MqttClient/>
   </div>
 </template>

 <script lang="ts">
 import { Component, Vue } from 'vue-property-decorator';
-import HelloWorld from './components/HelloWorld.vue';
+import MqttClient from './components/MqttClient.vue';

 @Component({
   components: {
-    HelloWorld,
+    MqttClient,
   },
 })
 export default class App extends Vue {}
<template>
  <div class="mqtt">
    <h1>Mqtt Topic: {{ topic }}</h1>
  </div>
</template>

<script lang="ts">
import { Component, Prop, Vue } from 'vue-property-decorator';
import * as Mqtt from 'mqtt';

@Component
export default class MqttClient extends Vue {
  private topic: string = 'unknown';
  private client!: Mqtt.MqttClient;

  constructor() {
    super();
    this.client = Mqtt.connect('ws://<<broker server IP>>:39090');
  }

  private mounted() {
    this.client.on('connect', () => {
      console.log('conect with broker server');
      this.client.subscribe('/MQTTTopic');
    });

    this.client.on('message', (topic: string, payload: Buffer) => {
      console.log({topic});
      this.topic = topic;
    });

  }

}
</script>
ROS Topicを受信し表示を更新するページと、MQTT Topicを受信し表示を更新するページを開き、
ROS Topicを受信するページの「BUTTON」を押下することで表示が更新されれば成功です。

長くなりましたが、ここまでお付き合いしていただきありがとうございます。