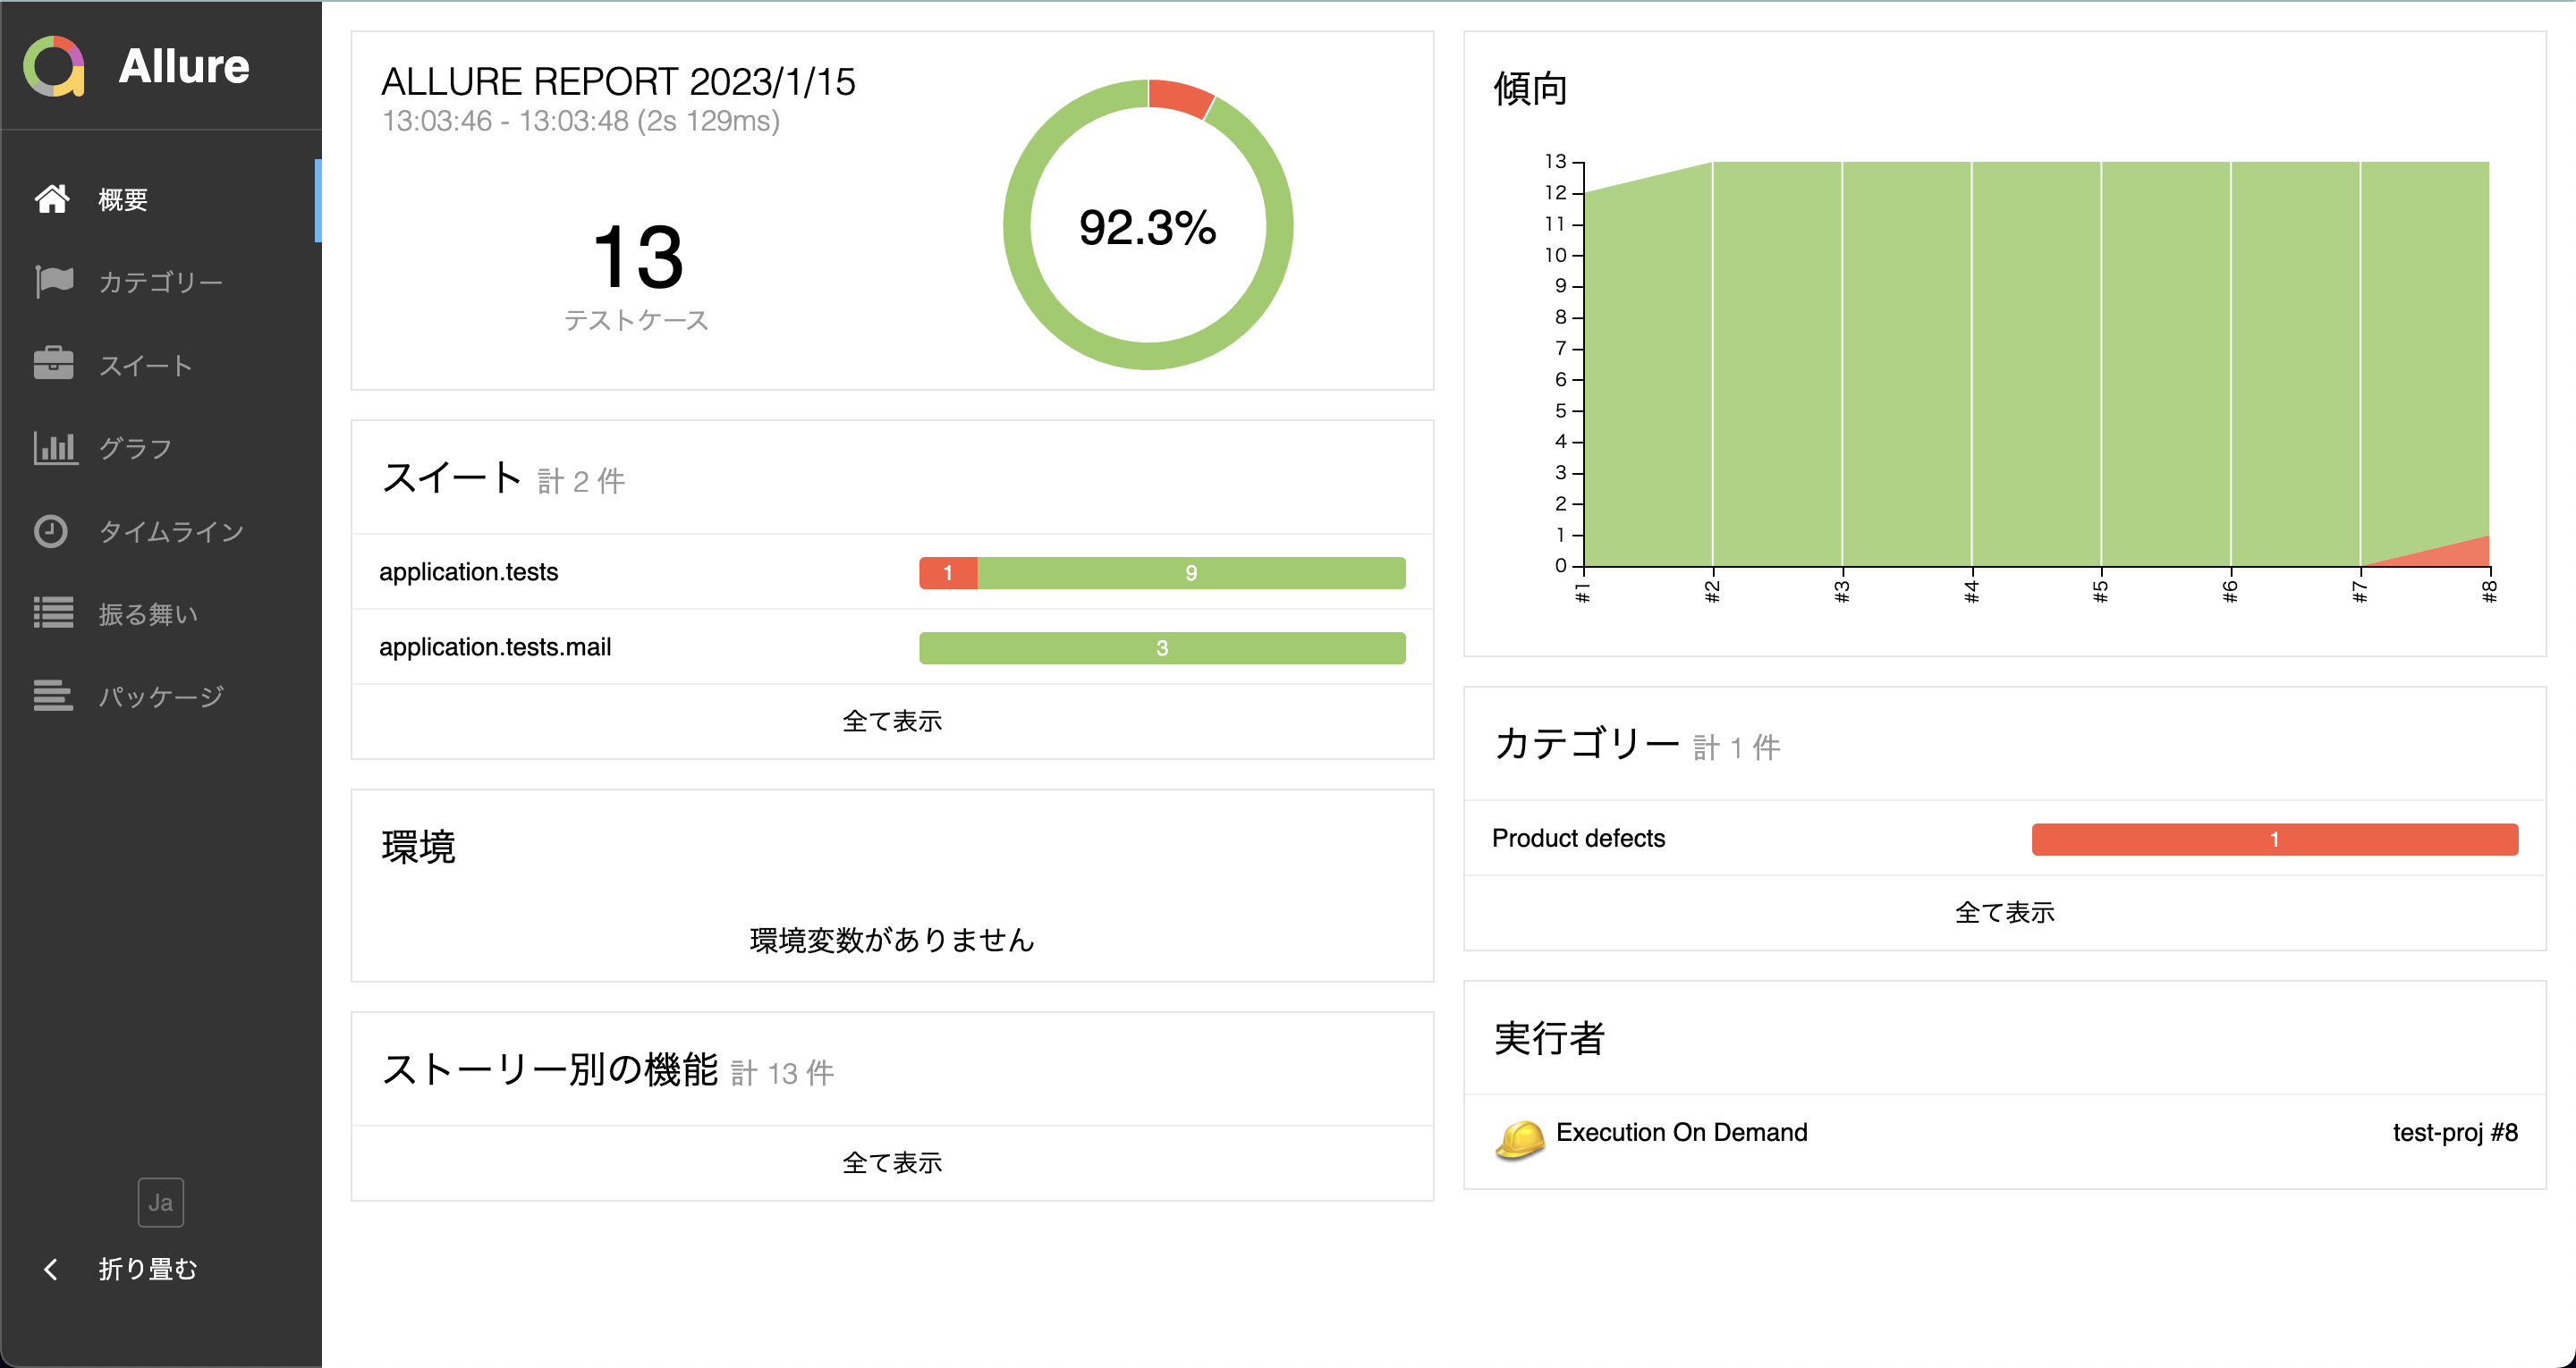
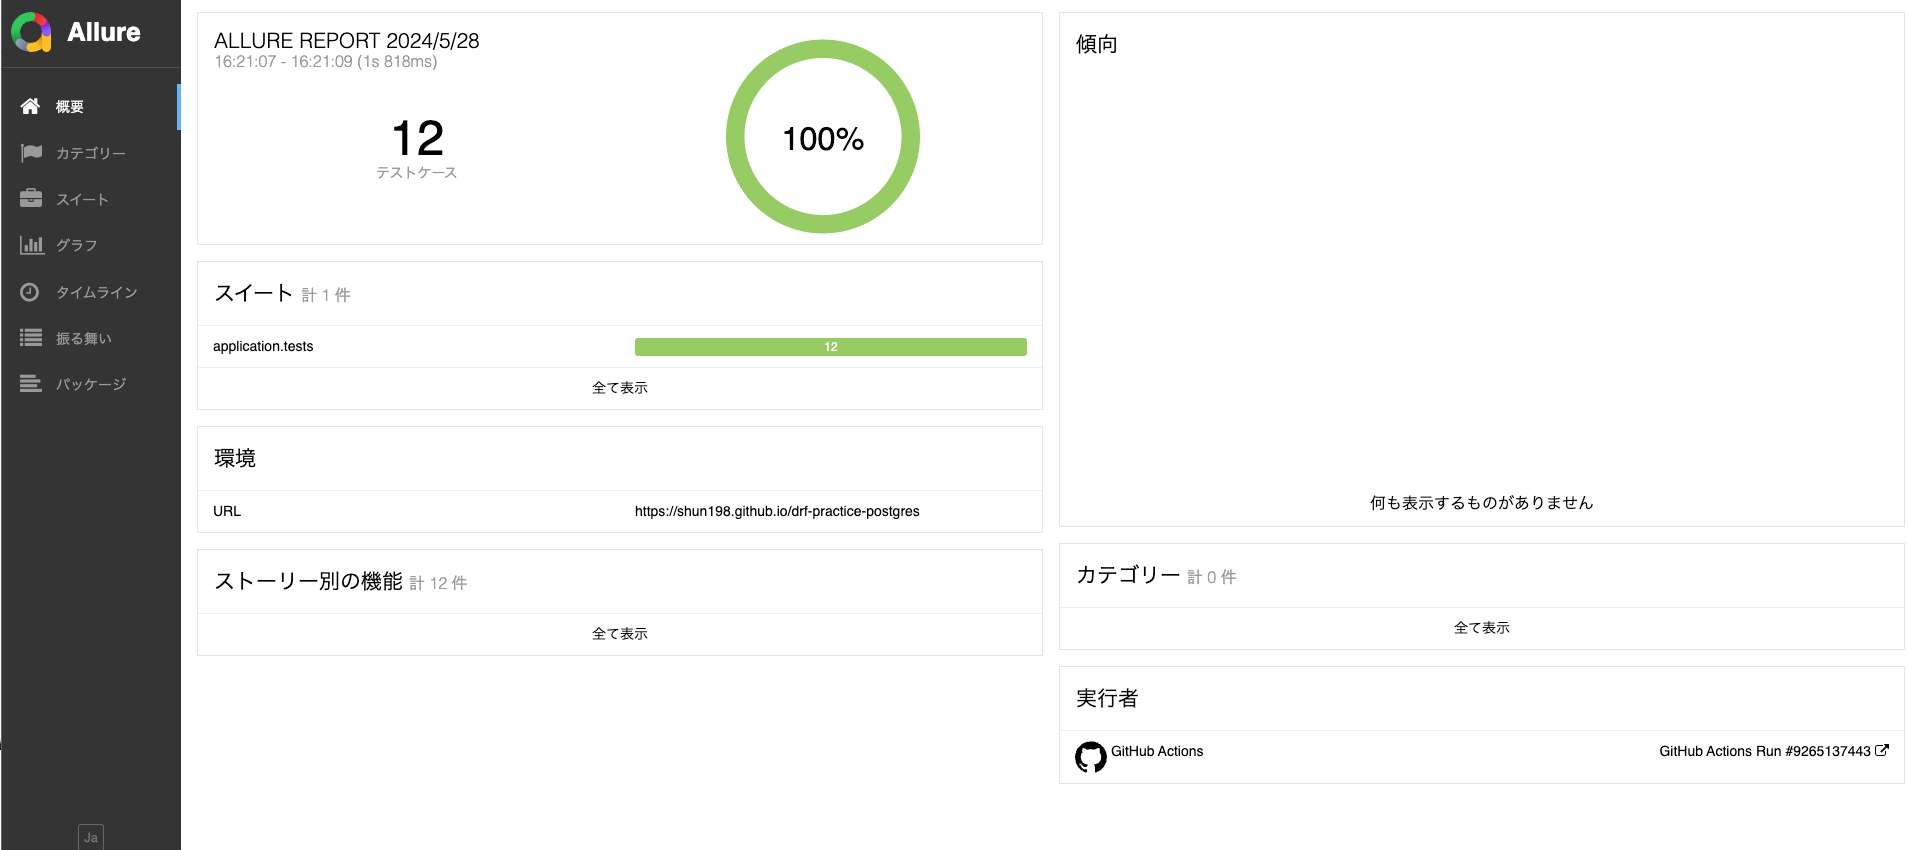
概要
Allure Reportをローカル上で使用する方法について解説します
また、記事の後半では自動生成したレポートをGitHub Pagesへデプロイする方法についても記載しています
前提
- 本記事ではDockerとdocker-composeを使用します
- WebフレームワークはDjango、テスト用フレームワークはPytestを使用
Allureとは?
公式ドキュメントにも記載している通りテストレポートを自動生成するツールです
Allure Framework is a flexible lightweight multi-language test report tool
- PythonのPytest
- RailsのRSpec
- JavaのjUnit
- PHPのPHPUnit
- KotlinのKotest
- JavaScriptのJasmine
にも対応しています
今あげたテストフレームワーク以外にも対応しているので詳細は公式ドキュメントを参照してください
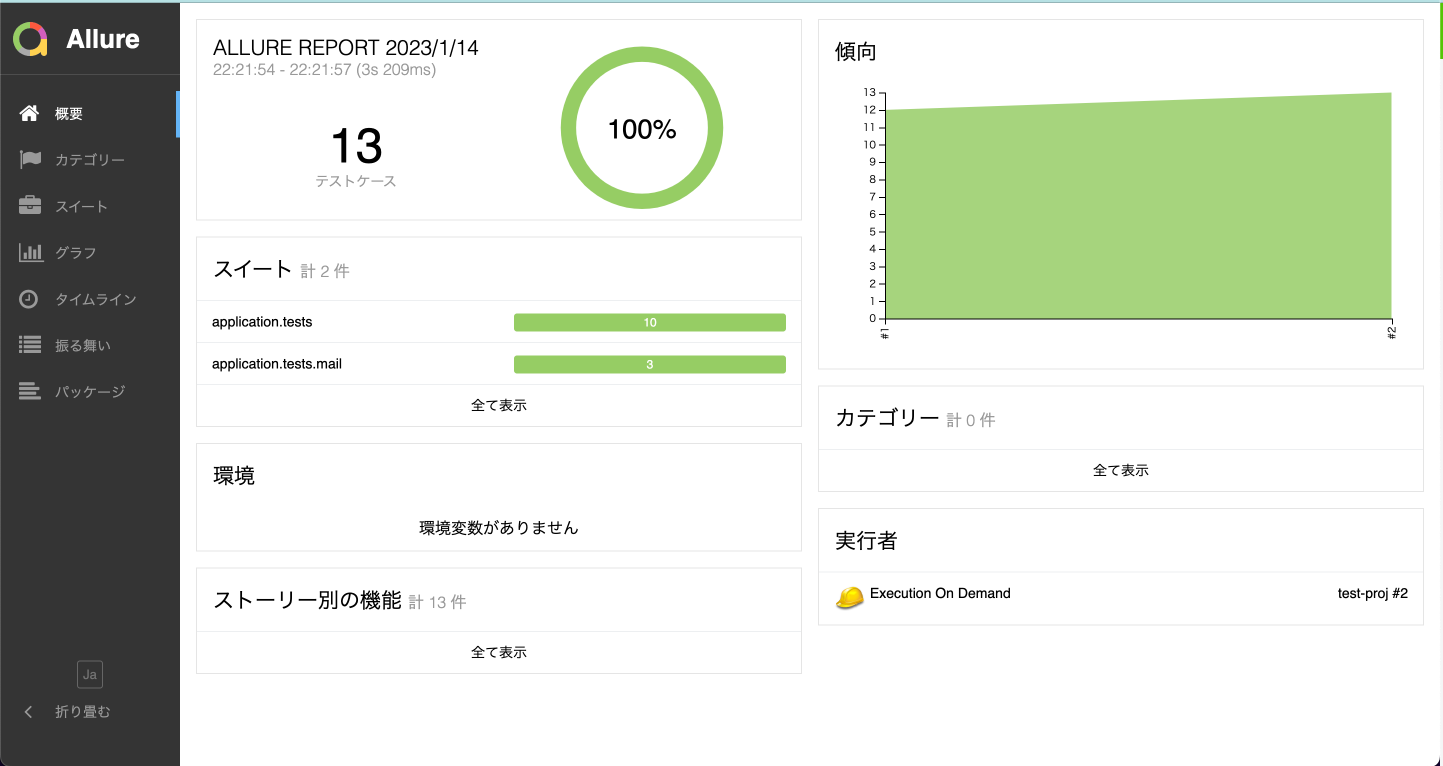
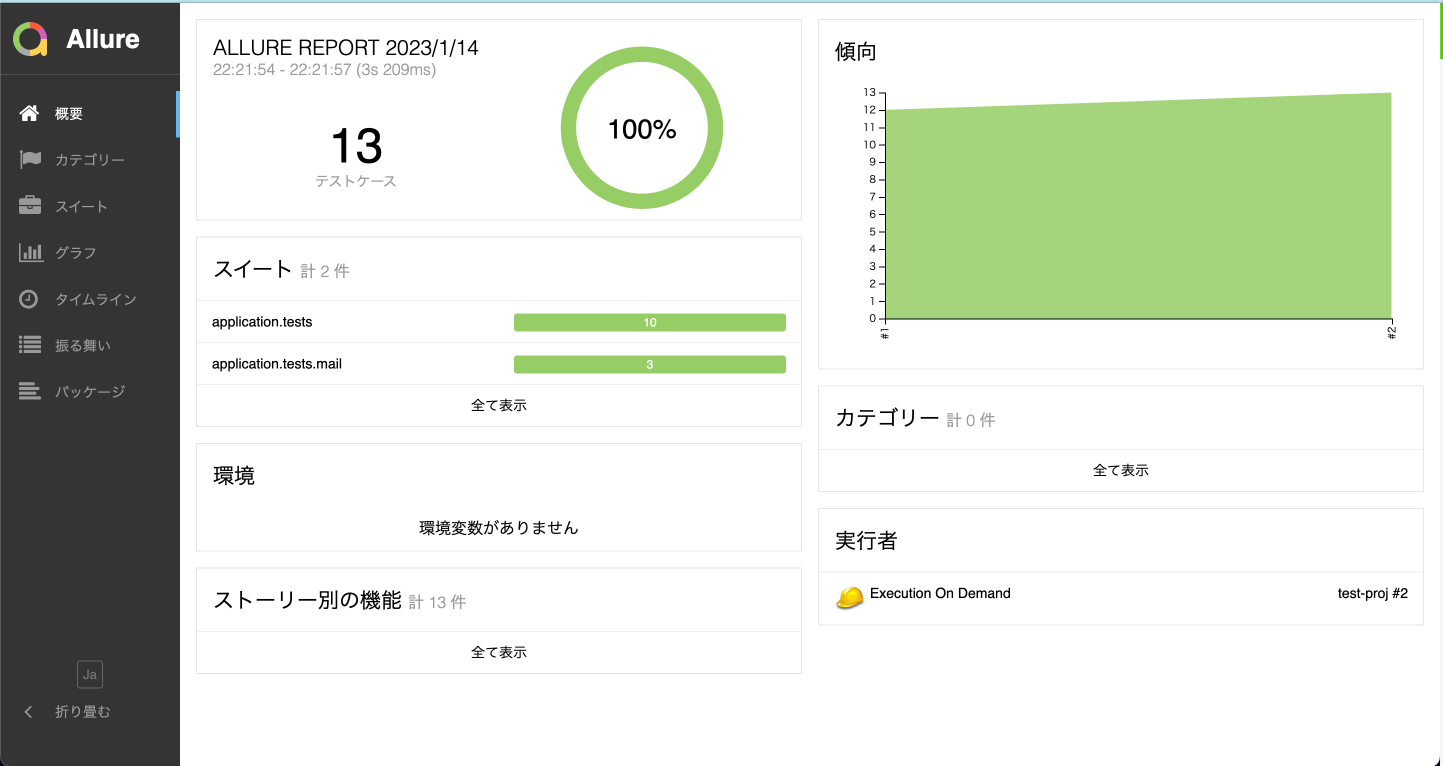
今回私はPytestでいくつかテストコードを作成してますが
- テスト数
- カバレージ
- 所要時間
などさまざまな情報を表示できます
しかも日本語にも対応しているのでありがたいです
記事の後半でレポートの内容を詳細に説明をしたいと思います
allure-docker-serviceとallure-docker-service-ui
ローカルで実行している記事が多いですが私はローカル環境を汚したくないので今回はDockerを使います
- allure-docker-service
- allure-docker-service-ui
の2つのDocker Imageを使用します
docker-compose.ymlに以下を記載します
version: '3'
services:
  allure:
    container_name: allure
    image: "frankescobar/allure-docker-service"
    environment:
      # 毎秒テスト結果を確認するかどうかの設定です
      # マシンへの負担が大きいとのことなので今回はNONEにします
      CHECK_RESULTS_EVERY_SECONDS: NONE
      # テストの履歴を保存したいのでKEEP_HISTORYを有効化(TRUE)にします
      KEEP_HISTORY: 1
      # 直近25回分までを保存します
      KEEP_HISTORY_LATEST: 25
    ports:
      - "5050:5050"
    volumes:
      - ${PWD}/allure-results:/app/allure-results
      - ${PWD}/allure-reports:/app/default-reports

  allure-ui:
    container_name: allure-ui
    image: "frankescobar/allure-docker-service-ui"
    environment:
      ALLURE_DOCKER_PUBLIC_API_URL: "http://localhost:5050"
      ALLURE_DOCKER_PUBLIC_API_URL_PREFIX: ""
    ports:
      - "5252:5252"
公式ドキュメントに記載されている通りvolumesのディレクトリを変更してしまうとコンテナ側でテスト結果の保存や反映ができなくなってしまいます
今回はcontainer_nameだけ変更してポートも含めて公式に書いてある通りの構成にします
The /app/allure-results directory is inside of the container. You MUST NOT change this directory, otherwise, the container won't detect the new changes.
The /app/default-reports directory is inside of the container. You MUST NOT change this directory, otherwise, the history reports won't be stored.
docker-compose.ymlを作成後、
docker-compose up -d
を実行します
すると、プロジェクトのルートディレクトリに以下のフォルダが作成されます
❯ tree
.
├── allure-reports
└── allure-results
- allure
- allure-ui
のコンテナが起動できていることも確認できました
docker ps -a
3b88c08ffc9e   frankescobar/allure-docker-service      "/bin/sh -c '$ROOT/r…"   2 minutes ago   Up 2 minutes (healthy)   4040/tcp, 0.0.0.0:5050->5050/tcp                 allure
becb4e3f0b5d   frankescobar/allure-docker-service-ui   "docker-entrypoint.s…"   2 minutes ago   Up 2 minutes (healthy)   0.0.0.0:5252->5252/tcp                           allure-ui
テストレポートを作成しよう!
テストレポートを作成する際は以下の順で行います
- プロジェクトの作成
- テストを実行し、テスト結果をJSONで出力
- JSONファイルをallureコンテナへアップロード
- レポートの作成
手順は多いですが順番にやっていきましょう
プロジェクトの作成
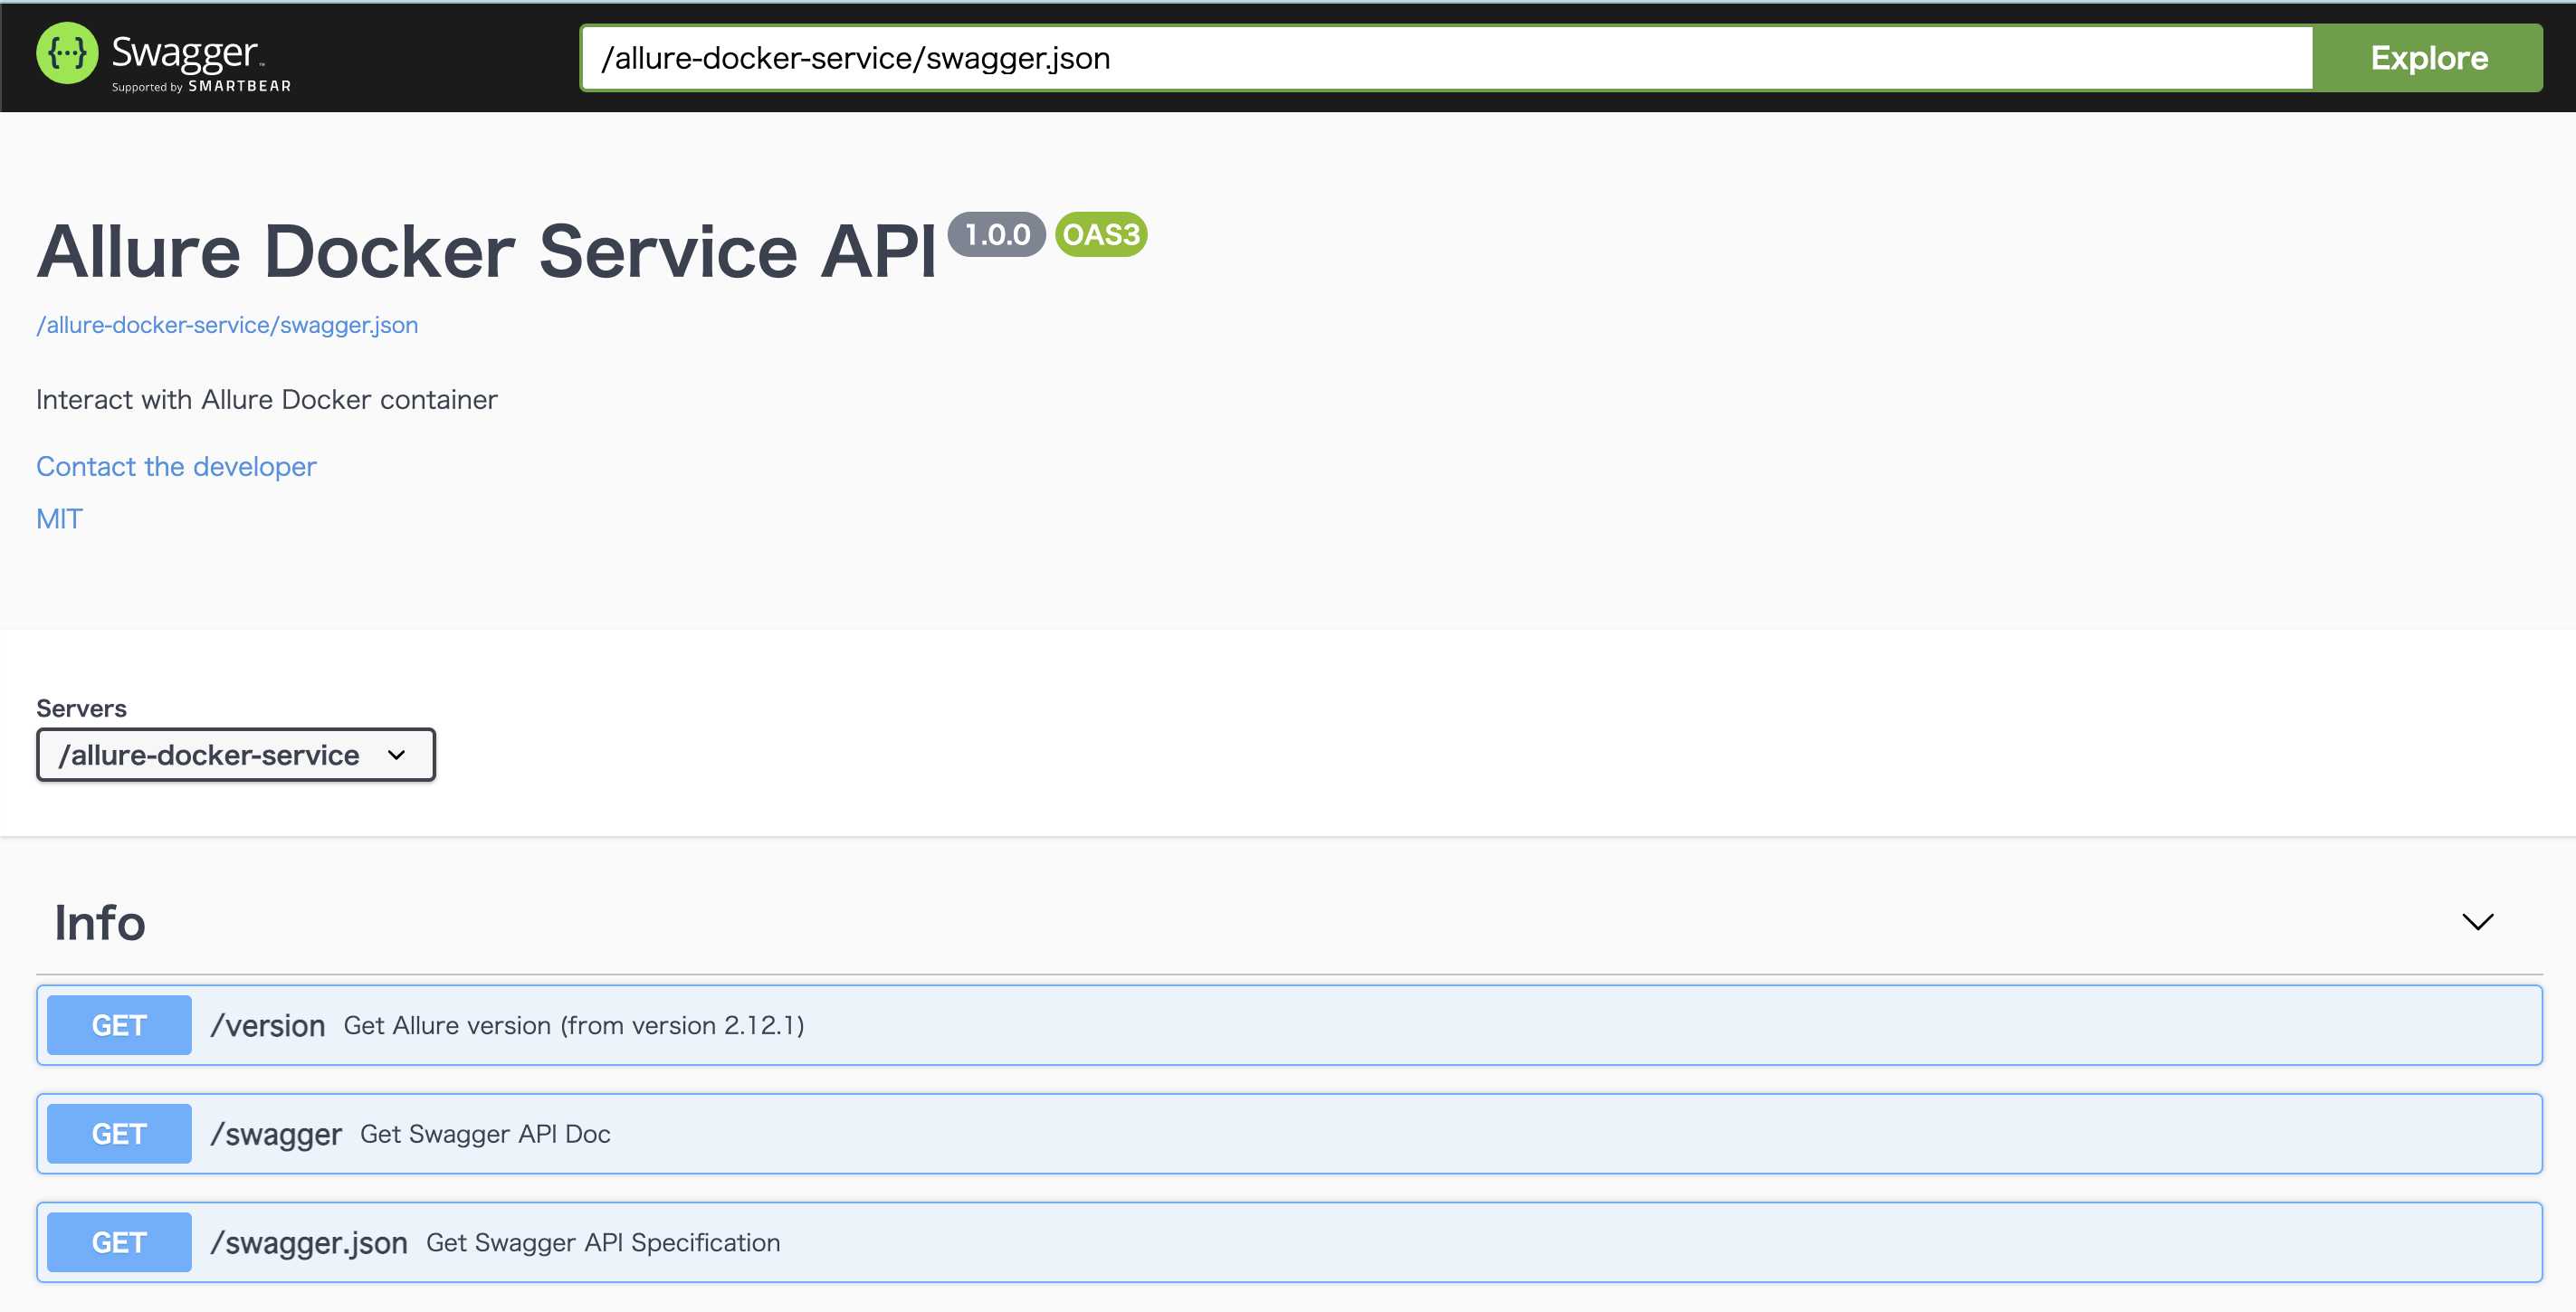
http://127.0.0.1:5050 にアクセスすると以下の画面が表示されます
Allure Reportを使用する際はプロジェクトごとにproject-idを設定します
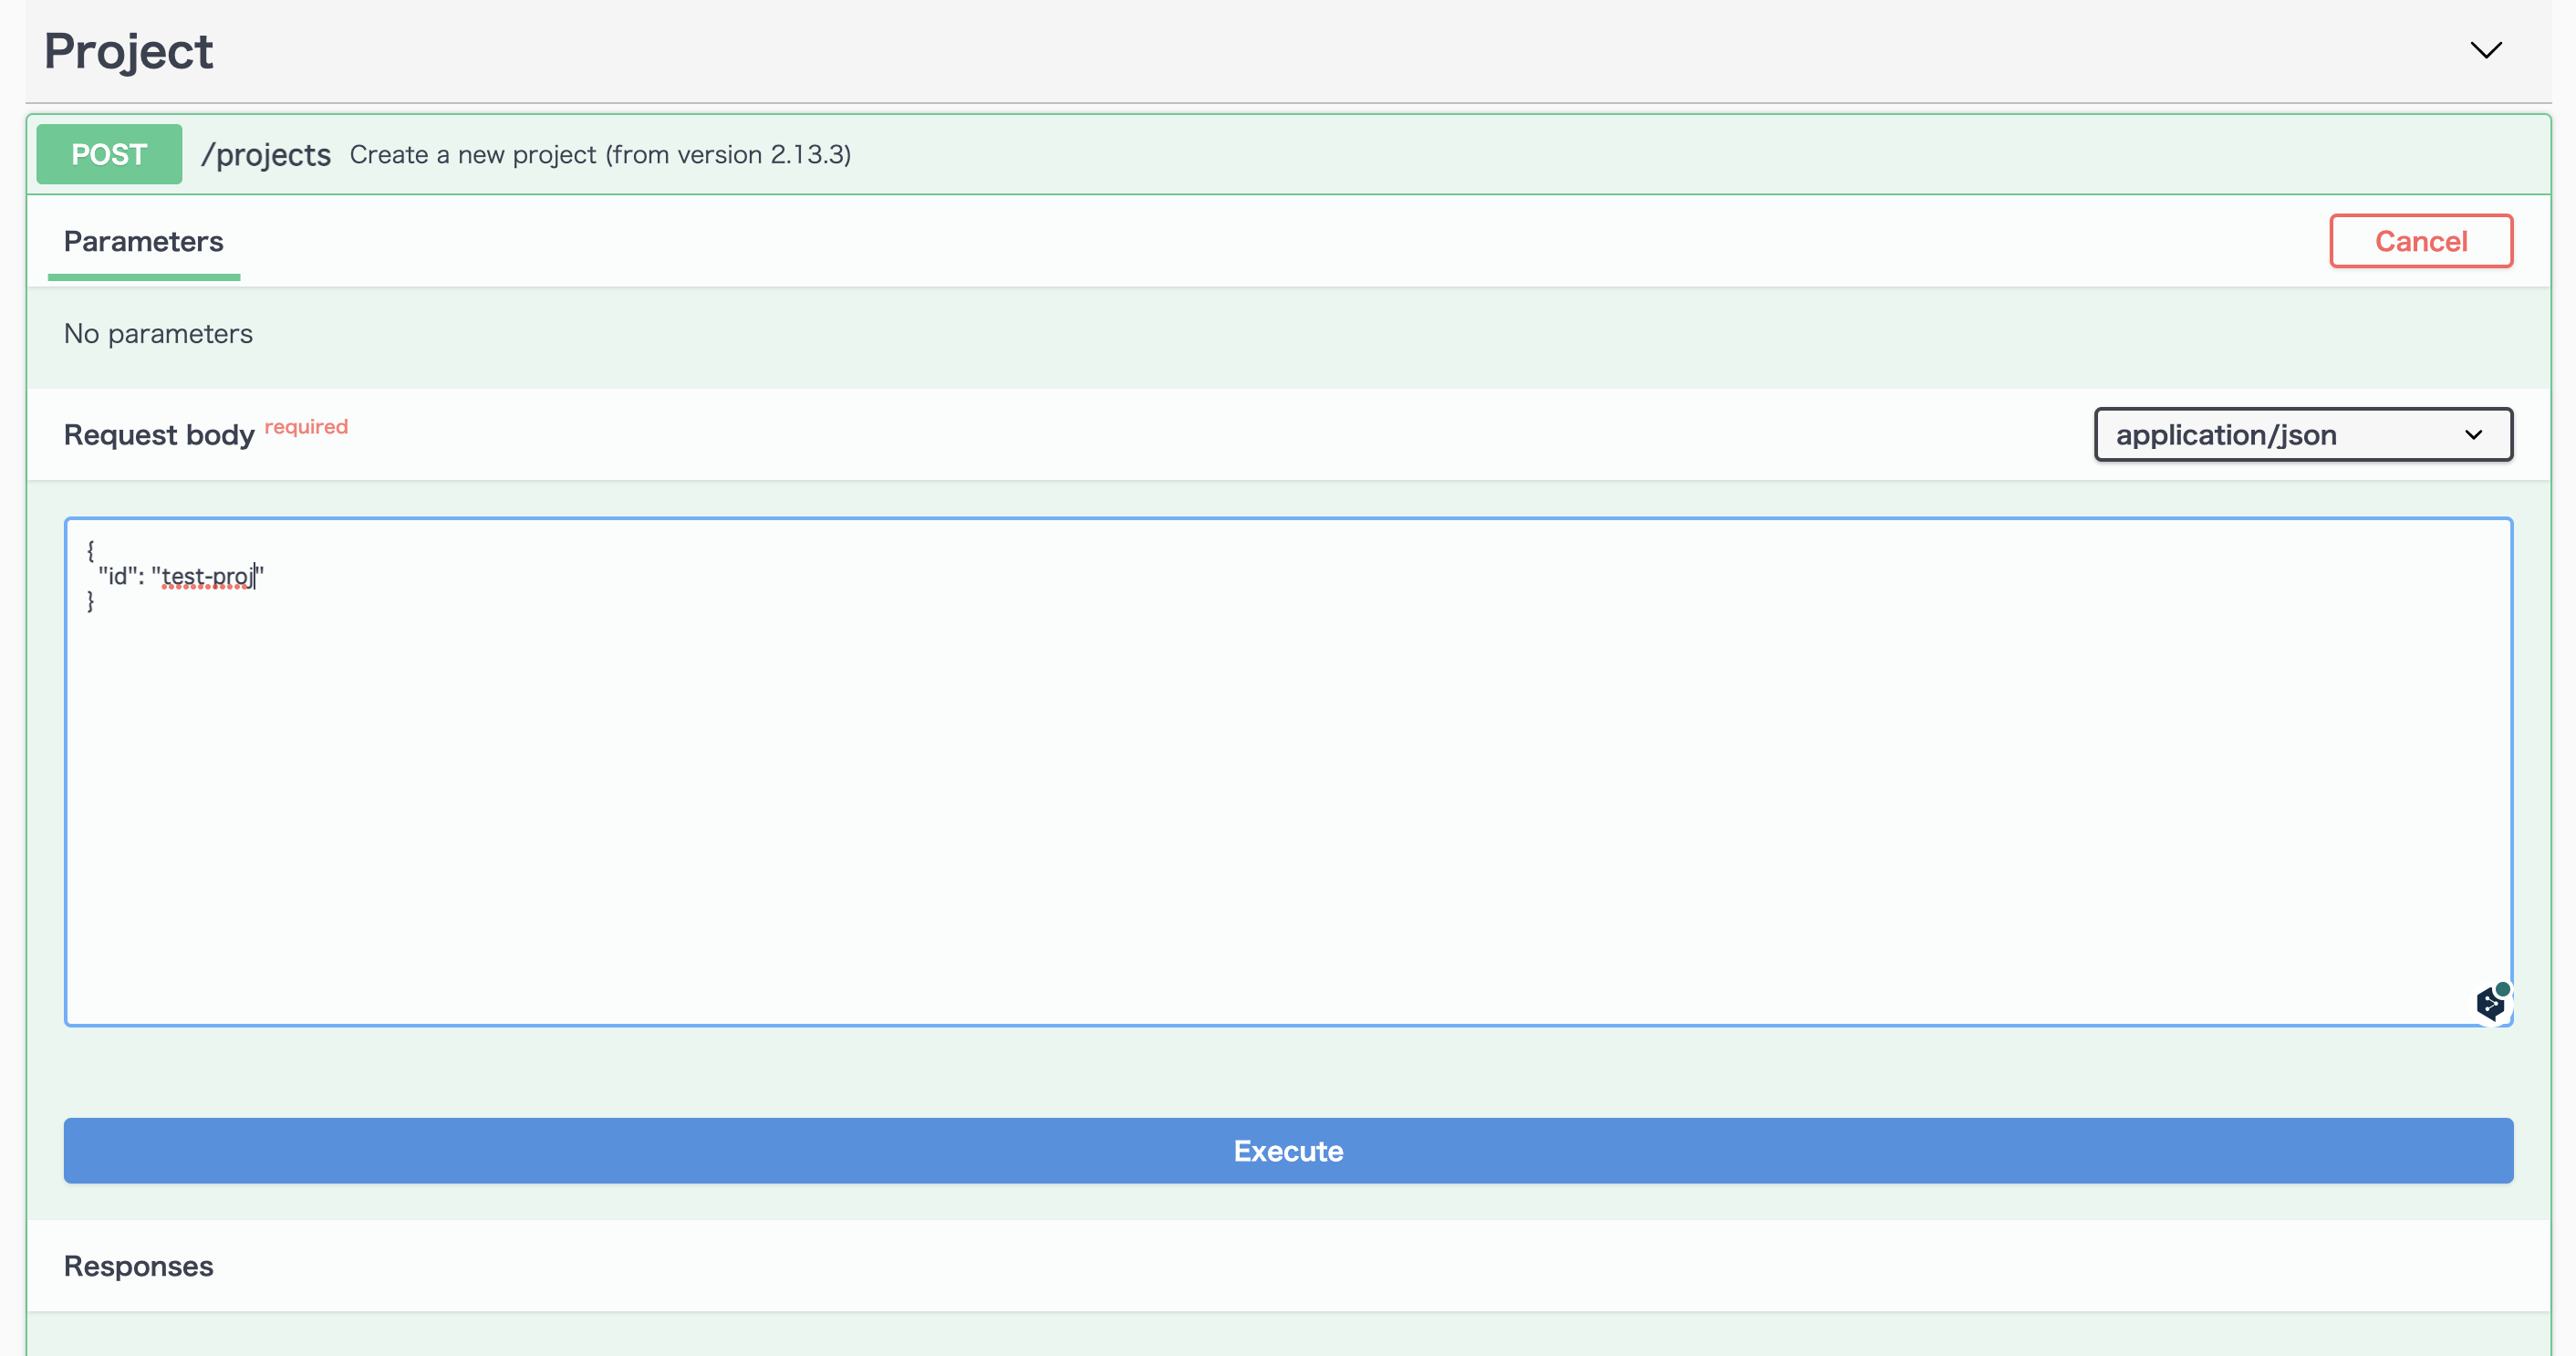
/projectsに任意のidを入力し、POSTリクエストを送ります
今回はtest-projというidで作成し、Executeを押します
以下の画面が表示されたら成功です
テストを実行し、テスト結果をJSONで出力
任意のテストフレームワークを使ってテストを実行し、実行したテストの結果をJSONに出力する必要があります
その際は
各テストフレームワークでのやり方は以下の公式ドキュメントを参照してください
今回私はPytestを使用するのでallure-pytestをインストールします
pip install allure-pytest
その後、以下のコマンドを使用します
pytest --alluredir=allure-results
テストが実行されるとallure-resultsフォルダ内にJSONファイルが作成されます
JSONファイルをallureコンテナへアップロード
先ほどJSONファイルをもとにテストレポートを作成しました
しかし、現状ではローカル上にはあるもののallureコンテナ(サーバ)内にありません
そのため、ローカル上のJSONファイルをallureコンテナへアップロードする必要があります
公式ではアップロード用のシェルスクリプトを用意しています
allure-reportsやallure-resultsと同じプロジェクトのルートディレクトリにシェルスクリプトを作成し、実行します
❯ tree
.
├── allure-reports
├── allure-results
└── send_results.sh
PROJECT_IDの箇所に自身が作成されたプロジェクトidを入れます
今回私はtest-projを入れます
#!/bin/bash

# This directory is where you have all your results locally, generally named as `allure-results`
ALLURE_RESULTS_DIRECTORY='allure-results'
# This url is where the Allure container is deployed. We are using localhost as example
ALLURE_SERVER='http://localhost:5050'
# Project ID according to existent projects in your Allure container - Check endpoint for project creation >> `[POST]/projects`
PROJECT_ID='test-proj'

DIR="$( cd "$( dirname "${BASH_SOURCE[0]}" )" >/dev/null 2>&1 && pwd )"
FILES_TO_SEND=$(ls -dp $DIR/$ALLURE_RESULTS_DIRECTORY/* | grep -v /$)
if [ -z "$FILES_TO_SEND" ]; then
  exit 1
fi

FILES=''
for FILE in $FILES_TO_SEND; do
  FILES+="-F files[]=@$FILE "
done

set -o xtrace
echo "------------------SEND-RESULTS------------------"
curl -X POST "$ALLURE_SERVER/allure-docker-service/send-results?project_id=$PROJECT_ID" -H 'Content-Type: multipart/form-data' $FILES -ik


#If you want to generate reports on demand use the endpoint `GET /generate-report` and disable the Automatic Execution >> `CHECK_RESULTS_EVERY_SECONDS: NONE`
#echo "------------------GENERATE-REPORT------------------"
#EXECUTION_NAME='execution_from_my_bash_script'
#EXECUTION_FROM='http://google.com'
#EXECUTION_TYPE='bamboo'

#You can try with a simple curl
#RESPONSE=$(curl -X GET "$ALLURE_SERVER/allure-docker-service/generate-report?project_id=$PROJECT_ID&execution_name=$EXECUTION_NAME&execution_from=$EXECUTION_FROM&execution_type=$EXECUTION_TYPE" $FILES)
#ALLURE_REPORT=$(grep -o '"report_url":"[^"]*' <<< "$RESPONSE" | grep -o '[^"]*$')

#OR You can use JQ to extract json values -> https://stedolan.github.io/jq/download/
#ALLURE_REPORT=$(echo $RESPONSE | jq '.data.report_url')
シェルスクリプトを作成したら実行します
sh send_results.sh
JSONのレスポンスが帰ってくるので以下のようなメッセージが含まれていたら成功です
"meta_data":{"message":"Results successfully sent for project_id 'test-proj'"}
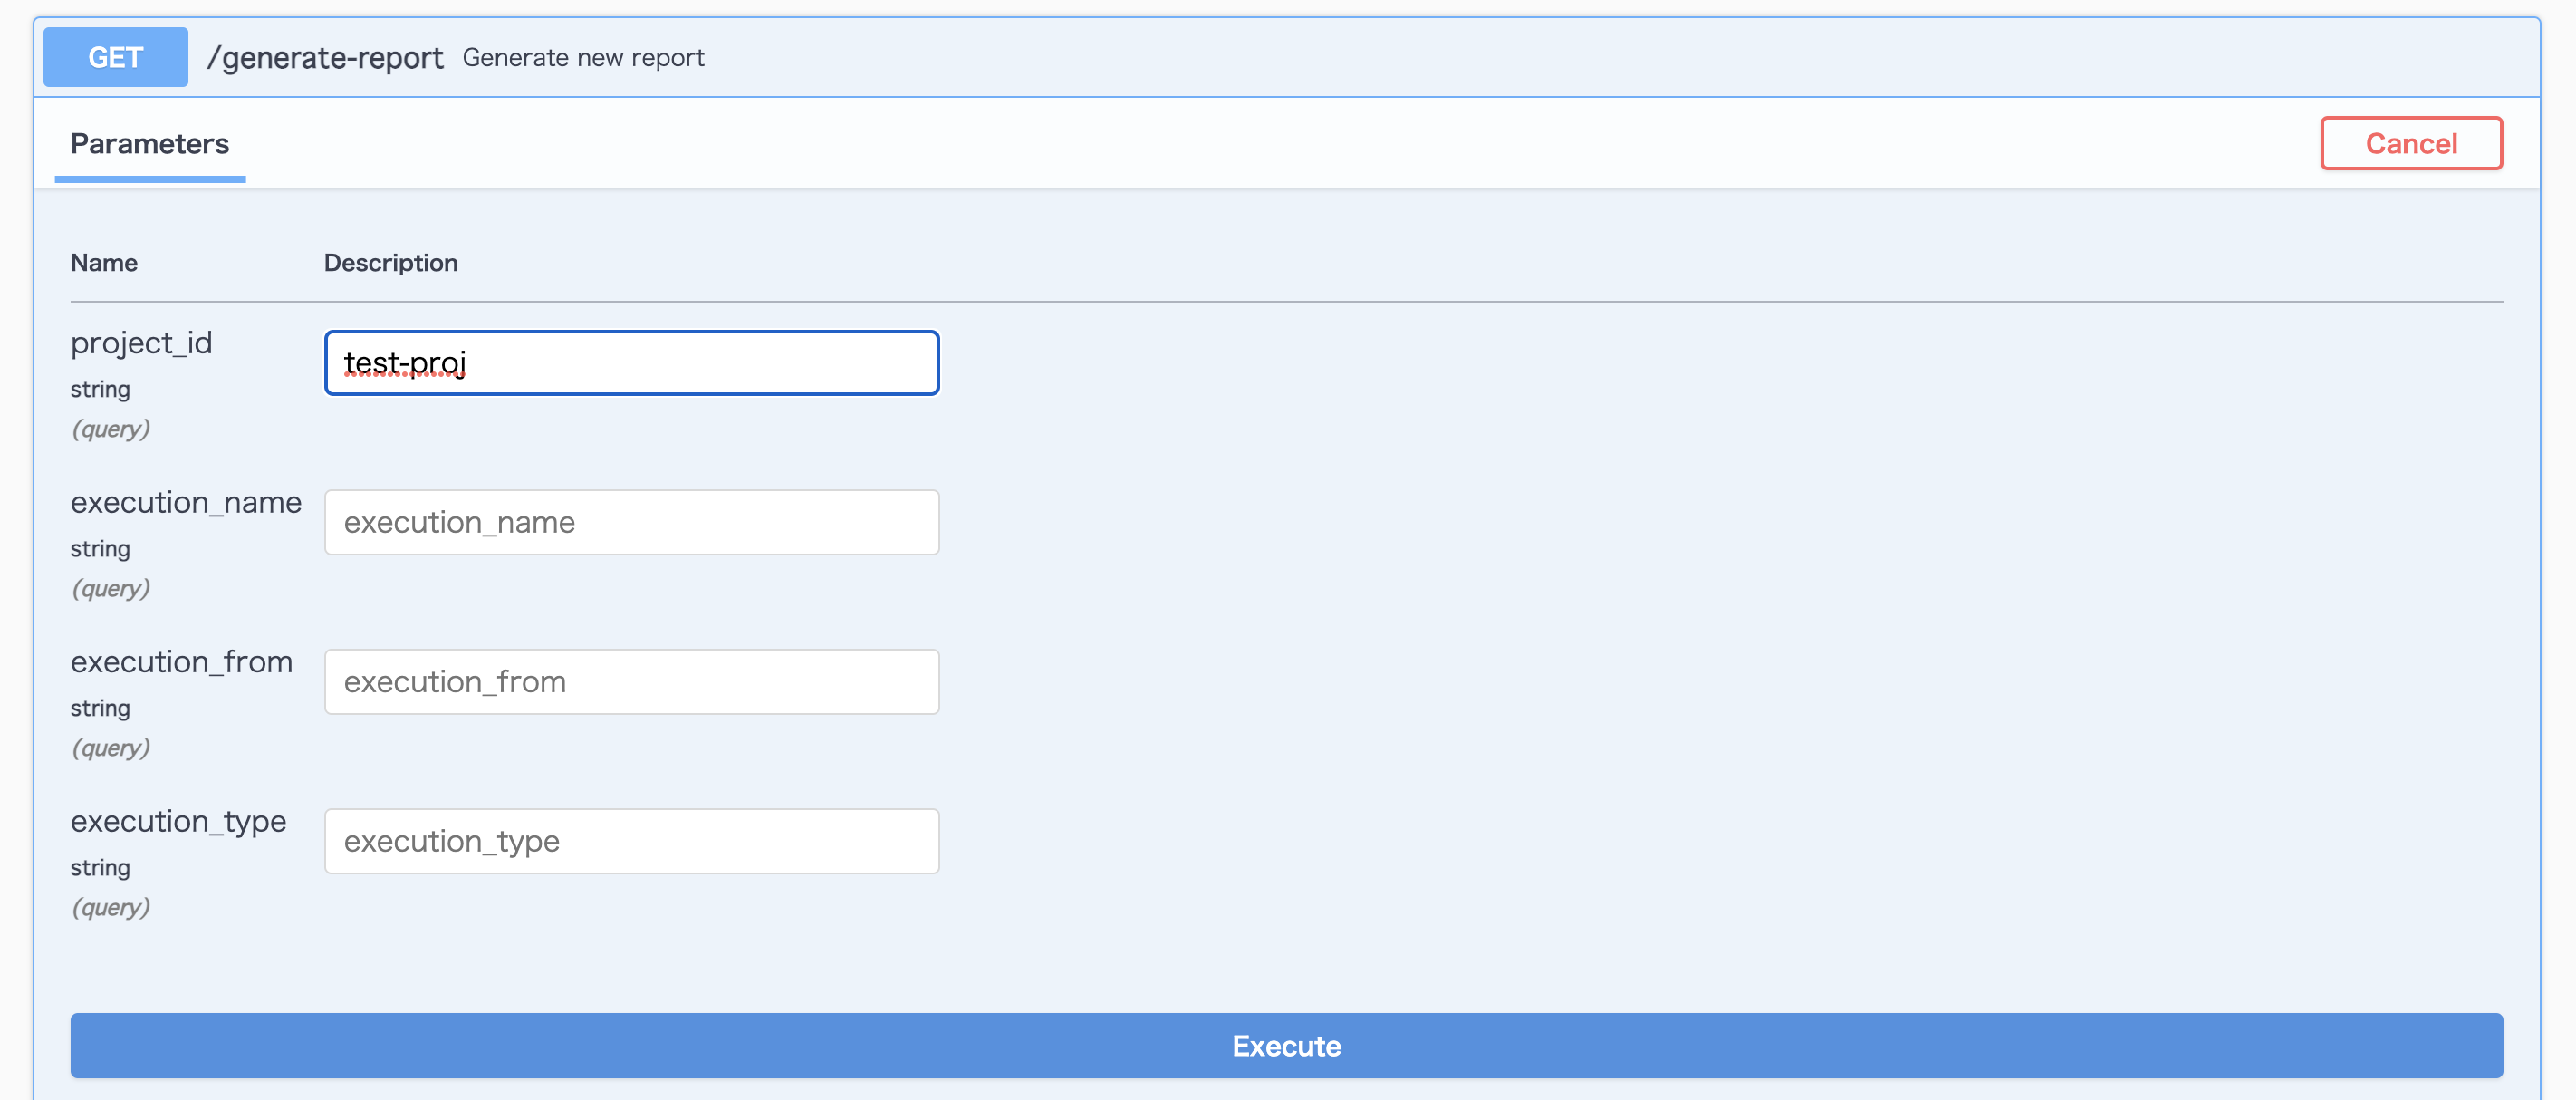
レポートの作成
ここでいよいよテストレポートを作成します
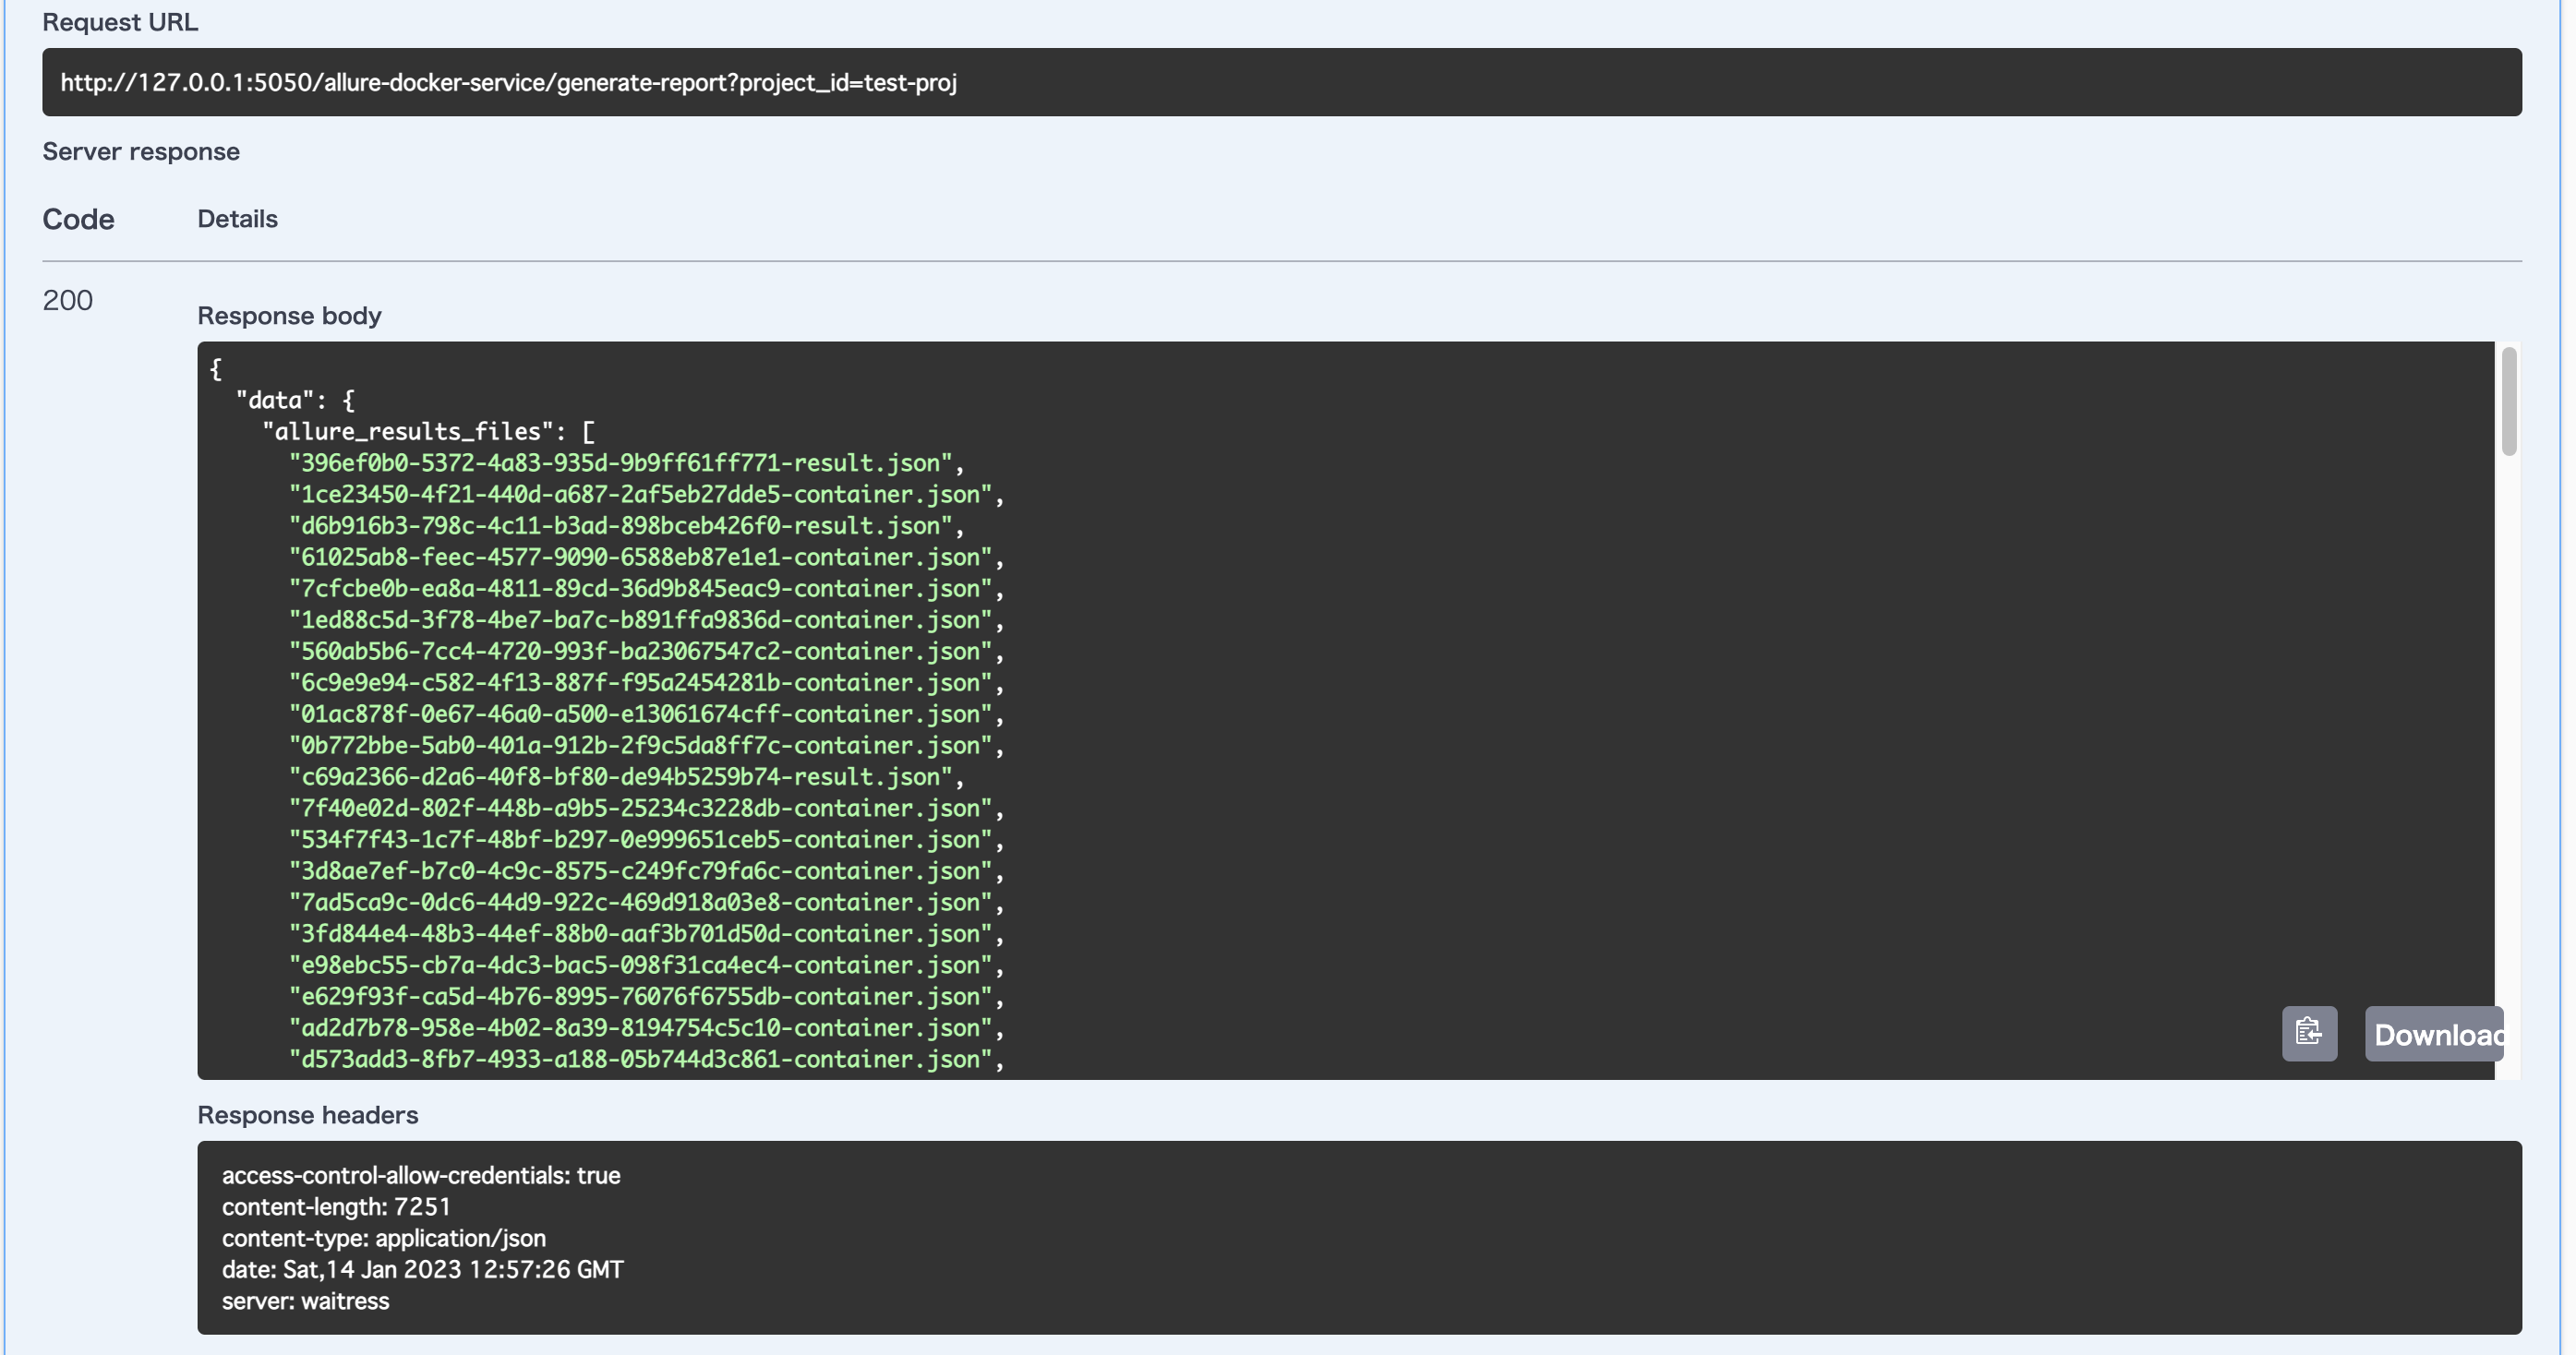
少し時間がかかるので待ちます
テストレポートを見てみよう!
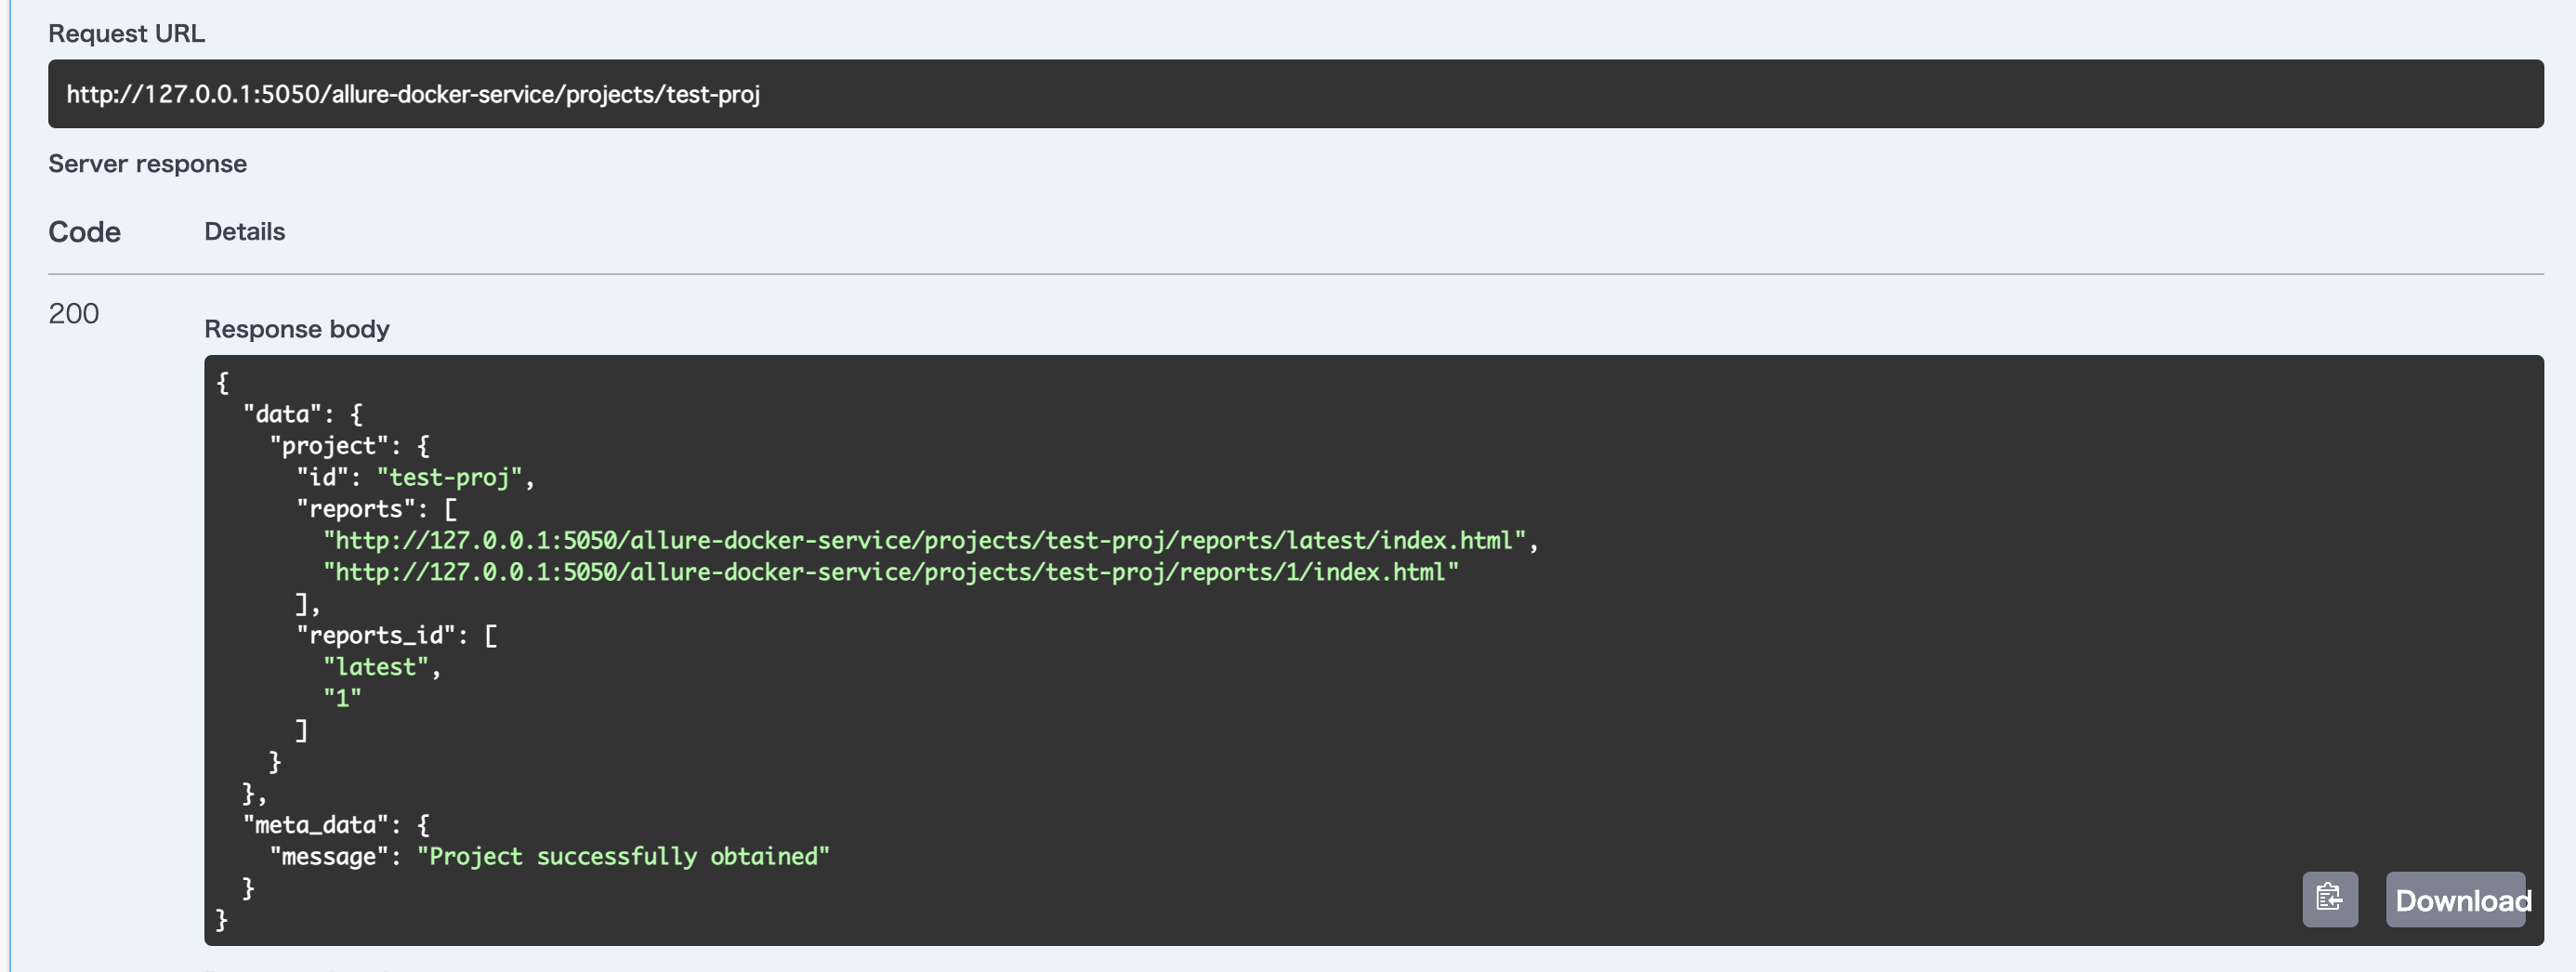
/projects/{id}
へGETリクエストを送ります
idにプロジェクトidを指定し、Executeを押します
レスポンス内にindex.htmlのパスがあります
今回は最新のものが見たいので
http://127.0.0.1:5050/allure-docker-service/projects/test-proj/reports/latest/index.html
を選択します
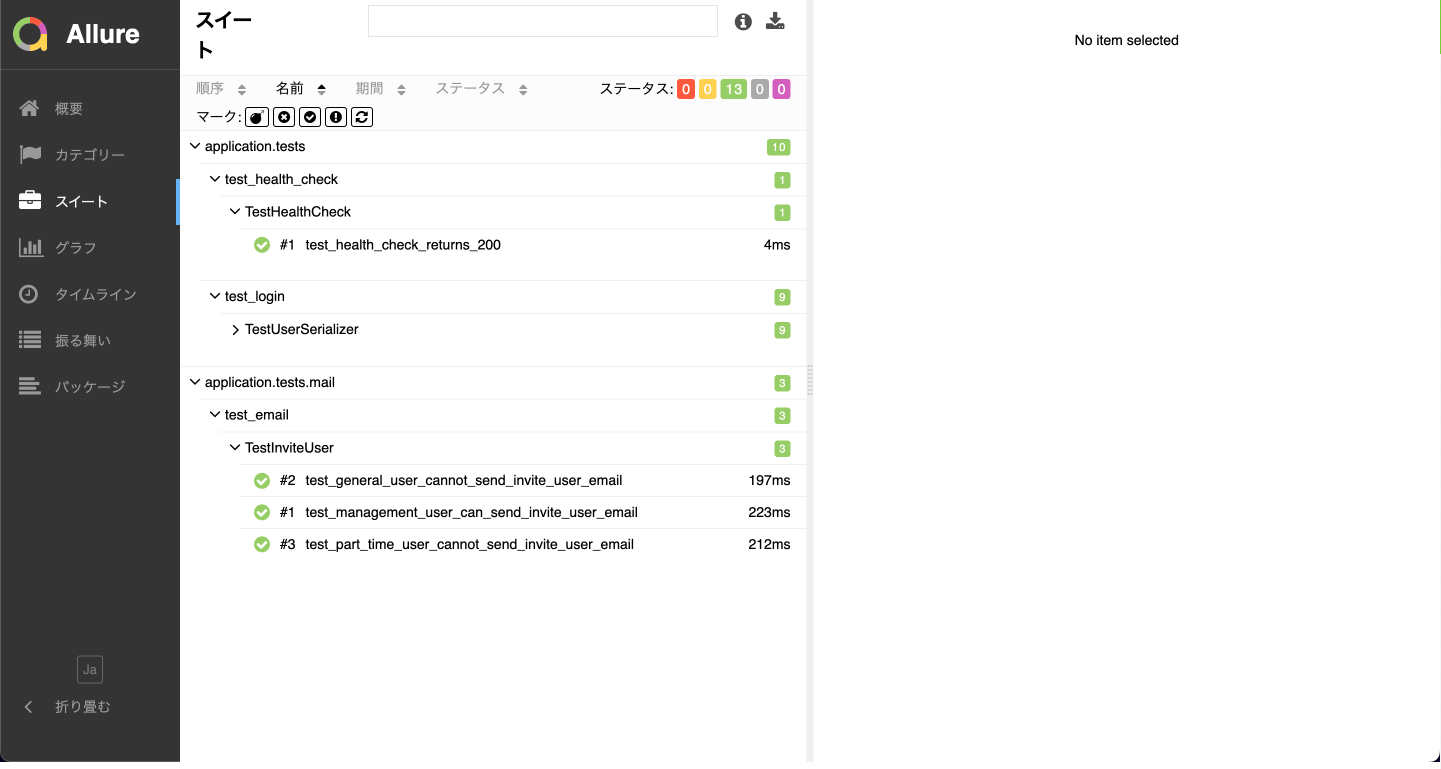
スイート
テストをステータス別で分類できます
分類の種類は以下の通りです
| 色 | 分類 |
|---|---|
| 赤 | 失敗 |
| 黄色 | 故障 |
| 緑 | 成功 |
| グレー | スキップ |
| 紫 | 不明 |
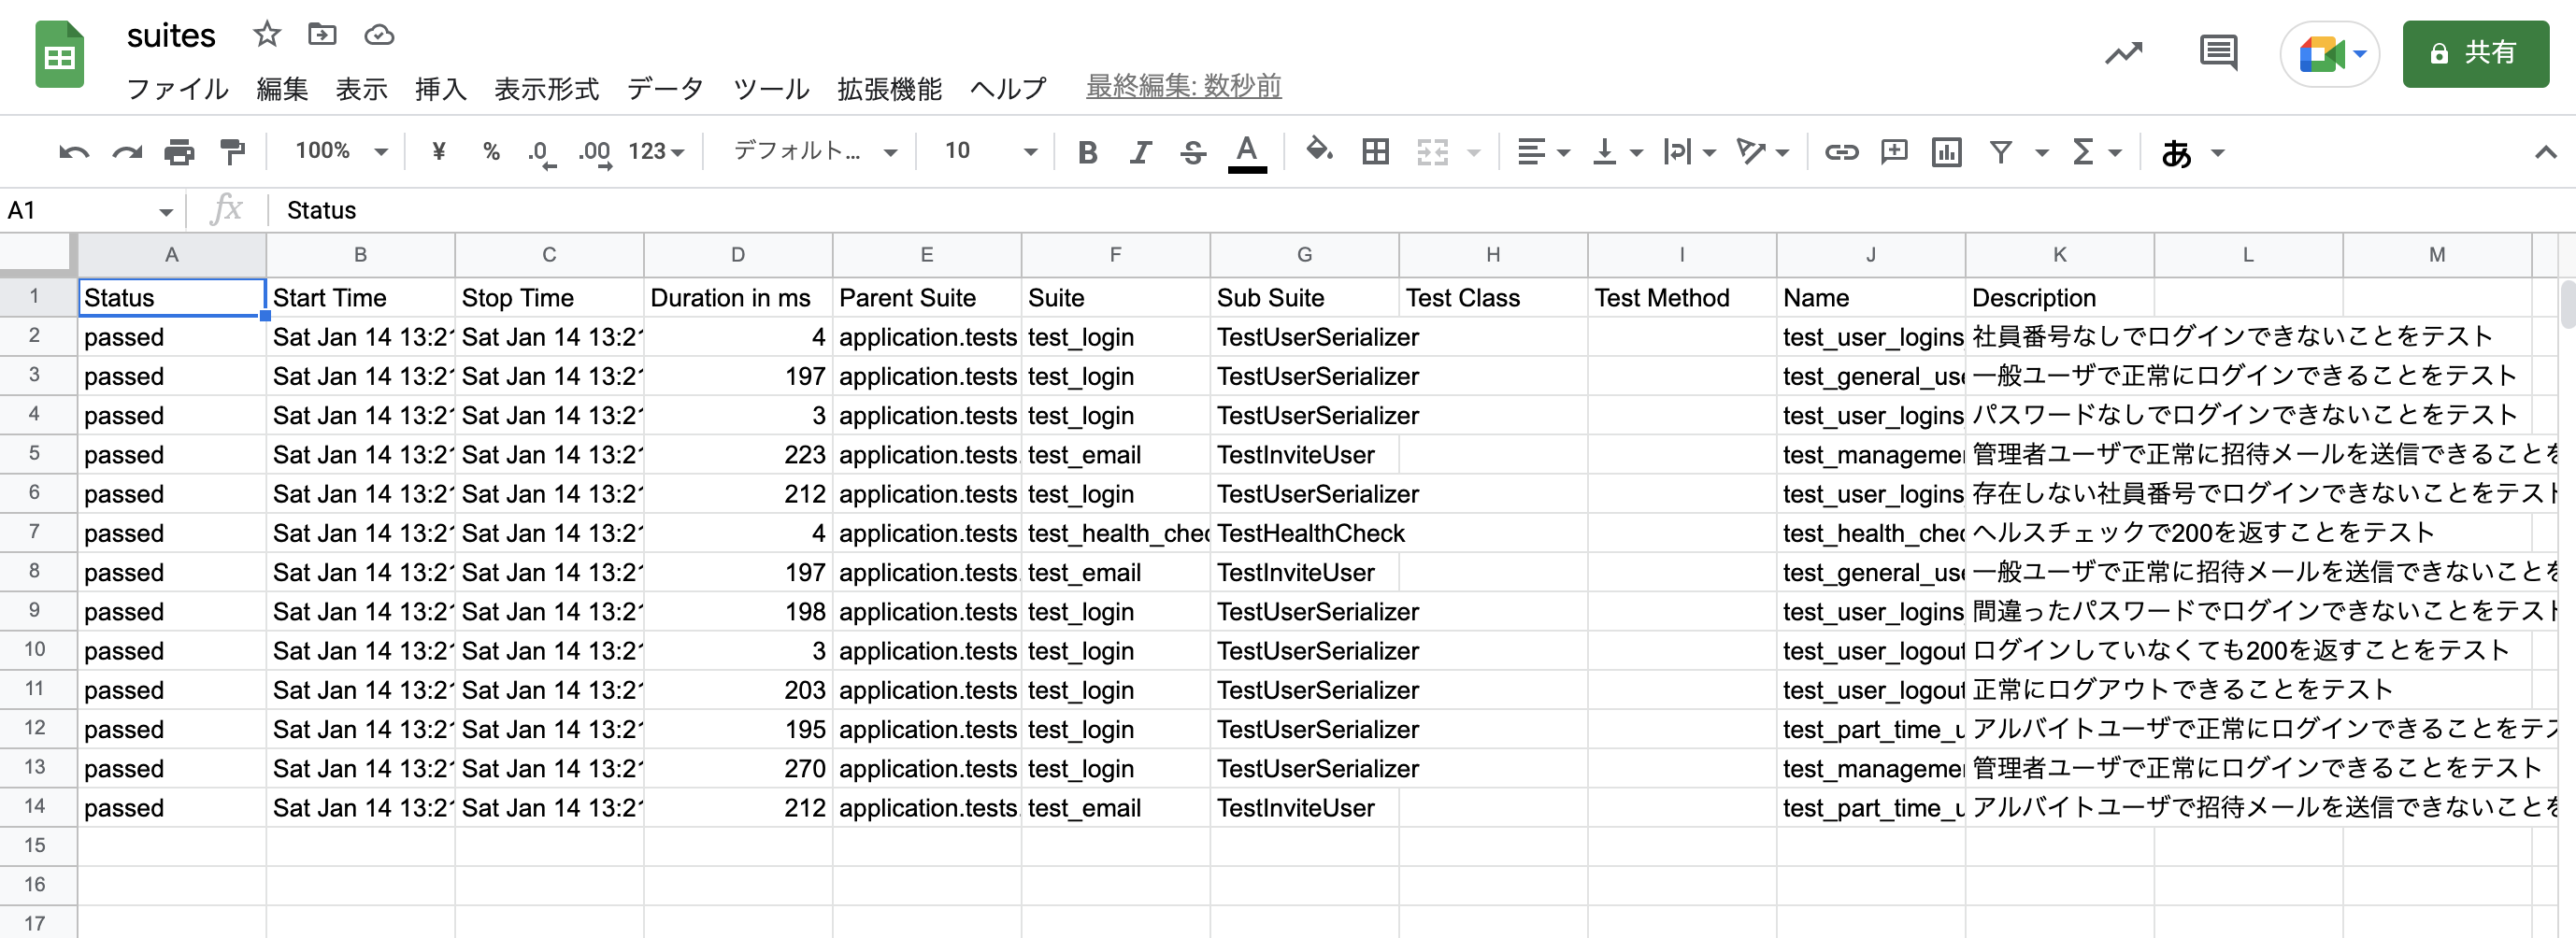
また、ステータスの真上に結果をCSVファイルに出力するボタンがあります
グラフ
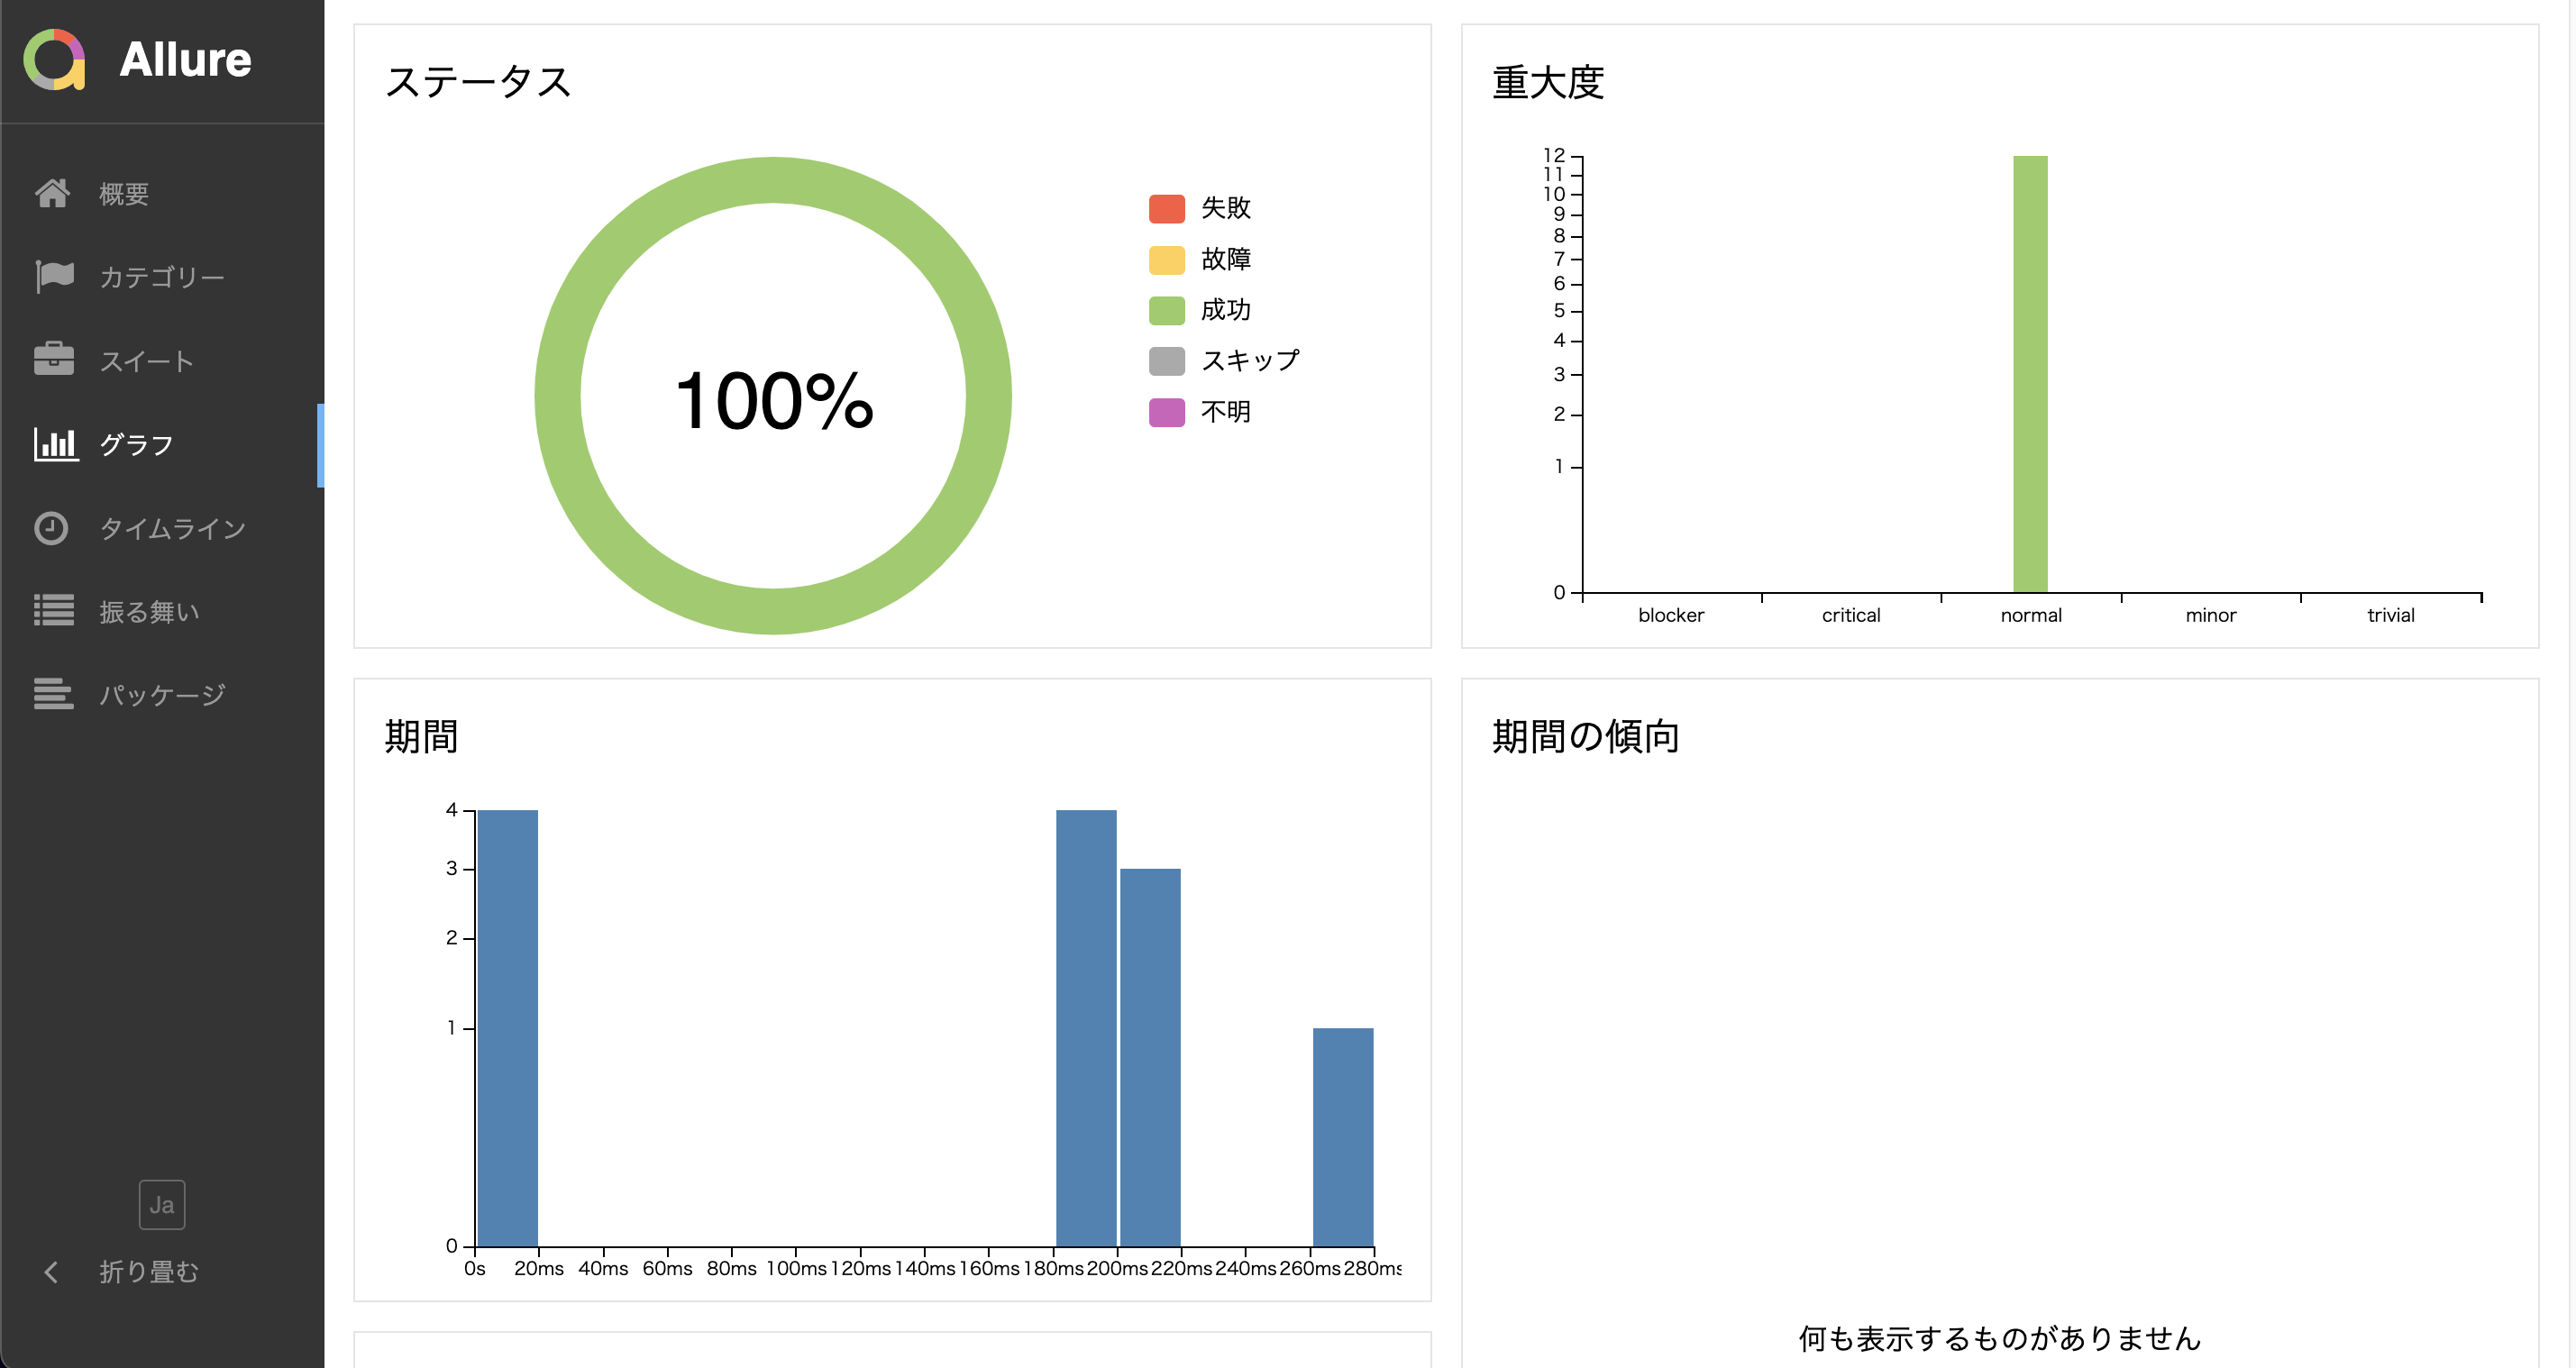
テストの分類や速度をグラフで表示することができます
タイムライン
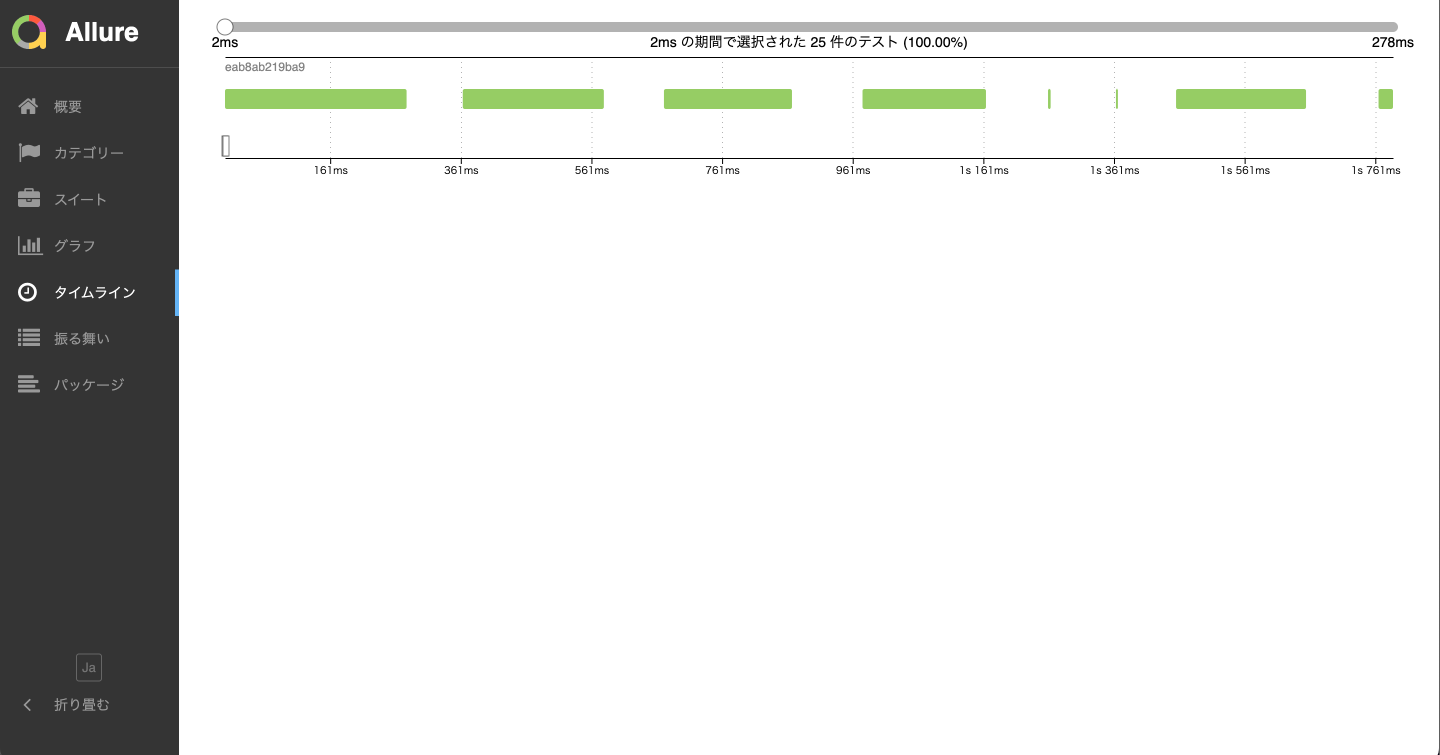
どの順番で、どのテストが、どれくらい時間がかかったかを表示することができます
振る舞い
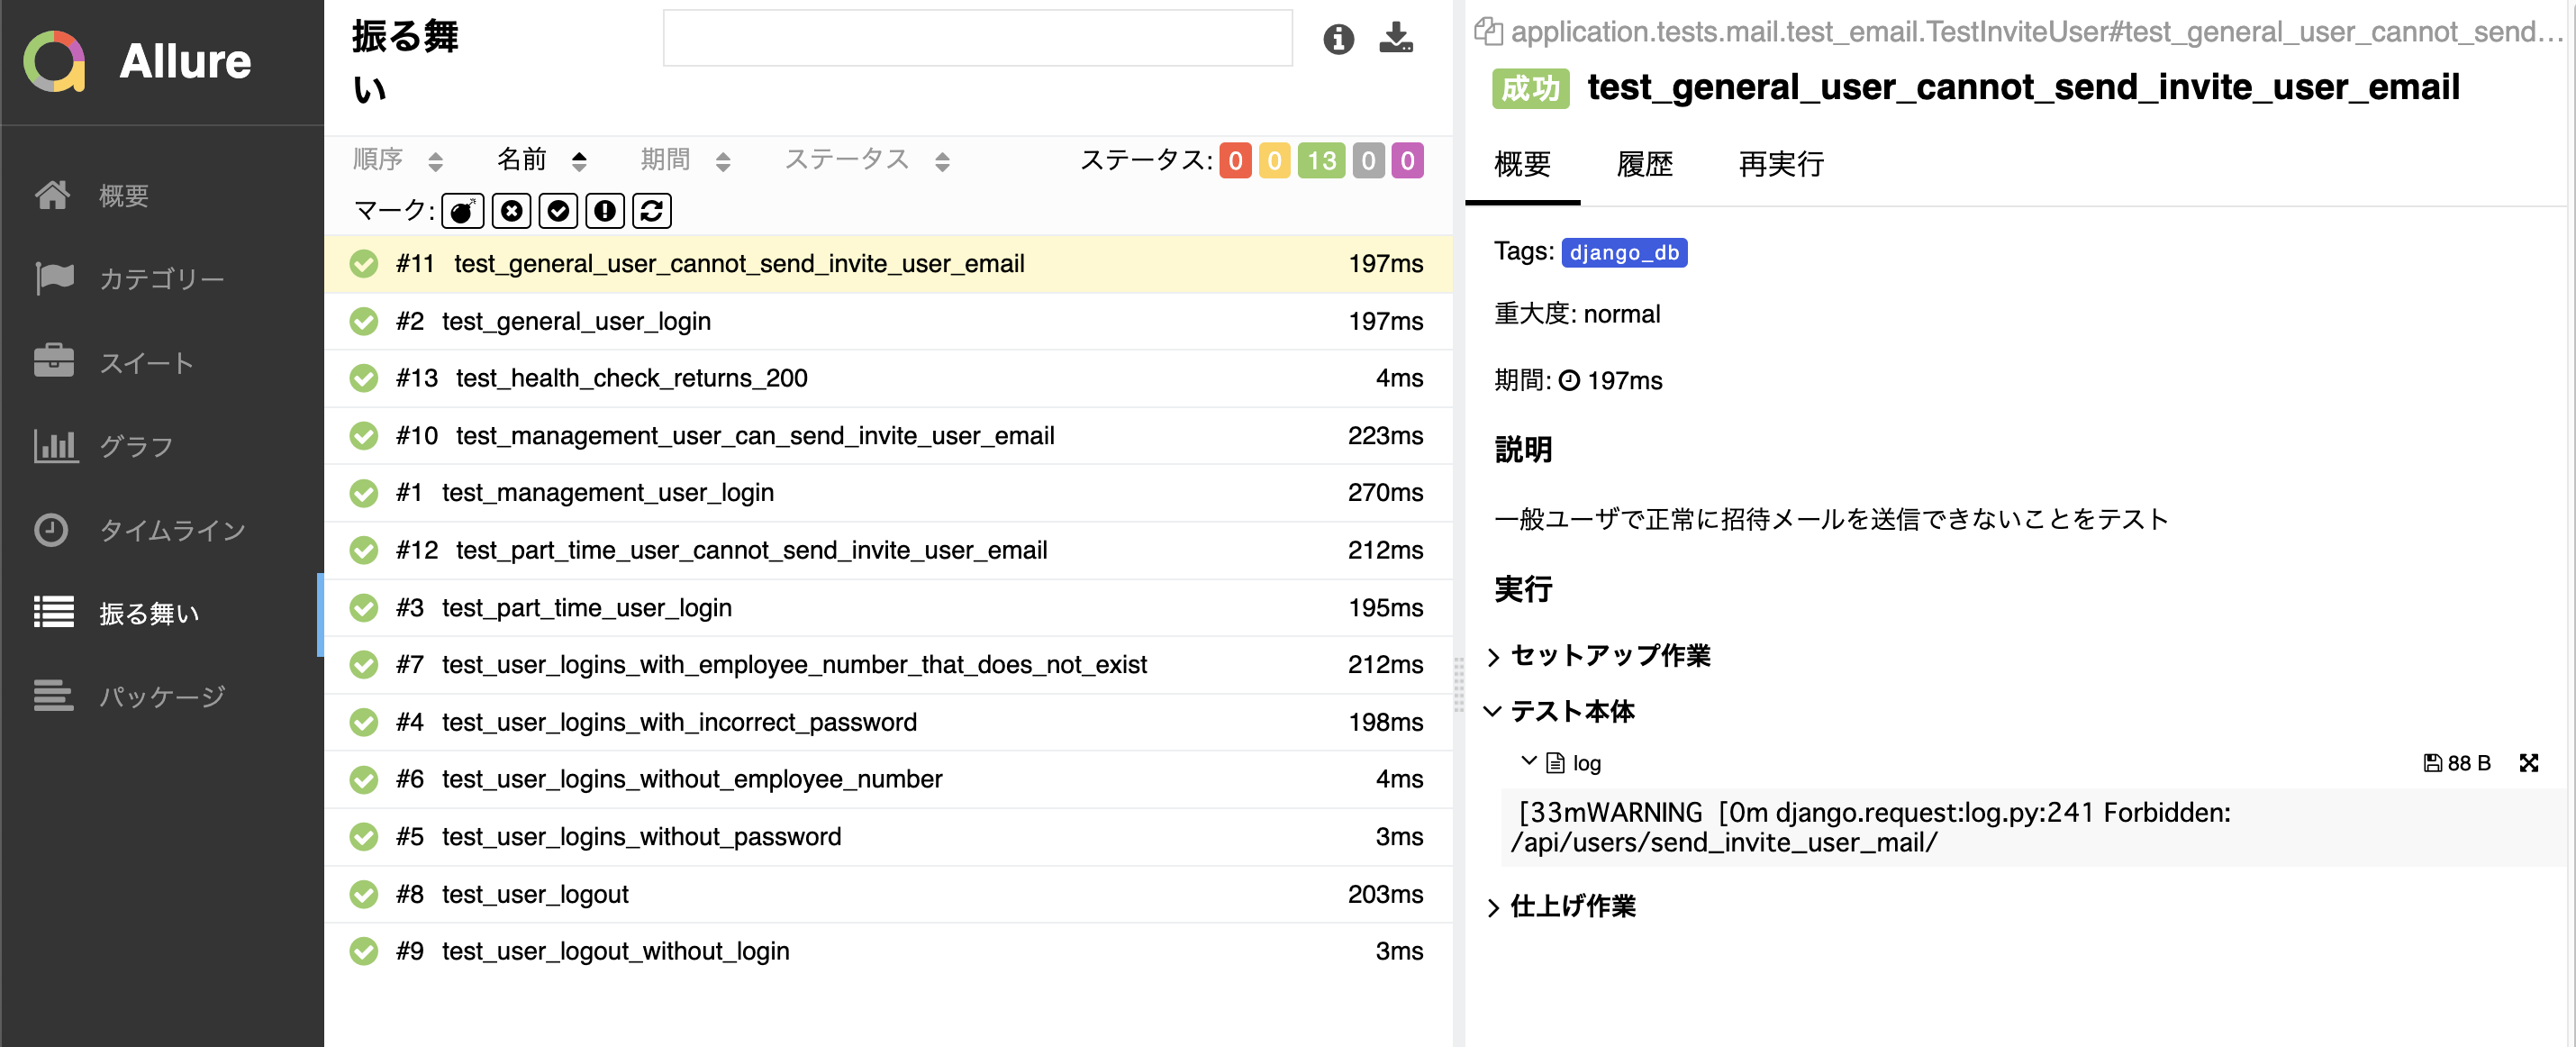
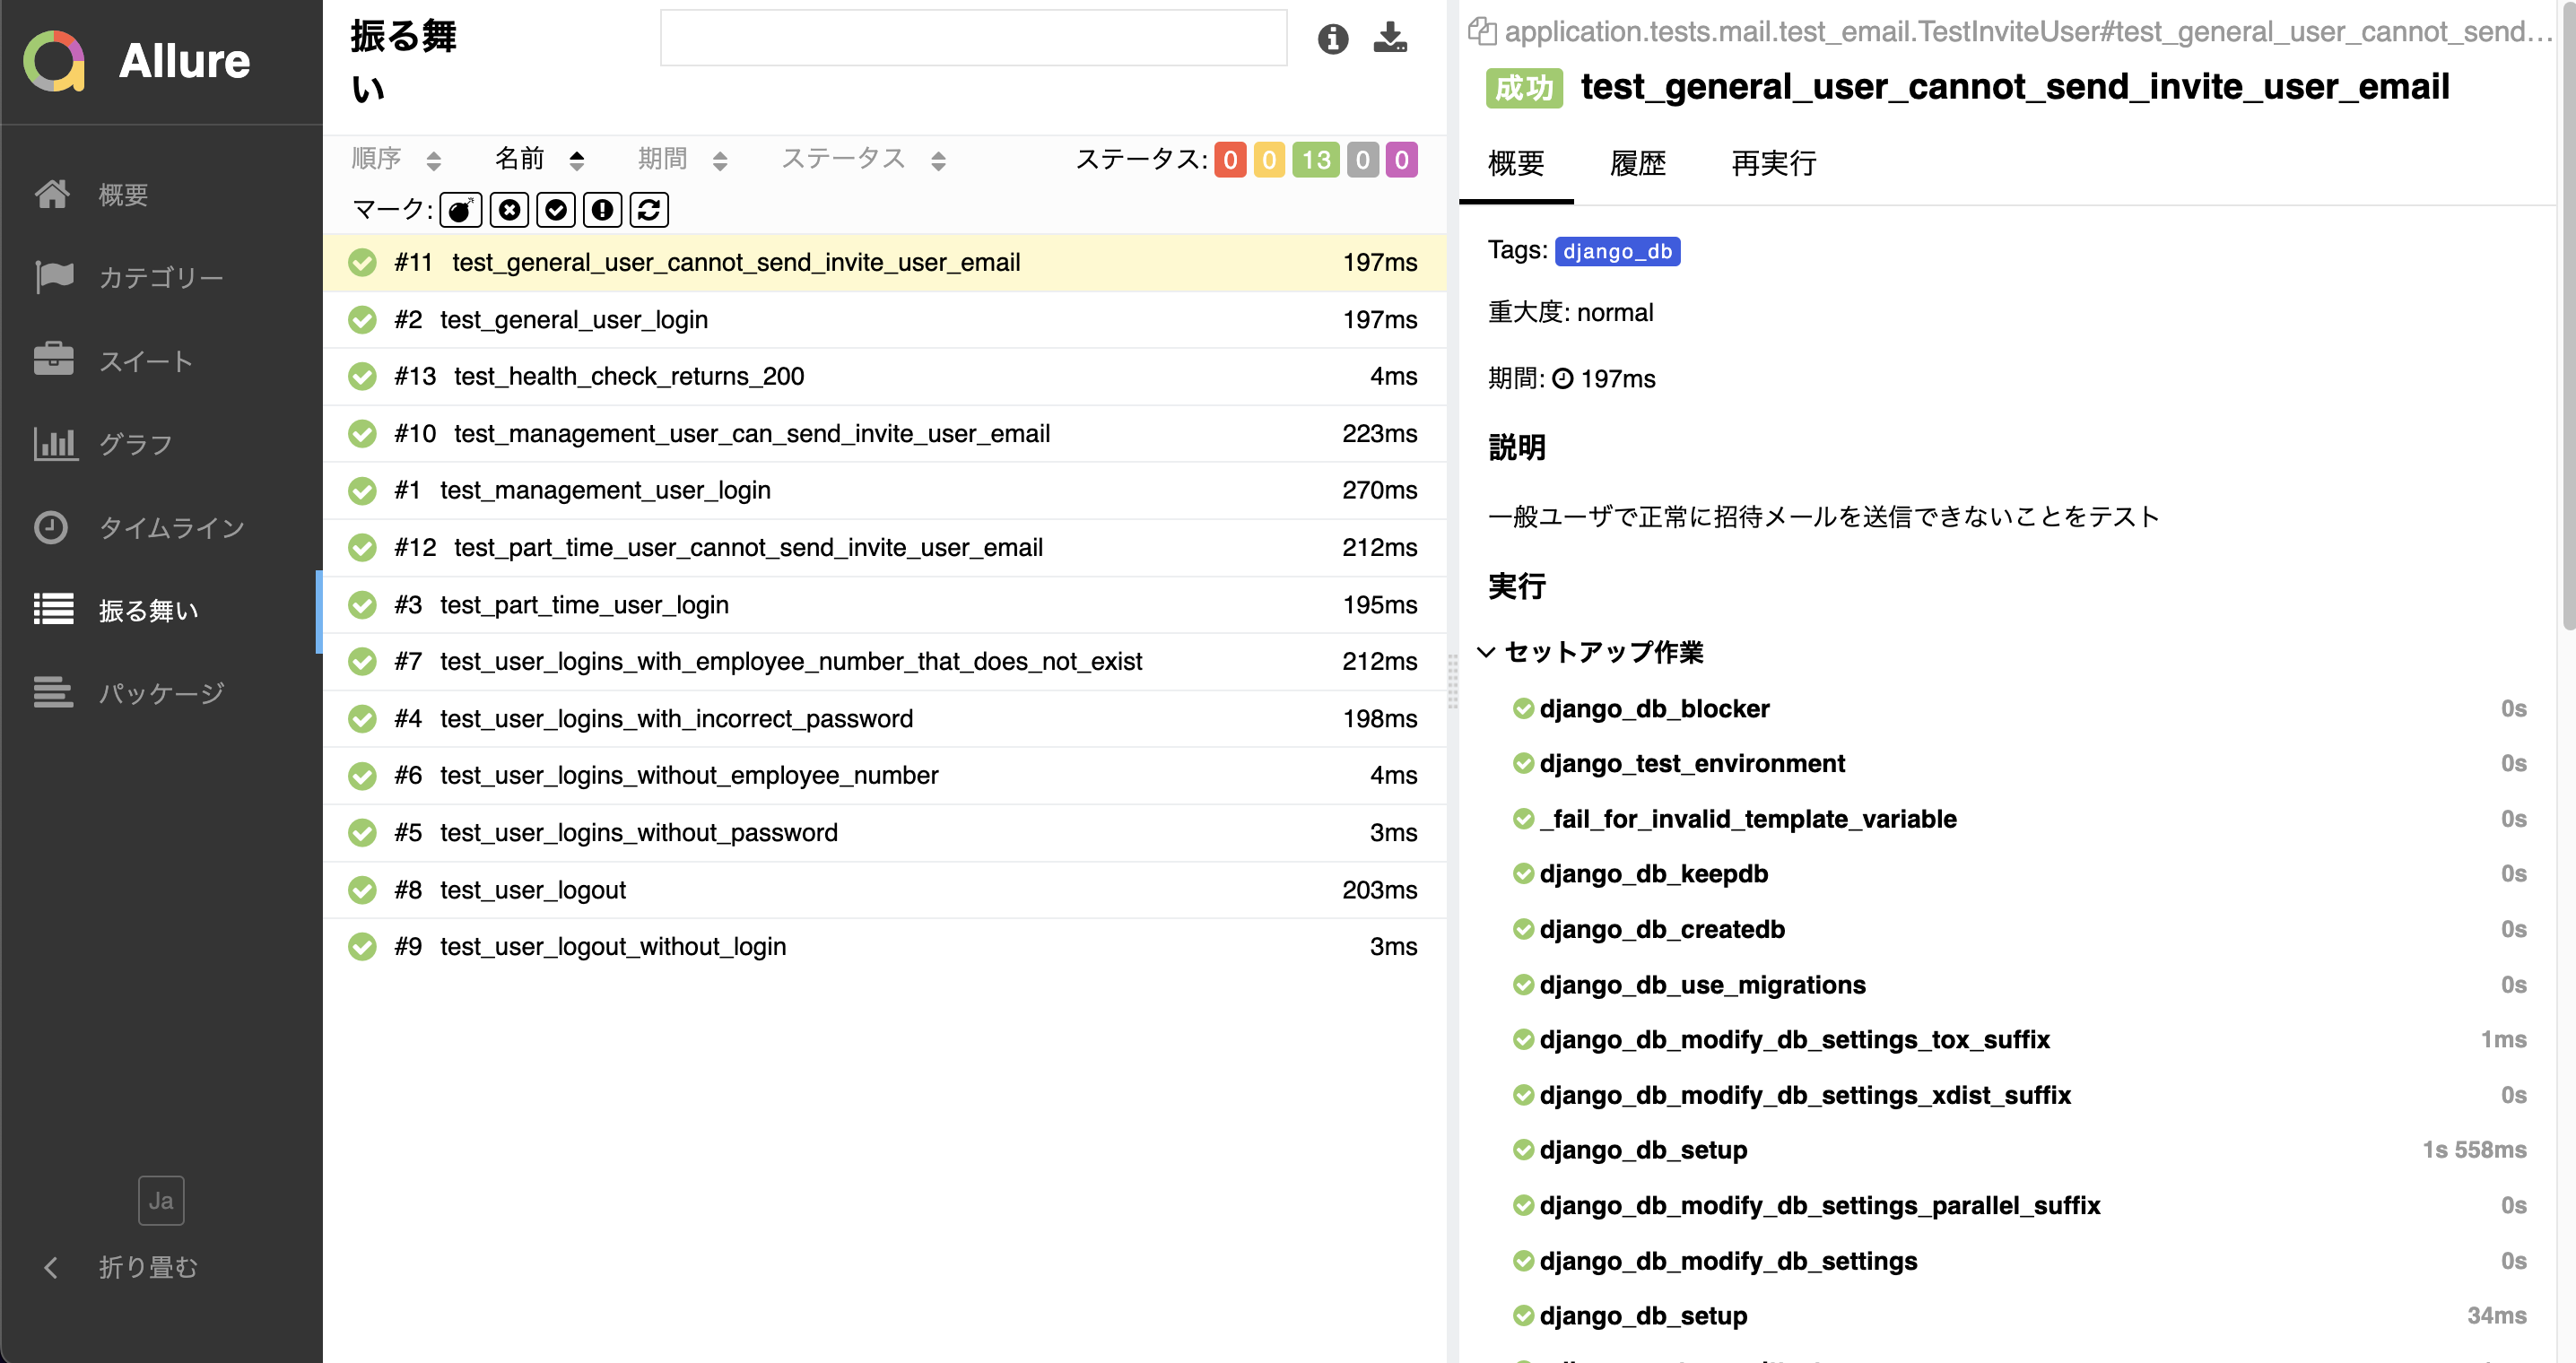
各テストの詳細を閲覧できます
テストのdocstring、異常テストのログも確認できます
Allure Reportの使い方は以上です
Makefileを作成してコマンド一つでテストレボートの作成から表示まで行おう!
手順が多いうえにコマンドが長いので覚えられないです
そこでMakefileを使って楽にテストレポートを作成しましょう
ルートディレクトリにMakefileを作成し、以下のように記載します
CONTAINER_NAME = app
PROJECT = test-proj
RUN_APP = docker-compose exec $(CONTAINER_NAME)
RUN_POETRY =  $(RUN_APP) poetry run
RUN_PYTEST = $(RUN_POETRY) pytest

make_report:
	-@ $(RUN_PYTEST) --alluredir=allure-results
	sh send_results.sh
	echo "Generating test report. This may take a while..."
	curl -X GET "http://127.0.0.1:5050/allure-docker-service/generate-report?project_id=$(PROJECT)" -H  "accept: */*"
	echo "Successfully generated test report. Redirecting to allure server."
	open http://127.0.0.1:5050/allure-docker-service/projects/$(PROJECT)/reports/latest/index.html

show_report:
	open http://127.0.0.1:5050/allure-docker-service/projects/$(PROJECT)/reports/latest/index.html
-@をつけることでテストが失敗しても処理を続行させます
make make_report
と打つと
http://127.0.0.1:5050/allure-docker-service/projects/test-proj/reports/latest/index.html
に遷移します
コマンド1つでレポートが表示される上にエラーが出た箇所が分かりやすく表示されていい感じですね!
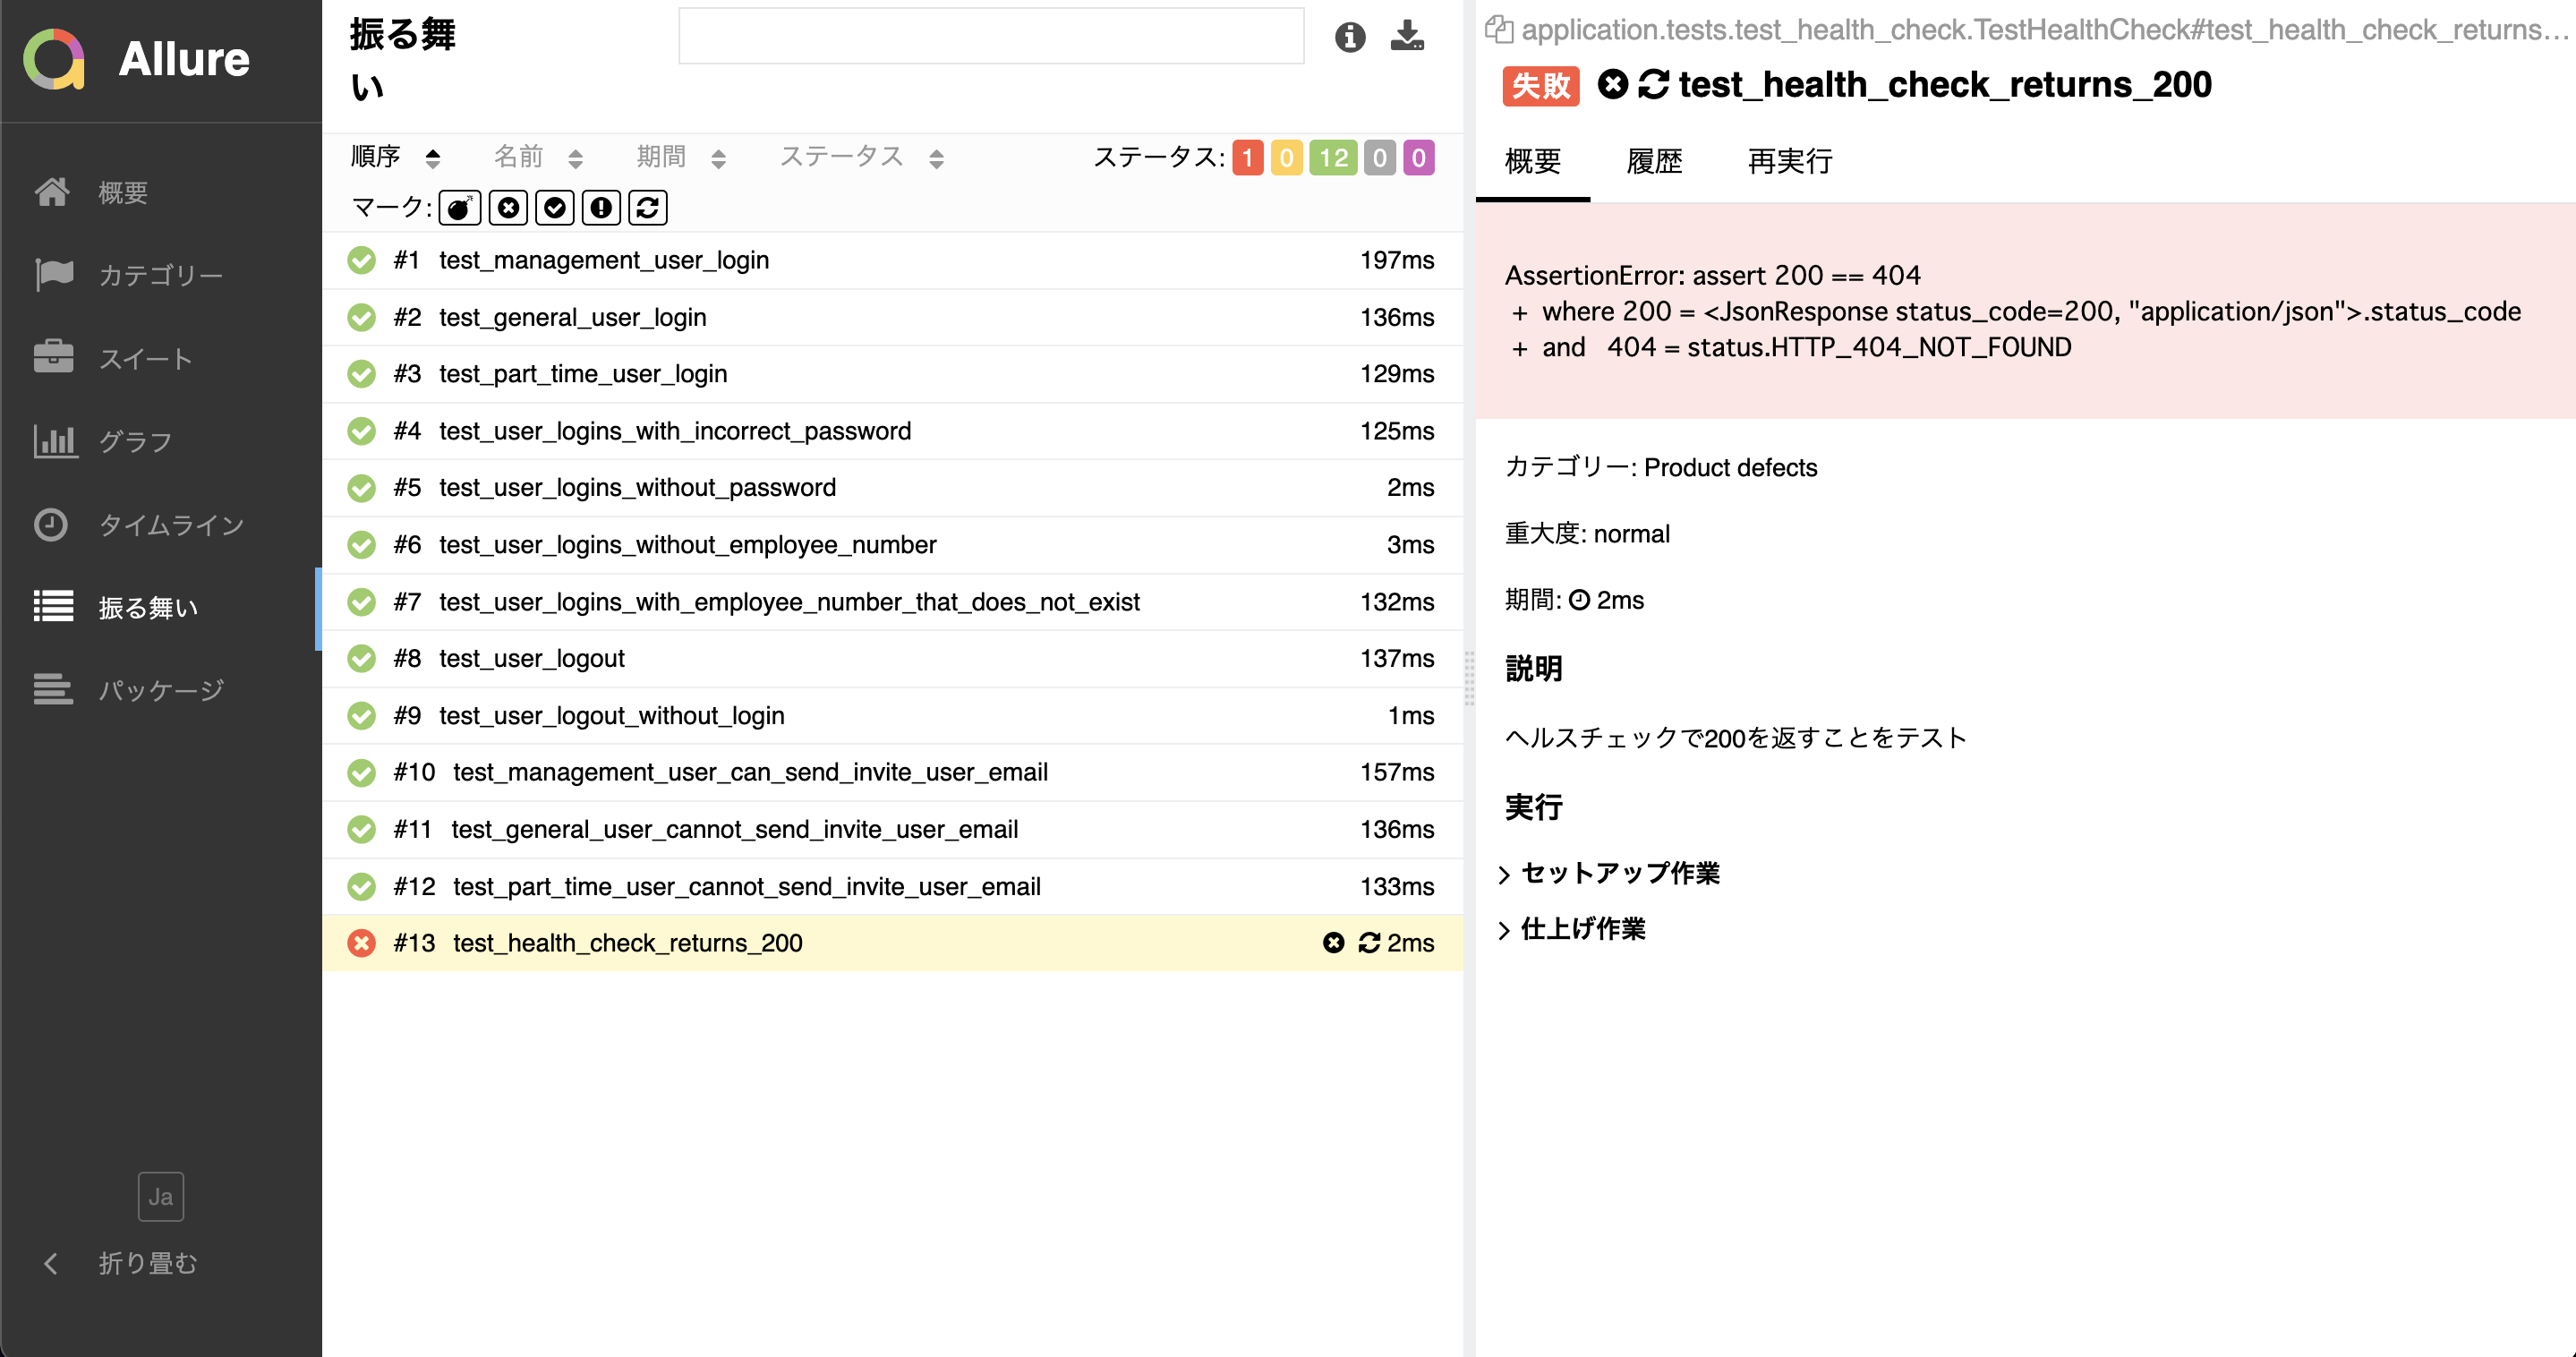
今回はレポートは生成しなくていいから見るたけでいいよ!と思ったら以下のコマンドを実行します
make show_report
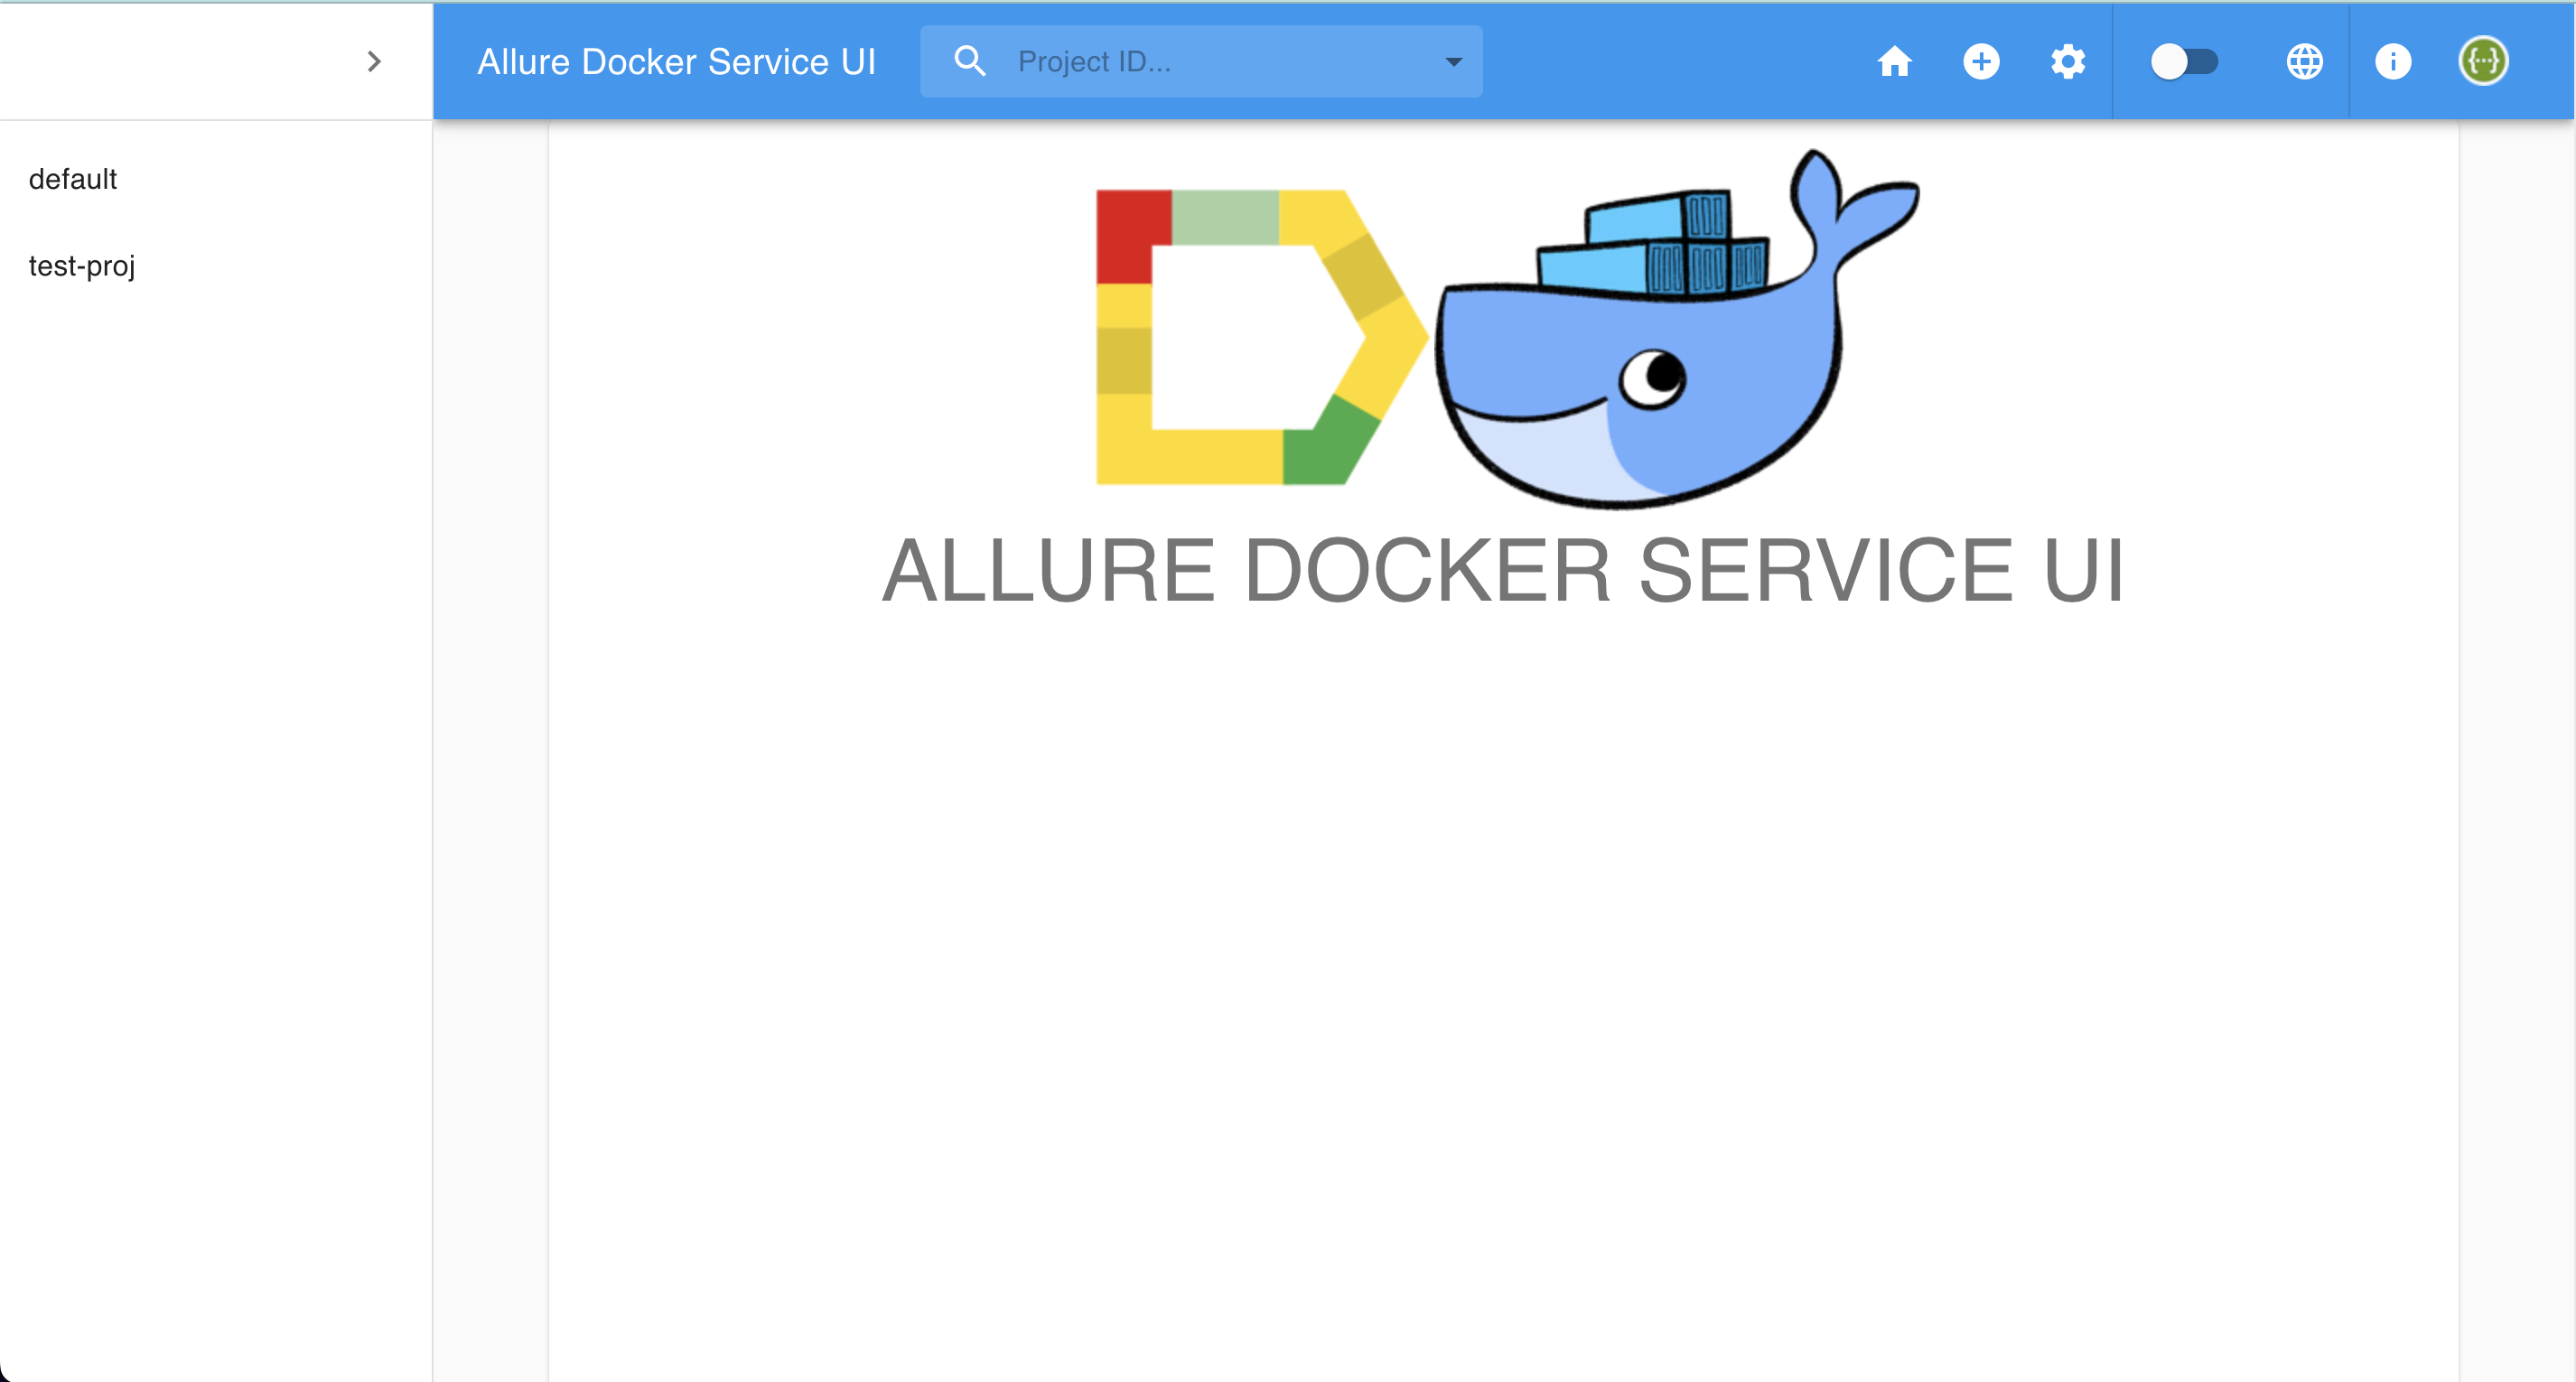
Allure Docker Service UI
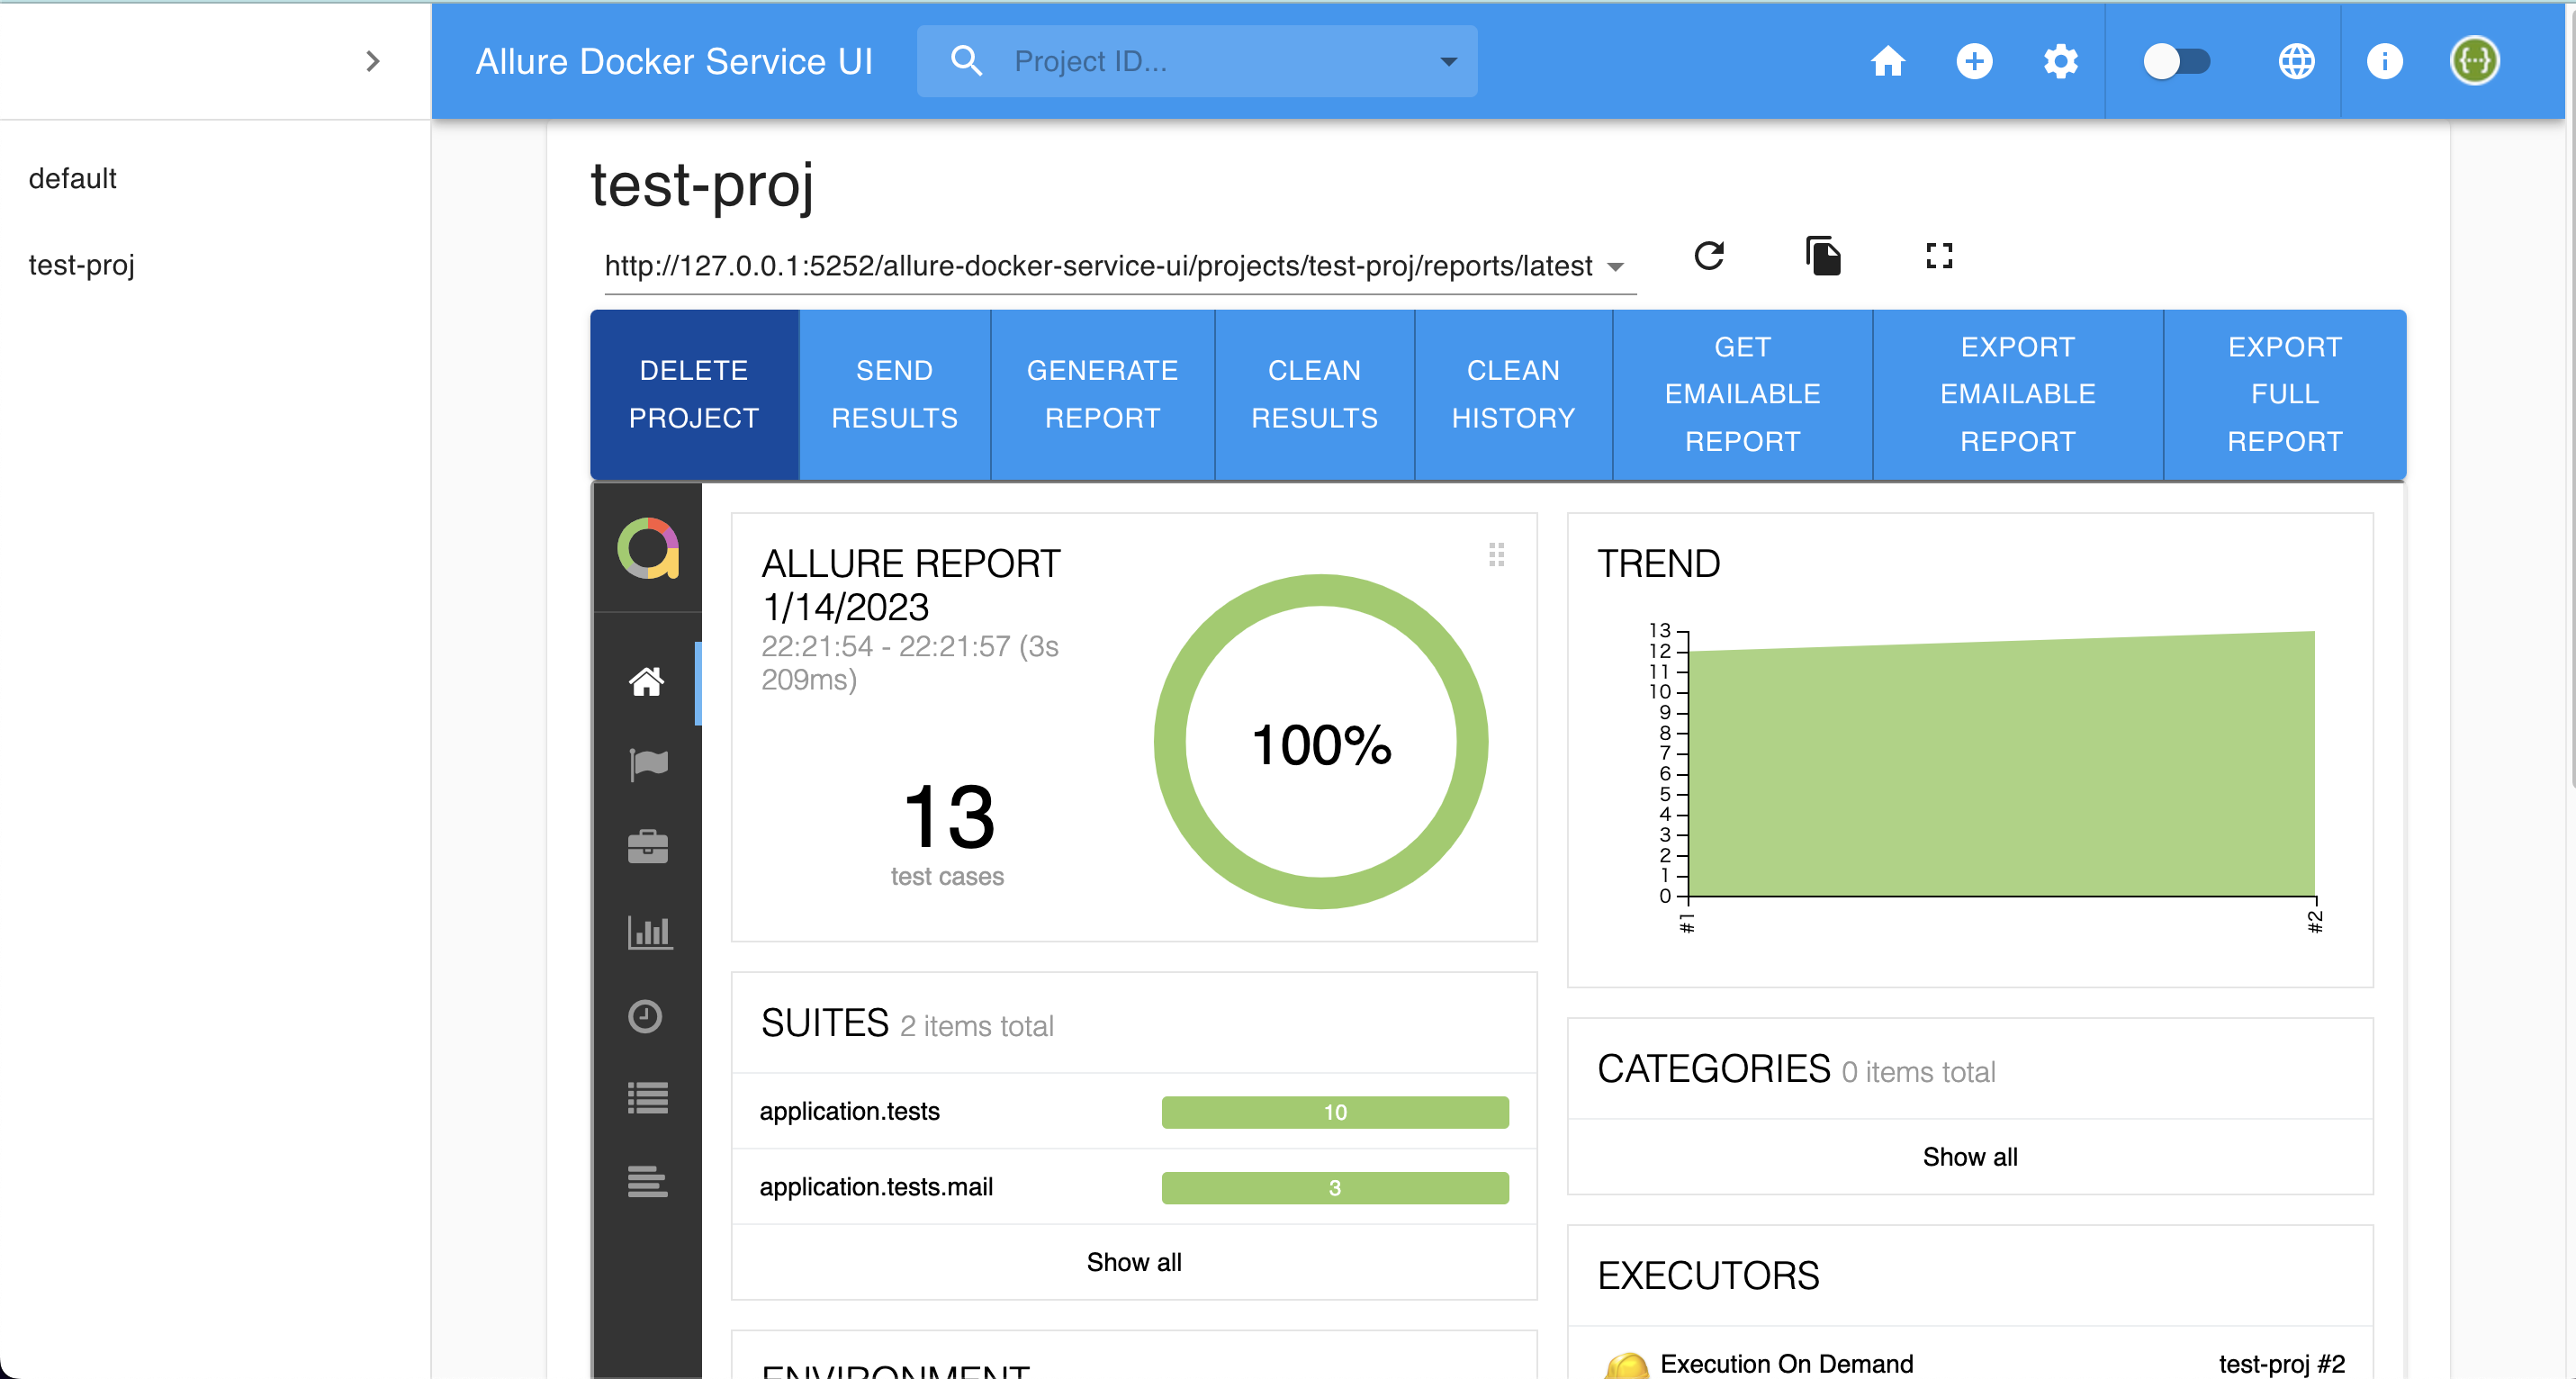
http://127.0.0.1:5252/
にアクセスするとAllure Docker Service UIを開くこともできます
該当するプロジェクトを開くとこちらもAllure Reportと同様の使い方ができます
413エラーが出た場合は?
send_results.shを使ってレポートを作成する場合、量が多すぎると413エラーを出力してしまいます
先ほどのシェルスクリプトを確認すると1回のリクエストで一気にレポートを作成してしまっています
FILES=''
for FILE in $FILES_TO_SEND; do
  FILES+="-F files[]=@$FILE "
done

set -o xtrace
echo "------------------SEND-RESULTS------------------"
curl -X POST "$ALLURE_SERVER/allure-docker-service/send-results?project_id=$PROJECT_ID" -H 'Content-Type: multipart/form-data' $FILES -ik
そのため、下記のように小分けにAPIへリクエストを送るようにすれば解決します
#!/bin/bash

# This directory is where you have all your results locally, generally named as `allure-results`
ALLURE_RESULTS_DIRECTORY='allure-results'
# This url is where the Allure container is deployed. We are using localhost as example
ALLURE_SERVER='http://localhost:5050'
# Project ID according to existent projects in your Allure container - Check endpoint for project creation >> `[POST]/projects`
PROJECT_ID='test-proj'

DIR="$( cd "$( dirname "${BASH_SOURCE[0]}" )" >/dev/null 2>&1 && pwd )"
FILES_TO_SEND=$(ls -dp $DIR/$ALLURE_RESULTS_DIRECTORY/* | grep -v /$)

if [ -z "$FILES_TO_SEND" ]; then
  exit 1
fi

FILES=''
COUNT=0
for FILE in $FILES_TO_SEND; do
  FILES+="-F files[]=@$FILE "
  COUNT+=1
  if [ $COUNT -gt 99 ]; then
    set -x
    echo "------------------SEND-RESULTS------------------"
    curl -X POST "$ALLURE_SERVER/allure-docker-service/send-results?project_id=$PROJECT_ID" -H 'Content-Type: multipart/form-data' $FILES -ik
    set +x
    FILES=''
    COUNT=0
  fi
done

#set -o xtrace
#echo "------------------SEND-RESULTS------------------"
#curl -X POST "$ALLURE_SERVER/allure-docker-service/send-results?project_id=$PROJECT_ID" -H 'Content-Type: multipart/form-data' $FILES -ik


#If you want to generate reports on demand use the endpoint `GET /generate-report` and disable the Automatic Execution >> `CHECK_RESULTS_EVERY_SECONDS: NONE`
#echo "------------------GENERATE-REPORT------------------"
#EXECUTION_NAME='execution_from_my_bash_script'
#EXECUTION_FROM='http://google.com'
#EXECUTION_TYPE='bamboo'

#You can try with a simple curl
#RESPONSE=$(curl -X GET "$ALLURE_SERVER/allure-docker-service/generate-report?project_id=$PROJECT_ID&execution_name=$EXECUTION_NAME&execution_from=$EXECUTION_FROM&execution_type=$EXECUTION_TYPE" $FILES)
#ALLURE_REPORT=$(grep -o '"report_url":"[^"]*' <<< "$RESPONSE" | grep -o '[^"]*$')

#OR You can use JQ to extract json values -> https://stedolan.github.io/jq/download/
#ALLURE_REPORT=$(echo $RESPONSE | jq '.data.report_url')
GitHub PagesへAllure Reportをデプロイするには
GitHub Pagesへアップロードするとローカル上で環境構築できないステークホルダーやPMもテストレポートを閲覧しやすくなるので便利です
今回は
- テストを実行し、レポートを生成するワークフロー
- 生成したレポートをGitHub Pagesへアップロードするワークフロー
の2種類を作成します
使用する流れとしては以下の通りです
- PRを作成し、テストを実行し、レポートを生成
- PRをdevelopへmerge後、レポートをGitHub Pagesへアップロード
テストを実行し、レポートを生成するワークフローの作成
DjangoのプロジェクトでPytestを実行するワークフローを例に出します
Pytestを実行する際に--alluredir=allure-resultsのオプションを付与します
テスト実行後、以下のActionを使ってallure-history配下にレポートを生成します
その後、公式のupload-pages-artifactのActionを使ってレポートをArtifactにアップロードします
name: Run Pytest
on:
  pull_request:
    types: [opened, reopened, synchronize, ready_for_review]

env:
  SECRET_KEY: test
  DJANGO_SETTINGS_MODULE: project.settings
  ALLOWED_HOSTS: 127.0.0.1
  POSTGRES_NAME: test
  POSTGRES_USER: test
  POSTGRES_PASSWORD: test
  POSTGRES_HOST: 127.0.0.1
  POSTGRES_PORT: 5432

jobs:
  Setup:
    if: |
      github.event.pull_request.draft == false
      && !startsWith(github.head_ref, 'release')
      && !startsWith(github.head_ref, 'doc')
    name: Run Test Code
    runs-on: ubuntu-22.04
    services:
      db:
        image: postgres:16.2
        ports:
          - 5432:5432
        env:
          POSTGRES_NAME: ${{ env.POSTGRES_NAME }}
          POSTGRES_USER: ${{ env.POSTGRES_USER }}
          POSTGRES_PASSWORD: ${{ env.POSTGRES_PASSWORD }}
        options: >-
          --health-cmd "pg_isready"
          --health-interval 10s
          --health-timeout 5s
          --health-retries 5
    steps:
      - name: Chekcout code
        uses: actions/checkout@v4
      - name: Install poetry
        run: pipx install poetry
      - name: Use cache dependencies
        uses: actions/setup-python@v5
        with:
          python-version-file: pyproject.toml
          cache: 'poetry'
      - name: Install Packages
        run: poetry install
      - name: Run migration
        run: |
          poetry run python manage.py makemigrations
          poetry run python manage.py migrate
      - name: Run Pytest
        run: poetry run pytest --alluredir=allure-results
      - name: Build test report
        uses: simple-elf/allure-report-action@v1.7
        with:
          allure_results: allure-results
      - name: Upload Documents
        uses: actions/upload-pages-artifact@v3
        with:
          # 絶対パスを指定
          path: allure-history
生成したレポートをGitHub Pagesへアップロードするワークフローの作成
dawidd6/action-download-artifact@v3を使用し、test.ymlで生成したArtifactをダウンロードします
公式のdownload-artifactを使用しないのは異なるワークフロー間のArtifactの受け渡しをサポートしてないからです
Let's suppose you have a workflow with a job in it that at the end uploads an artifact using actions/upload-artifact action and you want to download this artifact in another workflow that is run after the first one. Official actions/download-artifact does not allow this. That's why I decided to create this action. By knowing only the workflow name and commit SHA or other details, you can download the previously uploaded artifact from different workflow associated with that commit or other criteria and use it.
dawidd6/action-download-artifact@v3を使ってartifact.tarファイルをダウンロードした後、deploy-to-github-pages.yml内にartifact.tarファイルをArtifactとしてアップロードします
その後、公式のdeploy-pagesを使用してGitHub Pagesへデプロイします
name: Upload Allure Report to GitHub Pages

on:
  push:
    branches:
      - develop

jobs:
  deploy:
    name: Upload To GitHub Pages
    runs-on: ubuntu-latest
    permissions:
      pages: write
      id-token: write
    environment:
      name: github-pages
      url: ${{ steps.deployment.outputs.page_url }}
    steps:
      - name: Download Artifact
        uses: dawidd6/action-download-artifact@v3
        with:
          name: github-pages
          workflow: test.yml
      - name: Upload Artifact
        uses: actions/upload-artifact@v4
        with:
          name: github-pages
          path: artifact.tar
      - id: deployment
        uses: actions/deploy-pages@v4
GitHub Pagesの設定
GitHub Pagesを有効化します
Settings>PagesからSourceをGitHub Actionsにします
実際に実行してみよう!
PRを作成し、以下のようにテストが実行され、Artifactが作成されたら成功です

PRをmergeした後、以下のようにワークフローが正常終了し、GitHub Pagesへアップロードされたら成功です

Resource not accessible by integrationと表示されてしまった場合は
権限が足りてないので以下のように変更してみてください
    permissions:
      pages: write
      id-token: write
        pull-requests: write
        actions: read
まとめ
最初は設定が多いのとREADMEの内容を読むのに時間がかかって大変でした
やり方さえわかれば簡単にいい感じのテストレポートを作成できることがわかったので大満足です
記事の紹介
以下の記事も作成してみたのでよかったら読んでいただけると幸いです
参考
