概要
Swaggerを使ってNest.jsのAPIのドキュメントを自動生成する方法について解説します
前提
- Nest.jsのアプリケーションを作成済み
- APIを作成済
必要なパッケージのインストール
@nestjs/swaggerをインストールします
npm install @nestjs/swagger
Swaggerの設定
main.tsに以下のようにSwaggerの初期設定を行います
今回は127.0.0.1:8000/api/docsへアクセスするとSwaggerが起動します
import { NestFactory } from '@nestjs/core';
import { SwaggerModule, DocumentBuilder } from '@nestjs/swagger';
import { AppModule } from './app.module';

async function bootstrap() {
  const app = await NestFactory.create(AppModule);
  if (process.env.NODE_ENV === 'development') {
    // Swaggerの初期設定
    const config = new DocumentBuilder()
      .setTitle('Test API Project')
      .setDescription('Test API description')
      .setVersion('1.0')
      .build();
    const document = SwaggerModule.createDocument(app, config);
    SwaggerModule.setup('api/docs/', app, document);
  }
  await app.listen(8000);
}
bootstrap();
以下のように表示させたら成功です

nestjs/swaggerで作成したAPIドキュメントをymlに出力するには
以下のようにfs.writeFileSync()を使うと出力できます
import { NestFactory } from '@nestjs/core';
import { SwaggerModule, DocumentBuilder } from '@nestjs/swagger';
import { AppModule } from './app.module';
import * as fs from 'fs';
import { dump } from 'js-yaml';

async function bootstrap() {
  const app = await NestFactory.create(AppModule);
  if (process.env.NODE_ENV === 'development') {
    // Swaggerの初期設定
    const config = new DocumentBuilder()
      .setTitle('Test API Project')
      .setDescription('Test API description')
      .setVersion('1.0')
      .build();
    const document = SwaggerModule.createDocument(app, config);
    // main.tsと同じ階層でswagger-spec.yamlファイルとして出力する
    fs.writeFileSync('./swagger-spec.yaml', dump(document, {}));
    SwaggerModule.setup('api/docs/', app, document);
  }
  await app.listen(8000);
}
bootstrap();
ApiTagsを使ったAPIの分類分け
APIを複数以上作成する際にタグで分類することによって探すのが容易になります
以下のようにApiTagsデコレータを使うことで実現できます
import { Controller, Get } from '@nestjs/common';
import { AppService } from './app.service';
import { ApiTags, ApiResponse } from '@nestjs/swagger';

@Controller()
export class AppController {
  constructor(private readonly appService: AppService) {}

  @ApiTags('health')
  @Get('health')
  healthCheck(): { msg: string } {
    return this.appService.healthCheck();
  }
}
以下のようにタグによる分類ができたら成功です

ApiBody
APIを検証する際にリクエストが自動で補完されると入力の手間が省けて便利です
以下のようにApiBodyデコレータを使うことで実現できます
import {
  Body,
  Controller,
  Post,
} from '@nestjs/common';
import { CreateUserDto } from './dtos/create-user.dto';
import { UsersService } from './users.service';
import { ApiTags, ApiBody } from '@nestjs/swagger';

@ApiTags('users')
@Controller('users')
export class UsersController {
  constructor(private usersService: UsersService) {}

  @ApiBody({
    schema: {
      type: 'object',
      properties: {
        email: {
          type: 'string',
          default: 'test@gmail.com',
        },
        password: {
          type: 'string',
          default: 'test',
        },
      },
    },
  })
  /**
   * ユーザを新規登録するAPI
   * @param body - ユーザの情報
   */
  @Post('/signup')
  createUser(@Body() body: CreateUserDto) {
    this.usersService.create(body.email, body.password);
  }
}
以下のようにリクエストボディが表示されたら成功です

ApiResponse
ステータスコード、ケース別でレスポンス例を複数表示させることができます
以下のようにApiResponseデコレータを使うことで実現できます
import {
  Body,
  Controller,
  Get,
  Param,
} from '@nestjs/common';
import { UsersService } from './users.service';
import { ApiTags, ApiResponse } from '@nestjs/swagger';


@ApiTags('users')
@Controller('users')
export class UsersController {
  constructor(private usersService: UsersService) {}

  @ApiResponse({
    status: HttpStatus.OK,
    description: 'ユーザ詳細',
    content: {
      'application/json': {
        example: [
          {
            id: 1,
            email: 'test@gmail.com',
          },
        ],
      },
    },
  })
  @ApiResponse({
    status: HttpStatus.NOT_FOUND,
    description: '該当するユーザが存在しないとき',
    content: {
      'application/json': {
        example: [
          {
            message: '該当するIDを持つユーザが存在しません',
            error: 'Not Found',
            statusCode: 404,
          },
        ],
      },
    },
  })
  /**
   * ユーザを詳細表示するAPI
   * @param id - ユーザのID
   */
  @Get('/:id')
  async findUser(@Param('id') id: number) {
    const user = await this.usersService.findOne(id);
    if (!user) {
      throw new NotFoundException('該当するIDを持つユーザが存在しません');
    }
    return this.usersService.findOne(id);
  }
}
以下のように複数のレスポンス例が表示されたら成功です

ApiBearerAuth
Bearer認証をSwaggerでもできるようにするためのデコレータです
Swagger内でログイン時に使用するJWTトークンなどを設定できるようにするためにはまずaddBearerAuth()をDocumentBuilder()に追加します
import helmet from 'helmet';
import { HttpStatus } from '@nestjs/common';
import { NestFactory } from '@nestjs/core';
import { AppModule } from './app.module';
import { NestExpressApplication } from '@nestjs/platform-express';
import { DocumentBuilder, SwaggerModule } from '@nestjs/swagger'

async function bootstrap() {
  const app = await NestFactory.create<NestExpressApplication>(AppModule);
  const config = new DocumentBuilder()
    .setTitle("NestJS API")
    .setDescription('NestJS API desc')
    .setVersion("1.0")
    .addBearerAuth().build();
  const document = SwaggerModule.createDocument(app, config);
  SwaggerModule.setup('api/docs', app, document);
  app.use(helmet());
  app.enableCors(
    {
      origin: '*',
      methods: 'GET,HEAD,PUT,PATCH,POST,DELETE,OPTIONS',
      preflightContinue: false,
      optionsSuccessStatus: HttpStatus.NO_CONTENT,
      allowedHeaders: 'Content-Type, Accept',
      credentials: true,
    }
  );
  await app.listen(8000);
}
bootstrap();
このままではBearerトークンが必要なAPIに対してトークンをセットできないので下記のように@ApiBearerAuth()デコレータを設定して一度Swagger内で認証できれば自動でBearerトークンを設定できるようにします
  @ApiResponse({
    status: HttpStatus.OK,
    description: 'Get user profile',
    content: {
      'application/json': {
        example: [
          {
            username: "john",
            userId: 1,
          },
        ],
      },
    },
  })
  @UseGuards(JwtAuthGuard)
  @ApiBearerAuth()
  @Get('profile')
  getProfile(@Request() req) {
    return req.user;
  }
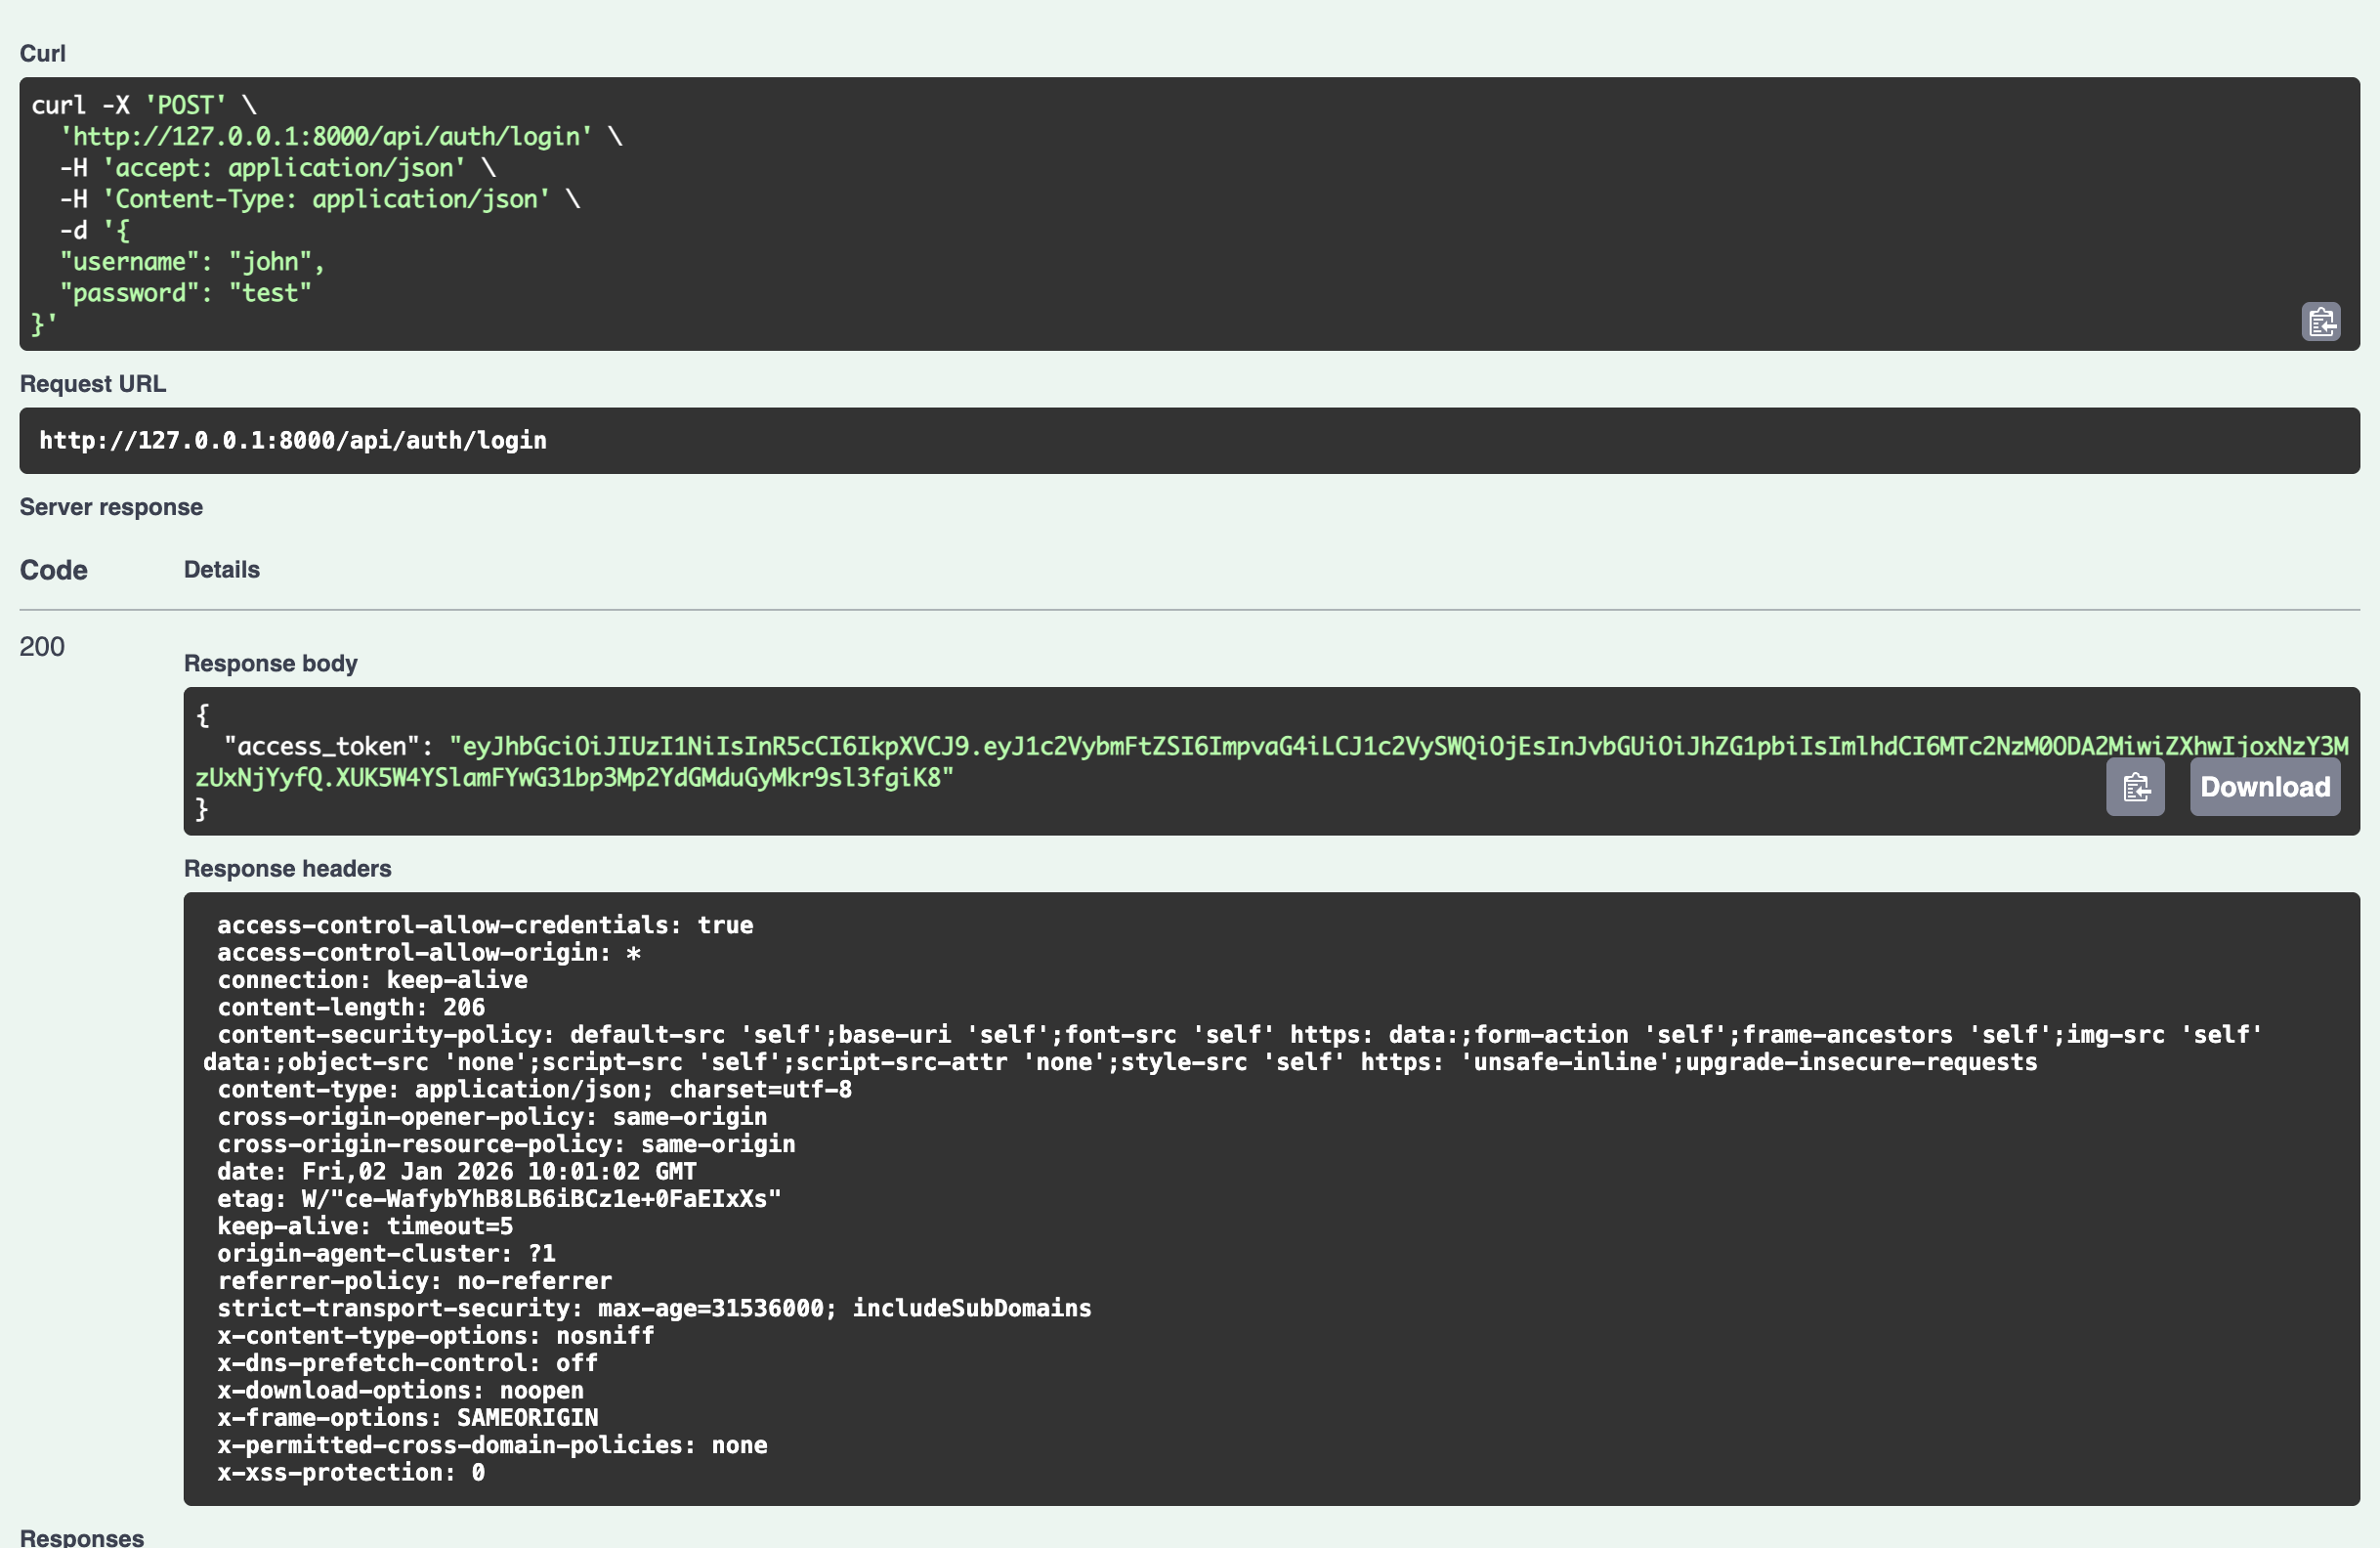
まずは自作したログインAPIを実行してJWTトークンを発行します
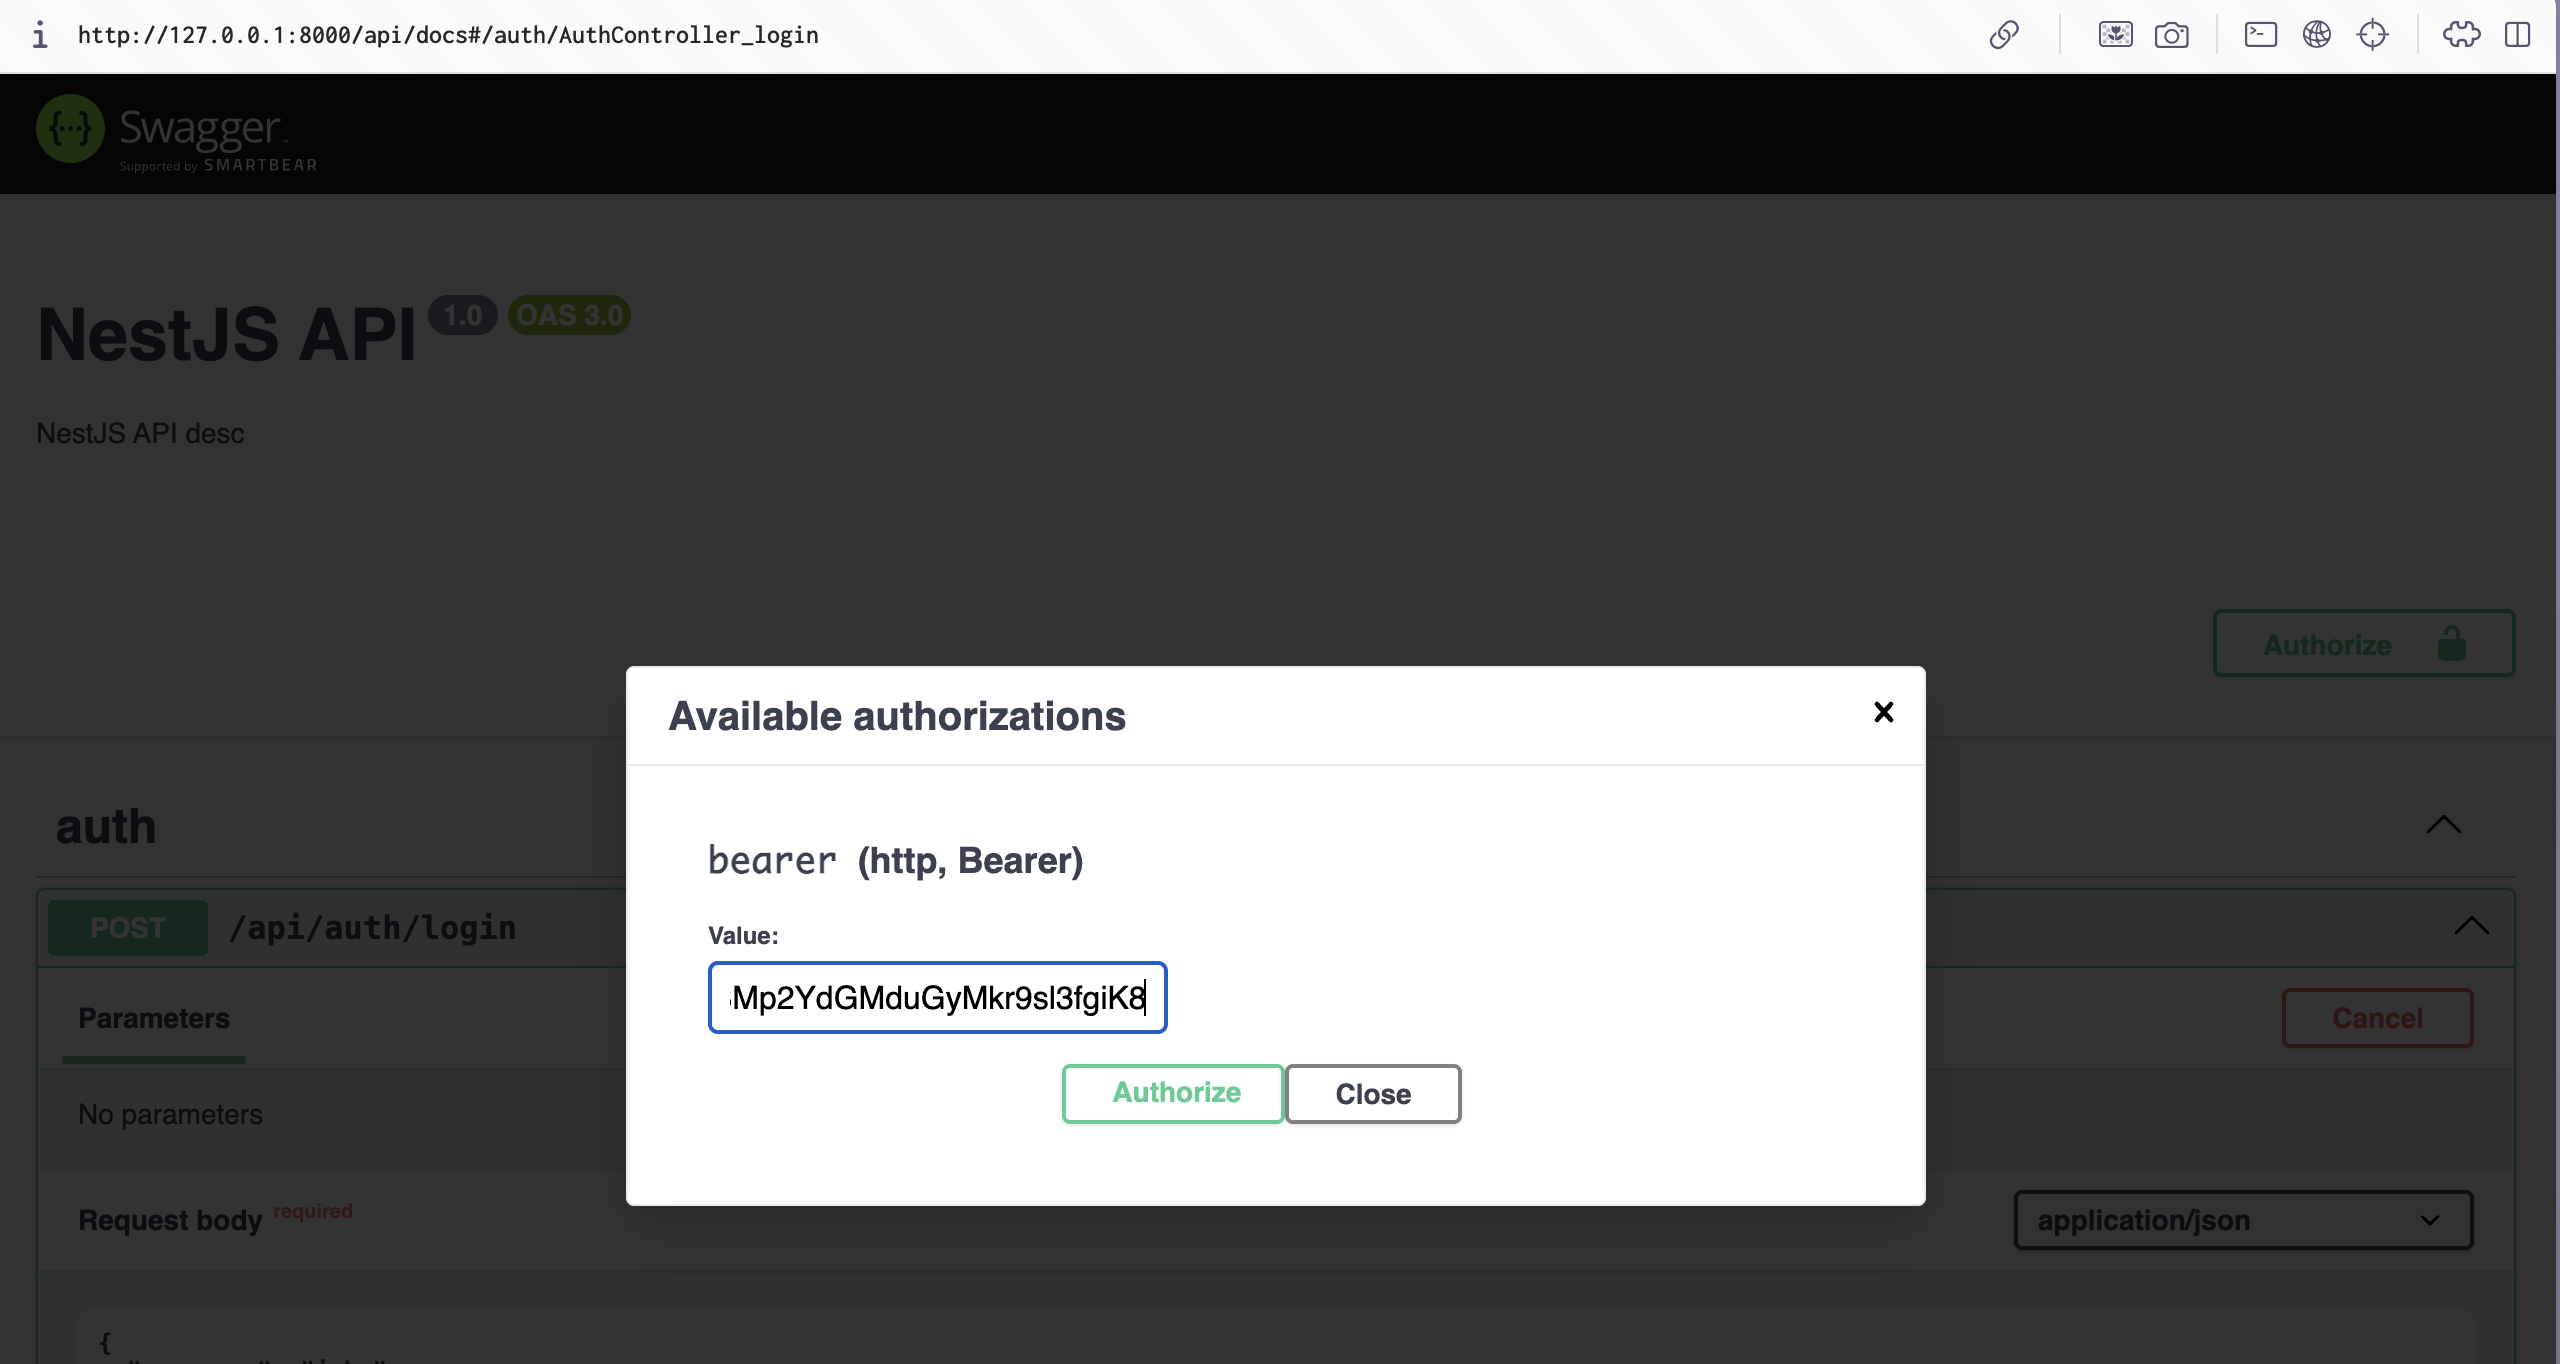
発行したトークンをSwaggerのAuthorizeにセットします
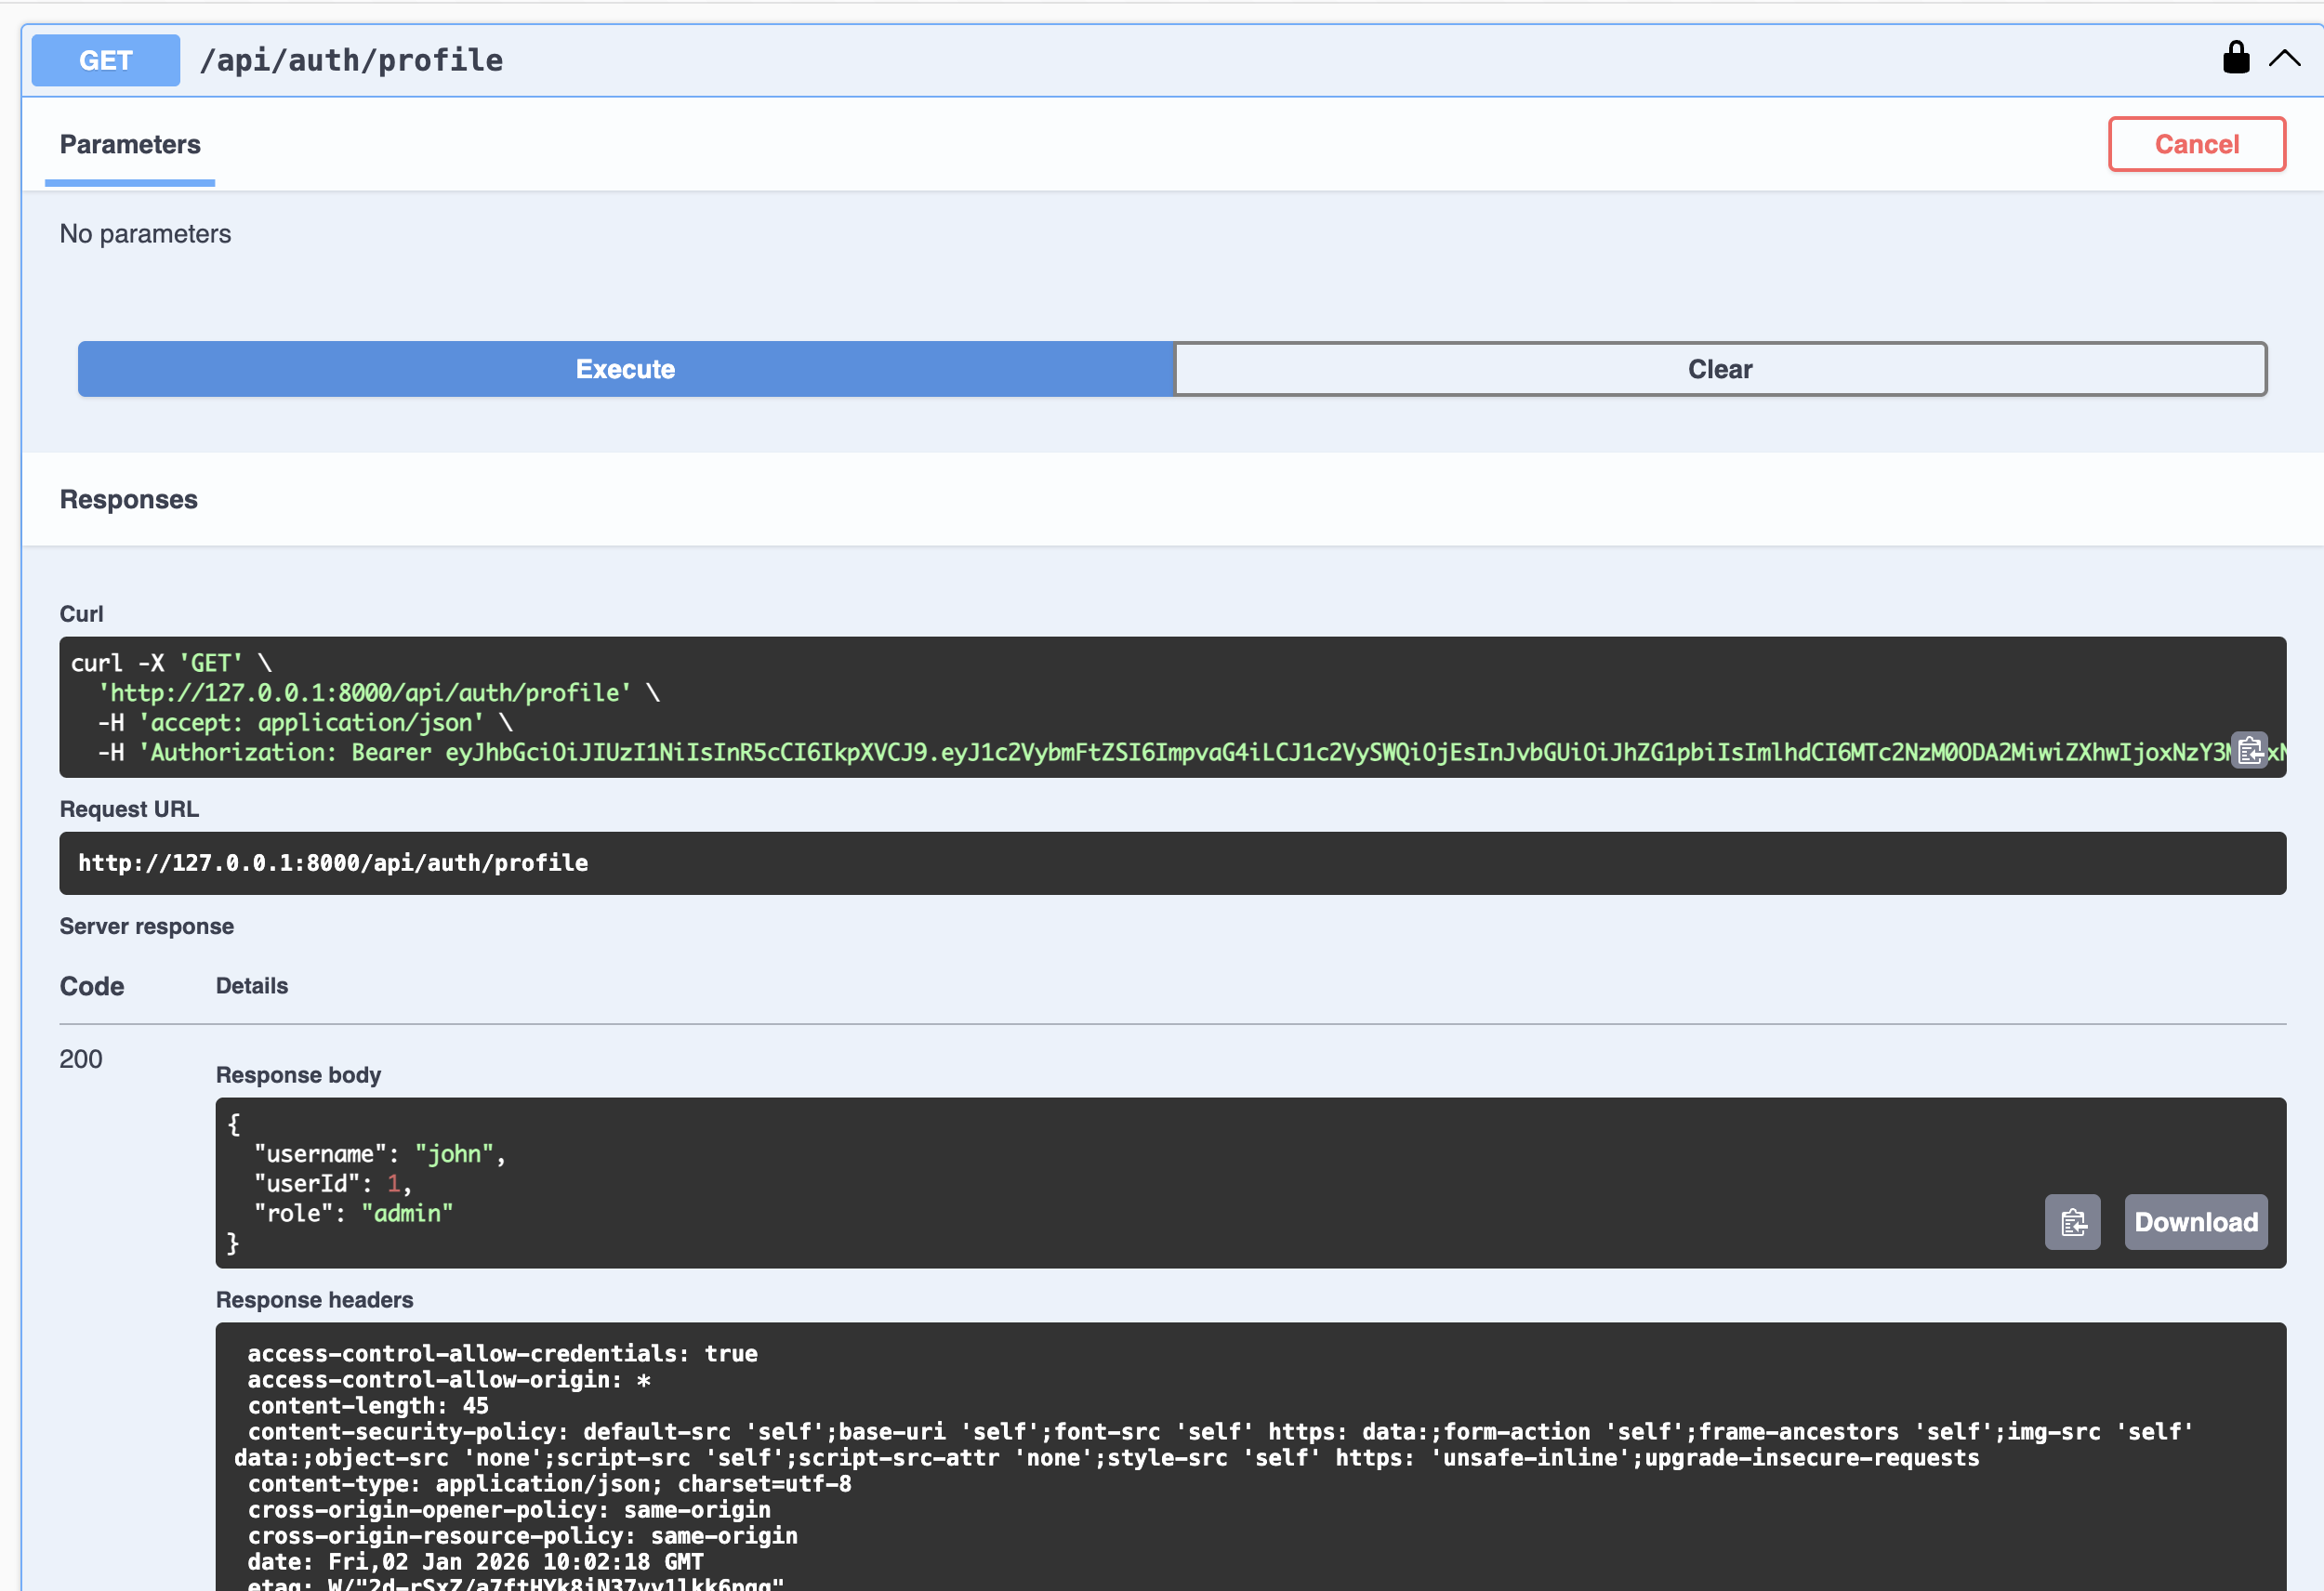
認証が必要なAPIをcall時にJWTトークンがヘッダにセットされている上にcallできていることを確認できれば成功です
まとめ
@nestjs/swagger(Swagger)を使うとAPIドキュメントを自動生成できるので管理が格段に楽になることがわかりました
他に@nestjs/swaggerに関する便利機能があれば定期的に本記事を更新していきたいと思います
参考