MarkdownAIというサービスを使うと、誰でも簡単に無料でAIサービスを作ることができます。
今回はAIと会話できるWebアプリを作ってみようと思います。
MarkdownAIとは
簡単に、無料でWebサービスを作れるプラットフォームです。Markdownで記述するだけでWebサイトを公開することができます。
また、生成AIを使って独自のサービスを作ることができます。生成AIを使ったアプリを手軽に作れるサービスとして個人開発で役に立つのではないでしょうか。
詳しい使い方はこちらの記事で解説していますので、ぜひご覧ください。
今回作るもの
このように、自分で作ったAIモデルと会話できるWebアプリを作ります。
この例では、「あなたは元気な小学生です」とプロンプトで指示しました。

こちらでデモが動いています。
手順
まず、AIモデルを作成します。
以下の公式のマニュアルが分かりやすいので参考にしてみてください。
AIモデルができたらWebページを作ります。
以下のコードが今回使用するチャットアプリのテンプレートです。
新しいページを作成し、以下のコードをコピー&ペーストしてください。
MarkdownAIでは、Markdownを記述するところにHTMLコードを書いて動作させることができます。
コード
<!DOCTYPE html>
<html lang="ja">
<head>
<meta charset="UTF-8">
<meta name="viewport" content="width=device-width, initial-scale=1.0">
<title>タイトル</title>

<style>
  body {
    font-family: Arial, sans-serif;
    background-color: #FFF5d0;
    margin: 0;
    padding: 0;
    display: flex;
    justify-content: center;
    align-items: center;
    height: 100vh;
    overflow: hidden;
  }

  .chat-container {
    background: #fff;
    border-radius: 10px;
    box-shadow: 0 4px 8px rgba(0, 0, 0, 0.1);
    width: 100%;
    max-width: 400px;
    display: flex;
    flex-direction: column;
    position: relative;
    height: 90vh;
    overflow: hidden;
  }

  header {
    background-color: #000000;
    color: white;
    text-align: center;
    padding: 5px 0;
    font-size: 18px;
    font-weight: bold;
    height: 30px;
    line-height: 30px;
    position: sticky;
    top: 0;
    z-index: 1;
  }

  .double-line {
    border-top: 3px double black;
  }

  .chat-box {
    flex: 1;
    padding: 10px;
    overflow-y: auto;
    background: #e5ffe5;
    display: flex;
    flex-direction: column;
    gap: 5px;
  }

  .message-wrapper {
    display: flex;
    align-items: flex-end;
    gap: 5px;
  }

  .message {
    padding: 10px;
    border-radius: 10px;
    max-width: 70%;
    word-wrap: break-word;
    position: relative;
  }

  .user-message {
    background-color: #9fe6a0;
    align-self: flex-end;
    border-top-right-radius: 0;
  }

  .ai-message {
    background-color: #ffffff;
    align-self: flex-start;
    border-top-left-radius: 0;
  }

  .timestamp {
    font-size: 10px;
    color: gray;
    line-height: 1.2;
  }

  .read-receipt {
    font-size: 10px;
    color: gray;
    line-height: 1.2;
  }

  .input-container {
    display: flex;
    padding: 10px;
    background: #fff;
    position: sticky;
    bottom: 0;
    gap: 5px;
  }

  .input {
    flex: 1;
    padding: 10px;
    border: 1px solid #ccc;
    border-radius: 5px;
  }

  .button {
    padding: 10px 15px;
    background-color: #00c300;
    color: white;
    border: none;
    border-radius: 5px;
    cursor: pointer;
  }

  .button.is-loading {
    background-color: #6c757d;
    cursor: not-allowed;
  }
</style>

</head>
<body>
 <header>ヘッダー</header>
 <div class="double-line"></div>
<div class="chat-container">
  <div class="chat-box" id="chat-box"></div>
  <div class="input-container">
    <input class="input" type="text" id="text-input" placeholder="メッセージを入力...">
    <button class="button" type="button" id="send-button">送信</button>
  </div>
</div>

<script>
(() => {
  const button = document.getElementById('send-button');
  const input = document.getElementById('text-input');
  const chatBox = document.getElementById('chat-box');

  const appendMessage = (text, className) => {
    const messageWrapper = document.createElement('div');
    messageWrapper.className = 'message-wrapper';

    const timestamp = document.createElement('div');
    timestamp.className = 'timestamp';
    const now = new Date();
    timestamp.innerHTML = now.getHours().toString().padStart(2, '0') + ':' + now.getMinutes().toString().padStart(2, '0');

    const message = document.createElement('div');
    message.className = `message ${className}`;
    message.textContent = text;

    const readReceipt = document.createElement('div');
    readReceipt.className = 'read-receipt';
    readReceipt.innerHTML = '既読<br>' + timestamp.innerHTML;

    if (className === 'user-message') {
      messageWrapper.style.justifyContent = 'flex-end';
      messageWrapper.appendChild(readReceipt);
      messageWrapper.appendChild(message);
    } else {
      messageWrapper.style.justifyContent = 'flex-start';
      messageWrapper.appendChild(message);
    }

    chatBox.appendChild(messageWrapper);
    chatBox.scrollTop = chatBox.scrollHeight;
  };

  const sendMessage = async () => {
    const message = input.value.trim();
    if (!message) return;

    appendMessage(message, 'user-message');
    input.value = '';

    button.classList.add('is-loading');
    button.disabled = true;

    const serverAi = new ServerAI();
    const answer = await serverAi.getAnswerText('#####YOUR TOKEN#####', '', message);

    appendMessage(answer, 'ai-message');

    button.classList.remove('is-loading');
    button.disabled = false;
  };

  button.addEventListener('click', sendMessage);
  input.addEventListener('keypress', (e) => {
    if (e.key === 'Enter') sendMessage();
  });
})();
</script>
</body>
</html>
次に、自分で作ったAIモデルのトークンを取得し、コードに埋め込みます。
新しくページを作って、Insertからモデルのサンプルを追加するとトークンを取得できます。
以下の箇所がトークンに該当します。
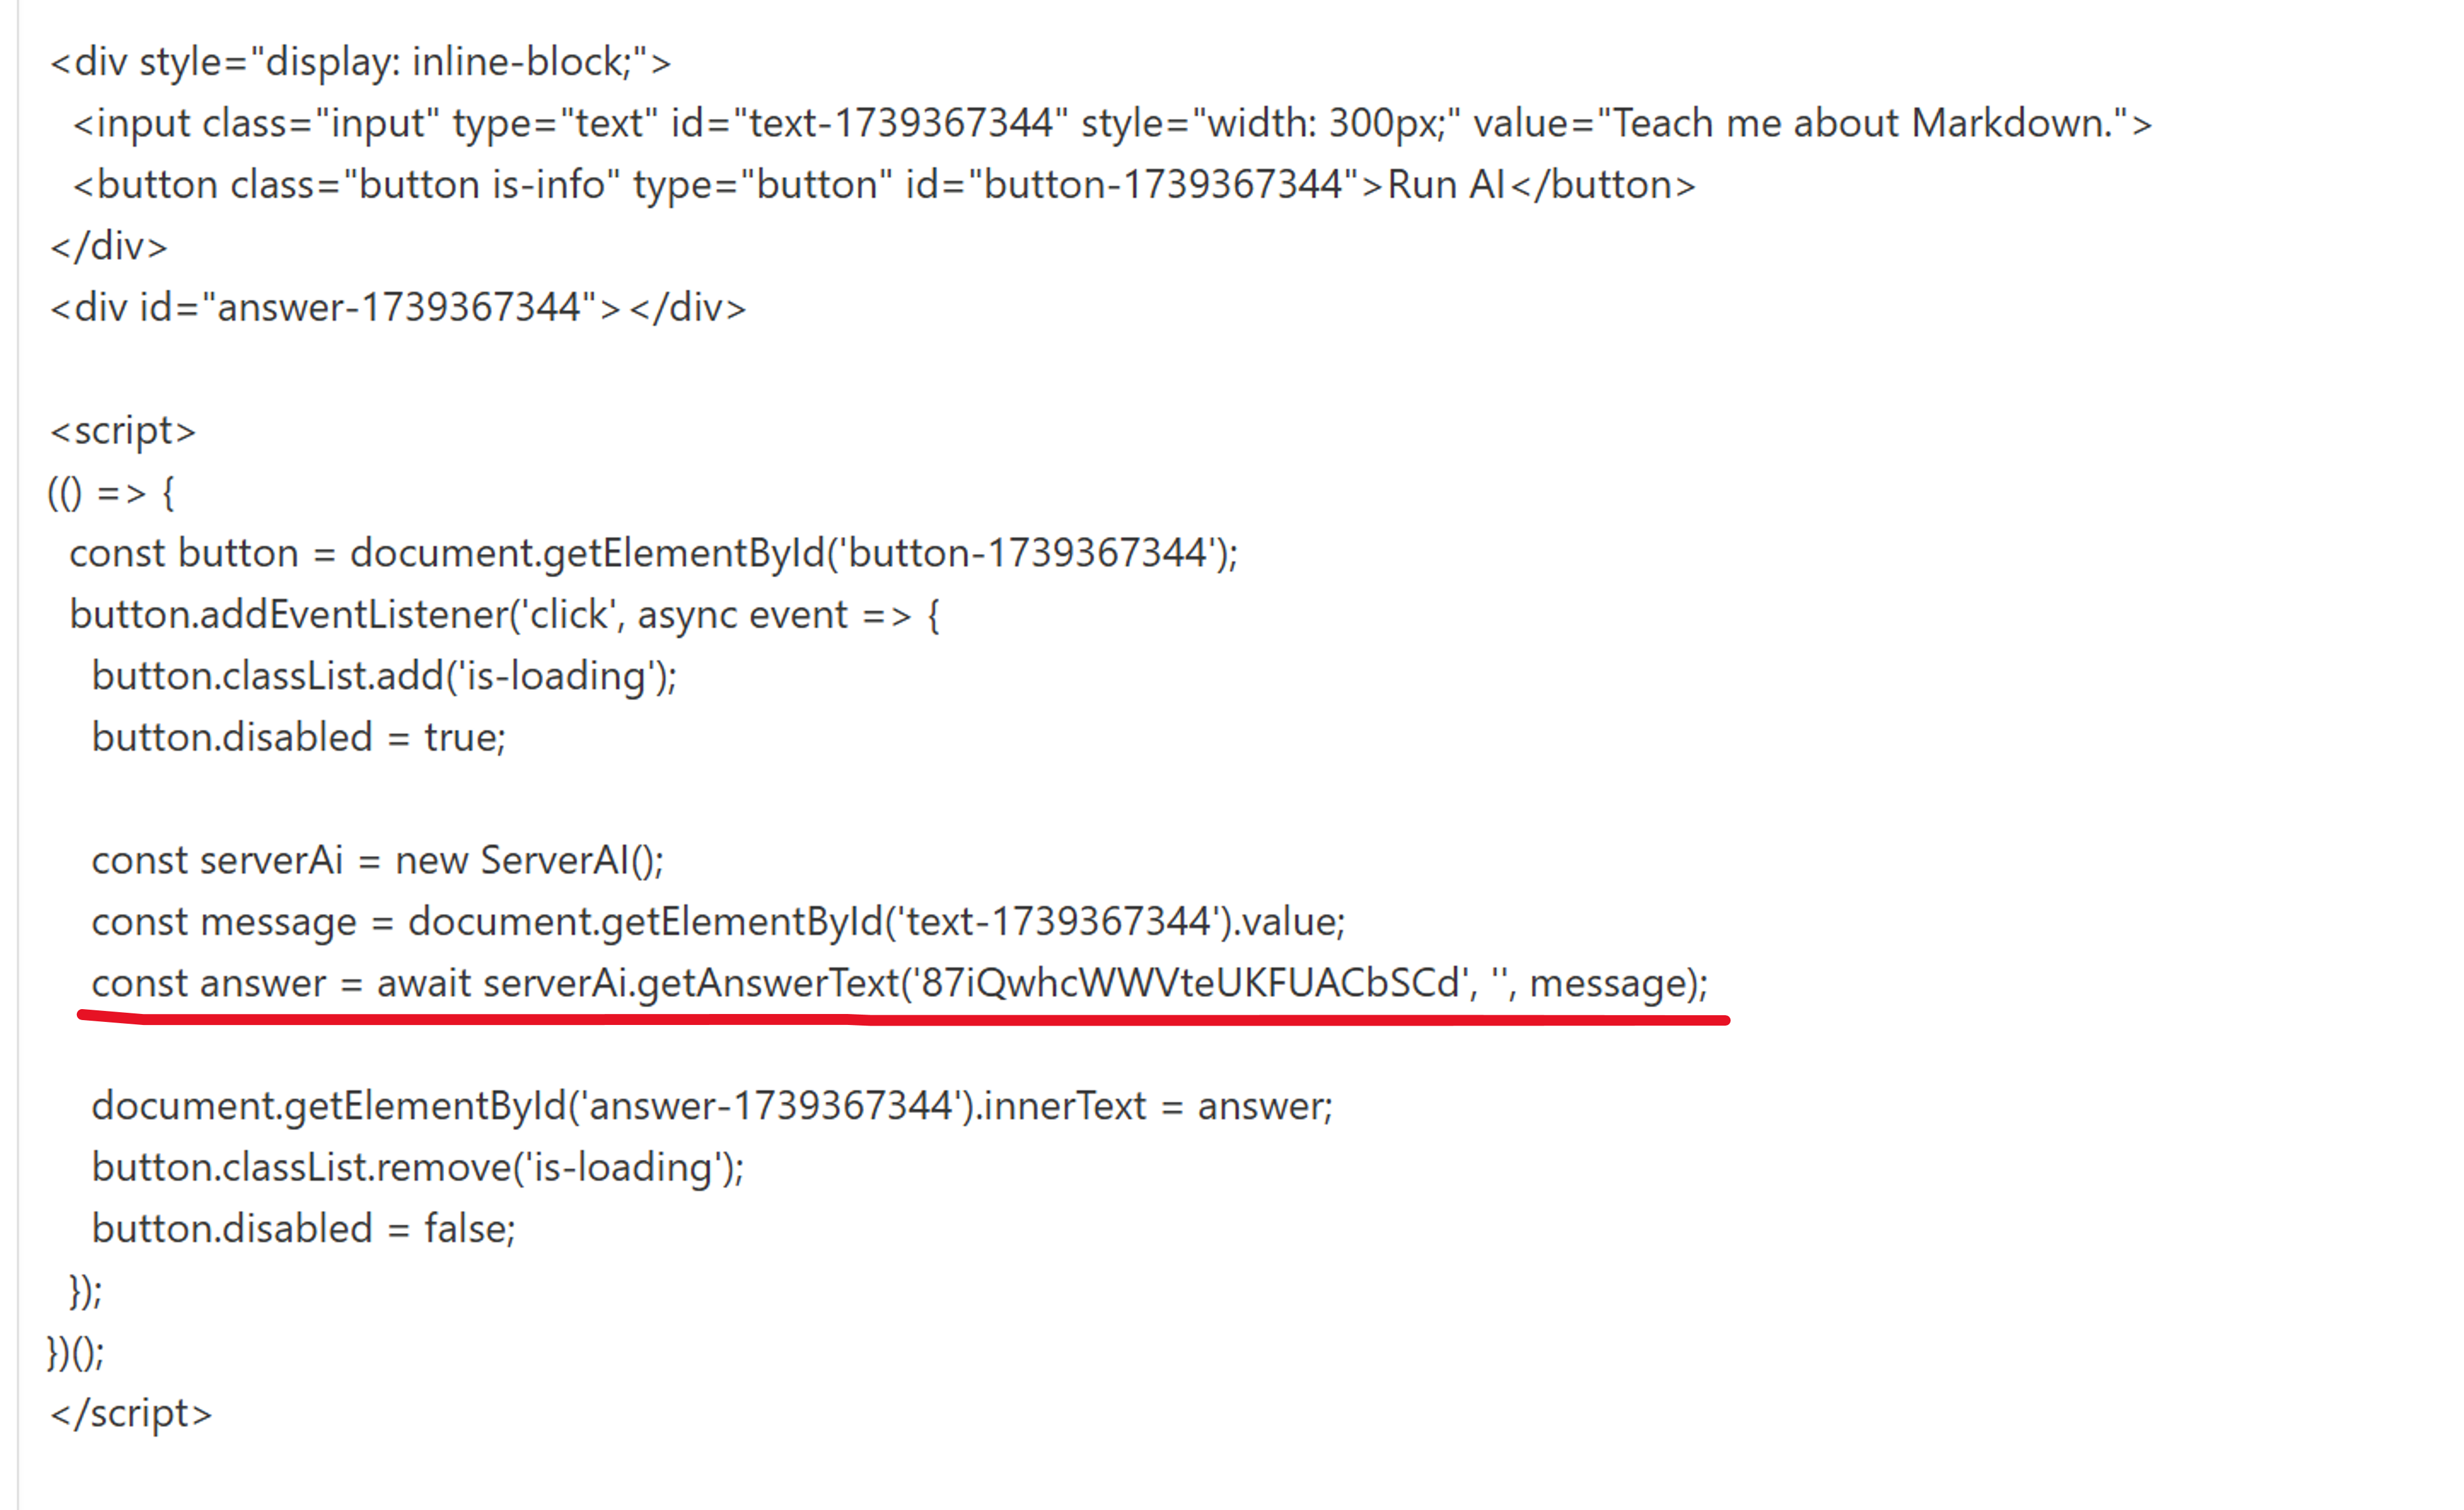
コピーをして、先ほどのコードのこの箇所に貼り付けしてください。
const answer = await serverAi.getAnswerText('#####YOUR TOKEN#####', '', message);
これでアプリが完成しました!
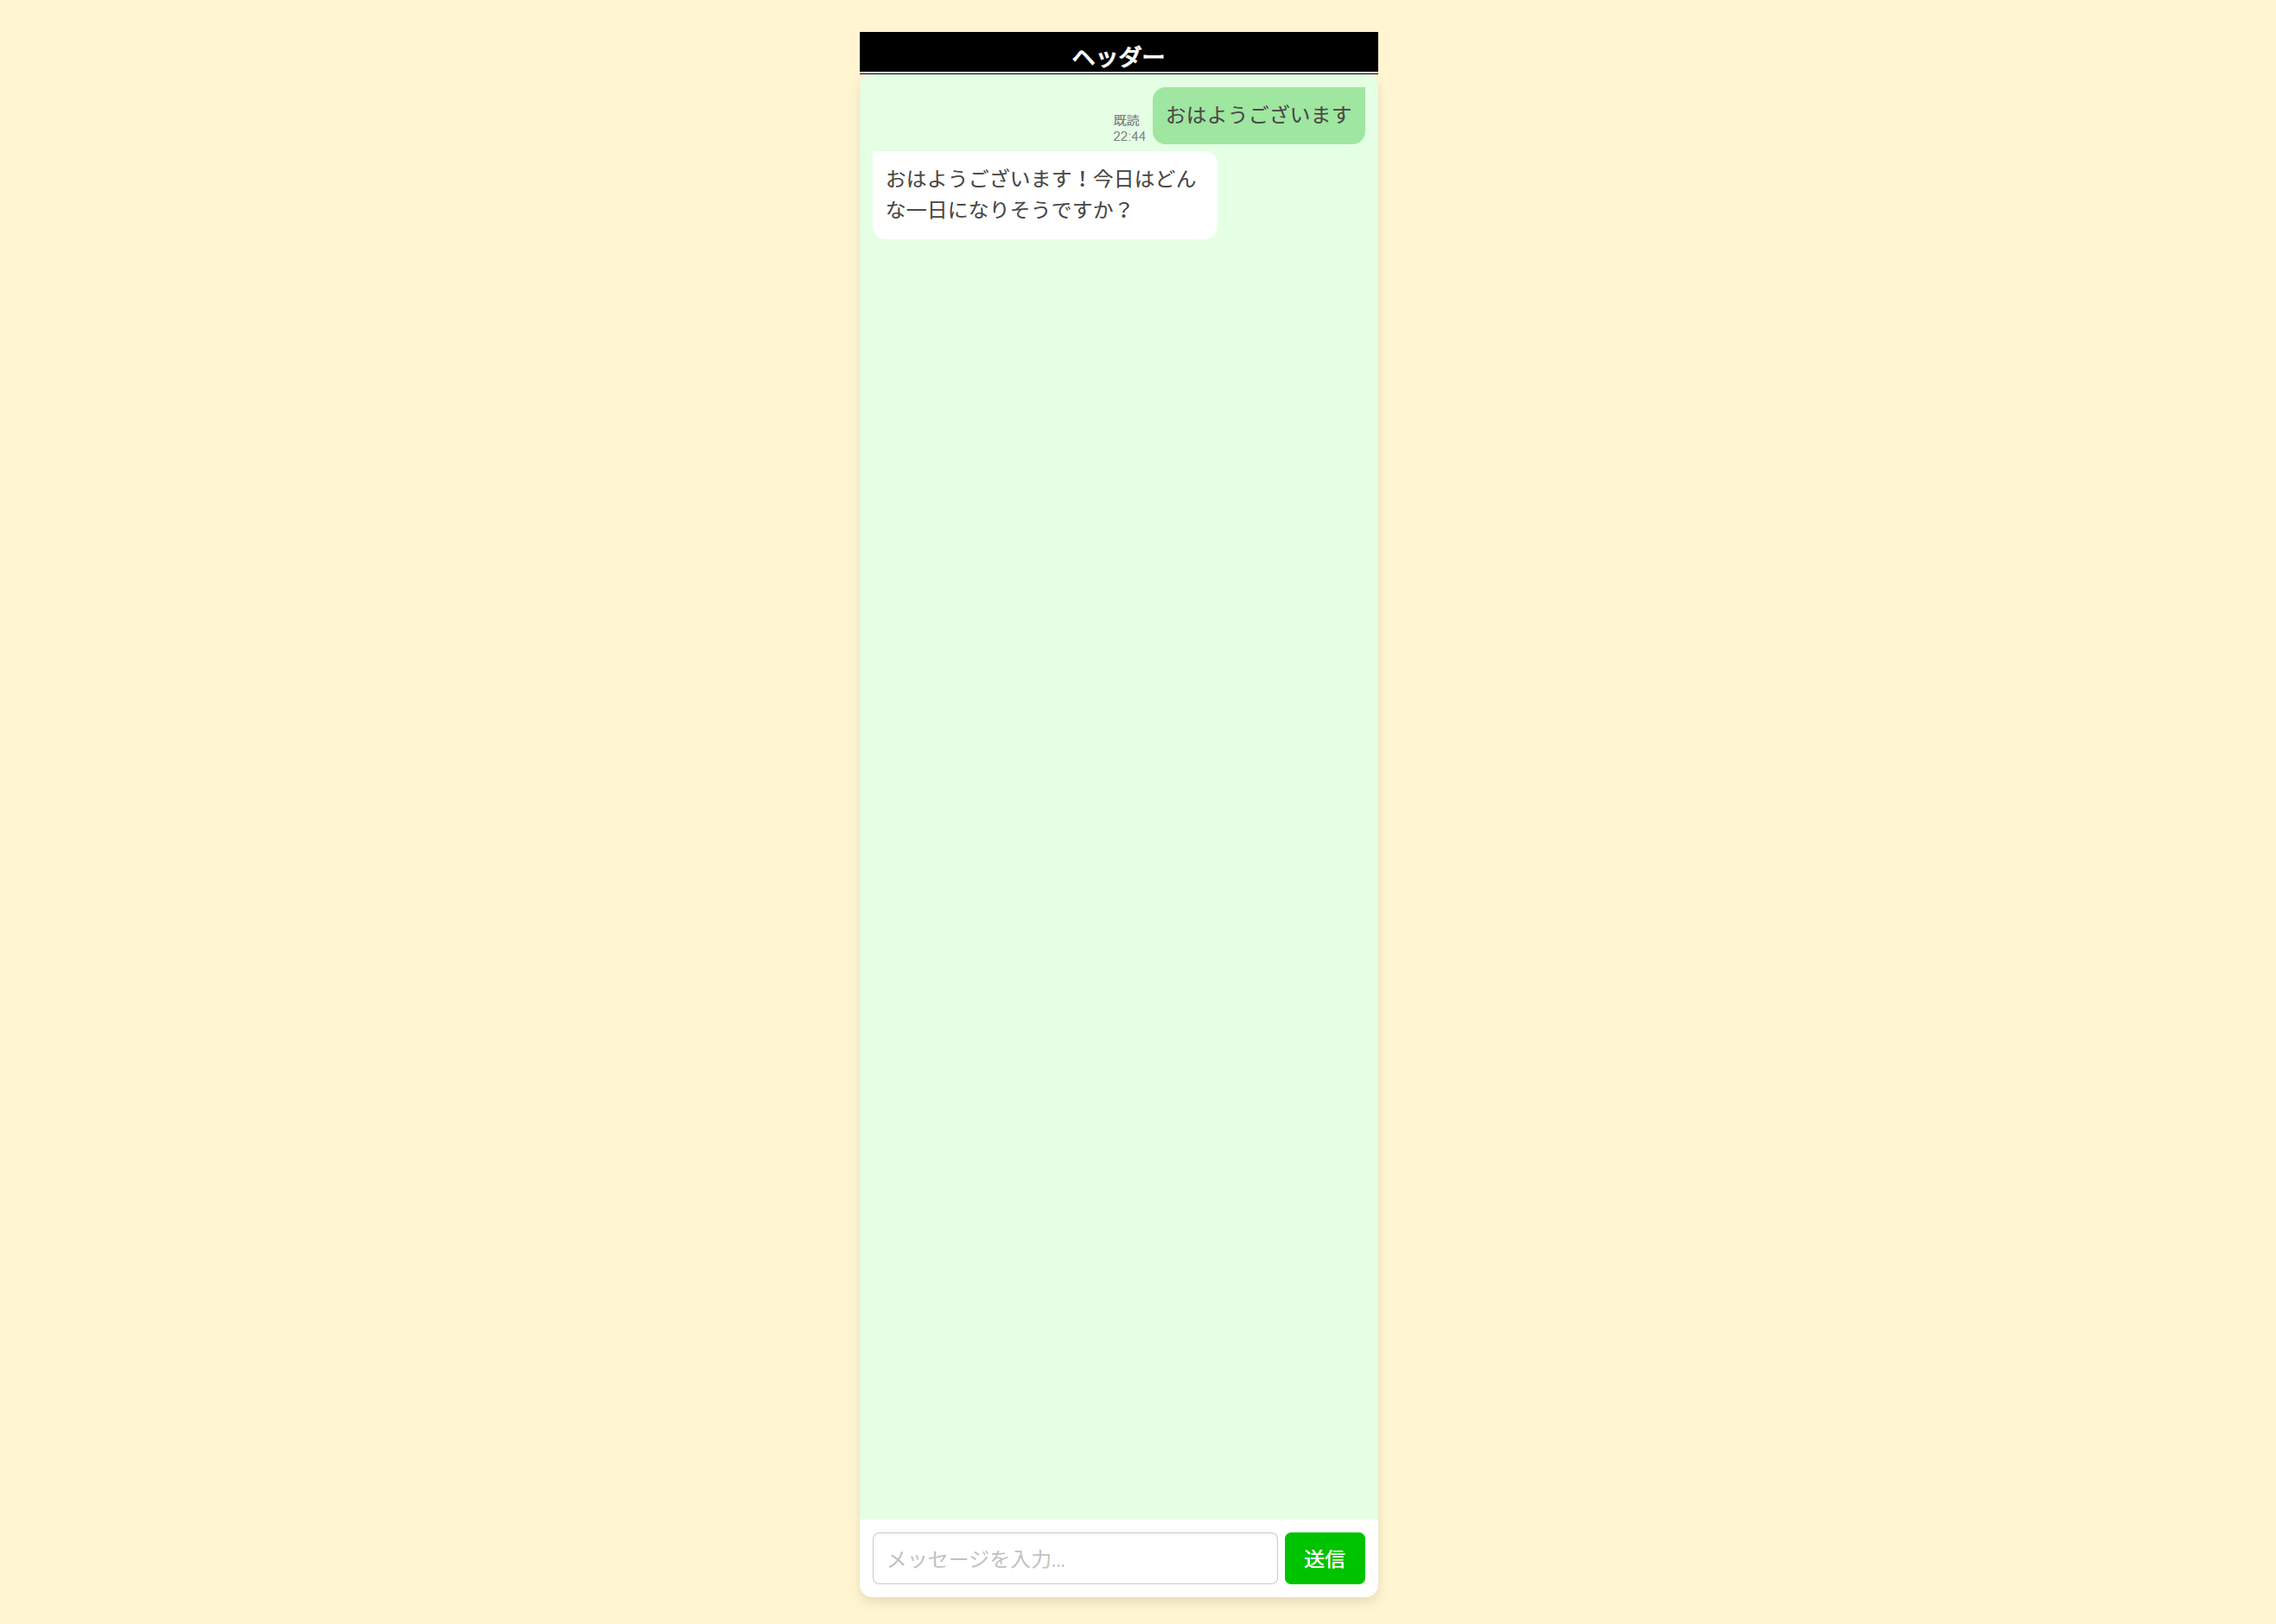
ViewからURLを発行すると、以下のようなサイトが開きます!
メッセージを入力して送信すると、AIから返事が返ってくるはずです。
アレンジする
ヘッダーや背景色を変えてみるといいと思います。
また、MarkdownAIではAIにあらかじめPromptやKnowledgeから応答の仕方を指定することができます。
例えば、こんな風にPromptを書くと、

こんな会話になりました。

ぜひ面白いAIを作ってみてください!
身の回りの誰かにそっくりなAIを作ってみても面白いかもしれませんね。
最後に
MarkdownAIを使うと自分だけのAIアプリを無料で簡単に作ることができます!
ぜひみなさん使ってみてください!