CSS使って画面をオシャレにしたいけど、センスがない
ロジック書ける、HTMLも何となく書けるので、とりあえず動くページは作れる。
しかし、CSSはよくわからんので無味乾燥なページにしかならない・・・
そんな人、意外と多いのではないでしょうか。
そこで、CSSのフレームワークを色々検討するのかなと思います。
CSSのフレームワークは色々あって、BootStrap、tailwindcss、Bulmaなど、世の中には無数のCSSフレームワークであふれかえっています。
今回はそんな中でもtailwindcssに焦点を当ててお話したいと思います。
tailwindcssって細かく記述できるけど、めんどい
下記のコードはtailwindcssでボタンを作成している例です。
<div className="flex-auto flex space-x-4">
    <button className="h-10 px-6 font-semibold rounded-full bg-violet-600 text-white" type="submit">
      Buy now
    </button>
</div>
tailwindの良いところは、class名に直接コードを記述できるところ。
結構細かく記述できるのはいいけど、コード量多くなってHTMLが汚くなりがち。
めんどくさがりのためのdaisyui
「CSSよくわからんから楽して書きたいけど、コード汚くなるのはちょっと・・・」
というそんな欲張りなアナタには、tailwindcssのコンポーネント、daisyuiをおススメしたい。
<button className="btn">Button</button>
なんとたったこれだけでいい感じのボタンを作ってくれる。
じつはこのbtnのなかには、下記のように大量の情報が詰まっている。
display: inline-flex;
    flex-shrink: 0;
    cursor: pointer;
    -webkit-user-select: none;
    user-select: none;
    flex-wrap: wrap;
    align-items: center;
    justify-content: center;
    border-color: transparent;
    border-color: hsl(var(--n) / var(--tw-border-opacity));
    text-align: center;
    transition-property: color, background-color, border-color, fill, stroke, opacity, box-shadow, transform, filter, -webkit-text-decoration-color, -webkit-backdrop-filter;
    transition-property: color, background-color, border-color, text-decoration-color, fill, stroke, opacity, box-shadow, transform, filter, backdrop-filter;
    transition-property: color, background-color, border-color, text-decoration-color, fill, stroke, opacity, box-shadow, transform, filter, backdrop-filter, -webkit-text-decoration-color, -webkit-backdrop-filter;
    transition-duration: 200ms;
    transition-timing-function: cubic-bezier(0.4, 0, 0.2, 1);
    border-radius: var(--rounded-btn, 0.5rem);
    height: 3rem/* 48px */;
    padding-left: 1rem/* 16px */;
    padding-right: 1rem/* 16px */;
    font-size: 0.875rem/* 14px */;
    line-height: 1.25rem/* 20px */;
    line-height: 1em;
    min-height: 3rem/* 48px */;
    font-weight: 600;
    text-transform: uppercase;
    text-transform: var(--btn-text-case, uppercase);
    -webkit-text-decoration-line: none;
    text-decoration-line: none;
    border-width: var(--border-btn, 1px);
    animation: button-pop var(--animation-btn, 0.25s) ease-out;
    --tw-border-opacity: 1;
    --tw-bg-opacity: 1;
    background-color: hsl(var(--n) / var(--tw-bg-opacity));
    --tw-text-opacity: 1;
    color: hsl(var(--nc) / var(--tw-text-opacity));
でも、これじゃ全然自由度ないやん・・・
そう思ってますよね、はい、わかってます。
<button className="btn btn-sm">Large</button>
たとえば、btn-smと追加するだけで、

こんな感じでサイズを変えることだってできちゃいます。
ボタンサイズに関しては、xl,lg,sm,xsなど様々なサイズが用意されているが、ぶっちゃけ用意されている分だけで十分。
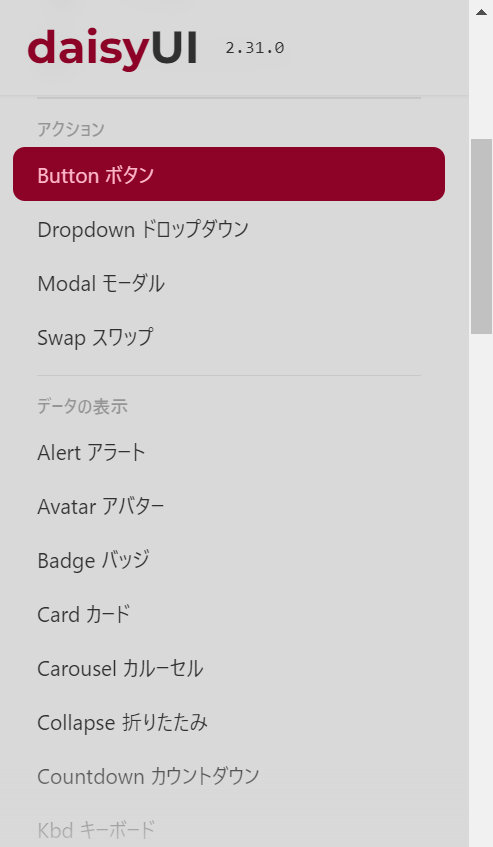
daisyuiの公式HPに飛ぶと、図のように左側にデザインを探したい要素が羅列されていて、
それぞれ作りたい要素のページに飛ぶことができる。

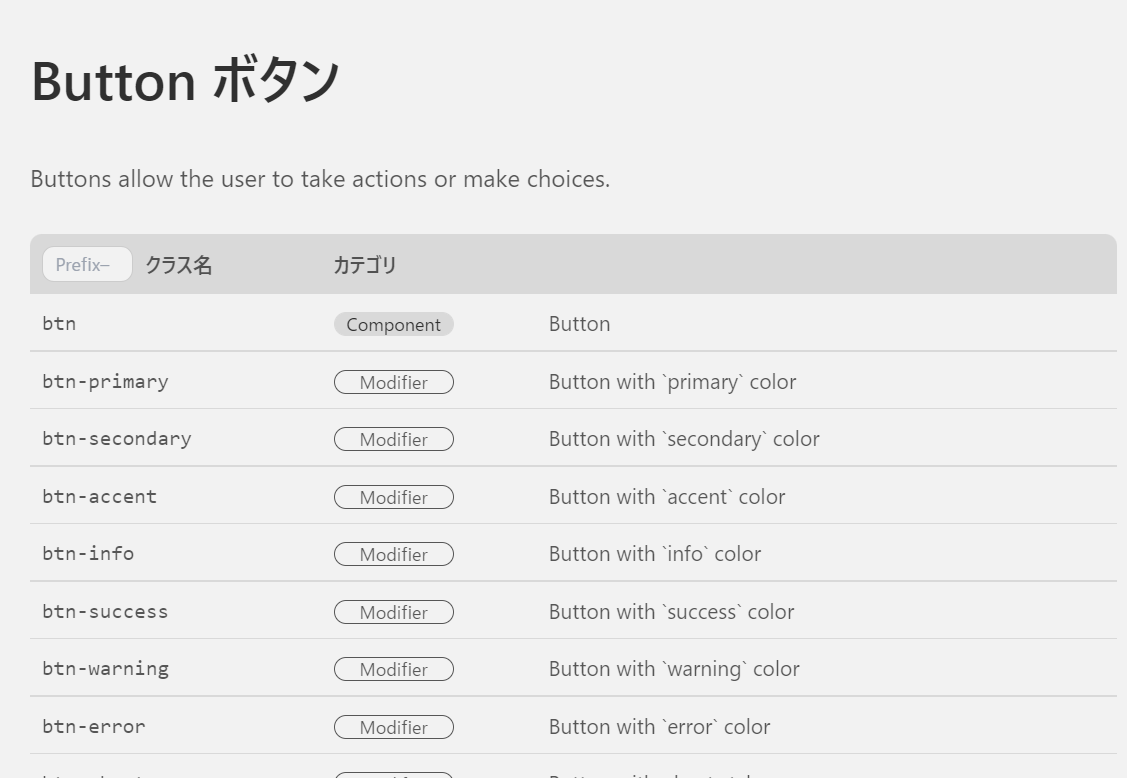
ボタンのページに飛んでみると、

まずはclassに記述するbtnなどの要素が羅列されていて、btn-primaryやbtn-secondaryなどを追記するとボタンの色を変えることができる。
primaryやsecondaryはテーマによって変わる色で、デフォルトはlightというテーマになっている。このテーマは後で変えることもできるし、自分でテーマを作成することもできる。ここではテーマの紹介は割愛するが、気になる人は公式ページから色々と試してみてほしい。
下の方にスクロールすると、

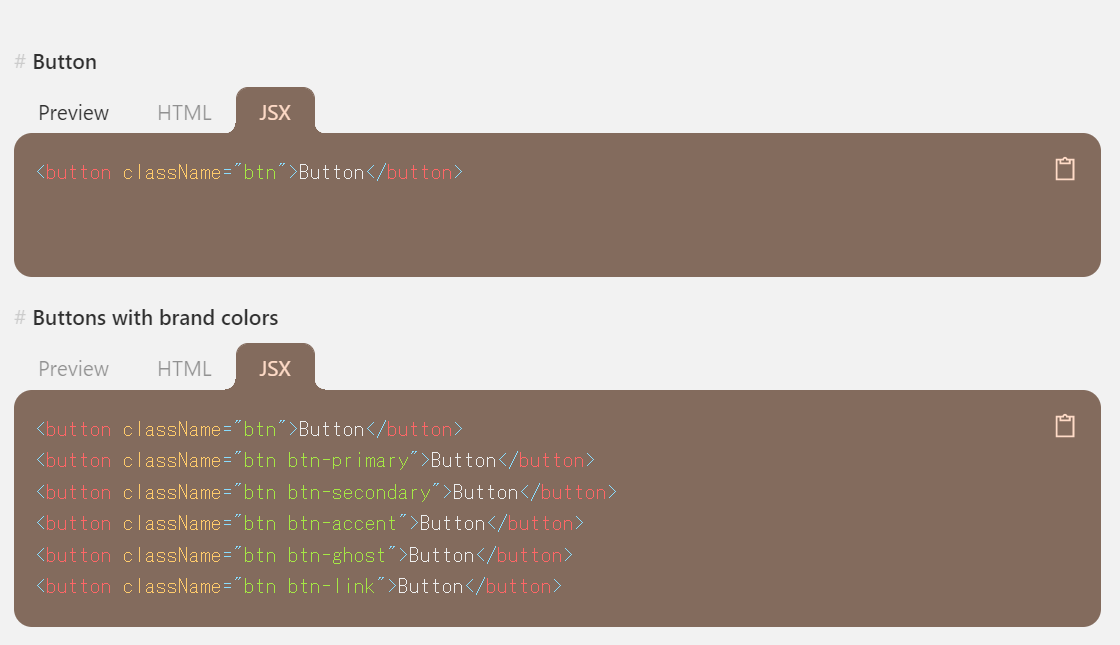
このようにボタンのデザインが表示されている場所を見つけることができる。
ここてはpreviewが表示されているが、上のタブでHTMLやJSXを選択すると、

このように実際のコード表示させることができる。
あとは個々から必要なコードコピペするだけ。超簡単。
daisyuiで実際にログイン画面でも作ってみましょう
ますはここからtailwindcss、daisyuiをインストールしましょう。
tailwindcssのインストール
daisyuiのインストール
Reactとか、そのほかの開発環境はセットしてある前提で進めていきます。
今回はReactのコードの中にdaisyuiをぶち込むやり方でいきます。
(一応、Reactの環境構築のやり方が載ってるページも紹介しときます)
React環境構築
最初はこんな感じのコードで、デザインもくそもないログイン画面ができるかと思います。
<html>
      <div>
        <div>
          <div>
            <h2>CHATAPP</h2>
            <h3>Welcome to attrcting chat app!</h3>
            <p>Thank you for choosing this app</p>
            <p>This is the best chat app ever.</p>
            <div>Log in with e-mail</div>
            <div>
              <form>
                <div>
                  <label>email</label>
                  <input name="email" id="email" type="email" placeholder="Type email here" />
                </div>
                <div>
                  <label>password</label>
                  <input name="password" type="password" placeholder="Type password here" />
                </div>
                <div>
                  <button>Log in</button>
                </div>
              </form>
            </div>
          </div>
        </div>
      </div>
    </html>
こんなダサダサな画面を、↓のようにちょいおしゃれにしていきたいと思います。
それぞれ、番号を振った部分をdaisyuiを参考にして彩りを加えていきます。
今回はReactの画面で編集する前提なので、HTMLではなくJSXの方を参照しましょう。
↓
①カードのページ(#Card)
②モーダルのページ(# Modal that closes when clicked outside)
③折りたたみのページ(# Collapse with checkbox、# With border and background color)
上の三つの要素を盛り込むと、下のようなコードになります
// テーマ設定
    <html data-theme="autumn">
      {/* ① */}
      <div className="hero min-h-screen">
        <div className="card w-96 bg-base-100 shadow-xl">
          <figure>
            <img src="https://placeimg.com/400/225/arch" alt="Shoes" />
          </figure>
          <div className="card-body">
            {/* ② */}
            {/* The button to open modal */}
            <label htmlFor="my-modal-4">
              <h2 className="card-title btn modal-button">CHATAPP</h2>
            </label>
            <input type="checkbox" id="my-modal-4" className="modal-toggle" />
            <label htmlFor="my-modal-4" className="modal cursor-pointer">
              <label className="modal-box relative">
                <h3 className="text-lg font-bold">Welcome to attrcting chat app!</h3>
                <p className="py-4">Thank you for choosing this app</p>
              </label>
            </label>
            <p className="text-lg font-serif">This is the best chat app ever.</p>
            <div tabIndex={0} className="collapse border border-base-300 bg-base-100 rounded-box">
              {/* input type="checkboxを入れないとボタンテキスト入力しようとすると閉じてしまう" */}
              <input type="checkbox" />
              <div className="collapse-title text-xl font-medium bg-secondary">
                Log in with e-mail
              </div>
              <div className="collapse-content">
                <form onSubmit={handleLogin}>
                  <div>
                    <label>email</label>
                    <input
                      name="email"
                      id="email"
                      type="email"
                      placeholder="Type email here"
                      className="input input-bordered input-primary w-full max-w-xs"
                    />
                  </div>
                  <div>
                    <label>password</label>
                    <input
                      name="password"
                      type="password"
                      placeholder="Type password here"
                      className="input input-bordered input-primary w-full max-w-xs"
                    />
                  </div>
                  <div className="text-red card-actions justify-center pt-3">
                    <button className="btn btn-primary">Log in</button>
                  </div>
                </form>
                {/* <p>tabIndex={0} attribute is necessary to make the div focusable</p> */}
              </div>
            </div>
          </div>
        </div>
      </div>
    </html>
あとがき
ご覧いただきありがとうございました。
この記事では全てを解説はしていないので、自分なりに色々触ってみてもらうといいと思います。特にテーマのカスタマイズとか自分の好きな色を設定できたりして楽しいので、ぜひやってみてほしいなと思ってます。(daisyuuiのテーマ)
簡単にカスタマイズできちゃうので、結構楽しくなってくると思います。
本記事の執筆者自身駆け出しなので、Reactの文法の理解とか、そっちの方に気を取られてなかなかCSSのことまで考える余裕がなかったです。
そんな中でも楽しく、簡単に書けるdaisyuiに出会って、運命を感じました。
ただ、そんなに一途ではないので、みなさんもおススメのCSSフレームワークやコンポーネントあれば情報共有お待ちしてます。


