FastAPIにCognito認証を導入していきます。結論から言うとFastAPI Cloud Authというパッケージを使用するだけで簡単にできます。ありがたいですね。Cognitoの設定については触れないので別の方の記事をご参照ください。
FastAPIサンプルコード
基本的にはgithubのREADMEを読んでいただければわかると思いますが、参考までにサンプルコードです。リージョンとユーザープールIDは事前に環境変数に設定しておきます。
sample_auth.py
import os

from fastapi import FastAPI, Depends
from fastapi_cloudauth.cognito import Cognito


app = FastAPI()
auth = Cognito(region=os.environ["REGION"], userPoolId=os.environ["USERPOOLID"])

@app.get("/", dependencies=[Depends(auth.claim())])
def sample():
    return 'Success!'
動作確認
IDトークンの取得
get_token.py
import base64
import getpass
import json

import boto3


def cognito_auth(user, passwd):
    # 認証開始
    try:
        cognito_idp = boto3.client('cognito-idp')
        cognito_result = cognito_idp.admin_initiate_auth(
            UserPoolId = "your user pool id",
            ClientId = "your client id",
            AuthFlow = "ADMIN_NO_SRP_AUTH",
            AuthParameters = {
                "USERNAME": user,
                "PASSWORD": passwd,
            }
        )
        return cognito_result
    except:
        # 認証失敗
        return None

if __name__ == '__main__':
    # cognito認証
    username = input('cogito username: ')
    password = getpass.getpass('cogito password: ')
    cognito_result = cognito_auth(username, password)
    print(cognito_result["AuthenticationResult"]["IdToken"])
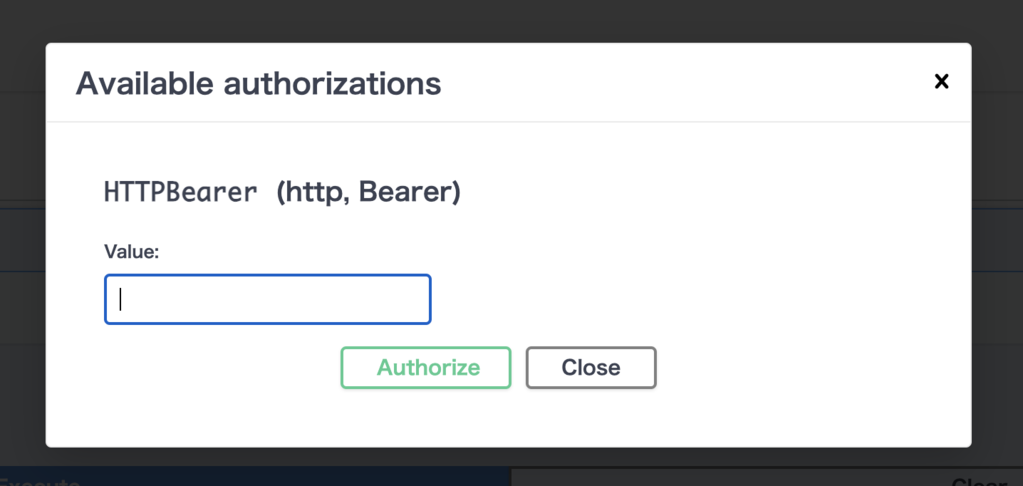
Swagger UIで確認
docsの「Authorize」ボタンから上で取得したIDトークンを入力。入力後に実行できればOKです。