はじめに
弊社では「リモートワーク」「休暇取得者」「メンバーの誕生日」「清掃タイム」などを、Slackで自動通知しています。
「毎朝お知らせしている情報は一つにまとめたい![]() 」という気持ちに駆られたので、
」という気持ちに駆られたので、
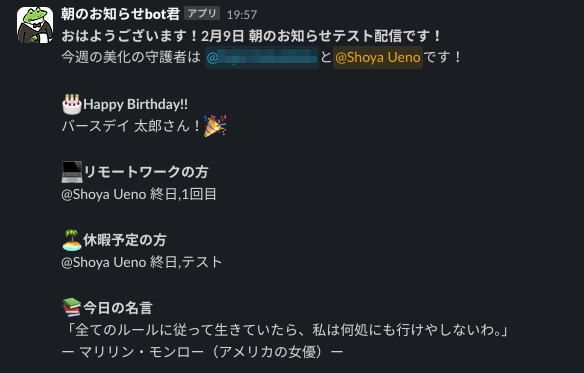
朝のお知らせbot君(仮)を作りました。
やりたいこと一覧
毎朝のお知らせ
- 平日の朝、指定時刻頃にチャンネルへ自動投稿する
- その日のリモートワーク申請者を表示する
- その日の休暇取得者を表示する
- その日の誕生日メンバーを表示する
- その日の株価を表示する
- その週の清掃当番をGoogleカレンダーから取得して表示する
- 第2、第4金曜日のみ追加メッセージを表示する
- 締切の近い全体連絡を表示する
- 毎日異なるメッセージを表示する
清掃タイムのお知らせ
- 平日16時にチャンネルへ自動投稿する
- Slackのリマインダーと連動する
今回実装したこと
上記の一覧の中から、今回は下記の実装をします。
- 平日の朝9時頃にチャンネルへ自動投稿する
- その日のリモートワーク申請者を表示する
- その日の休暇取得者を表示する
- その日の誕生日メンバーを表示する
- その週の清掃当番をGoogleカレンダーから取得して表示する
- 毎日異なるメッセージを表示する
(今回のアイコンはダ鳥獣戯画からお借りしました。LINEスタンプも愛用中)
記事を読んで、コードレビューやアドバイス等あれば、ぜひお願いします!
GASでシートやカレンダーから情報を取得する
社内でリモートワーク申請と誕生日はデータの取得と表示をしてくれていたので、
前回作成した休暇連絡の通知と統合させて、整理します。
今日の日付を取得する
スプレッドシートのデータの保存形式がバラバラなので、日付を色々な形で取得します。
元のSlackのワークフローなどを見直して、データを統一した形で取得&蓄積できるように改善したいです。
function getToday(){
  const date  = new Date();
  const month = Utilities.formatDate(date, 'JST', 'MM');
  const day   = Utilities.formatDate(date, 'JST', 'dd');
  const today = [
    Utilities.formatDate(date, 'JST', 'yyyy/MM/dd'),
    Utilities.formatDate(date, 'JST', 'M月d日') ,
    month + "/" + day,
    date.getDay(),
    date
  ];

  return today;
}
今日の「休暇取得者」「リモートワーク」「誕生日の人」を取得する
この3つは列順の違いによる多少の差異はありますが、基本は同じ方法で取得します。
スプレッドシートでは、画像のように情報が蓄積されています。

- 今日の日付と一致するセルを探す
- そのセルの行と列を取得する
- 「誰が」「時間」「何回目」の3つに該当するセルの値を取得
- 日付(予定日)のセルを基準にして、columnの数値を増減させて取得する
function getRemoteMatchCell(sheet, date){
  const cells = sheet.createTextFinder(date)
    .matchEntireCell(true)
    .findAll();
  const array = [];

  //一致するセルを取得
  for(let i=0; i<cells.length; i++){
    const cell   = cells[i].getA1Notation();
    const column = sheet.getRange(cell).getColumn();
    const row    = sheet.getRange(cell).getRow();

    const person = sheet.getRange(row, column -1).getValue();
    const hour   = sheet.getRange(row, column +1).getValue();
    const times  = sheet.getRange(row, column +2).getValue();
    array.push([person, hour, times]);
  }

  return array;
}
Googleカレンダーから予定を取得する
社内で今週の清掃当番を、Googleカレンダーの予定に入れて表示しています。
その予定を取得し、該当のSlackユーザーIDを返して、メンション形式でお知らせします。
Googleカレンダーの予定は「今週の清掃当番:山田 & 田中」という表示形式です。
まずは、取得したい予定のGoogleカレンダーのIDを確認します。
Googleカレンダーのマイカレンダーから「設定と共有」を選択します。

下の方にある「カレンダーの統合」に記載されている「カレンダーID」を確認します。

清掃当番シートに、タイトル、SlackユーザーID1、SlackユーザーID2のテーブルを用意します。

「予定のタイトルの一部」と一致する文字列を検索して、SlackのユーザーIDを返します。
(もう少しスマートなやり方がありそう)
- 取得したいカレンダーの設定
- その日の予定を取得
- イベントのタイトルに「清掃当番」を含むイベントを取得
- タイトル全体と、一致した部分を配列で取得
- 一致した行のユーザーIDをそれぞれ取得して返す
function getCleaner(sheet, date){
  const myCalendar = CalendarApp.getCalendarById('カレンダーID');
  const events = myCalendar.getEventsForDay(date);
  const array = [];
  events.forEach(event => {
    if (event.getTitle().includes("清掃当番")) {
      const eventTitle = event.getTitle();
      console.log("eventTitle:" + eventTitle);

      const match = eventTitle.match(/清掃当番[::](.*)/);
        if (match && match[1]) {
          const searchText = match[1].trim();
          const cell = sheet.createTextFinder(searchText).findNext();
          console.log("cell:" + cell);
          if (cell) {
            const row = cell.getRow();
            const col = cell.getColumn();
            const cleaner1 = sheet.getRange(row, col + 1).getValue();
            const cleaner2 = sheet.getRange(row, col + 2).getValue();
            array.push(cleaner1, cleaner2);
          }
        }
      }
  });
  return array;
}
毎日ランダムにメッセージを取得する
名言用シートに名言の内容と発言者のテーブルを作成します。

名言用シートからランダムで内容と発言者を取得します。
function getWord(sheet) {
  const firstRow = 2;
  const lastRow = sheet.getLastRow();
  const colIndices = [2, 3];
  const rowIndex = Math.floor(Math.random() * (lastRow - firstRow + 1)) + firstRow;

  const values = colIndices.map(colIndex => sheet.getRange(rowIndex, colIndex).getValue());
  return values;
}
GASでSlackにメッセージを送信する
取得した情報でメッセージを作成する
それぞれのシートから取得した情報を使ってメッセージを作成します。
function createMessage(birthday, remote, vacation, cleaner, word, today){
  let message = "*おはようございます!" + today + " 朝のお知らせテストです!*\n";
  message = message + "今週の清掃当番は <@" + cleaner[0] + ">と<@" + cleaner[1] + ">です!\n";
  if(today[3] = 0){

  }

  if(birthday.length > 0){
    message = message + "\n\n:birthday:*Happy Birthday!!*\n";
    for(let i=0; i<birthday.length; i++){
      message = message + birthday[i] + "さん!:tada:\n";
    }
  }

  message = message + "\n\n:computer:*リモートワークの方*\n";
  if(remote.length > 0){
    for(let i=0; i<remote.length; i++){
      message = message + remote[i][0] + ' ' + remote[i][1] + ',' + remote[i][2] + "\n";
    }
  }else{
    message = message + "本日のリモート申請者はいませんでした。\n"
  }

  message = message + "\n\n:desert_island:*休暇予定の方*\n";
  if(vacation.length > 0){
    for(let i=0; i<vacation.length; i++){
      message = message + vacation[i][0] + ' ' + vacation[i][1] + ',' + vacation[i][2] + "\n";
    }
  }else{
    message = message + "本日の休暇取得者はいませんでした。\n"
  }

  message = message + "\n\n現在改良中!〇〇もお知らせ予定です:qiitan-lgtm:\n";
  message = message + "\n\n:books:*今日の名言*\n「" + word[0] + "」\n" + "ー " + word[1] + "ー\n"

  return message;
}
Slackにメッセージを送信する
まずは、SlackでIncoming WebHooksを連携させます。
場所はSlackの その他 -> 自動化 -> App -> Incoming WebHooks

設定から、投稿するチャンネル、名前、アイコン画像を設定します。
WebHooks URLをコピーしておきます。

コピーしたWebHooksのURLを、コードに貼り付けます。
Incoming Webhooksを使って、Slackにメッセージを送信します。
- それぞれのシートを取得する
- 今日の日付を取得する
- 平日のみ通知する
- それぞれのシートからデータを取得する
- メッセージを作成する
- WebHookでSlackにメッセージを送信する
function morningNotesBot(){
  const activeSpreadSheet = SpreadsheetApp.getActiveSpreadsheet();
  const birthdaySheet     = activeSpreadSheet.getSheetByName("誕生日通知");
  const remoteWorkSheet   = activeSpreadSheet.getSheetByName("リモート承認");
  const vacationSheet     = activeSpreadSheet.getSheetByName("通知用");
  const cleanSheet        = activeSpreadSheet.getSheetByName("美化通知");
  const wordSheet         = activeSpreadSheet.getSheetByName("名言");

  const today = getToday();
  console.log("today:" + today);

  if(today[3] > 0 && today[3] < 7){
    const birthdayPerson = getBirthdayMatchCell(birthdaySheet, today[2]);
    console.log("birthdayPerson:" + birthdayPerson);
    console.log("birthdayPerson count:" + birthdayPerson.length);

    const remoteWorker = getRemoteMatchCell(remoteWorkSheet, today[0]);
    console.log("remoteWorker:" + remoteWorker);
    console.log("remoteWorker count:" + remoteWorker.length);

    const vacationer = getVacationMatchCell(vacationSheet, today[0]);
    console.log("vacationer:" + vacationer);
    console.log("vacationer count:" + vacationer.length);

    const cleaner = getCleaner(cleanSheet, today[4]);
    console.log("cleaner:" + cleaner);

    const word = getWord(wordSheet);
    console.log("word:" + word);

    const message = createMessage(birthdayPerson, remoteWorker, vacationer, cleaner, word, today[1]);
    console.log("message:" + message);

    const webhookUrl = 'https://hoge.com/services/abcxxx'; // あなたのWebhook URLをここに
    const payload = JSON.stringify({text: message});
    const options = { method: 'POST', contentType: 'application/json', payload: payload };

    UrlFetchApp.fetch(webhookUrl, options);

  }else{
    console.log('休日のため実行されませんでした。');
  }
}
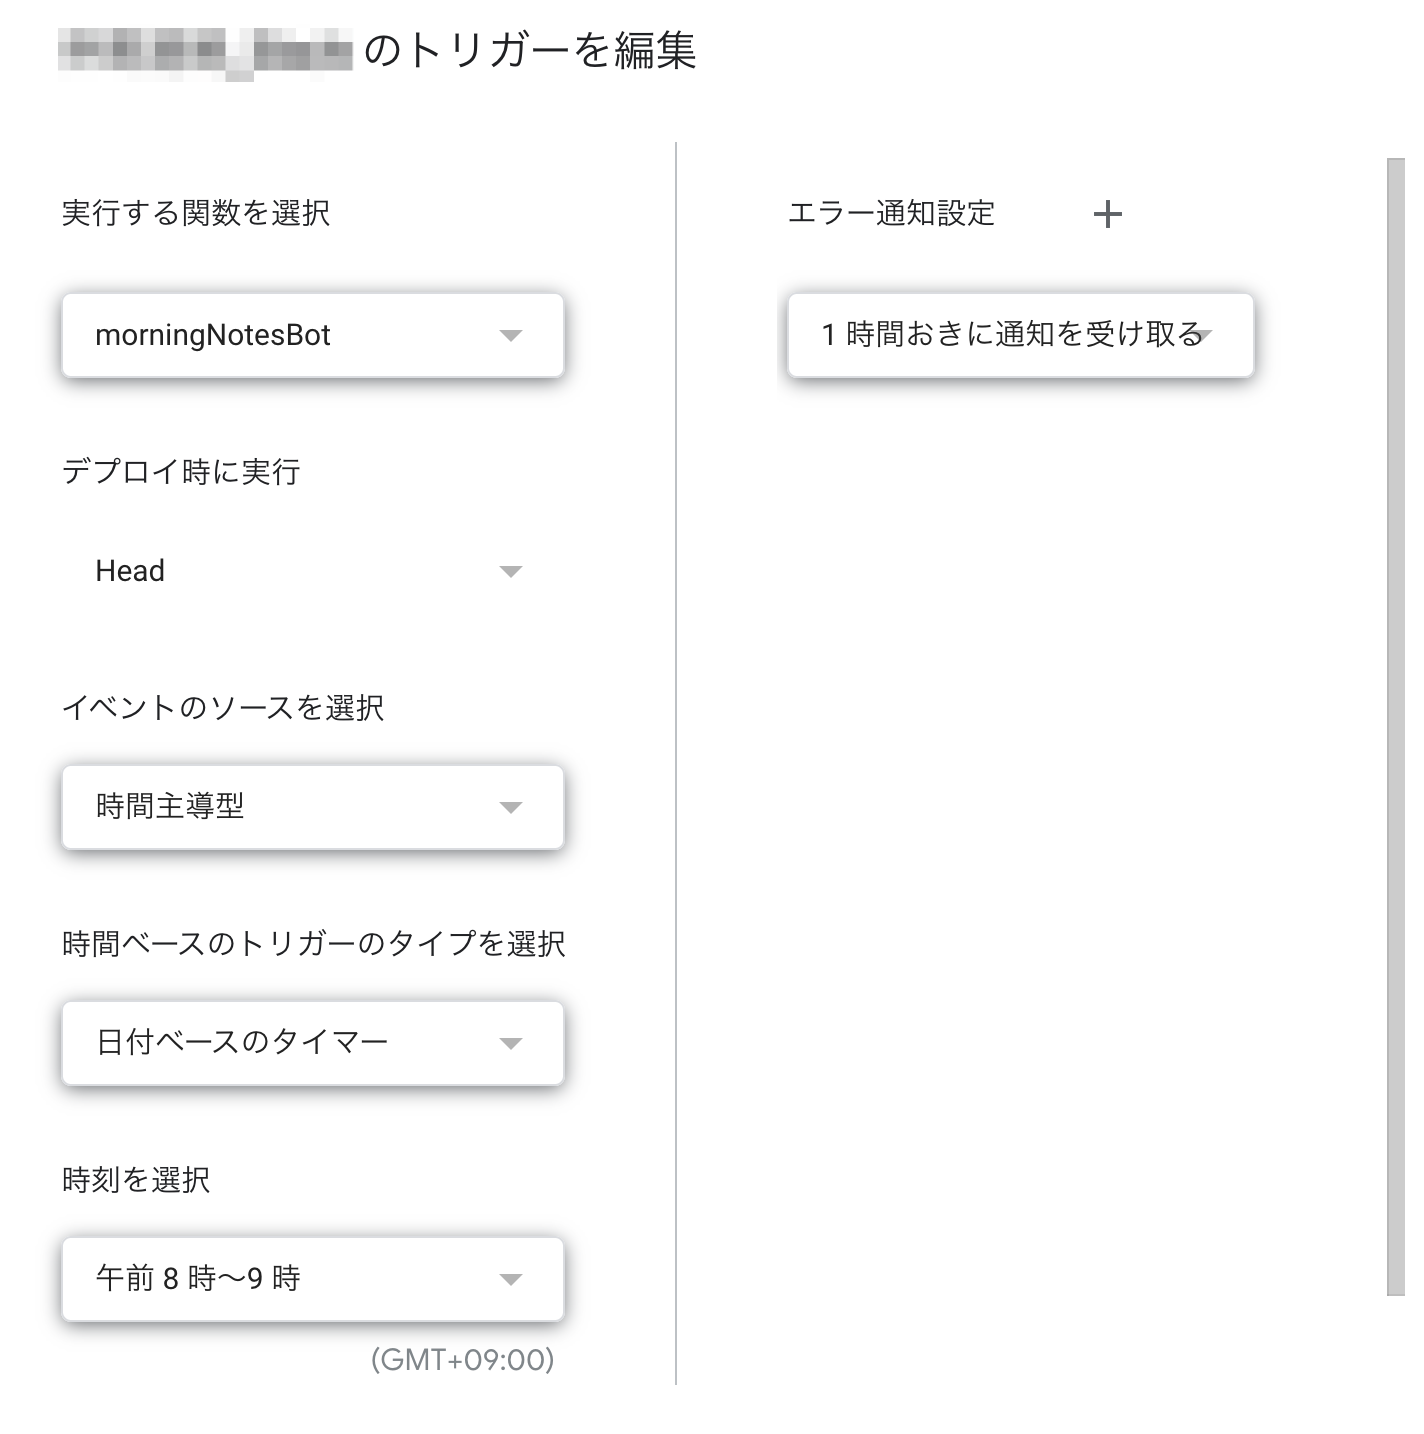
トリガーを設定する
AppScript -> トリガー -> トリガーを追加から、
トリガーを追加します。
時間指定は1時間ごとのみで「9:00ピッタリ」などの設定はできません。
(任意の時間に送信するコードは、今後実装する予定です)
- 実行する関数を選択:Slackにメッセージを送信するメソッド
- イベントのソース:時間主導型
- 時間ベースのトリガーのタイプ:日付ベースのタイマー
- 時間を選択:任意の時間
まとめ
今回は、朝にお知らせをまとめて通知する機能を実装しました。
次の記事では、まだ実装できていない機能を追加して書きたいと思います。