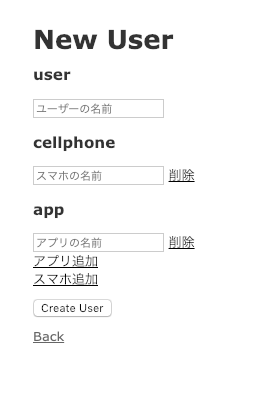
はじめに
railsのgem:nested_formについて使用方法と実際に作成した簡単なサンプルを記事にしました。
以下のGitHubにソースあります。
https://github.com/shotaimai66/nested_form
- masterブランチが、JSを使って、動的に追加された要素の数を制限した機能と、番号を付与する機能を追加したブランチです。
- basicブランチが、今回作るサンプルの内容です。
想定するアプリ
- アプリ内容
- ユーザーのCRUDアプリ
- ユーザーは複数のスマホを持っていて、スマホは複数のアプリを持っている
- リソース
- User
- Cellphone
- App
- アソシエーション
- User (has_many :cellphones)
- Cellphone (belongs_to :user, has_many :apps)
- App (belongs_to :cellphone)
- ライブラリ等
- JQuery
- nested_form
- Bootstrap4
- 環境
- AWScloud9
- Rails 5.2.2
- ruby 2.4.1p111 (2017-03-22 revision 58053) [x86_64-linux]
rails new
rails new nested_form
model(データベース)作成
rails g scaffold User name:string       #Userモデル(scaffoldコマンド)
rails g model Cellphone user:references name:string     #Cellphoneモデル
rails g model App cellphone:references name:string           #Appモデル
Userモデルをscaffoldコマンドで作成し、コントローラー、ビュー、ルーティングを設定してもらう。
CellphoneモデルとAppモデルをコマンドにreferencesオプションをつけて、モデルの関係を明示する。
モデル同士の紐付け(アソシエーション)
先ほどのreferencesオプションで紐付けができているか確認する。
かくモデルファイルと、マイグレーションファイルを確認して以下のように修正する。
class User < ApplicationRecord
  has_many :cellphones, :dependent => :destroy
  accepts_nested_attributes_for :cellphones, allow_destroy: true
end
class Cellphone < ApplicationRecord
  belongs_to :user
  has_many :apps, :dependent => :destroy
  accepts_nested_attributes_for :apps, allow_destroy: true
end
class App < ApplicationRecord
  belongs_to :cellphone
end
-
accepts_nested_attributes_forはリソースをネストさせて、フォームを作成およびネストしたパラメーターを作る為のものです。 -
:dependent => :destroyとallow_destroy: trueは親リソースが削除された時に、子リソースの扱いをどうするか明記したもの。今回は、親リソースが削除されると子リソースも削除されるようにしたい為、このように明記します。
class CreateUsers < ActiveRecord::Migration[5.2]
  def change
    create_table :users do |t|
      t.string :name

      t.timestamps
    end
  end
end
class CreateCellphones < ActiveRecord::Migration[5.2]
  def change
    create_table :cellphones do |t|
      t.references :user, foreign_key: true
      t.string :name

      t.timestamps
    end
  end
end
class CreateApps < ActiveRecord::Migration[5.2]
  def change
    create_table :apps do |t|
      t.references :cellphone, foreign_key: true
      t.string :name

      t.timestamps
    end
  end
end
-
t.references :cellphone, foreign_key: trueこれで、リソースに参照カラム(user_id,cellphone_id)の定義と外部キー制約がつきます。
Gem(nested_form)
gem nested_formのインストール
gem "nested_form"
application.js修正
//= require jquery_nested_form #追記
bundle install
bundle install
rails db:migrate
rails db:migrate
ビュー、コントローラーの修正
# GET /users/new
  def new
    @user = User.new
    @cellphone = @user.cellphones.build
    @cellphone.apps.build
  end
<%= nested_form_for(@user) do |f| %>
<!--errors-->
  <% if user.errors.any? %>
    <div id="error_explanation">
      <h2><%= pluralize(user.errors.count, "error") %> prohibited this user from being saved:</h2>
      <ul>
        <% user.errors.full_messages.each do |message| %>
          <li><%= message %></li>
        <% end %>
      </ul>
    </div>
  <% end %>
<!--end_errors-->


  <div class="field card" style="width: 500px;">
    <!--user-->
    <h3>user</h3>
    <%= f.text_field :name, {placeholder: "ユーザーの名前"} %>
    <div class="cellphone card" style="width: 400px;">
      <h3>cellphone</h3>

      <!--cellphone-->
      <%= f.fields_for :cellphones do |f| %>
        <%= f.text_field :name, {placeholder: "スマホの名前"} %>
        <%= f.link_to_remove "削除" %>
        <div class="test"></div>
          <div class="app card" style="width: 300px;">
            <h3>app</h3>

            <!--app-->
            <%= f.fields_for :apps do |f| %>
              <%= f.text_field :name, {placeholder: "アプリの名前"} %>
              <%= f.link_to_remove "削除" %>
            <% end %>
            <%= f.link_to_add "アプリ追加", :apps %>
            <!--end_app-->

          </div>
      <% end %>
      <%= f.link_to_add "スマホ追加", :cellphones %>
      <!--end_cellphone-->

    </div>
    <!--end_user-->
  </div>

  <div class="actions">
    <%= f.submit %>
  </div>
<% end %>
<p id="notice"><%= notice %></p>

<div class="field card" style="width: 500px;">
    <h3>user</h3>
    <%= @user.name %>
    <div class="cellphone card" style="width: 400px;">
      <h3>cellphone</h3>
      <% @user.cellphones.each do |cellphone| %>
        <%= cellphone.name %>
          <div class="app card" style="width: 300px;">
            <h3>app</h3>
            <% cellphone.apps.each do |app| %>
              <%= app.name %>
            <% end %>
          </div>
      <% end %>
    </div>
</div>

<%= link_to 'Edit', edit_user_path(@user) %> |
<%= link_to 'Back', users_path %>
動作確認
あれ、動かない!!
なんでや!
gem nested_formはjqueryに依存しているので、JQueryを使えるようにしてあげましょう!
Gemの修正
gem 'jquery-rails'

gem 'bootstrap', '~> 4.1.1'     #見た目をよくする為にBootstrapも一緒に入れときます。
Bootstrap4導入方法:Railsアプリで Bootstrap 4 を利用する
bundle install
application.js追記
//= require jquery3
//= require popper
//= require bootstrap-sprockets
見やすいように修正
@import "bootstrap";

input {
    margin-top: 20px;
    margin-bottom: 20px;
    margin-left: 20px;
    width: 170px;
}

.card {
    margin-left: 20px;
    margin-bottom: 20px;
}

label {
    display: block;
}

.cellphone {
    background-color: #0000000f;
}


.cellphone > .fields {
    border-bottom: 2px dotted black;
}
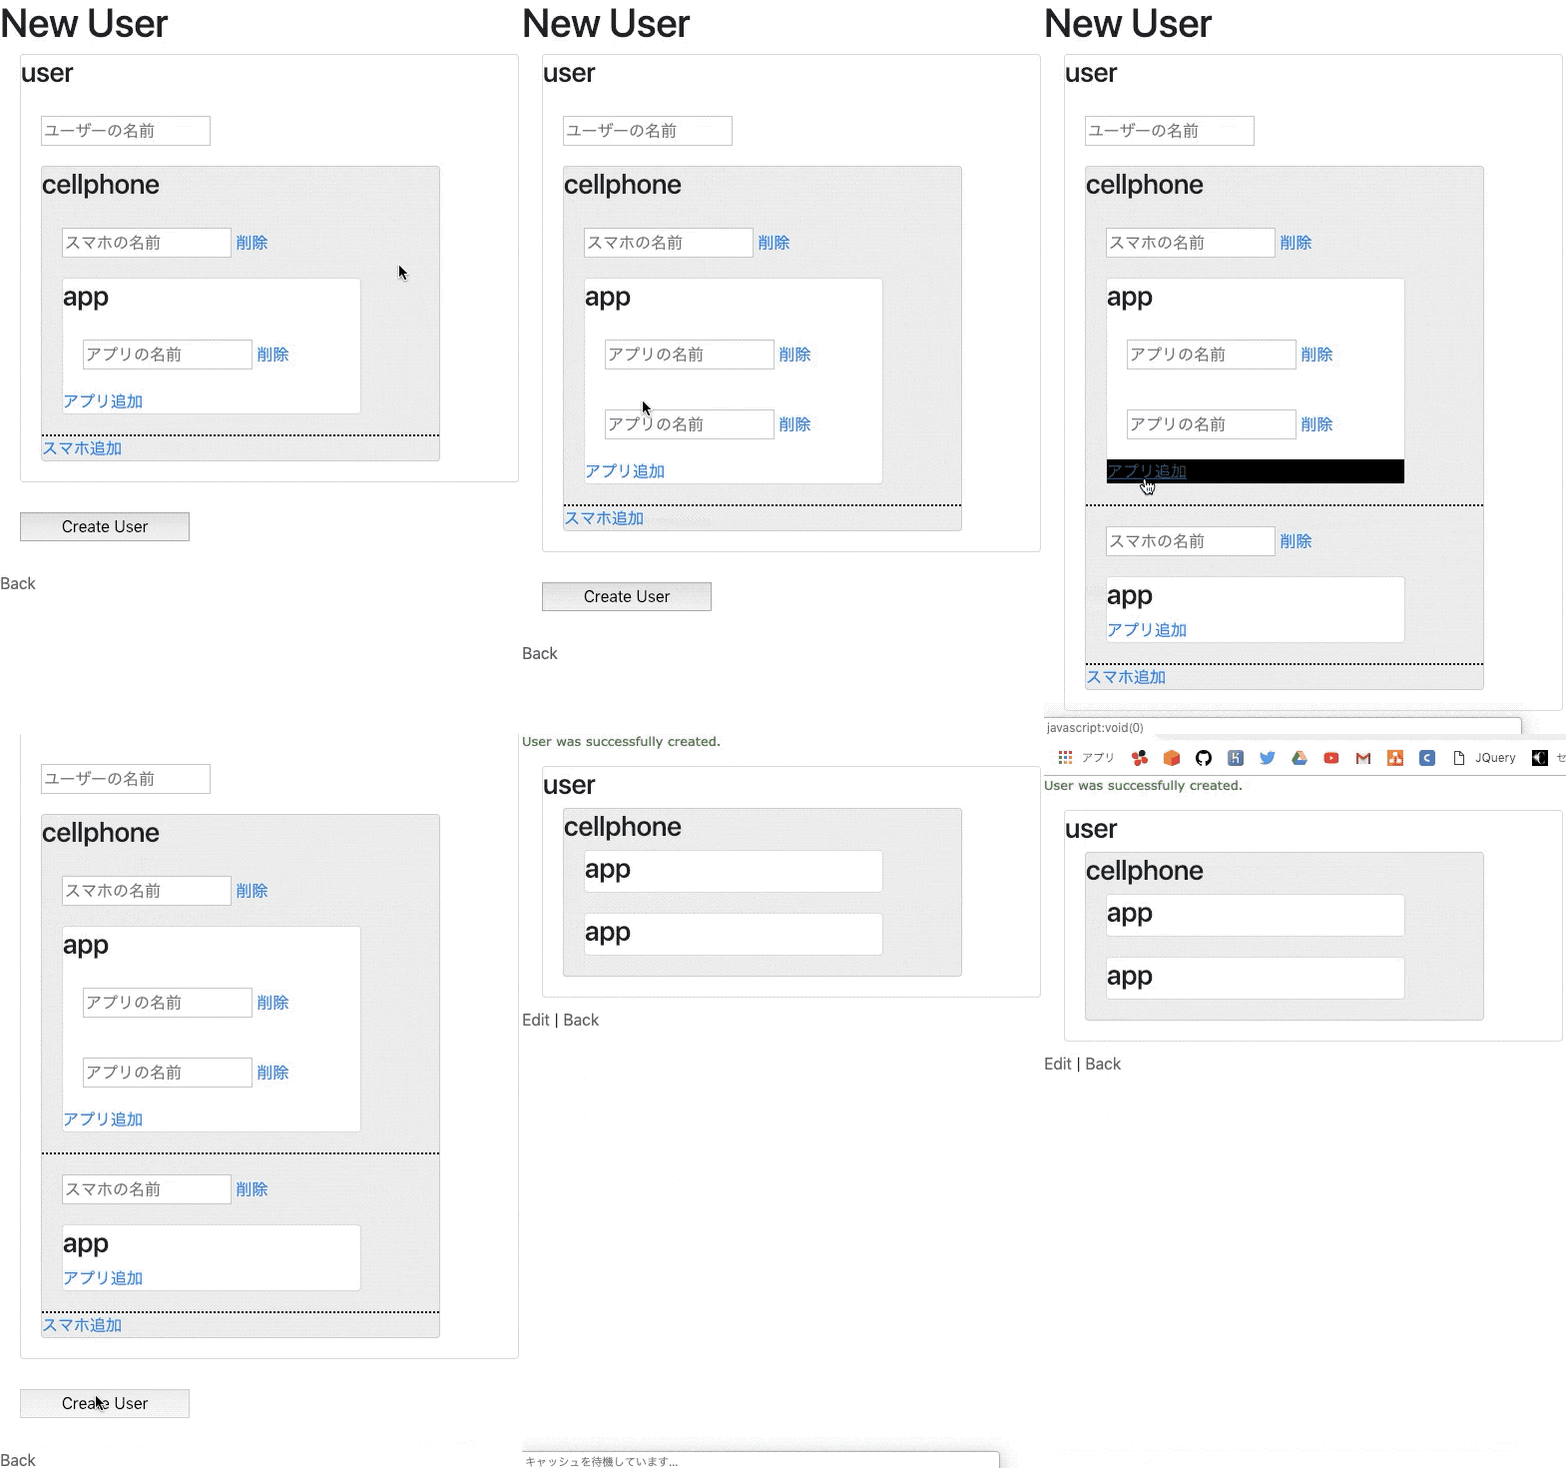
完成 イエーイ!
JSでもう少しよくする
nested_formに動的に追加した後に、何かしらの処理ができる方法が載っている。
今回は、以下の3つの機能を実装してみた。
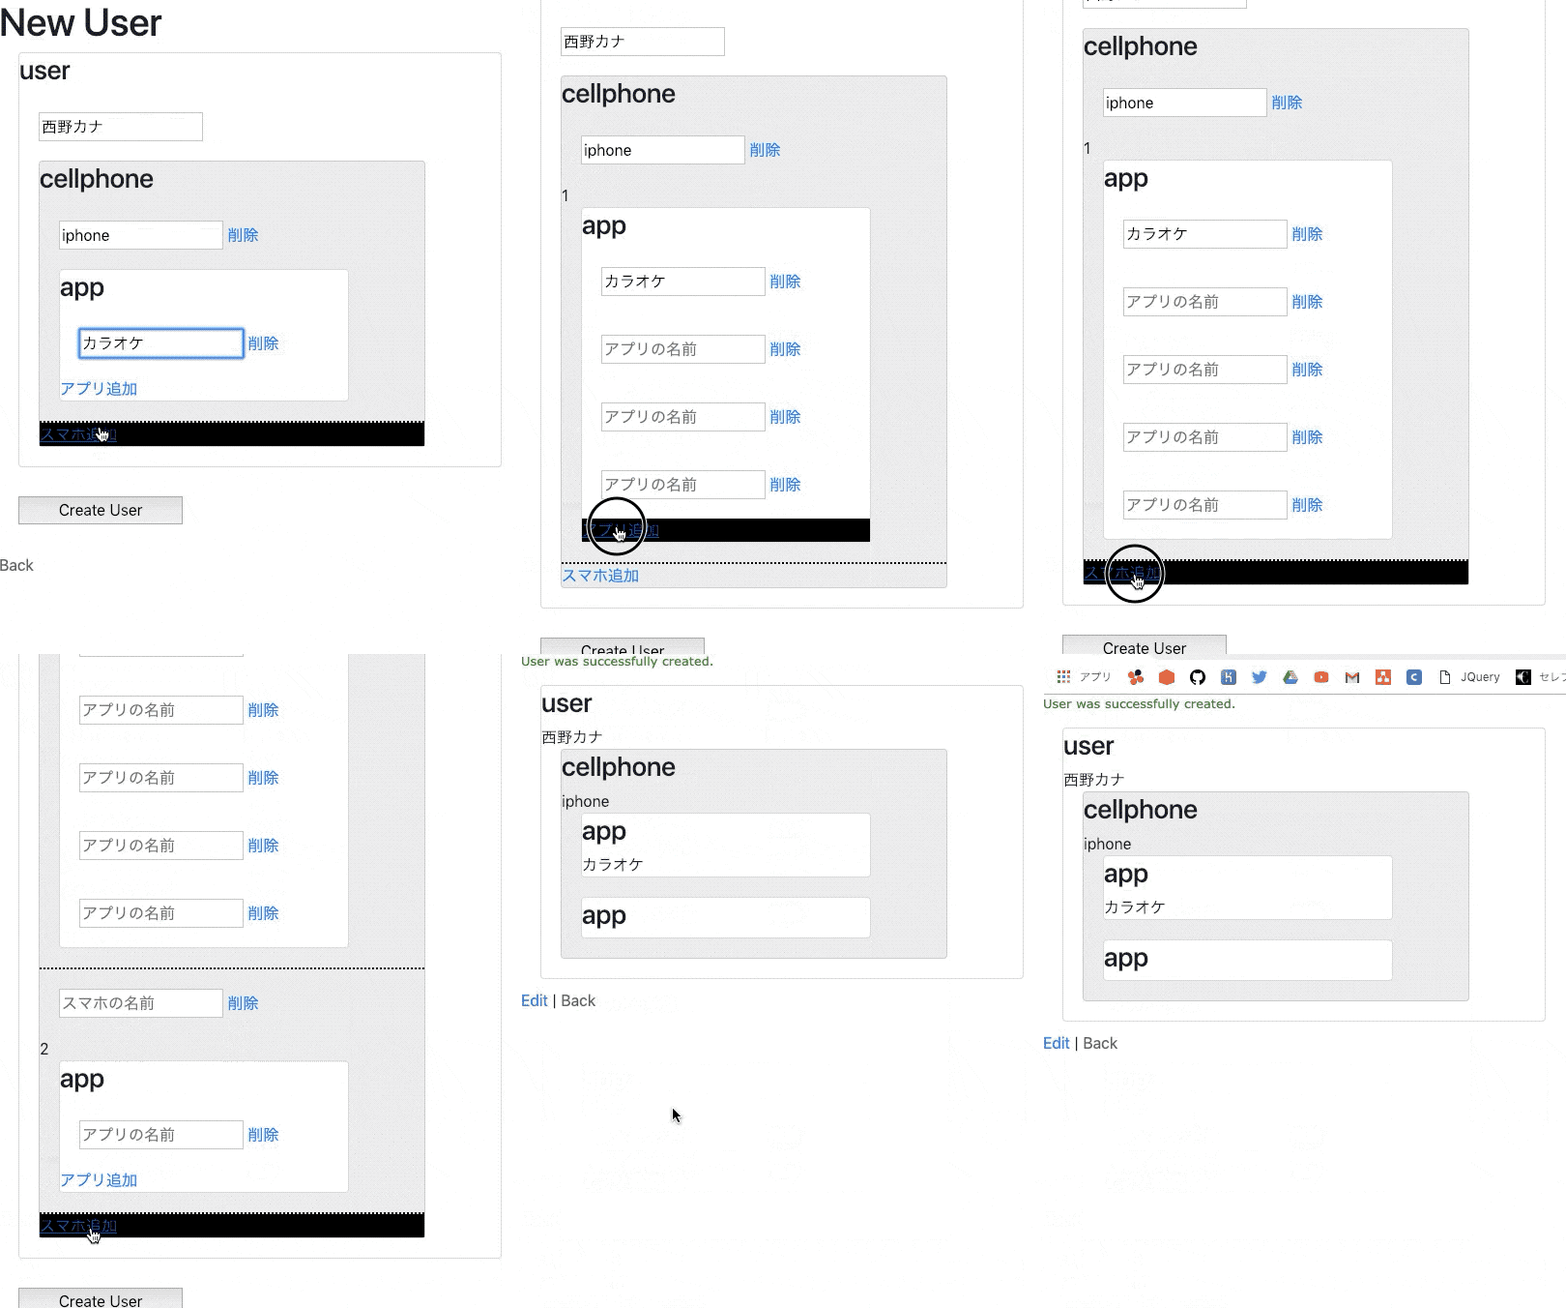
- スマホをフォームを追加すると、その子要素のアプリフォームも同時に追加する。
- スマホフォームを動的に追加、削除した時に、要素の数を表示させる。
- 動的に追加できる数を5つに制限する。
javascriptの追加(今回は、ビューに直接コーディング)
_form.html.erbの一番下に追記
以上省略#
<script>
  // スマホフォーム追加でアプリフォーム同時追加
  $(document).on('nested:fieldAdded:cellphones', function(event){
  var field = event.field;
  var addField = field.find('.add_nested_fields');
  addField.click();
})


$(function() {
  // 動的に追加されたスマホフォームにインデックスを表示
  function setFieldNum() {
      $('.cellphone').children('div.fields:visible').each(function(index) {
        $(this).find('.test').text($('.cellphone').children('div.fields:visible').index(this) + 1)
  });
  }
  // 動的に表示するフォームの数を制限
  $(document).on('nested:fieldAdded', function(e) {
    setFieldNum();
    var link = $(e.currentTarget.activeElement);
    if (!link.data('limit')) {
      return;
    }
    if (link.siblings('.fields:visible').length >= link.data('limit')) {
      link.hide();
    }
  });

  $(document).on('nested:fieldRemoved', function(e) {
    setFieldNum();
    var link = $(e.target).siblings('a.add_nested_fields');
    if (!link.data('limit')) {
      return;
    }
    if (link.siblings('.fields:visible').length < link.data('limit')) {
      link.show();
    }
  });
})
</script>
link_to_addメソッドに "data: { limit: 5 }" を追記
            <%= f.link_to_add "アプリ追加", :apps, data: { limit: 5 }%>
            <!--end_app-->

          </div>
      <% end %>
      <%= f.link_to_add "スマホ追加", :cellphones, data: { limit: 5 } %>
      <!--end_cellphone-->
終わり
長くなってしまいましたが、これにて終了。


