はじめに
bocci bocciを運営している@shoji-kaiです。
前回の中編では、GASから購入メール確認〜仕訳登録までを定期実行するやり方を確認しました。
ですが、前回の最後にも書きましたが、本番環境に展開するには以下の項目をクリアする必要があります。
- アクセストークンの更新 (freeeのアクセストークン期限は24時間なのでリフレッシュする必要があります)
- 検索するメールの範囲を指定する (一日単位でトリガーを設定した場合、一日以内のメールのみを検索する)
- 重複取引の除外 (同じデータを取り込まないようにする)
- 購入メール本文から注文番号、商品名、商品価格を抽出する
それでは、順に実装していきます。
アクセストークンの更新
アクセストークンを更新するにはリフレッシュトークンが必要になります。
まずは、freeeのアプリストアのページから必要な情報を取得します。
アクセストークン、リフレッシュトークンの取得
freee アプリストアの開発者ページにログインします。
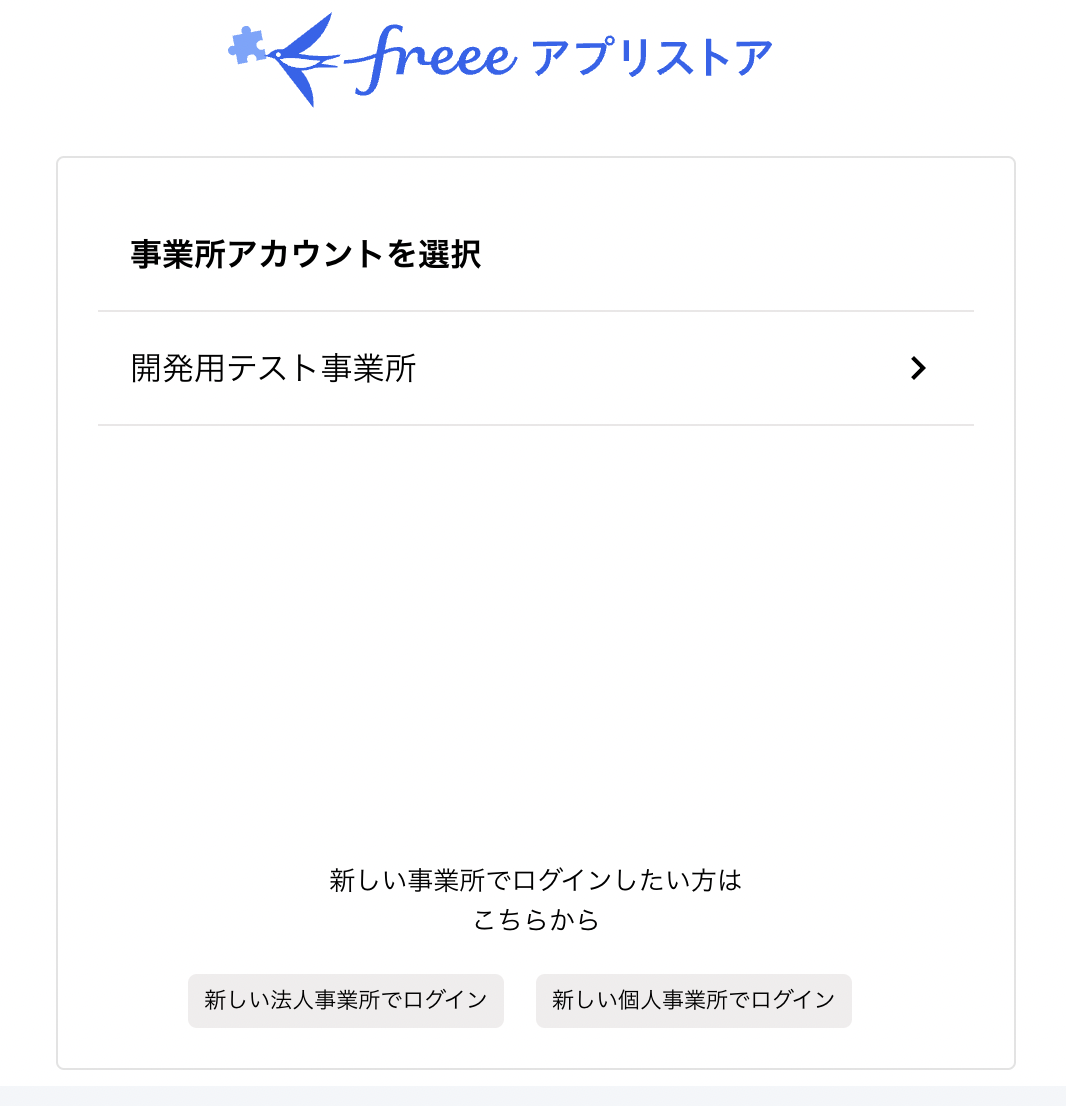
ログイン後、「事業所アカウントを選択」画面が出てくるので対象の事業所を選択します。
次に、アプリ管理のページから対象のアプリを選択します。
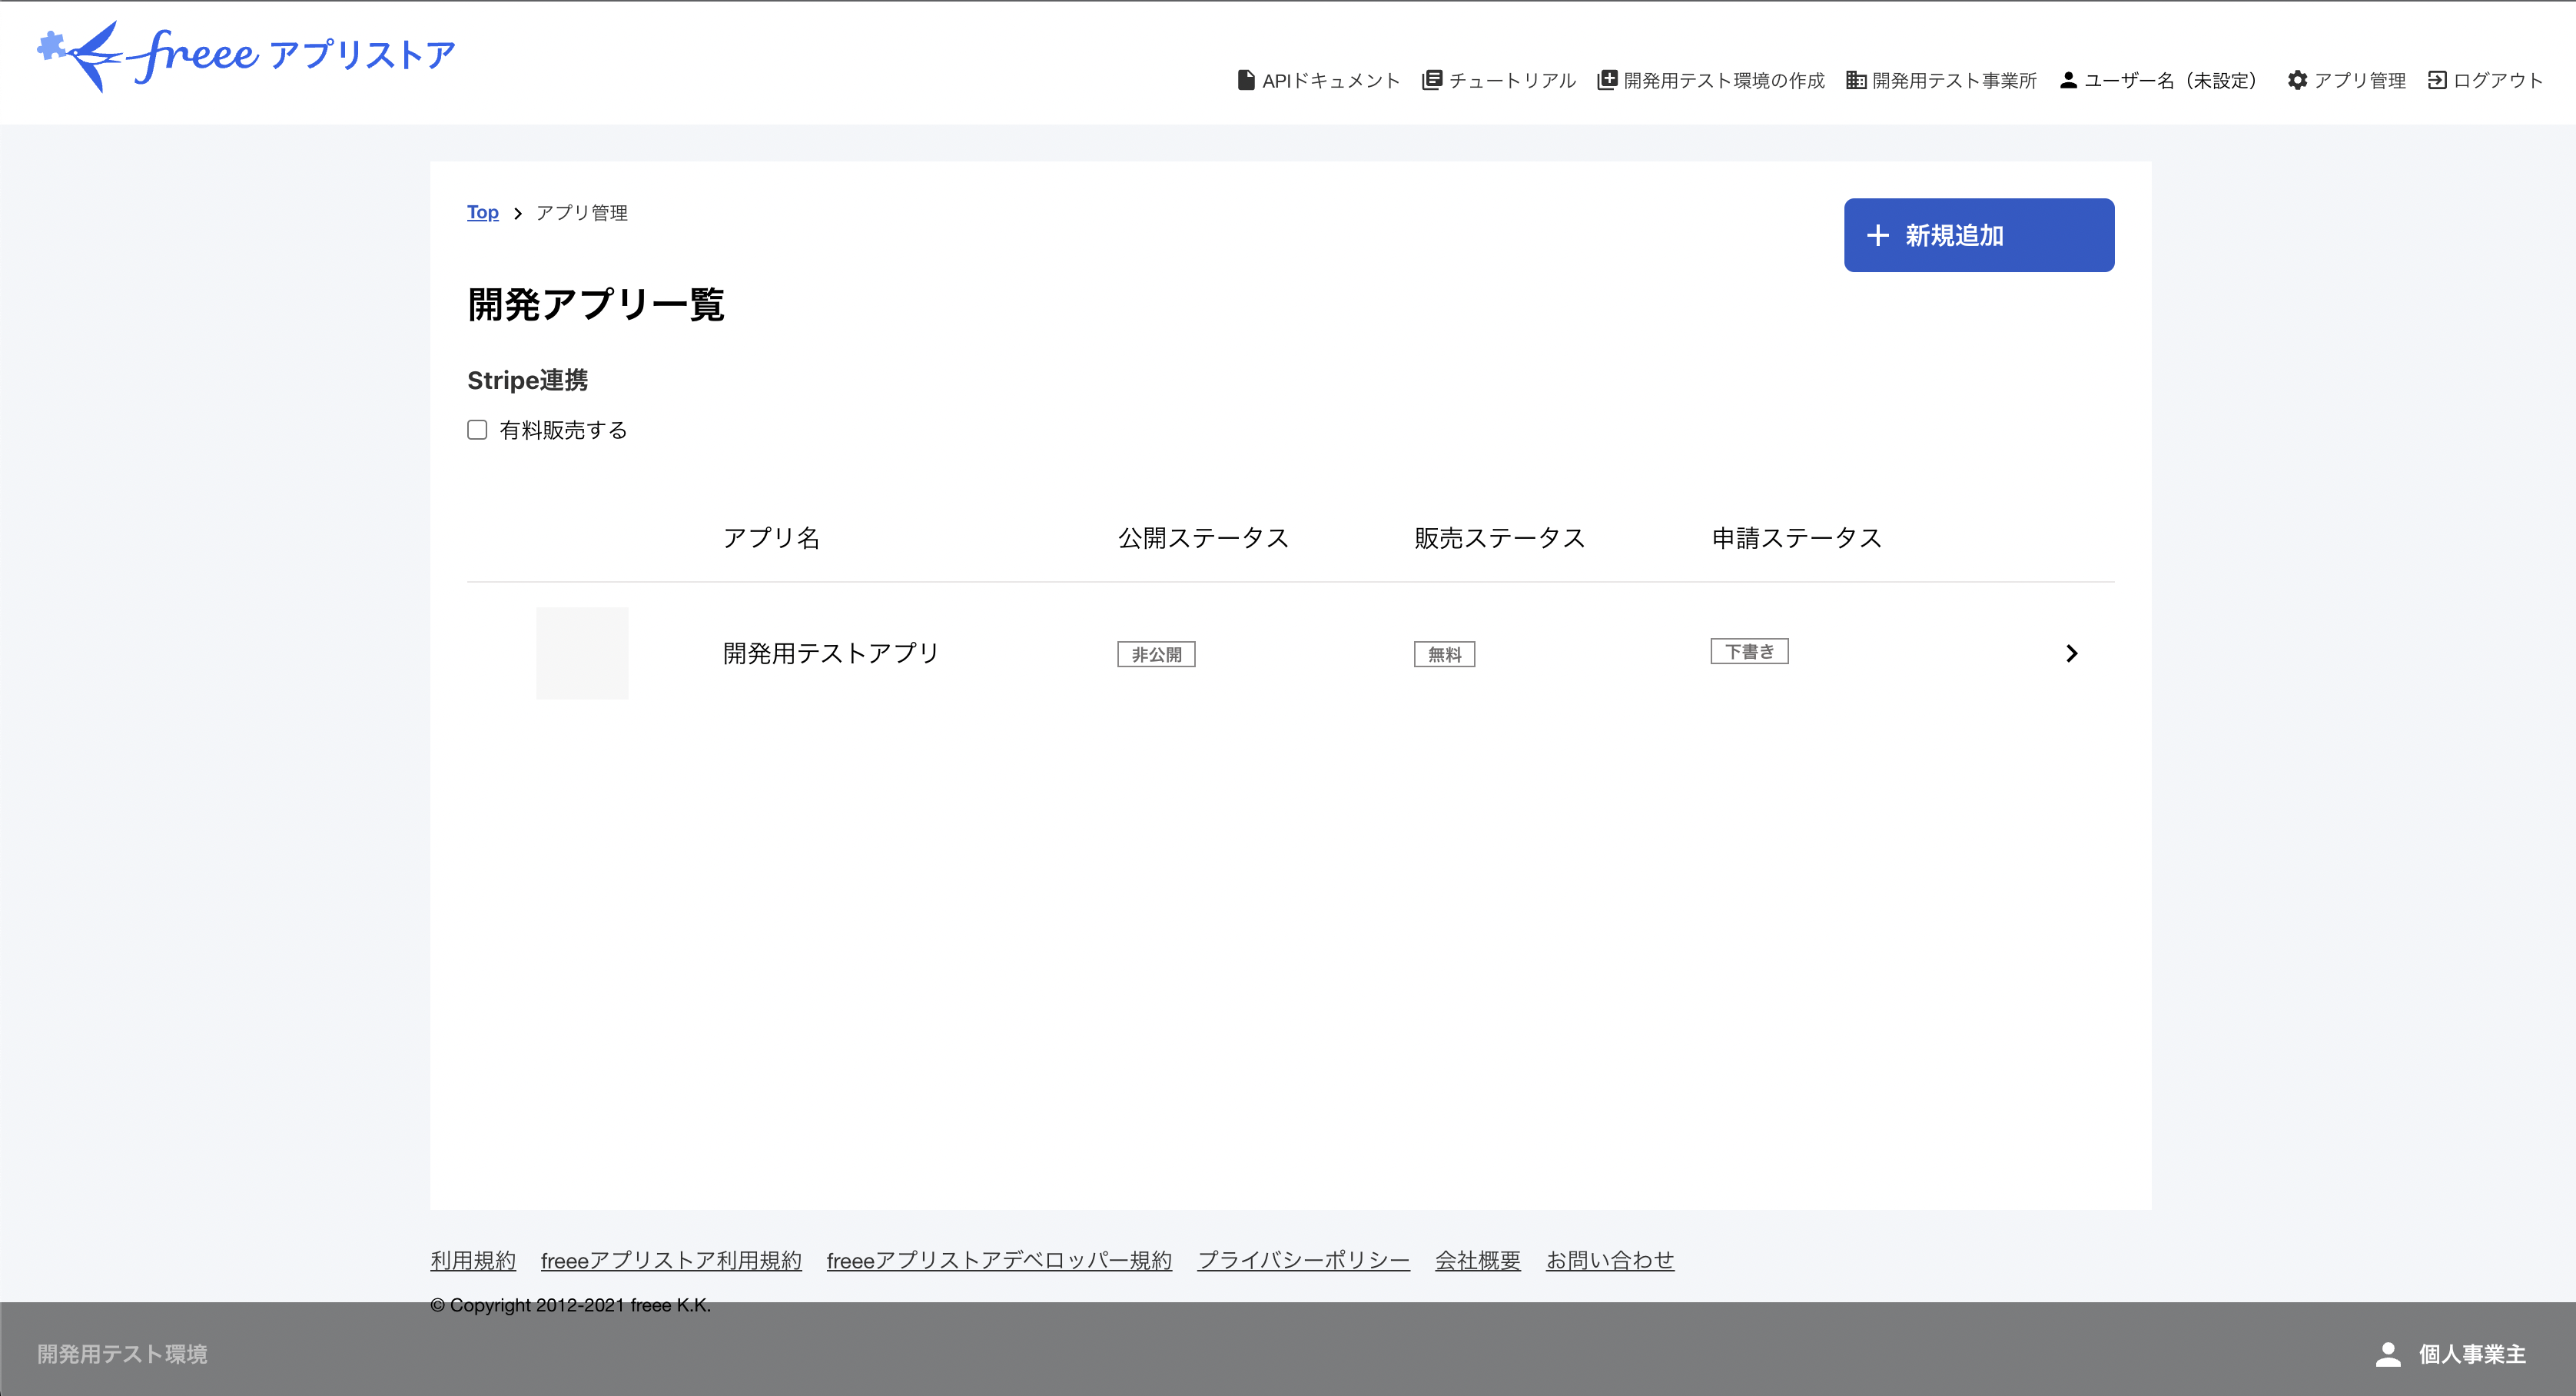
アプリ詳細ページの基本情報に書かれているClient ID, Client Secretを環境変数に保存します。
CLIENT_ID=<CLIENT_ID>
CLIENT_SECRET=<CLIENT_SECRET>
コールバックURL(リダイレクトURI)は以下のように設定します。
# "urn:ietf:wg:oauth:2.0:oob"をURLエンコードしたいだけなので、やり方は何でも構いません
REDIRECT_URI=$(echo "urn:ietf:wg:oauth:2.0:oob" | nkf -WwMQ | sed 's/=$//g' | tr = % | tr -d '\n')
下記コマンドで出力されるURLをブラウザで開くとOAuth同意画面にリダイレクトされ、同意すると認可コードが取得できます。
# Macの場合は、echoコマンドの代わりにopenコマンドで直接ブラウザが開きます
echo "https://accounts.secure.freee.co.jp/public_api/authorize?client_id=${CLIENT_ID}&redirect_uri=${REDIRECT_URI}&response_type=code"
認可コードを環境変数に保存しておきます。
CODE=<認可コード>
アクセストークン、リフレッシュトークンを取得します。
% curl -s -XPOST 'https://accounts.secure.freee.co.jp/public_api/token' -d "code=${CODE}&redirect_uri=${REDIRECT_URI}&client_id=${CLIENT_ID}&client_secret=${CLIENT_SECRET}&grant_type=authorization_code" | jq -r
以下のようなJSONが返ってきたら成功です。
{
  "access_token": "<ACCESS_TOKEN>",
  "token_type": "bearer",
  "expires_in": 86400,
  "refresh_token": "<REFRESH_TOKEN>",
  "scope": "read write default_read",
  "created_at": 1636898953
}
アクセストークンを更新するには以下のようにします。
REFRESH_TOKEN=<REFRESH_TOKEN>
curl -s -XPOST 'https://accounts.secure.freee.co.jp/public_api/token' -d "client_secret=${CLIENT_SECRET}&grant_type=refresh_token&refresh_token=${REFRESH_TOKEN}&client_id=${CLIENT_ID}"
アクセストークン更新処理をGASに実装する
アクセストークンの更新に必要な秘匿データ(CLIENT_ID, CLIENT_SECRET, REFRESH_TOKEN)はGASのプロパティに保存します。
プロパティへの登録方法はすでに先人の方が書いてくださっているので、ありがたくこちらを参照させていただきます。
上記を参考にプロパティの設定が終わったら、コードを実装していきます。
function getAccessToken() {
  const properties = PropertiesService.getScriptProperties();
  const clientId = properties.getProperty('CLIENT_ID');
  const clientSecret = properties.getProperty('CLIENT_SECRET');
  const refreshToken = properties.getProperty('REFRESH_TOKEN');

  const url = 'https://accounts.secure.freee.co.jp/public_api/token';
  const options = {
    'method': 'post',
    'payload': {
      'client_id': clientId,
      'client_secret': clientSecret,
      'refresh_token': refreshToken,
      'grant_type': 'refresh_token'
    }
  };
  const res = UrlFetchApp.fetch(url, options);

  const data = JSON.parse(res.getContentText());
  properties.setProperty('ACCESS_TOKEN', data.access_token);
  properties.setProperty('REFRESH_TOKEN', data.refresh_token);

  Logger.log('access_token: ' + data.access_token);
  Logger.log('refresh_token: ' + data.refresh_token);
  return data.access_token;
}
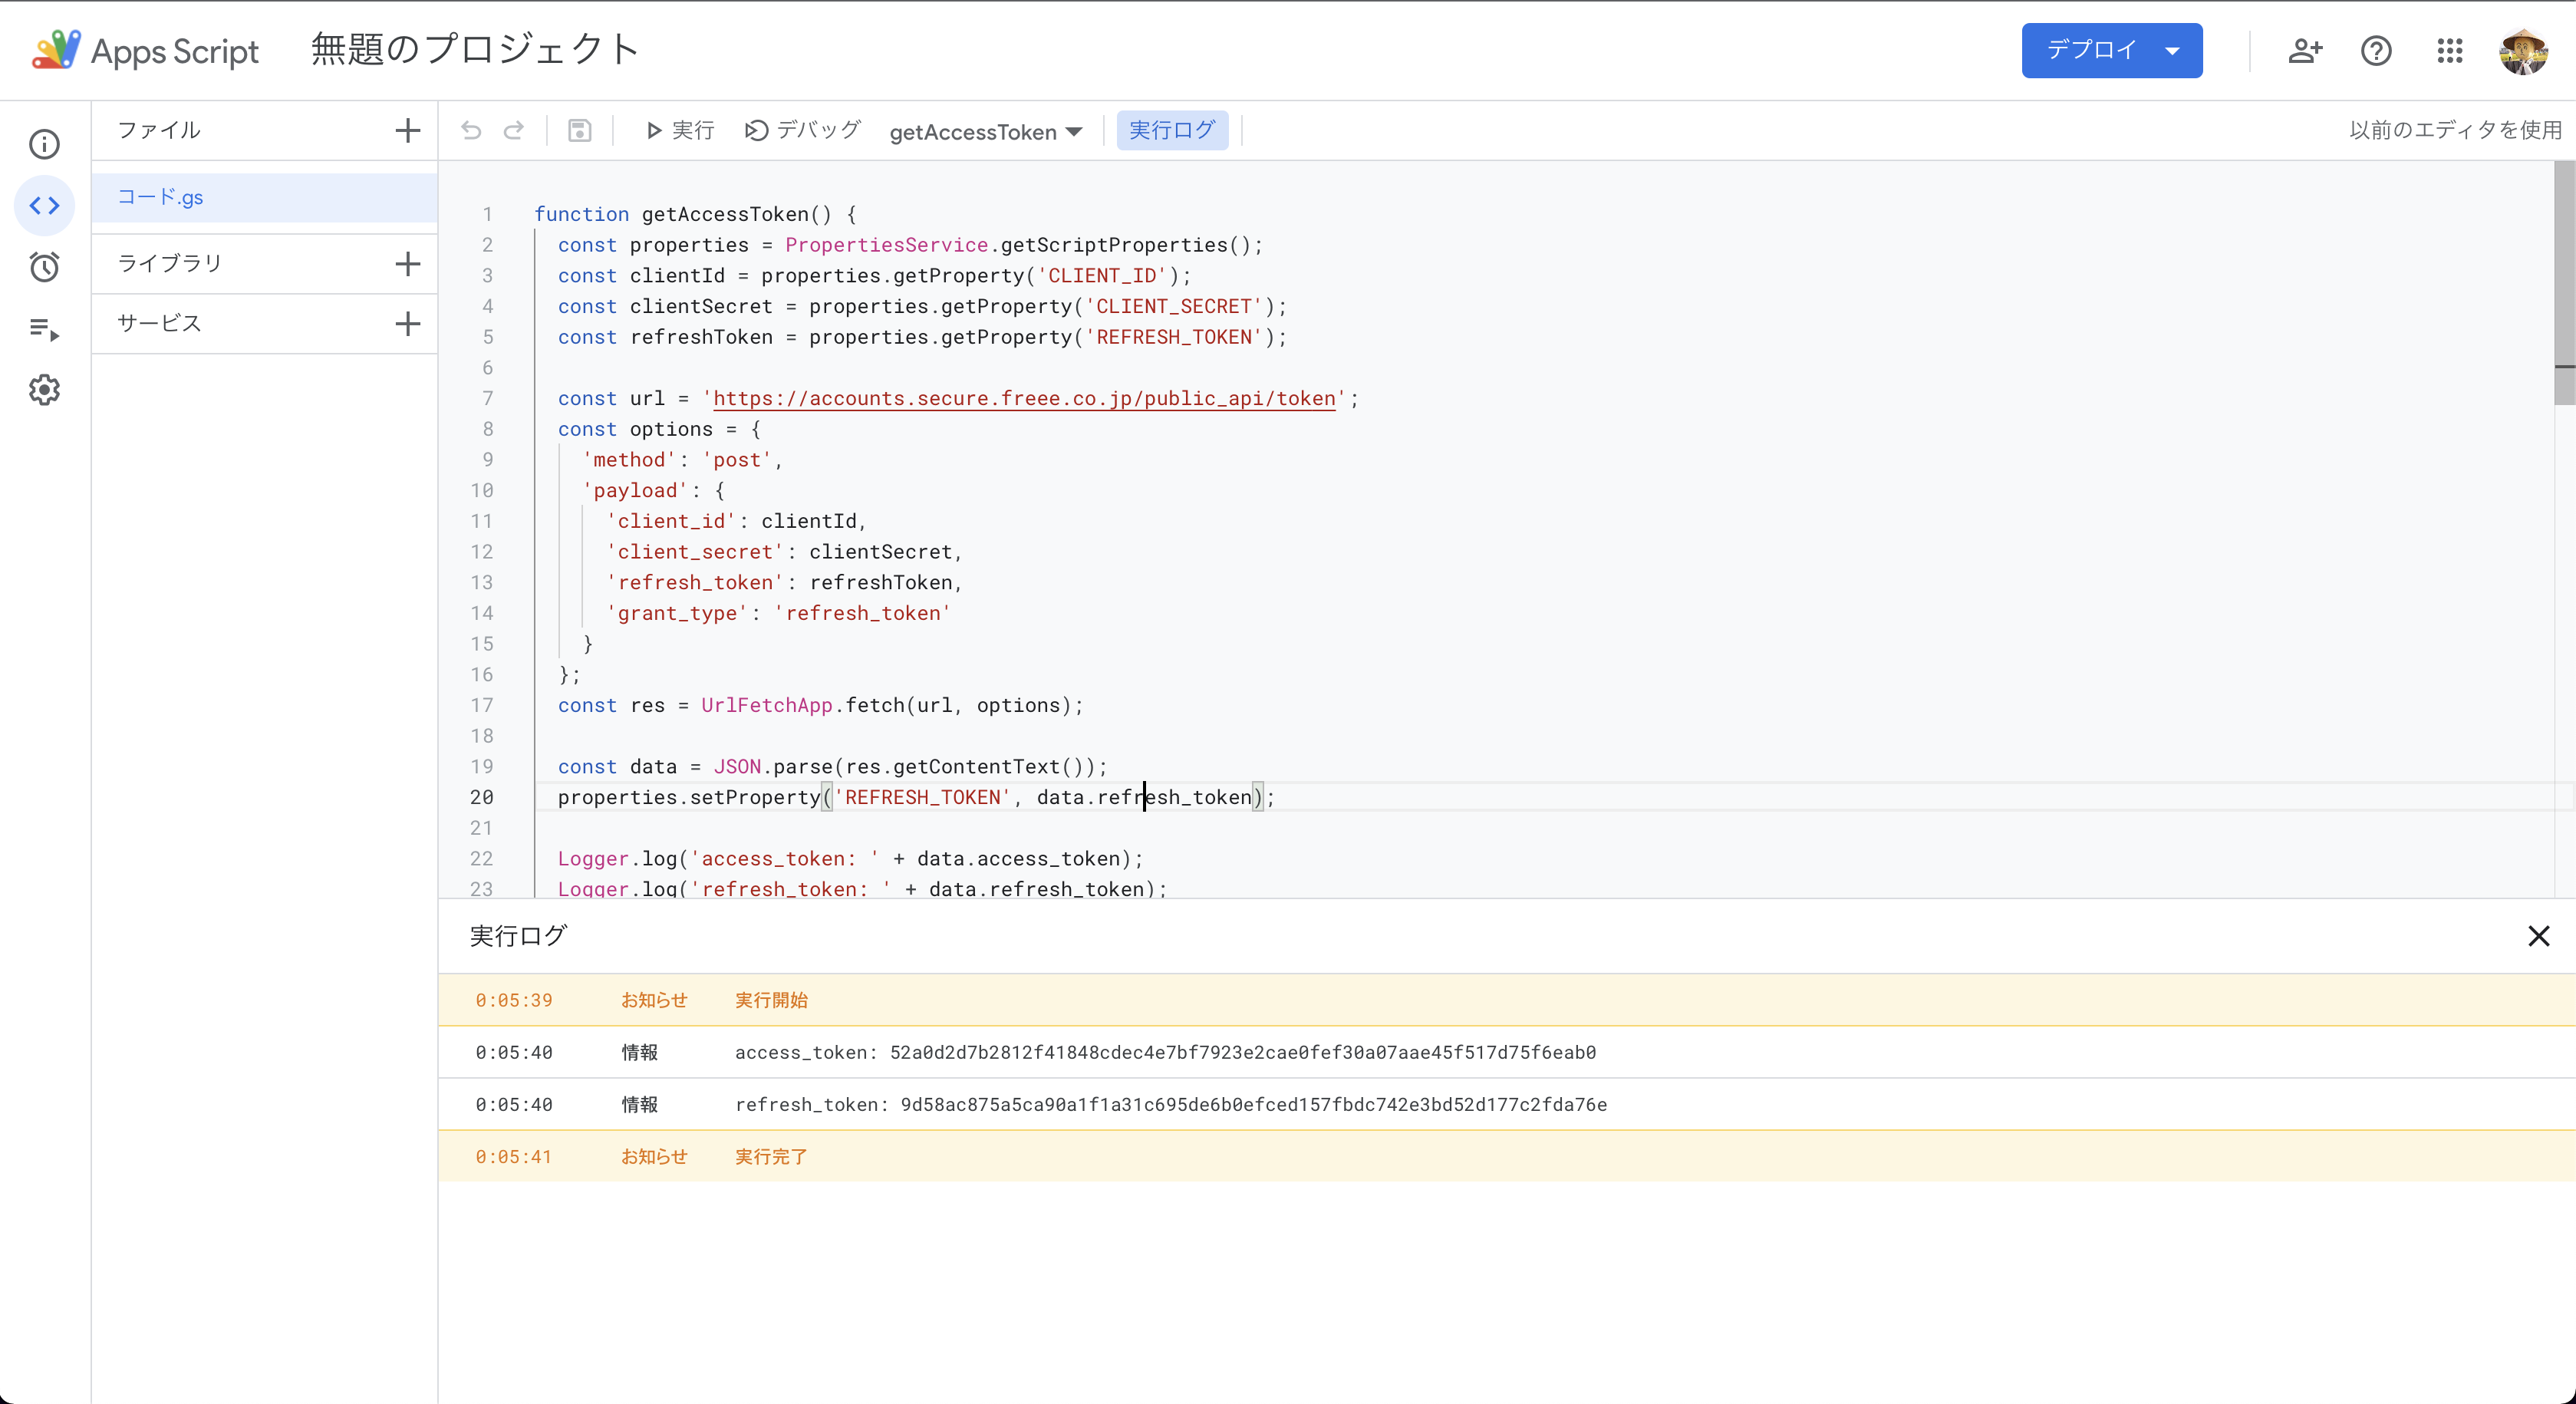
実行する関数にgetAccessTokenを選択して実行します。
ログにaccess_token, refresh_tokenが表示されていれば成功です。
次に、postDeal関数のaccessTokenを設定している箇所をgetAccessToken関数から求めるように変更します。
function postDeal(orderedAt) {
  const accessToken = getAccessToken();  // <= getAccessToken()から求めるように変更
:
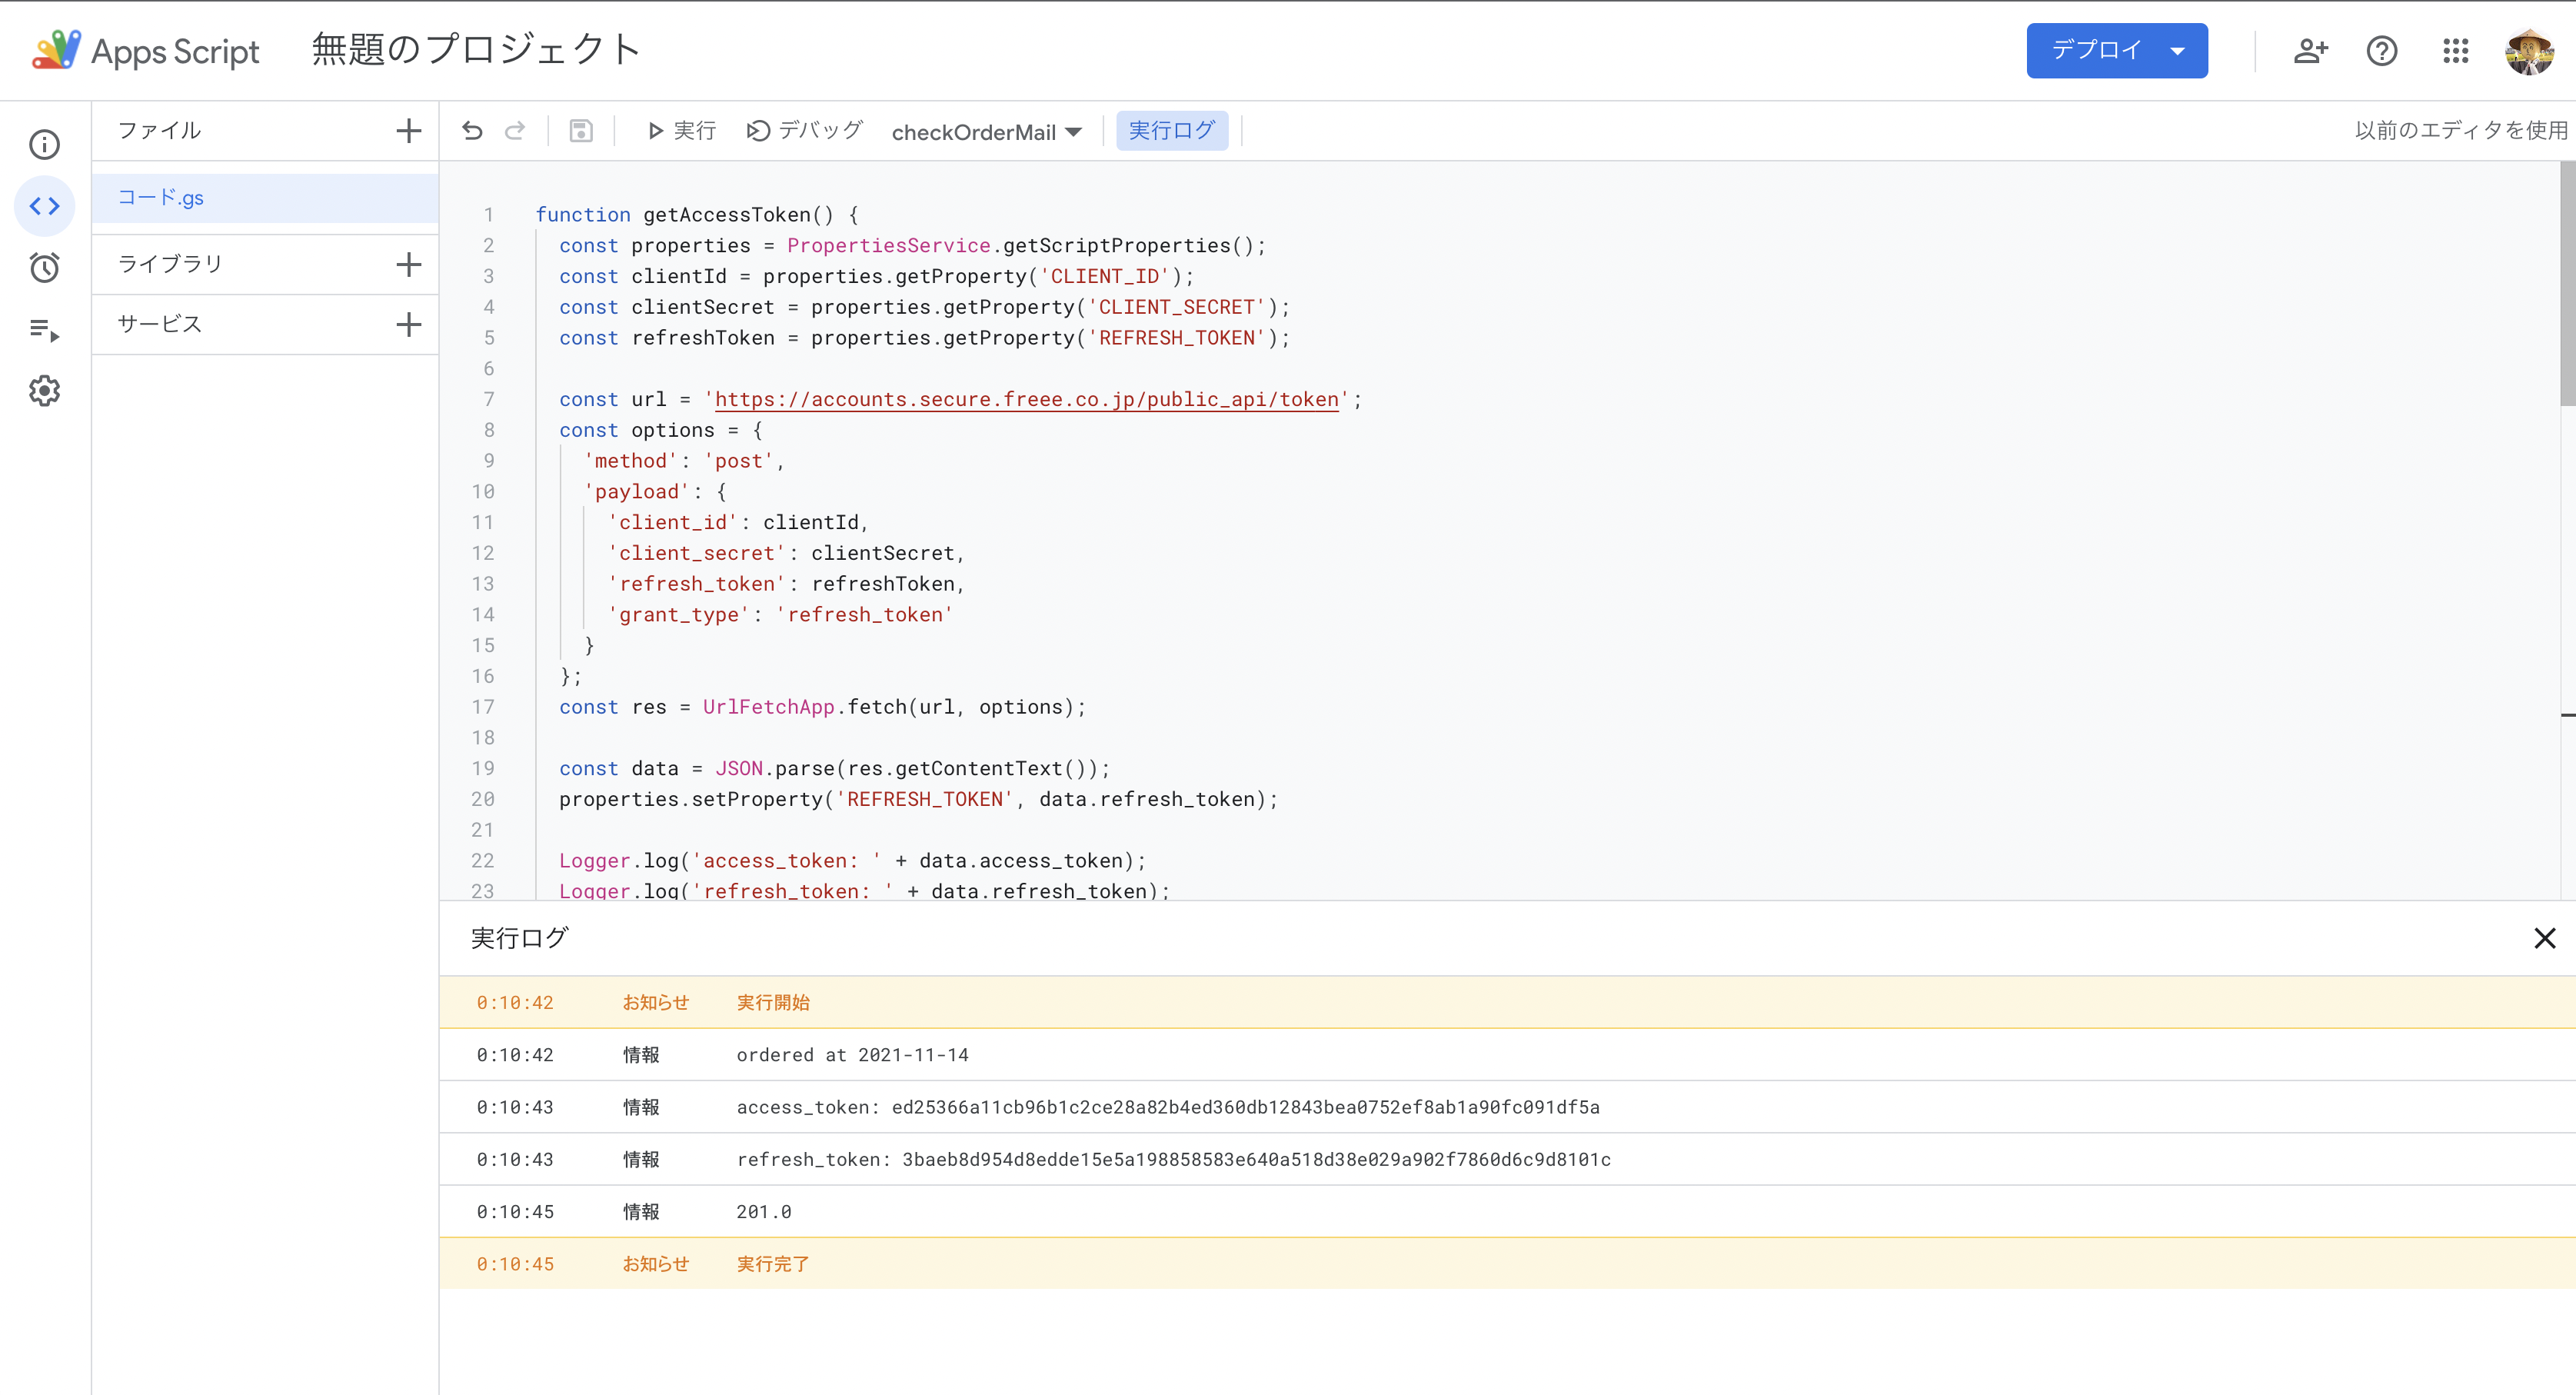
最後にcheckOrderMail関数を実行して通しで確認します。
検索するメールの範囲を指定する
Gmailの期間指定は年月日単位となりますので、1日以内のメールのみを対象に検索するようにします。
checkOrderMail関数のqueryを以下のように変更します。
function checkOrderMail() {
  const query = 'subject:(商品が購入されました) in:anywhere newer_than:1d';  // newer_than:1d を追加
:
重複取引の除外
メールの検索範囲は1日以内ですが、トリガーは12時間ごとに設定します。
トリガーの開始時刻が一定でないため、多少はオーバーラップさせてメールの取りこぼしを防ぐためです。
ですが、このままだと同じメールを2回取り込んでしまうことになります。
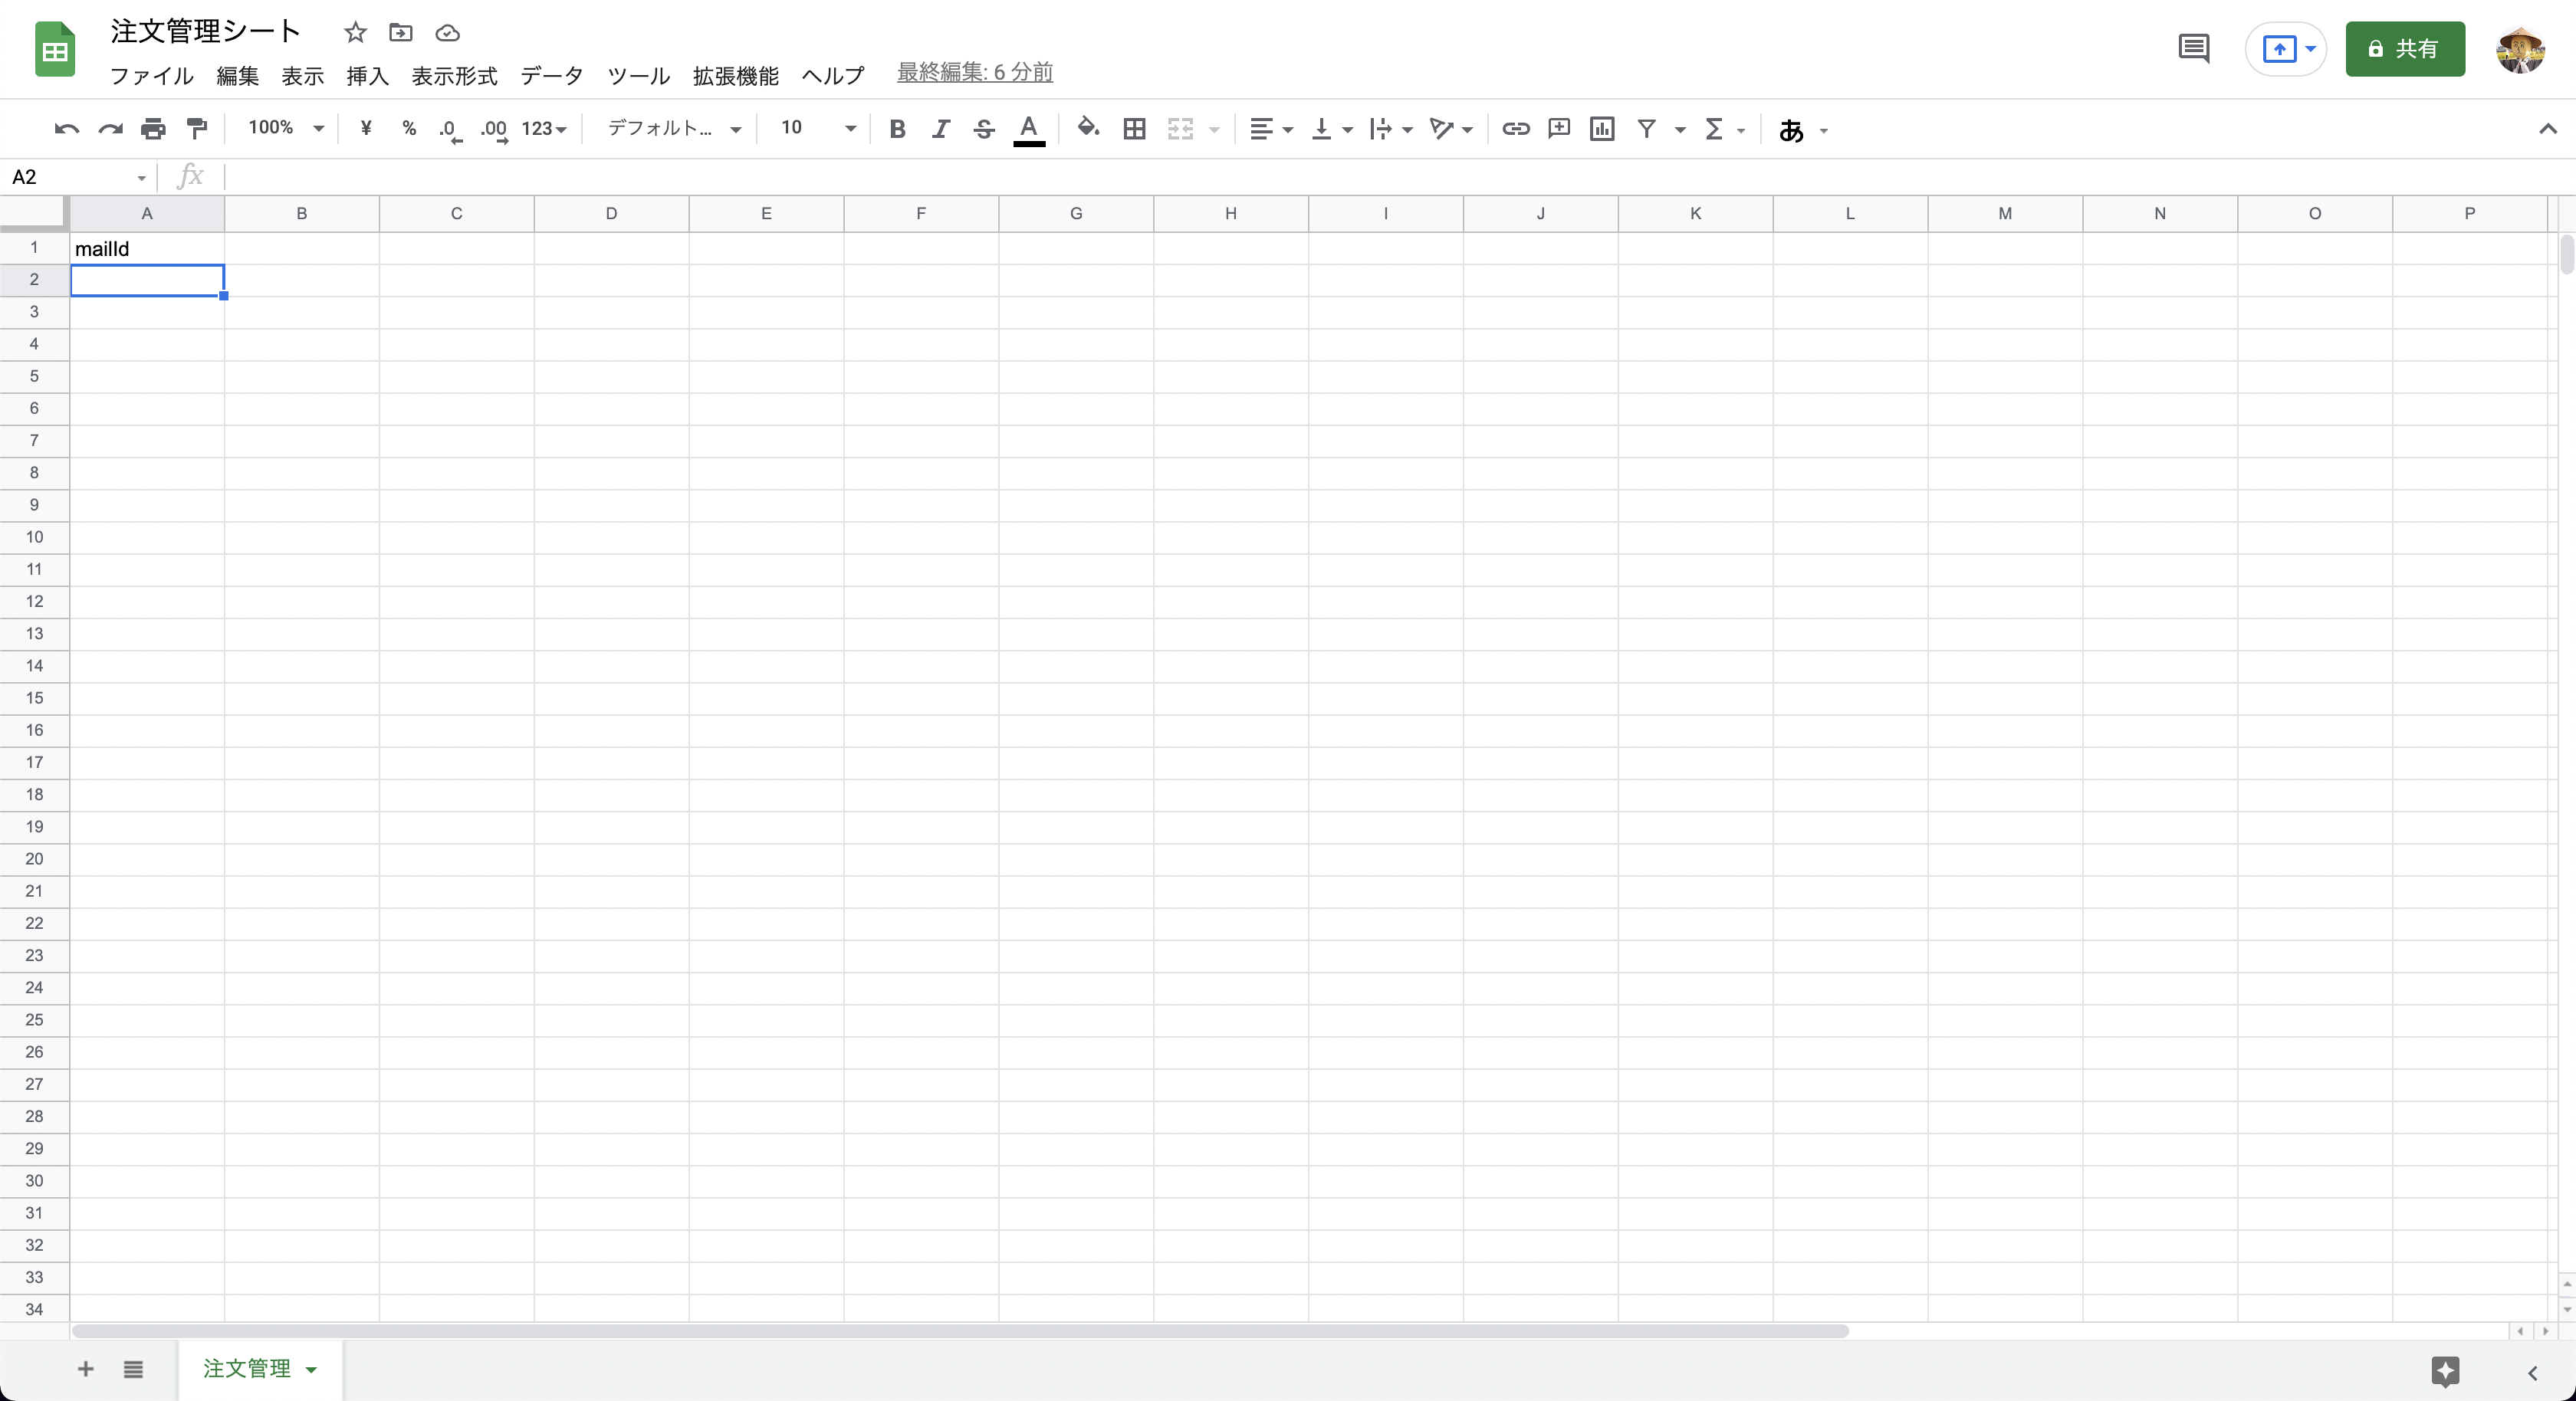
そこで、一度処理したメールは再度処理しないよう、Google SpreadsheetsにメールIDを保存することにします。
まずは、以下のようなGoogle Spreadsheetsを準備しておきます。一行目はヘッダとして使います。
コードは以下のようになります。
const SSID = '<スプレッドシートID>';  // 自分のスプレッドシートIDに置き換えてください
const SHEET_NAME = '<シート名>';   // 自分のシート名に置き換えてください

function setOrderedMessageId(messageId) {
  const sheet = SpreadsheetApp.openById(SSID).getSheetByName(SHEET_NAME);
  sheet.getRange(sheet.getLastRow() + 1, 1).setValue(messageId);
}

function getOrderedMessageIds() {
  const sheet = SpreadsheetApp.openById(SSID).getSheetByName(SHEET_NAME);
  const orderedMessageIds = {};
  const rows = sheet.getRange(1, 1, sheet.getLastRow()).getValues();
  for (let i = 1; i < rows.length; i++) {
    orderedMessageIds[rows[i][0]] = true;
  }
  return orderedMessageIds;
}

:

function checkOrderMail() {
  const orderedMessageIds = getOrderedMessageIds(); // 仕訳済みメッセージIDを取得
  const query = 'subject:(商品が購入されました) in:anywhere newer_than:1d';
  const threads = GmailApp.search(query).reverse();
  for (let i = 0; i < threads.length; i++) {
    const messages = threads[i].getMessages();
    for (let j = 0; j < messages.length; j++) {
      // 仕訳済み判定を追加
      const messageId = messages[j].getId();
      if (!orderedMessageIds[messageId]) {
        // 未仕訳の場合
        const date = messages[j].getDate();
        const orderedAt = date.getFullYear() + '-' + (date.getMonth() + 1) + '-' + date.getDate();
        postDeal(orderedAt);

        // メッセージIDを仕訳済みとしてスプレッドシートに保存
        setOrderedMessageId(messageId);
        Logger.log('New order messageId: ' + messageId);
      } else {
        // 仕訳済みの場合
        Logger.log('Already ordered messageId: ' + messageId);
      }
    }
  }
}
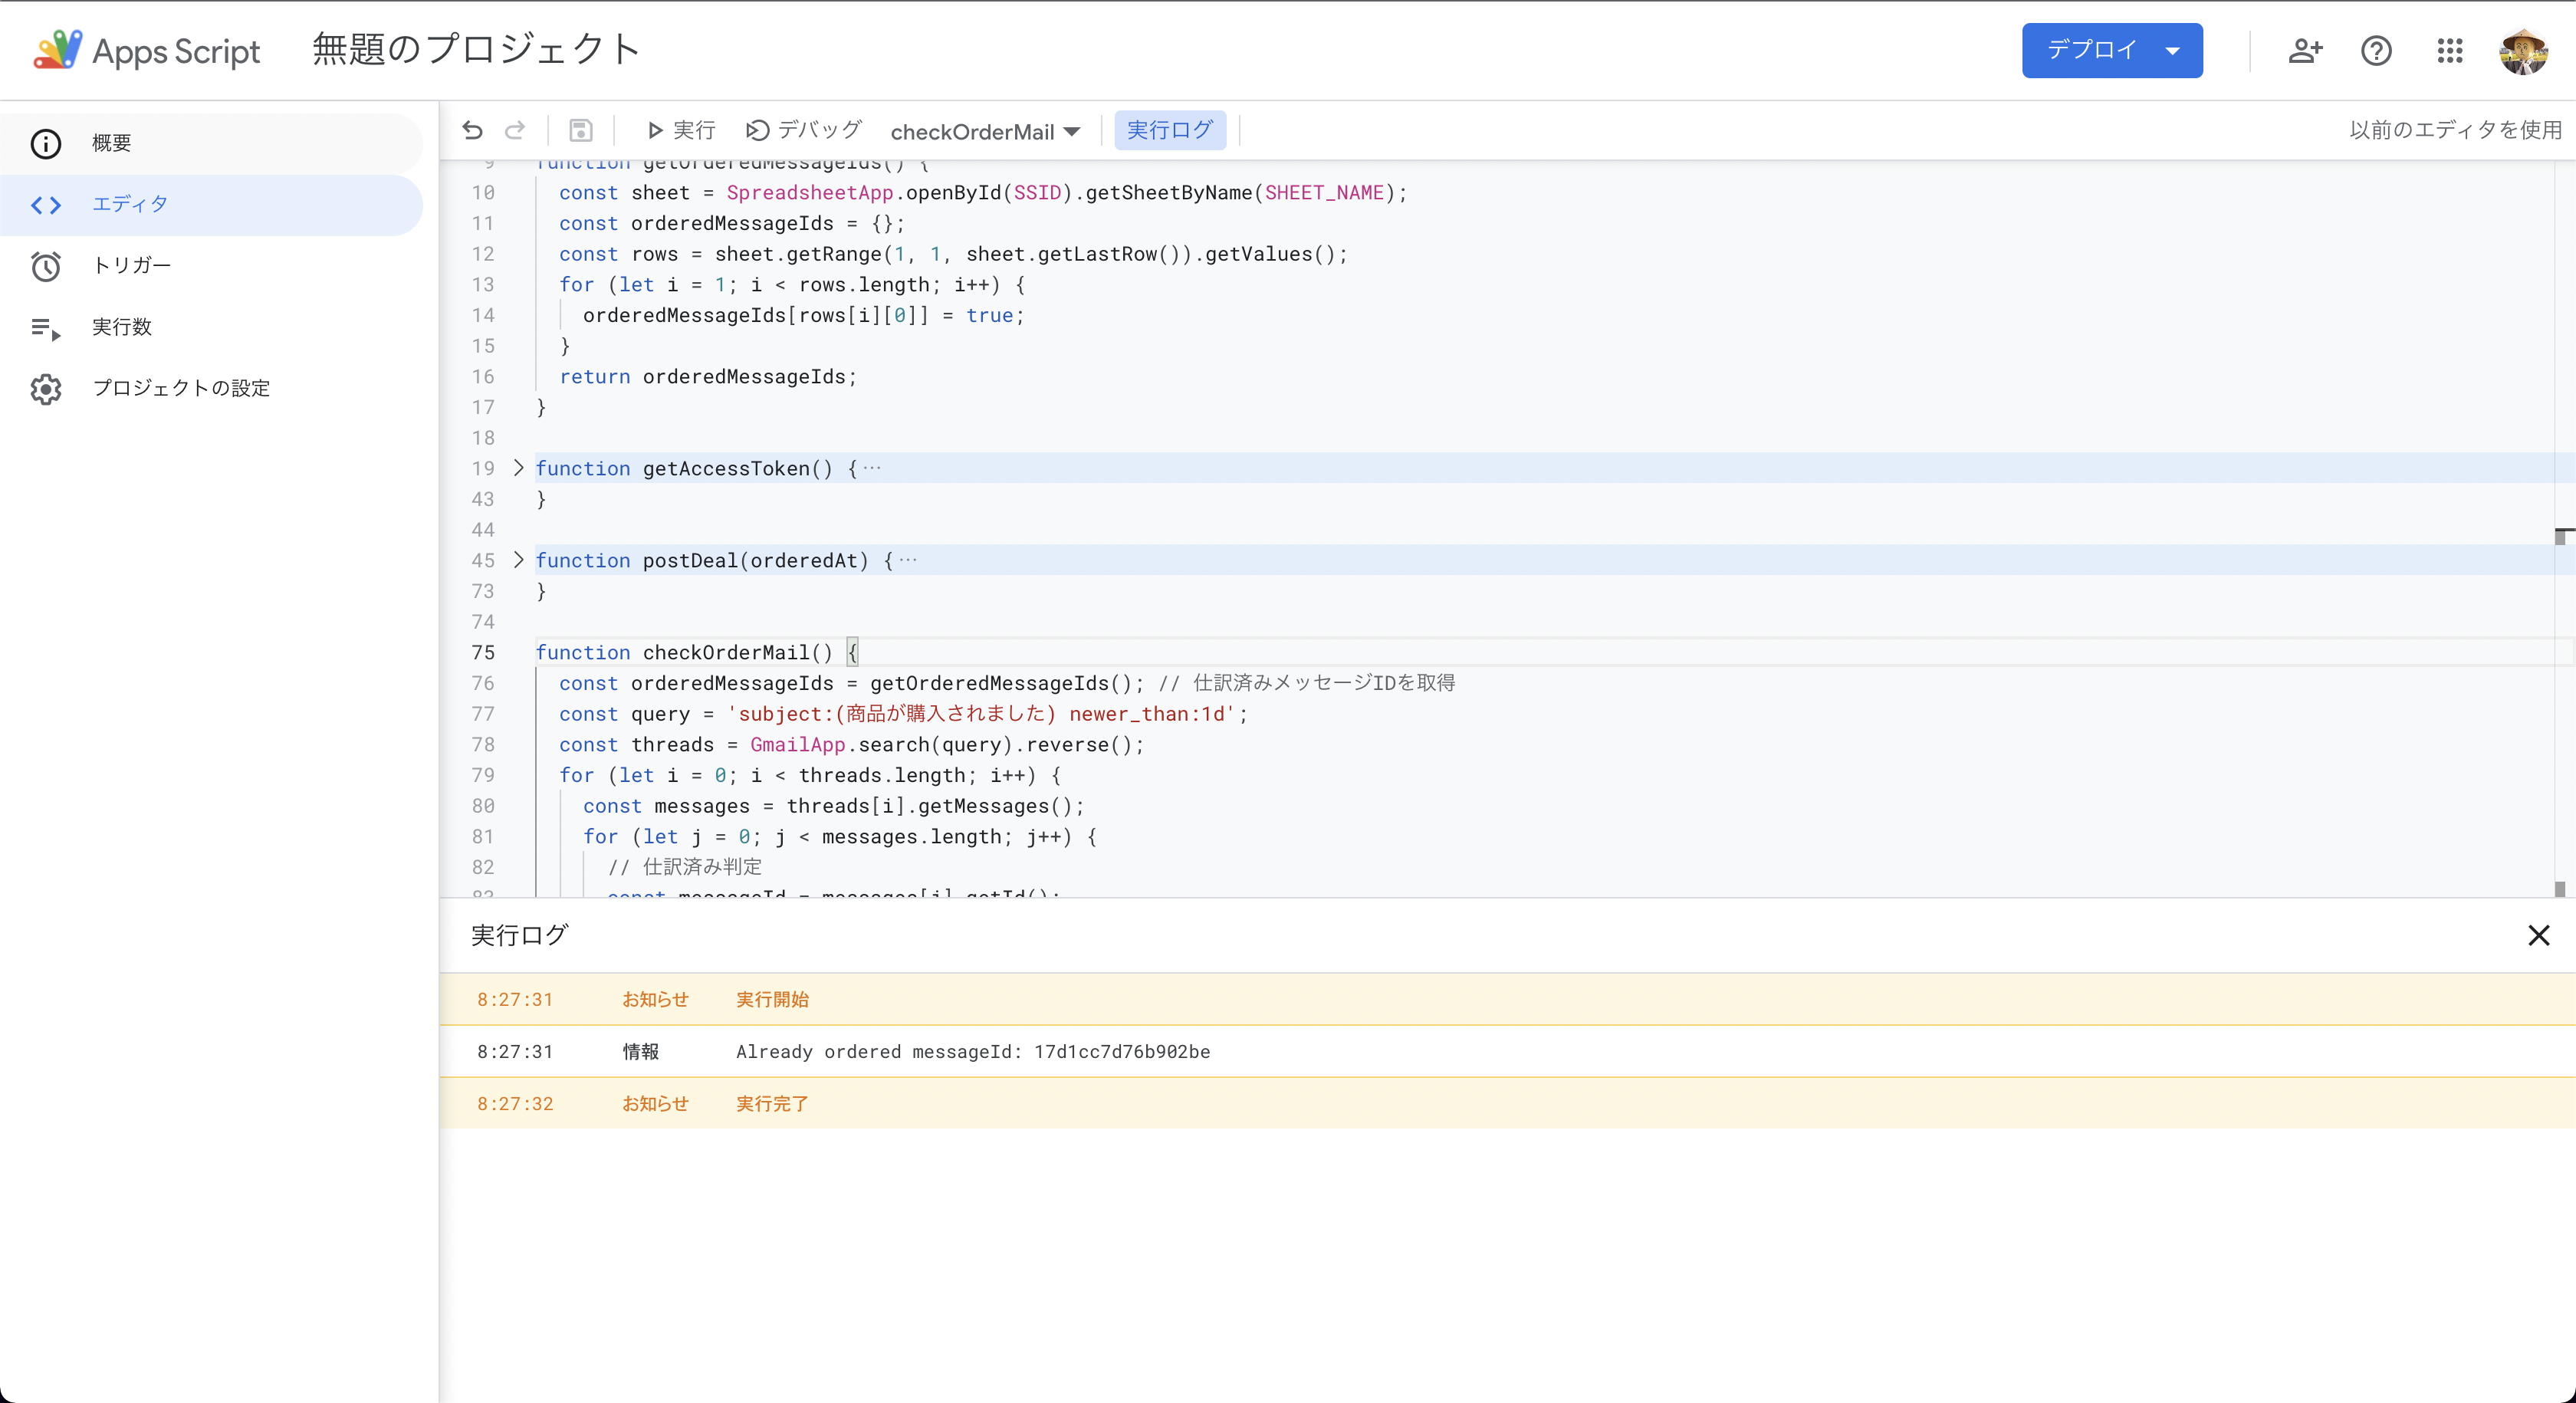
上記コードを保存して、checkOrderMail関数を実行すると以下のようになります。
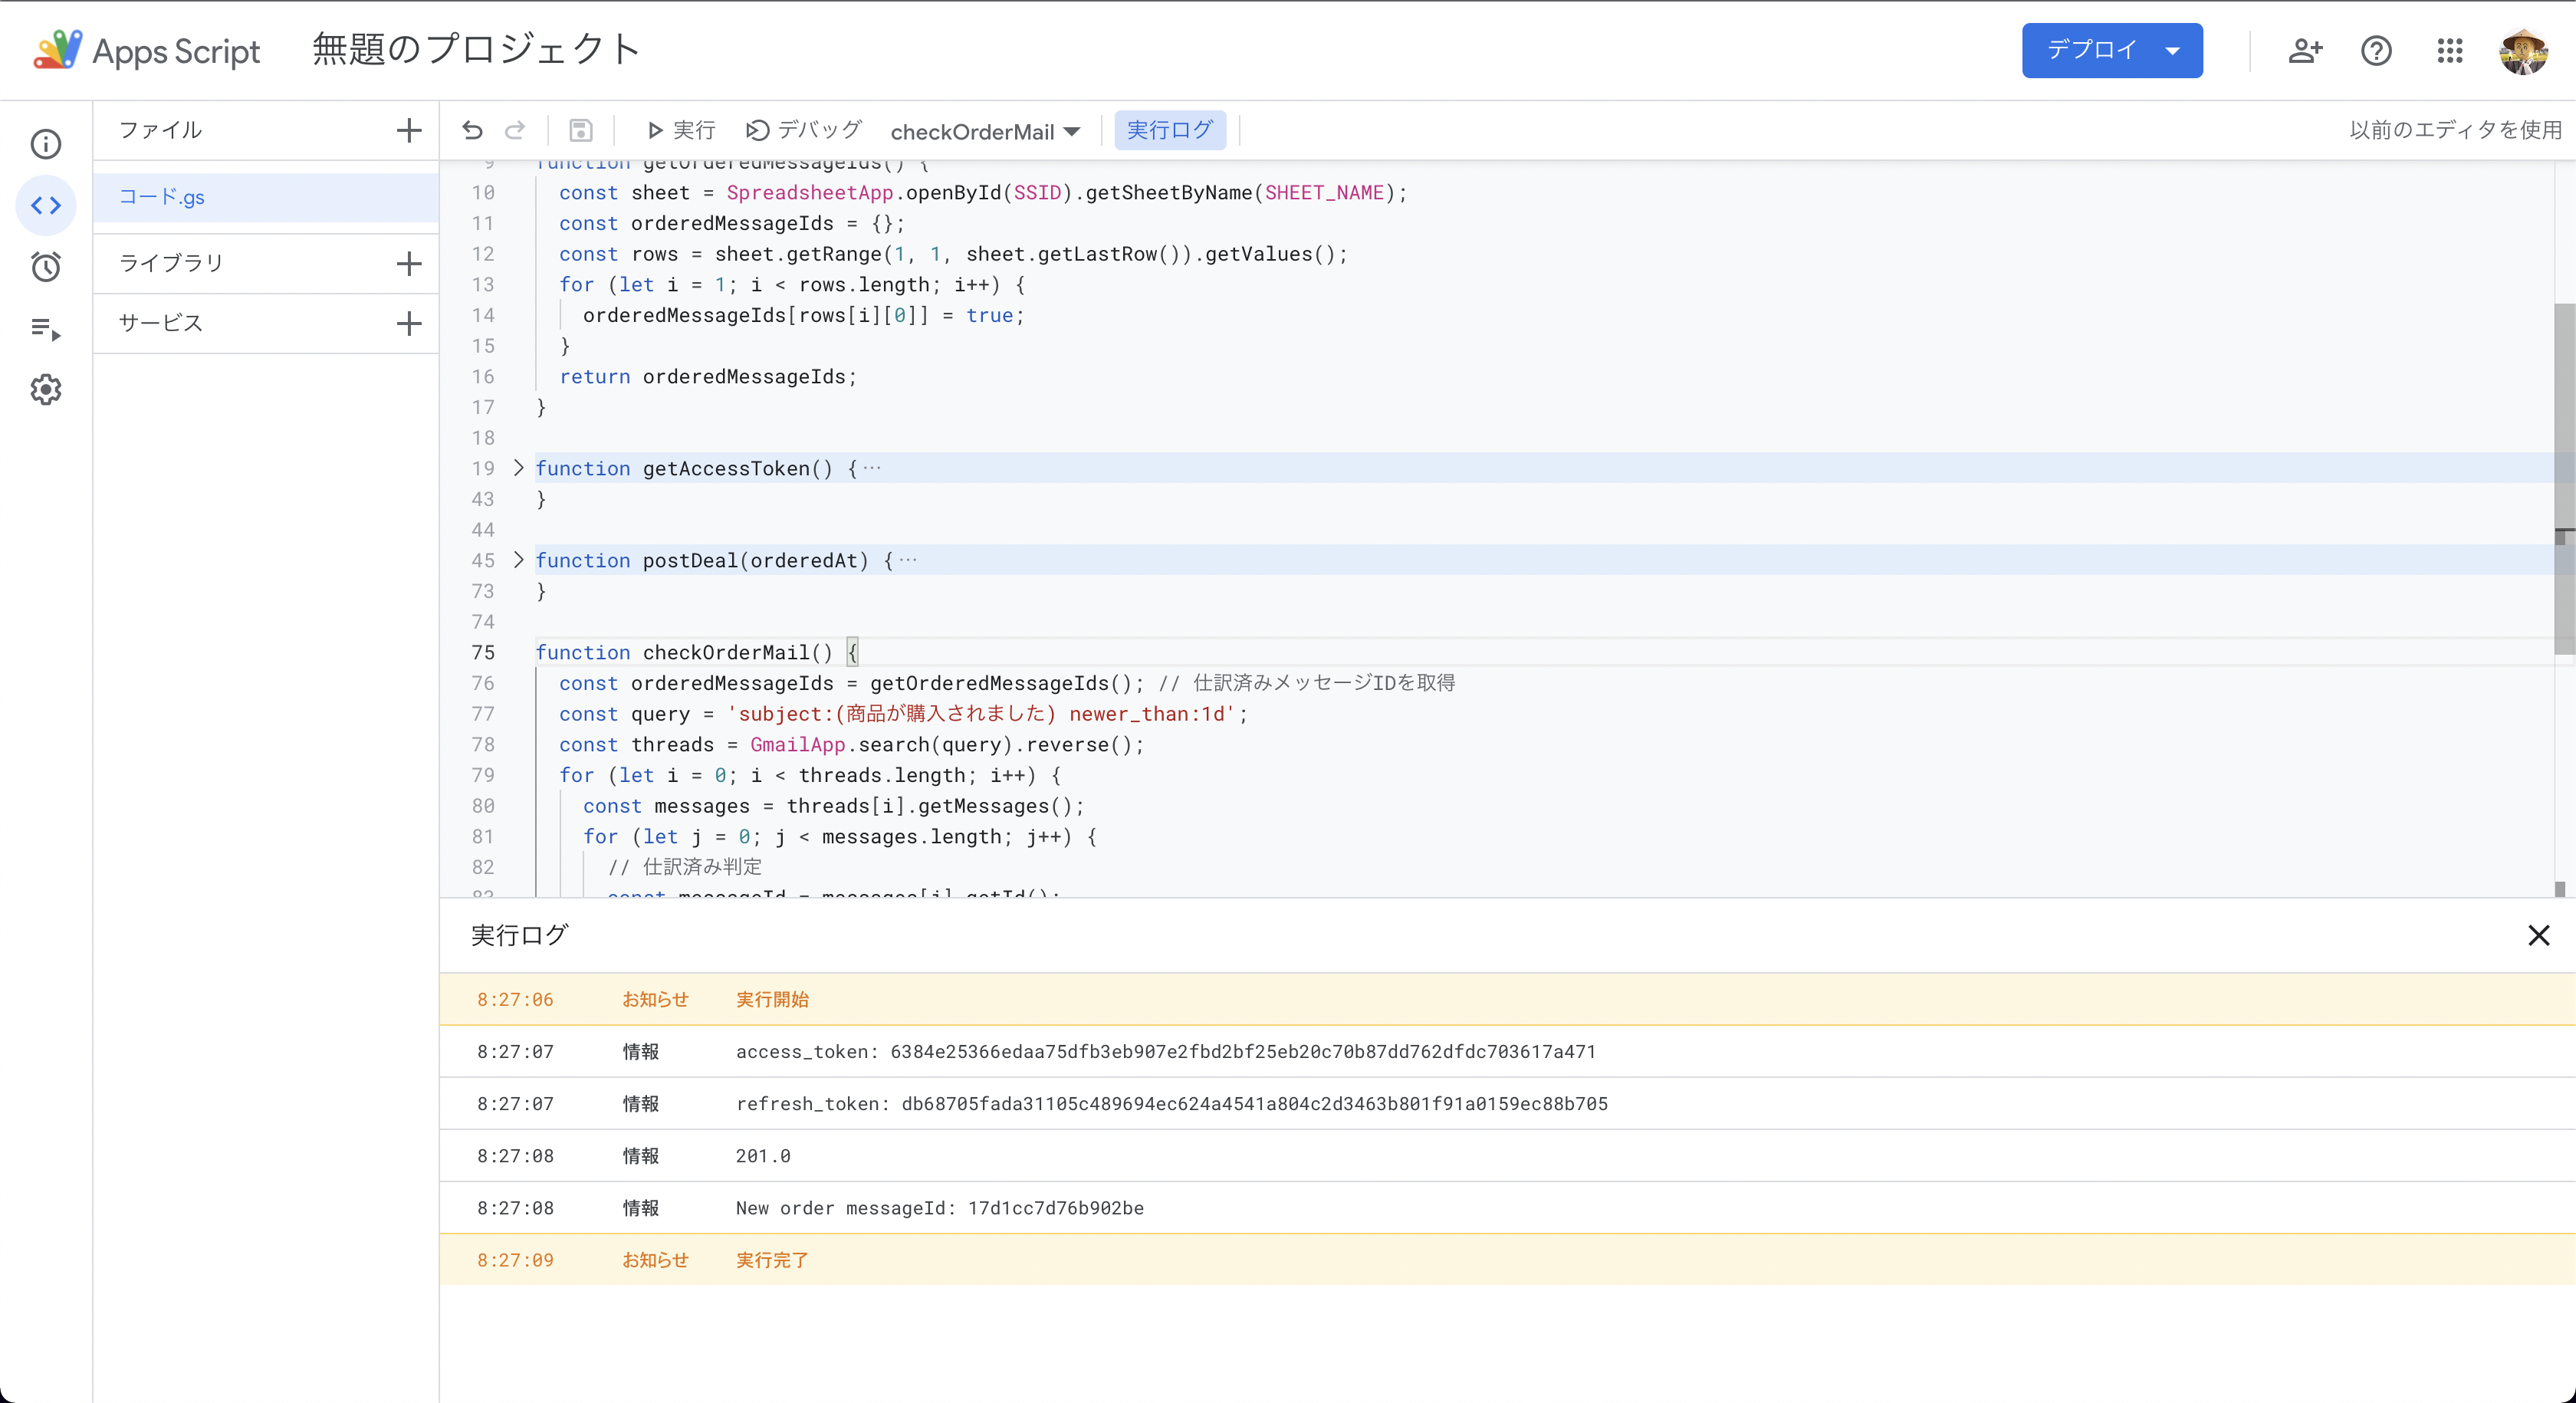
メッセージIDがスプレッドシートに保存されたら、二回目以降は以下のようになります。
購入メール本文から注文番号、商品名、商品価格を抽出して仕訳登録する
まずは先に販売商品の仕訳と勘定科目を確認しておきます。
販売商品の勘定科目
ここでは話を簡単にするため以下の2つの商品を販売しているとします。
| 商品名 | 販売価格 | 送料 | 販売手数料 |
| --- | --- | --- | --- | --- |
| 2kgのお米 | 2000 | 450 | 200 |
| 5kgのお米 | 5000 | 800 | 500 |
仕訳はそれぞれ以下のようにします。
2kgのお米
| 借方 | 貸方 | ||||
|---|---|---|---|---|---|
| 売掛金 | 1350 | 対象外 | 売上高 | 2000 | 課税売上8% |
| 荷造運賃 | 450 | 課対仕入10% | |||
| 販売手数料 | 200 | 課対仕入10% |
5kgのお米
| 借方 | 貸方 | ||||
|---|---|---|---|---|---|
| 売掛金 | 3700 | 対象外 | 売上高 | 5000 | 課税売上8% |
| 荷造運賃 | 800 | 課対仕入10% | |||
| 販売手数料 | 500 | 課対仕入10% |
各勘定科目の勘定科目IDを取得します。勘定科目IDの取得方法は前編をご参照ください。
| 勘定科目 | 勘定科目ID |
|---|---|
| 売掛金 | 538987854 |
| 荷造運賃 | 538987935 |
| 販売手数料 | 538987967 |
| 売上高 | 538987920 |
税区分コードも同様に取得します。
| 税区分 | 税区分コード |
|---|---|
| 対象外 | 2 |
| 課税売上8% | 101 |
| 課対仕入10% | 136 |
GASに実装
上記を踏まえた上で、購入メールをパースして商品ごとの仕訳を作成し、freeeに登録する処理を実装します。
その前に、各商品のダミー購入メールを自分宛てのGmailに送っておきます。
cat <<. | sendmail -t
Subject: 「2kgのお米」が購入されました。商品の発送をお願いします。
To: <メールアドレス>

注文番号: order_12345
商品名: 2kgのお米 玄米
商品価格: ¥2,000
.

cat <<. | sendmail -t
Subject: 「5kgのお米」が購入されました。商品の発送をお願いします。
To: <メールアドレス>

注文番号: order_67890
商品名: 5kgのお米 白米
商品価格: ¥5,000
.
そして、最終的なコードは以下のようになりました。主な変更点を以下に纏めます。
- main関数をエントリーポイントにしました
- createData関数を新規作成し、取引データの作成処理を集約しました
- 合わせて、postDeal関数の引数をdataオブジェクトに変更しました
const SSID = '<スプレッドシードID>';  // 各自の環境に置き換えてください
const SHEET_NAME = '<シート名>';   // 各自の環境に置き換えてください

function setOrderedMessageId(messageId) {
  const sheet = SpreadsheetApp.openById(SSID).getSheetByName(SHEET_NAME);
  sheet.getRange(sheet.getLastRow() + 1, 1).setValue(messageId);
}

function getOrderedMessageIds() {
  const sheet = SpreadsheetApp.openById(SSID).getSheetByName(SHEET_NAME);
  const orderedMessageIds = {};
  const rows = sheet.getRange(1, 1, sheet.getLastRow()).getValues();
  for (let i = 1; i < rows.length; i++) {
    orderedMessageIds[rows[i][0]] = true;
  }
  return orderedMessageIds;
}

function getAccessToken() {
  const properties = PropertiesService.getScriptProperties();
  const clientId = properties.getProperty('CLIENT_ID');
  const clientSecret = properties.getProperty('CLIENT_SECRET');
  const refreshToken = properties.getProperty('REFRESH_TOKEN');

  const url = 'https://accounts.secure.freee.co.jp/public_api/token';
  const options = {
    'method': 'post',
    'payload': {
      'client_id': clientId,
      'client_secret': clientSecret,
      'refresh_token': refreshToken,
      'grant_type': 'refresh_token'
    }
  };
  const res = UrlFetchApp.fetch(url, options);

  const data = JSON.parse(res.getContentText());
  properties.setProperty('ACCESS_TOKEN', data.access_token);
  properties.setProperty('REFRESH_TOKEN', data.refresh_token);

  //Logger.log('access_token: ' + data.access_token);
  //Logger.log('refresh_token: ' + data.refresh_token);
  return data.access_token;
}

function postDeal(data) {
  const accessToken = getAccessToken();

  const url = 'https://api.freee.co.jp/api/1/deals';
  const options = {
    'method': 'post',
    'contentType': 'application/json',
    'payload': JSON.stringify(data),
    'headers': {
      'Authorization': 'Bearer ' + accessToken
    }
  };
  const res = UrlFetchApp.fetch(url, options);
  //Logger.log(res.getResponseCode());
}

function createData(message) {
  let data = {
    'company_id': <事業所ID>,  // 各自の環境に置き換えてください
    'type': 'income',
    'issue_date': '',
    'details': []
  };

  const date = message.getDate();
  data.issue_date = date.getFullYear() + '-' + (date.getMonth() + 1) + '-' + date.getDate();

  const body = message.getBody();
  const orderNumber = body.match(/(order_.*)[^]/)[1];
  const productName = body.match(/商品名: (.*)[^]/)[1];
  const productPrice = parseInt(body.match(/商品価格: (.*)[^]/)[1].replace(/[^0-9]/g, ''));

  if (productPrice === 2000) {
    data.details.push(
      {
        'account_item_id': 538987920,
        'amount': 2000,
        'tax_code': 101,
        'description': '注文番号:' + orderNumber + ', 商品名:' + productName
      },
      {
        'account_item_id': 538987935,
        'amount': -450,
        'tax_code': 136
      },
      {
        'account_item_id': 538987967,
        'amount': -200,
        'tax_code': 136
      }
    );
  } else if (productPrice === 5000) {
    data.details.push(
      {
        'account_item_id': 538987920,
        'amount': 5000,
        'tax_code': 101,
        'description': '注文番号:' + orderNumber + ', 商品名:' + productName
      },
      {
        'account_item_id': 538987935,
        'amount': -800,
        'tax_code': 136
      },
      {
        'account_item_id': 538987967,
        'amount': -500,
        'tax_code': 136
      }
    );
  } else {
    throw new Error('Unknown product');
  }

  return data;
}

function checkOrderMail() {
  const orderedMessageIds = getOrderedMessageIds();
  const query = 'subject:(が購入されました。商品の発送をお願いします。) in:anywhere newer_than:1d';
  const threads = GmailApp.search(query).reverse();
  for (let i = 0; i < threads.length; i++) {
    const messages = threads[i].getMessages();
    for (let j = 0; j < messages.length; j++) {
      // 仕訳済み判定
      const messageId = messages[j].getId();
      if (!orderedMessageIds[messageId]) {
        // 未仕訳の場合
        const data = createData(messages[j]);
        postDeal(data);
        setOrderedMessageId(messageId);
        Logger.log('New order messageId: ' + messageId);
      } else {
        // 仕訳済みの場合
        Logger.log('Already ordered messageId: ' + messageId);
      }
    }
  }
}

function main() {
  checkOrderMail();
}
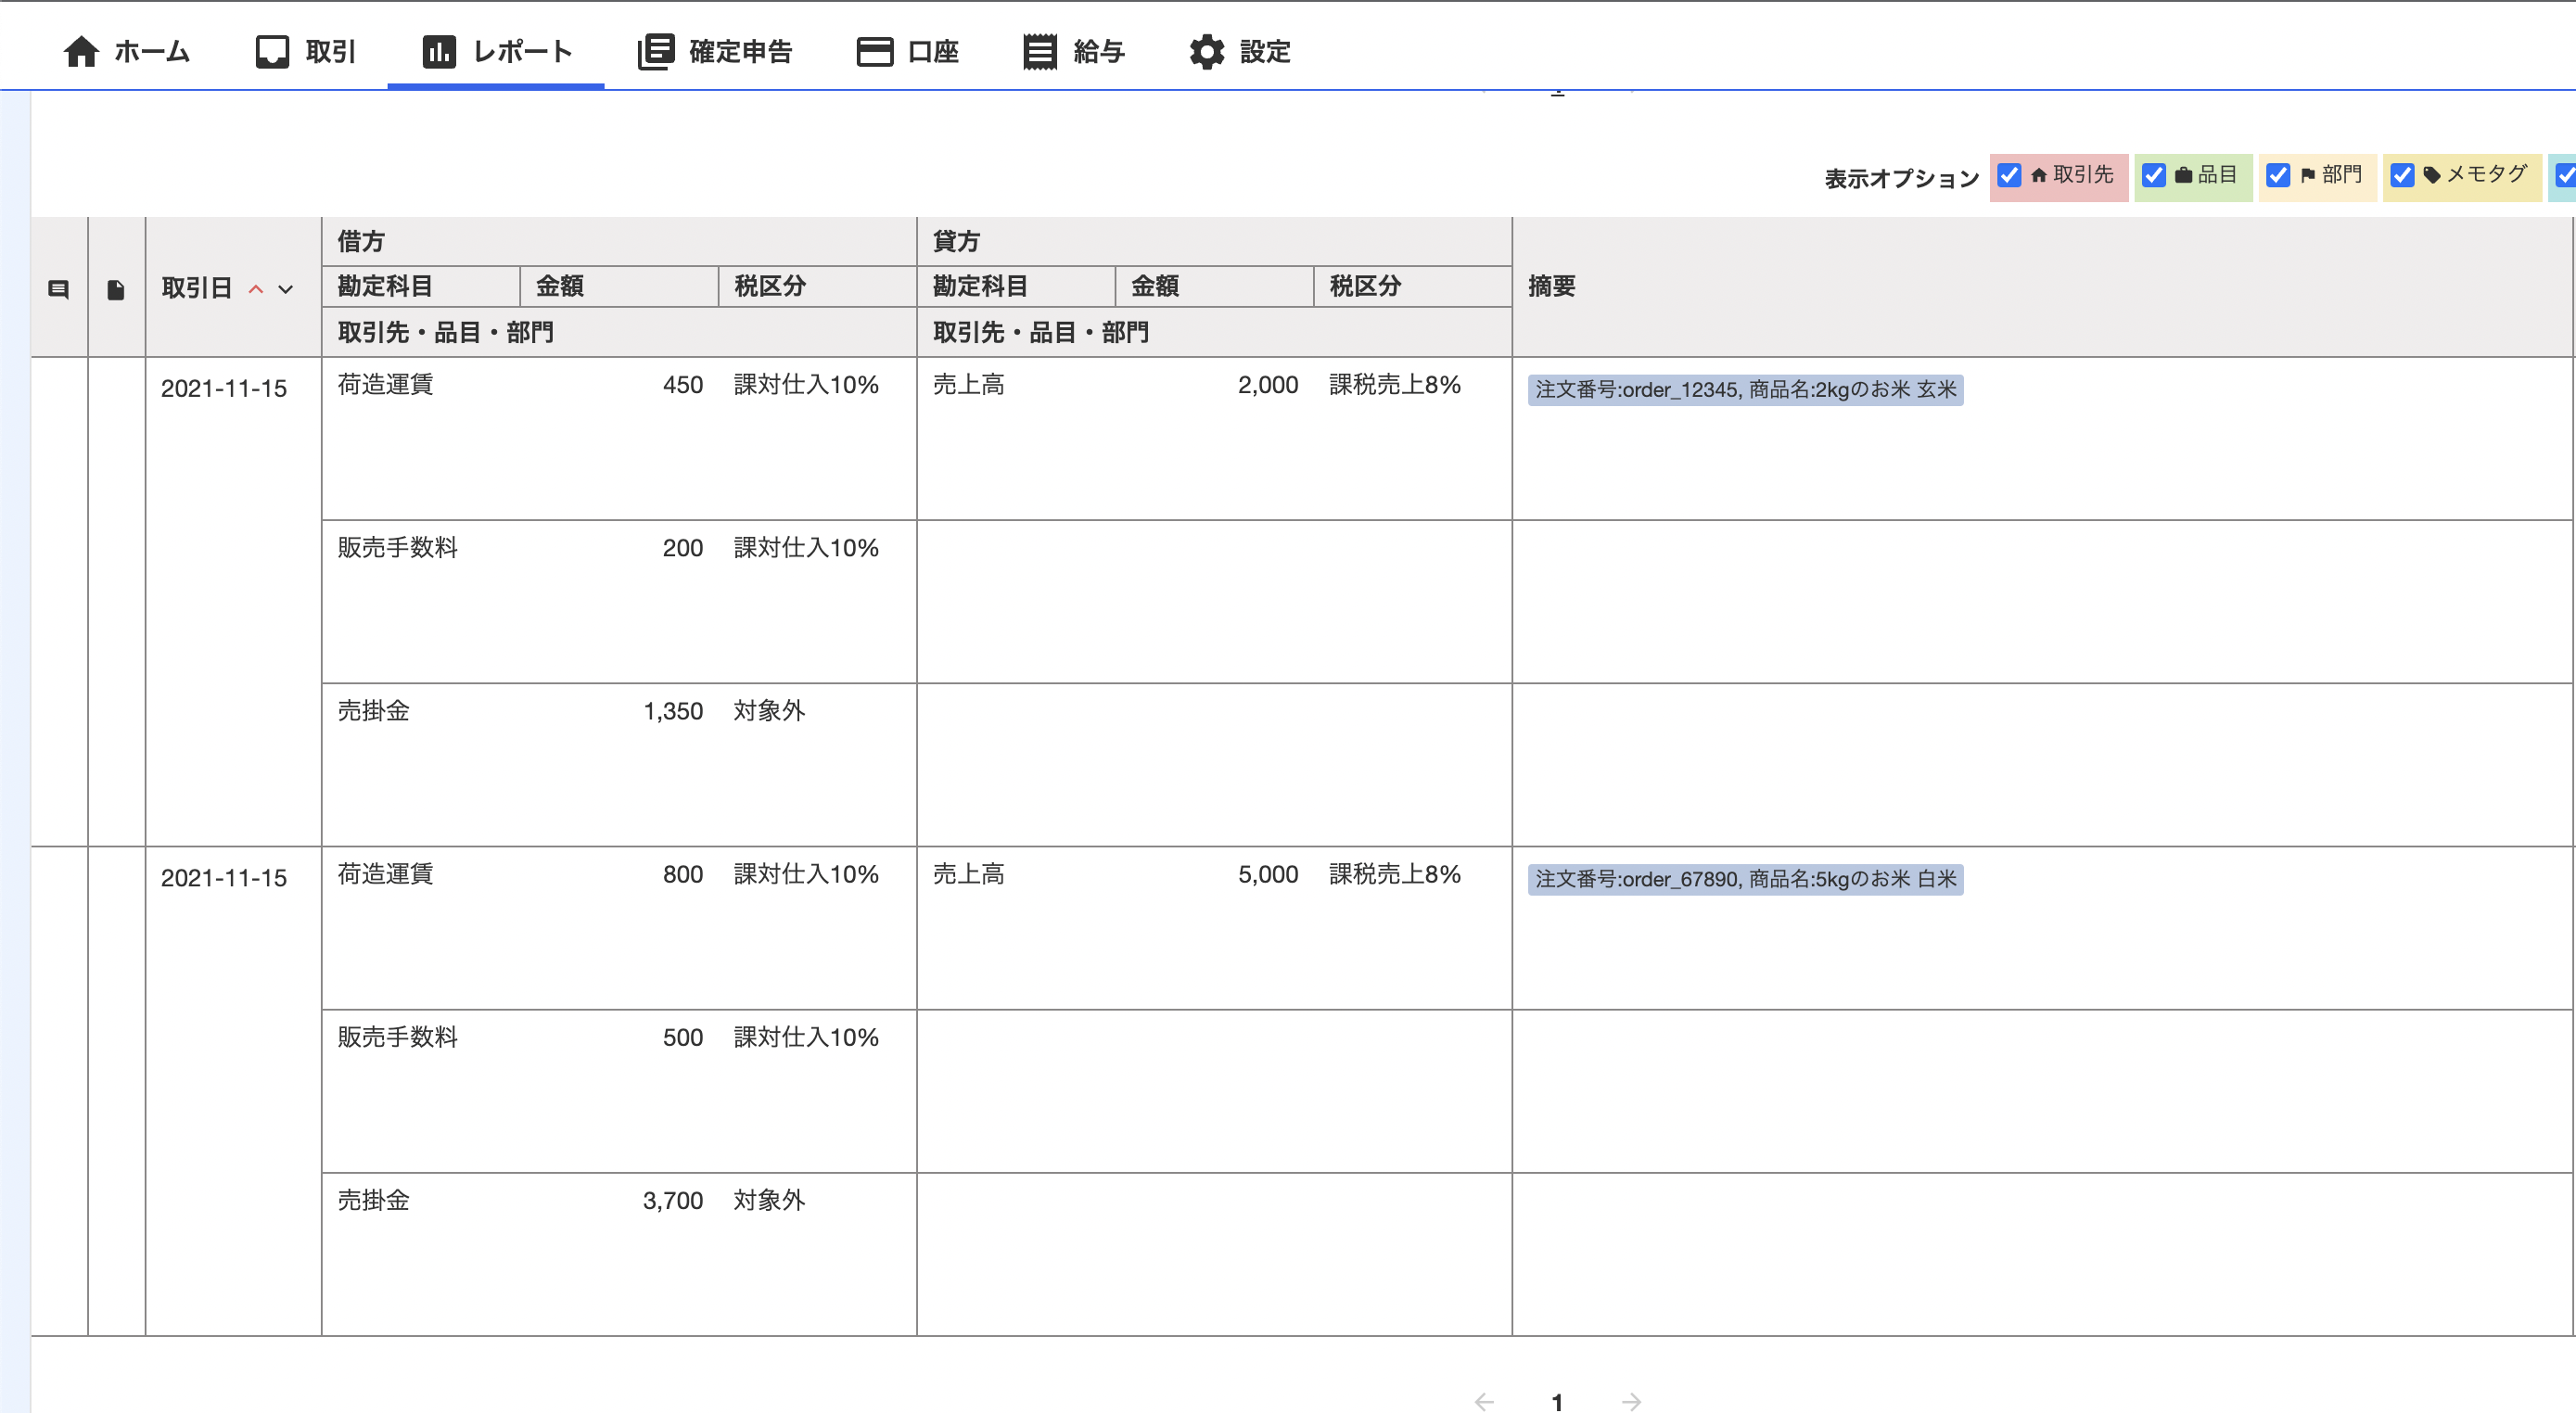
main関数を実行します。正常終了していれば、freeeの画面に以下のように取引データが登録されます。
おわりに
今回は説明を簡単にするために購入メールの仕訳登録に絞っていますが、実際には口座入金された際の仕訳の相殺やアマゾン・モノタロウなどで購入した資材の費用計上なども実装する必要があります。
完全なるRPA化への道のりはまだまだ遠いです。「ローマは一日にして成らず」と言ったところでしょうか。
ま、ぼちぼちと楽しみながらやってまいります。
それでは、今回の記事がどなたかの参考になりましたら幸いです。
