MediaDevicesとWeb Audio API vuejsとthreejs
概要
- WebRTCの話が盛り上がってたのでjsでカメラとマイクを使う方法をおさらいする
- デバイスの選択をする仕組みをvueで作ってみる
- ビデオデバイスの映像をvideoタグで表示してみる
- オーディオデバイスの音声をAnalyserNodeを使ってビジュアライズしてみる
WebRTCの話が盛り上がってたのでjsでカメラとマイクを使う方法をおさらいする
社内でWebRTCについて話題が上がり、そこで以前webGLでカメラ映像をテクスチャとして取り込んでエフェクトかけて遊べる何やらを試作したのを思い出したので、すっかり忘れたその方法を復習してみました。
まずはカメラとマイクのデバイスを取得してVIDEOタグで再生させてみる。
var constraints = { audio: true, video: true };
navigator.mediaDevices.getUserMedia(constraints).then(function(stream){
  document.getElementById("video").srcObject = stream;
  document.getElementById("video").play();
}).catch(function(err){
  console.log("!!!!",err);
});
これでブラウザでHTMLに事前に貼り付けておいたVIDEOタグ(#video)にカメラの映像が表示される様になしました。
ただこれだとカメラもマイクも自動選択なのでHangoutMeetの開始時の様にデバイス選択できる様にしたい。
デバイスの選択をする仕組みをvueで作ってみる
enumerateDevices()という命令でデバイスリストを取得できる様です。
MediaDevices.enumerateDevices() - Web API | MDN
navigator.mediaDevices.enumerateDevices().then(function(devices){
  console.log(devices);
});
さっそくリスト取得してみましたが思いの外いっぱい出てきます。
取得できるデバイスの単品のデータ構造はこんな感じで
{
"deviceId": "default",
"groupId": "13eaa2c10d3b436a8bbb085b5af46a8a721eea3c271546792e9dfe15a1e6c4c2",
"kind": "audioinput",
"label": "既定 - External Microphone (Built-in)"
}
kind がデバイスの種類を示す様で、MDNによれば
"videoinput" "audioinput" "audiooutput"
の3種類あるそうです。
思いの外多かったのは出力用のデバイス "audiooutput" があったからですね。
入力だけとばかり思ってましたがmediaDevicesには出力も含まれる様です。
このリストから"videoinput" "audioinput"を抽出して選択できる様にします。
jsはこんな感じで
var app = new Vue({
  el:"#app",
  data:{
    videomedias: [],
    audiomedias: []
  }
});
navigator.mediaDevices.enumerateDevices().then(function(devices){
  var videomedias = [];
  var audiomedias = [];
  devices.forEach(device => {
    if( device.kind == "videoinput" ){
      videomedias.push(device);
    }
    if( device.kind == "audioinput" ){
      audiomedias.push(device);
    }
  });
  Vue.set(app,"videomedias",videomedias);
  Vue.set(app,"audiomedias",audiomedias);
});
HTMLはこんな感じ
<div id="app">
  <div>
    <select name="sel_video" id="sel_video">
      <option v-for="(item, index) in videomedias" :value="index" >{{item.label}}</option>
    </select>
    <select name="sel_audio" id="sel_audio">
      <option v-for="(item, index) in audiomedias" :value="index" >{{item.label}}</option>
    </select>
  </div>
</div>
これでリストアップはできたので、フォーム入力バインディングを使って簡単に値を取れる様にしておきます。
var app = new Vue({
  el:"#app",
  data:{
    videomedias: [],
    audiomedias: [],
    selectedvideo: 0,
    selectedaudio: 0
  }
});
<div id="app">
  <div>
    <select name="sel_video" id="sel_video" v-model="selectedvideo">
      <option v-for="(item, index) in videomedias" :value="index" >{{item.label}}</option>
    </select>
    <select name="sel_audio" id="sel_audio" v-model="selectedaudio">
      <option v-for="(item, index) in audiomedias" :value="index" >{{item.label}}</option>
    </select>
  </div>
</div>
あとはボタンを追加して選択したデバイスを使った処理を行います。
<button @click="startvideo()" >開始</button>
methods:{
  startvideo:function(){
   ...
  }
}
ビデオデバイスの映像をvideoタグで表示してみる
実際にカメラデバイス指定をしてvideoタグで表示する処理をボタンを押したら実行する様にします。
methods:{
  startvideo:function(){
    var constraints = {
      video: {
        deviceId: this.selectedvideo != -1 ? this.videomedias[this.selectedvideo].deviceId : null,
        width: 1280,
        height: 720
      }
    };
    navigator.mediaDevices.getUserMedia(constraints).then(function(stream){
      document.getElementById("video").srcObject = stream;
      document.getElementById("video").play();
    }).catch(function(err){
      console.log("!!!!",err);
    });
  }
}
これでvueで作ったボタンを押せば、指定したカメラの映像がブラウザ上で再生されます。
オーディオデバイスの音声をAnalyserNodeを使ってビジュアライズしてみる
ここまでやってカメラの画像をwebGLでどうこうじゃなくて、音声の波形情報とか表示できないかなと思い調べてみると
Web Audio APIを使って波形や周波数スペクトラムデータが取れる模様
Visualizations with Web Audio API - Web API | MDN
MDNの解説に従いオーディオデバイスからオーディオストリーム取得し、それを元にオーディオソースを取得し、
アナライザーノードに接続します。
var audio_ctx = new AudioContext();
var analyser = audio_ctx.createAnalyser();
var audioinput;
var audio_constraints = {
  audio:{
    deviceId: this.selectedaudio != -1 ? this.audiomedias[this.selectedaudio].deviceId : null,
  }
};
navigator.mediaDevices.getUserMedia(audio_constraints).then(function(stream){

  audioinput = audio_ctx.createMediaStreamSource(stream);

}).catch(function(err){
  console.log("!!!!",err);
});
何も変わらないですがこれで取れているはず・・・。
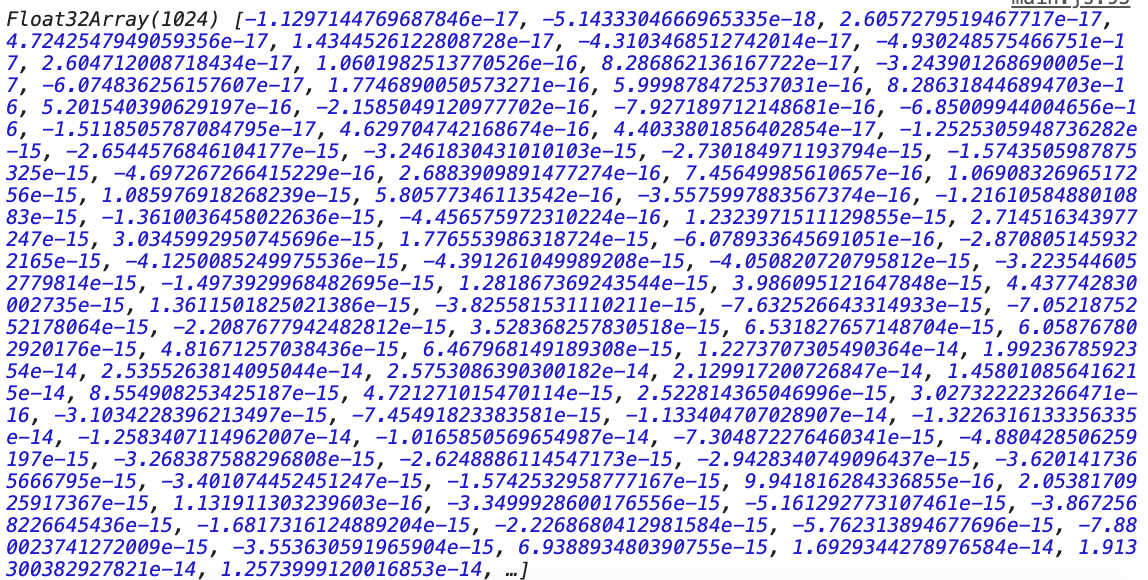
実際に値を表示してみます。
var dataArray = new Float32Array(analyser.frequencyBinCount);
setInterval(function(){
analyser.getFloatTimeDomainData(dataArray);
console.log(dataArray);
},100);
これをヴィシュアライズしていきますが、ヴィジュアライズには
Three.jsを使っていきます。
まずは、色々表示のための準備をしていきます。
ラインで波形を表示しますがある程度なめらかが必要ですので、点の数が500個でデータを用意します。
var scene;
var renderer;
var camera;
var points = [];
var line;

var width = 1280;
var height = 300;

scene = new THREE.Scene();
camera = new THREE.OrthographicCamera( width / -2, width / 2, height / 2, height / -2, 1, 1000 );
scene.add(camera);

for(var i = 0 ; i < 500; i++){
  points.push(new THREE.Vector2(i / 500 * width, 0));
}

var geometry = new THREE.BufferGeometry().setFromPoints( points );
var material = new THREE.LineBasicMaterial({
  color: 0xff0000;
});
line = new THREE.Line( geometry, material );
line.position.x = width / -2;
scene.add( line );

renderer = new THREE.WebGLRenderer();
renderer.setSize(width,height);
document.body.appendChild( renderer.domElement );
あとはレンダリングの処理を書きます。
function animate(){
  requestAnimationFrame( animate );
  renderer.render( scene, camera );
}
これで animation関数 を実行すれば
アニメーションのレンダリングが開始されます。
今のところただまっすぐ赤い線を引くだけですので、ここにアナライザーノードからの波形データを入れていきます。
まず頂点データを変更するためにジオメトリから頂点データを引っ張ってきます。
var positions = line.geometry.attributes.position.array;
ここには x y z の順番で頂点データが入っていますので、そのうち y の値を変化させて、波形のデータを反映させます。
波形のデータは -1〜1 の範囲でデータが入ってくるはずですので 表示領域の半分の高さを乗算した値を入れていきます。
ただし、波形データのデータ長と、頂点データのデータ長が一致していないので計算で補正して波形データの値を拾っていっています。
function animate(){
  var height = 300;
  var positions = line.geometry.attributes.position.array;
  for(var i = 0 ; i < positions.length; i+=3){
    positions[i+1] = height/2 * dataArray[Math.floor( i/positions.length * dataArray.length) ];
  }
  requestAnimationFrame( animate );
  renderer.render( scene, camera );
}
さらにラインの頂点データの変更を反映するには
line.geometry.attributes.position.needsUpdate = true;
の様にレンダリング前にneedsUpdateにtrueをセットする必要があるとのこと。
function animate(){
  var height = 300;
  var positions = line.geometry.attributes.position.array;
  for(var i = 0 ; i < positions.length; i+=3){
    positions[i+1] = height/2 * dataArray[Math.floor( i/positions.length * dataArray.length) ];
  }

  line.geometry.attributes.position.needsUpdate = true;

  requestAnimationFrame( animate );
  renderer.render( scene, camera );
}
これでひとまず出来上がりです。
アナライザーノードは周波数スペクトラムも取得できるので時間を見てそちらも挑戦してみます。
![]() FORK Advent Calendar 2020
FORK Advent Calendar 2020
![]() 19日目 Vue.jsのSSGフレームワークのGridsomeはすごいぞ @Kodak_tmo
19日目 Vue.jsのSSGフレームワークのGridsomeはすごいぞ @Kodak_tmo
![]() 21日目 ml5.js の FaceApi で遊んでみる @kinoleaf
21日目 ml5.js の FaceApi で遊んでみる @kinoleaf

