環境
- macOS v10.15.5
- npm v6.13.4
- Ionic v6.10.1
- Xcode v12.0.1
- Android Studio v4.0.1
Ionic環境構築
Nodeを以下からインストールします
https://nodejs.org/ja/
Ionic CLIをインストールします
% sudo npm install ionic -g
Ionic+Angularプロジェクトを作成
以下コマンドでIonic+Angularプロジェクトを作成します
% ionic start --type=angular
以下のように聞かれるので? Project name:の後に任意のプロジェクト名を入力します
Every great app needs a name! 😍

Please enter the full name of your app. You can change this at any time. To
bypass this prompt next time, supply name, the first argument to ionic start.

? Project name:
プロジェクト名設定後ionicのテンプレートを選択します
モバイルアプリでよく使うUIが用意されているようです(本記事ではtabsを選択)
? Starter template: (Use arrow keys)
❯ tabs         | A starting project with a simple tabbed interface
  sidemenu     | A starting project with a side menu with navigation in the cont
ent area
  blank        | A blank starter project
  list         | A starting project with a list
  my-first-app | An example application that builds a camera with gallery
  conference   | A kitchen-sink application that shows off all Ionic has to offer
(Move up and down to reveal more choices)
以下のように聞かれるのでyを入力して次に進みます
yを選択するとCapacitorというライブラリによってプロジェクト内にiOSとAndroidが追加されます
? Integrate your new app with Capacitor to target native iOS and Android? (y/N)
Nを選択して進んだ場合でも以下コマンドで後から追加することが可能です
% ionic integrations enable capacitor
% npx cap add ios
% npx cap add android
以下が表示されていればプロジェクト作成完了です
Your Ionic app is ready! Follow these next steps:
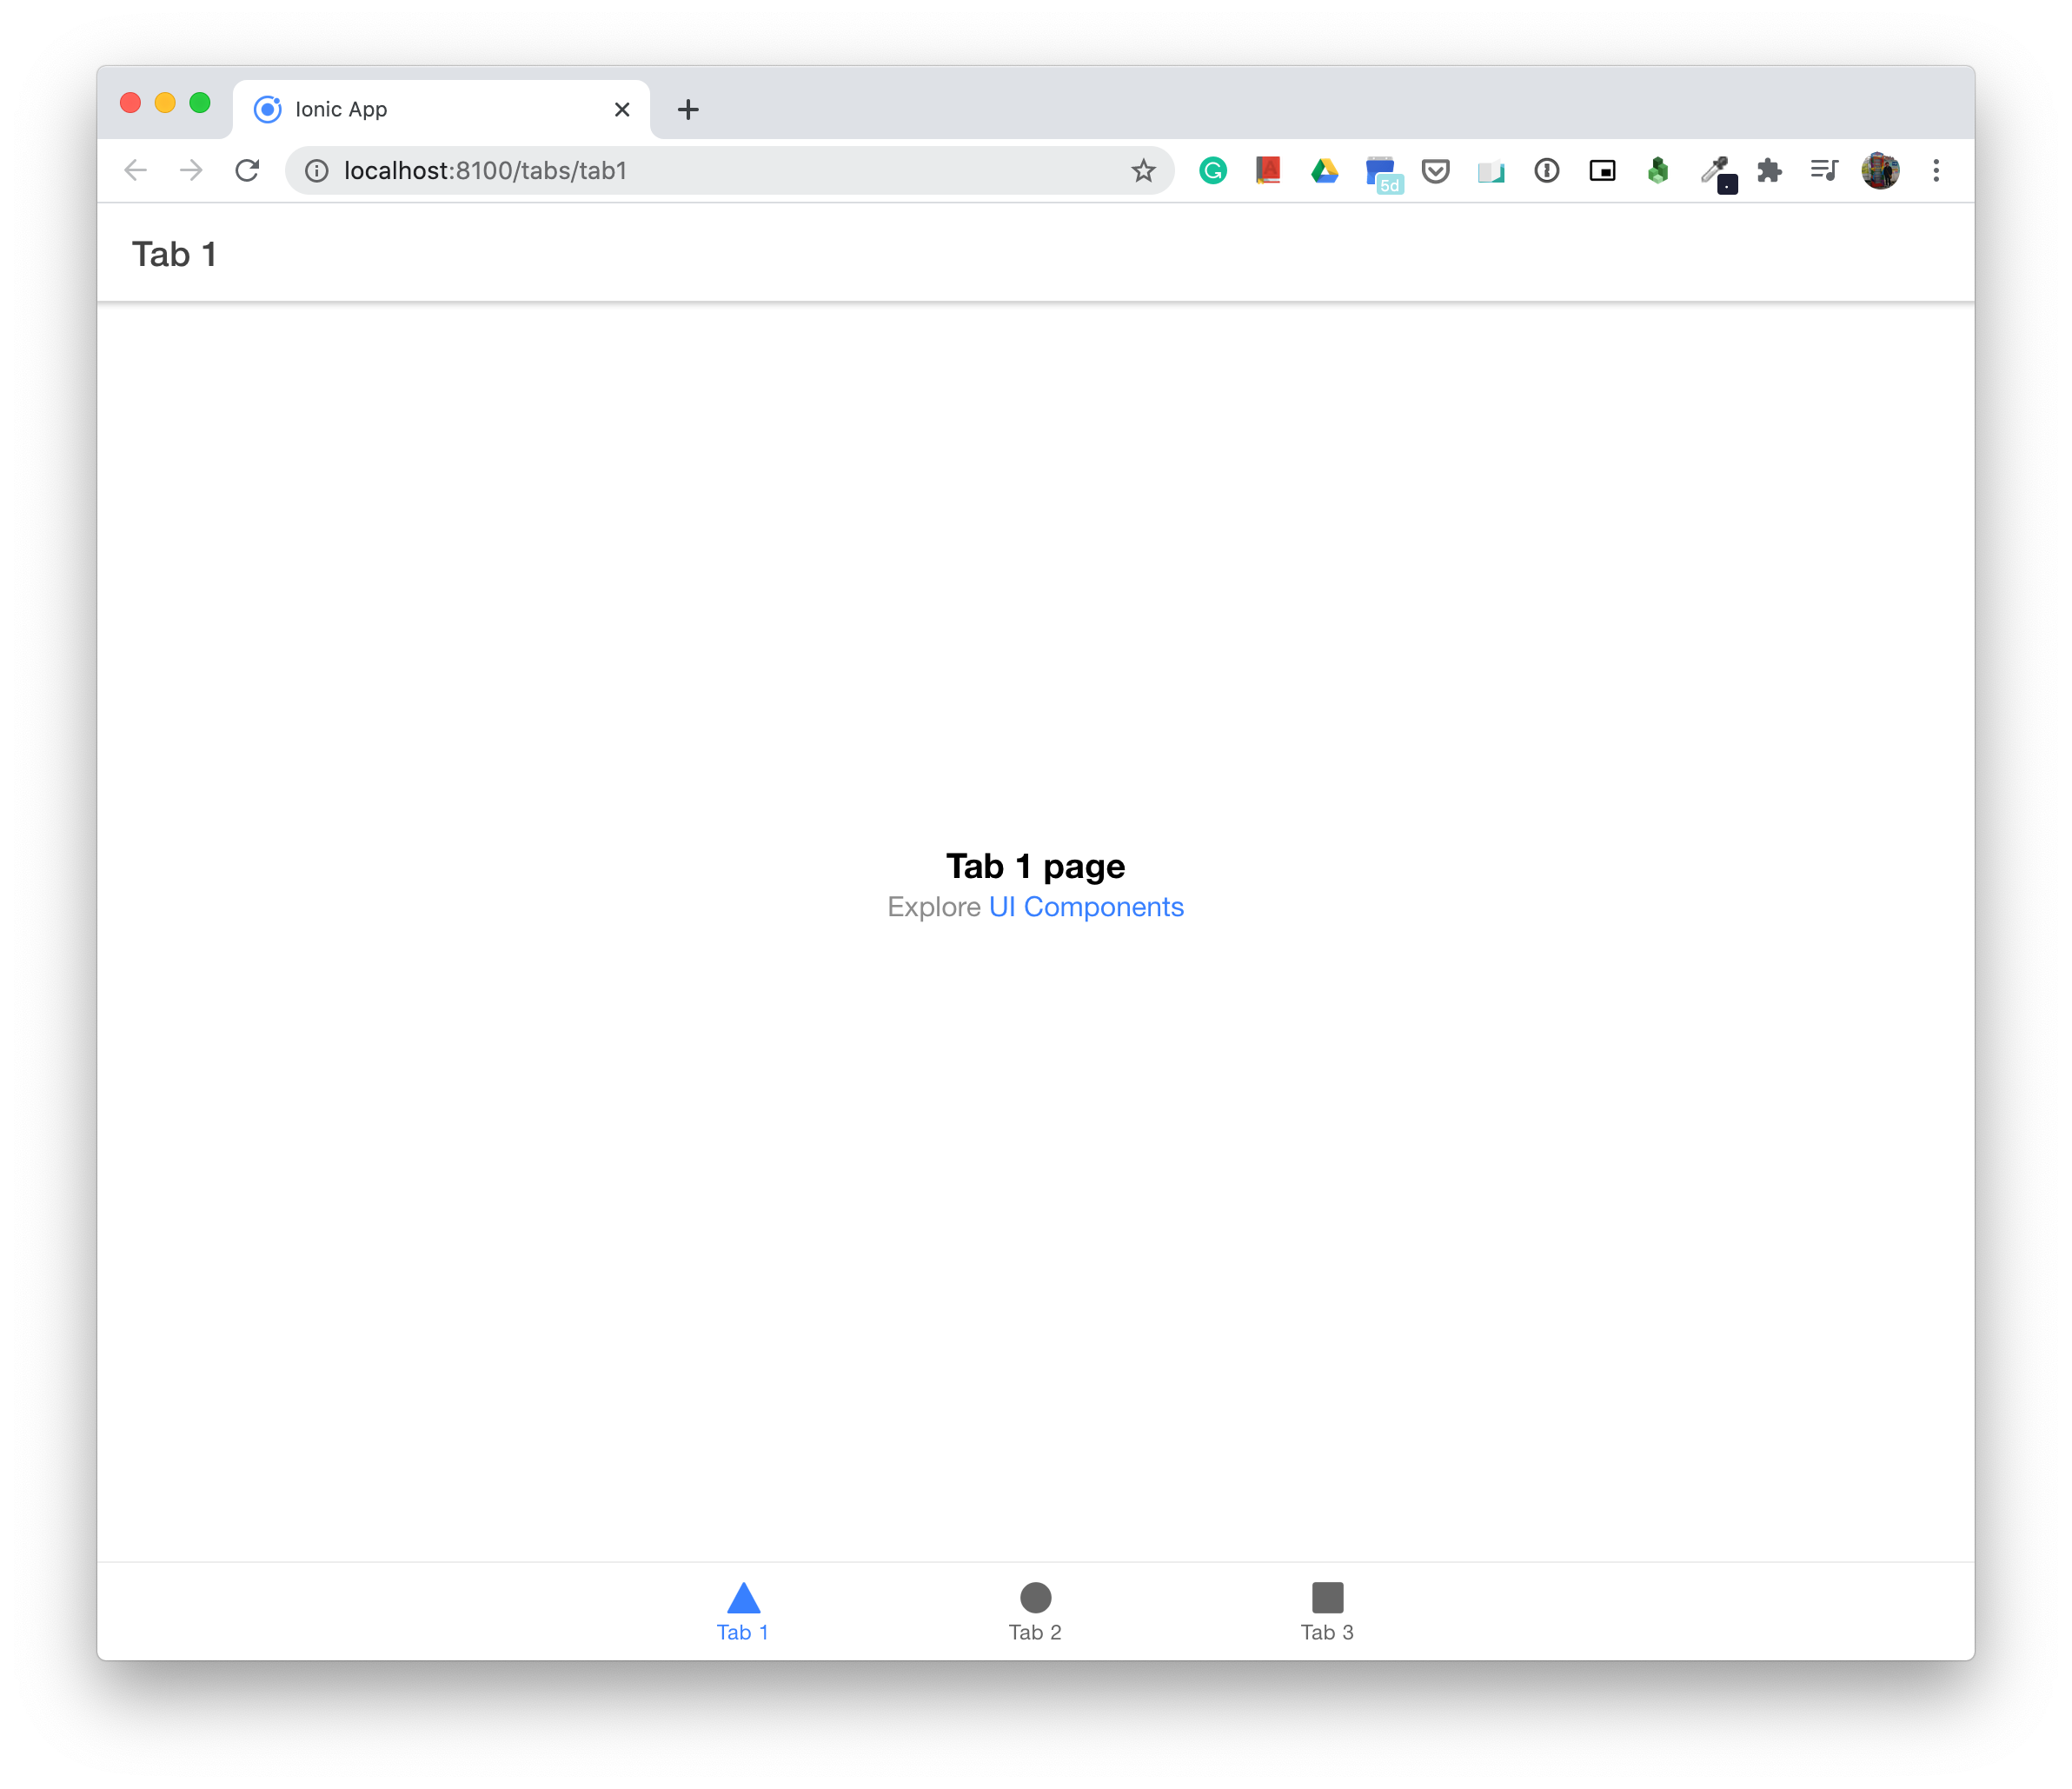
ブラウザで立ち上げる
以下コマンドでブラウザでプレビューを表示します
% ionic serve
以下のように表示されました
プロジェクト作成時点でtabsテンプレートを選択したのでタブが自動生成されています
アプリとしてビルドする
コマンドにてXcodeかAndroidを起動するだけでビルド自体は各IDEの機能で行います
プロジェクト作成時点で前述したCapacitorライブラリが利用可能になっていることが前提です。
iOSの場合
以下コマンドでXcodeが自動で起動します
% npx cap open ios
Androidの場合
以下コマンドでAndroid Studioが自動で起動します
% npx cap open android
また以下コマンドで各OS端末のプレビューをブラウザでも確認することができるようです。
% ionic serve --lab
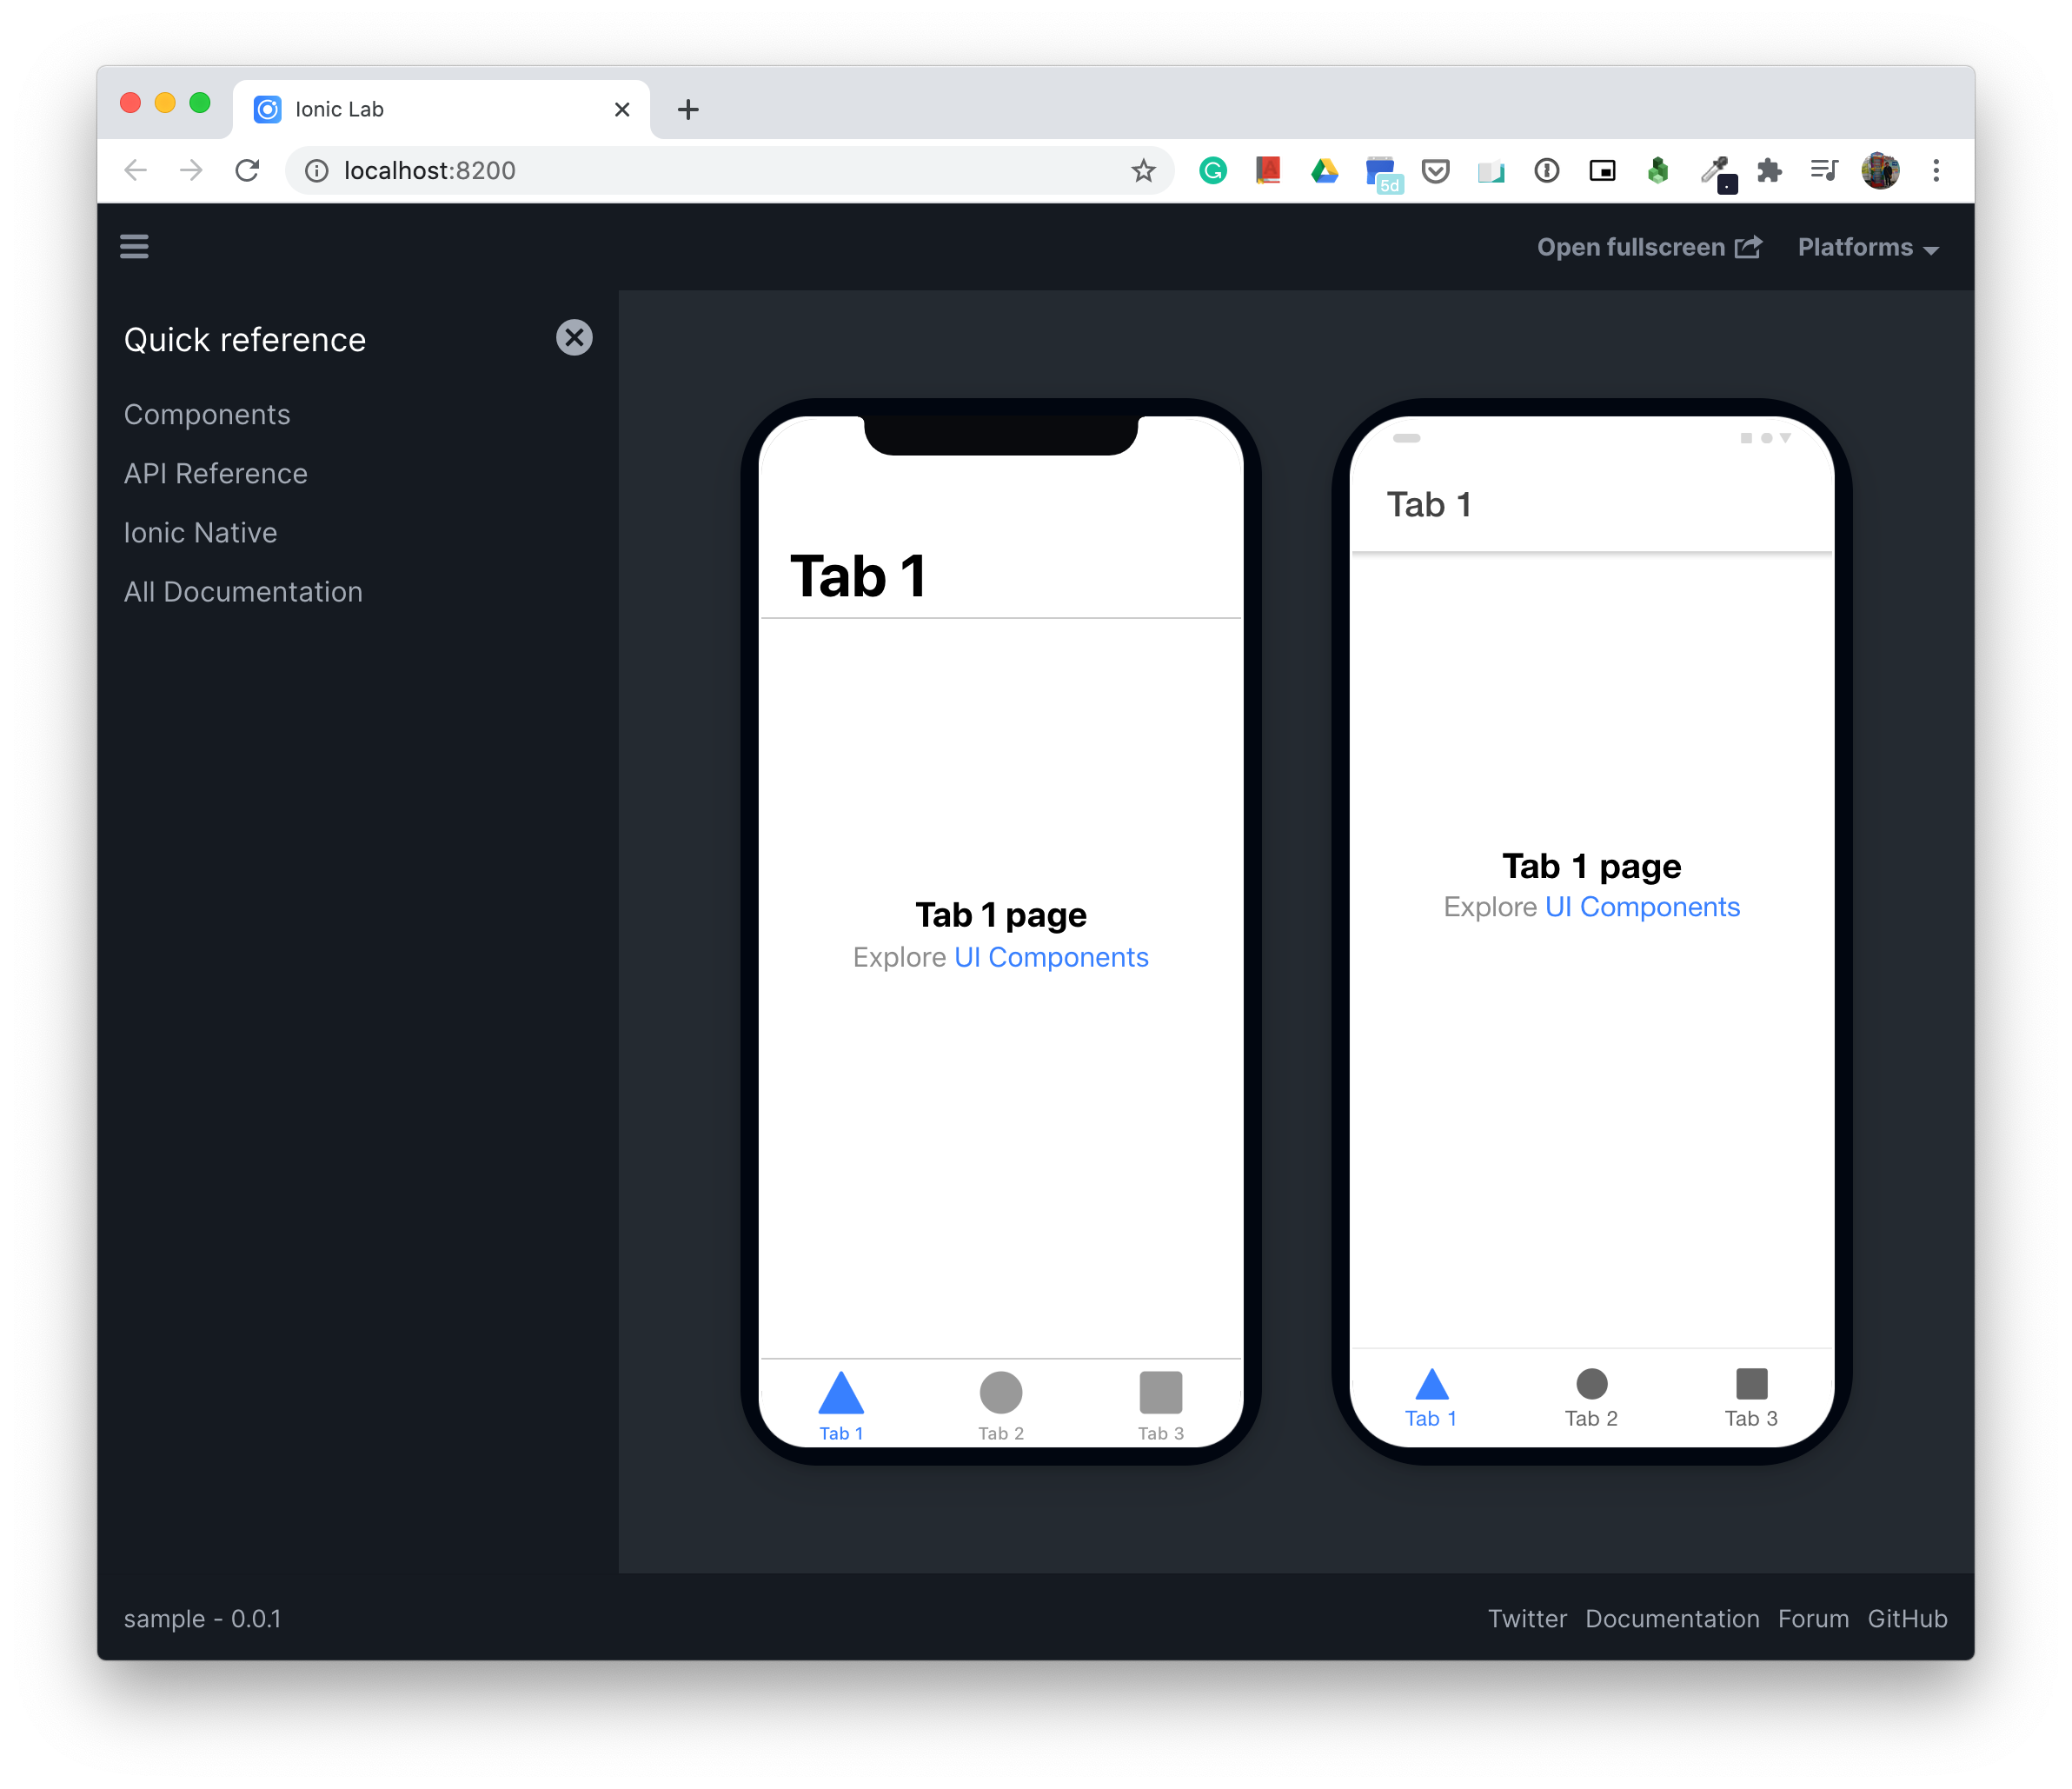
この時点ですでにiOS、Androidらしいデザインで生成されていて素晴らしいです
おわり
次回はプロジェクトファイルの構成を調べて投稿予定です。(2020/10/25時点)
参考
https://ionicframework.com/jp/docs/angular/your-first-app
https://capacitorjs.jp/docs/getting-started/with-ionic