概要紹介
簡単に機能を列挙します。
① M5stack core からIMU情報をBLE通信で送信する。
② Unity側で IMU情報をBLE通信で受信する。
③ 受信したIMU情報を画面上に表示する。
④ 受信したIMU情報をcsvにて保存する。(内部フォルダ)
アプリ化までの設定手順・紹介もいたします。
※IMUの通信内容・保存内容はあまり整理できていないので、正常な値は未調整です。
環境
● macOS Big Sur ver11.2.2
- Unity ver : 2019.2.8f1
- Platform : iOS
- Unity Api Compatibility Level : .NET 4.x
- Unity asset: Bluetooth LE for iOS, tvOS and Android
- xcode 12.0
● iphone X
- iOS 14.5
● M5stark Gray - codeは、Arduino
今回のM5stack側のコード説明は省きます。
※ xcode, iOS, macOSは常に最新版で合わせています。iOSへのアプリをxcodeで生成するには、Apple developperの登録が必要です。無料でもビルドできますが、ビルド回数が週か月かで制限があります。有料会員だと制限はありません。( 年会費 12,000円くらい)
github
・Unityコード
・Arudiunoコード
参考元
Aruduino側設定
今回は、省きます。M5stackの基本的な使い方の説明は多々あると思いますので、そちらをご参照ください。
Unity側設定
・ファイル → Build Setting → Platform「iOS」

・Player Settings… → Target minimum iOS Version 「14.5」に設定する。
※ verを合わせておく。xcodeでも設定可です。
また Configuration の Api Compatibility Level : .NET 4.x に設定する。

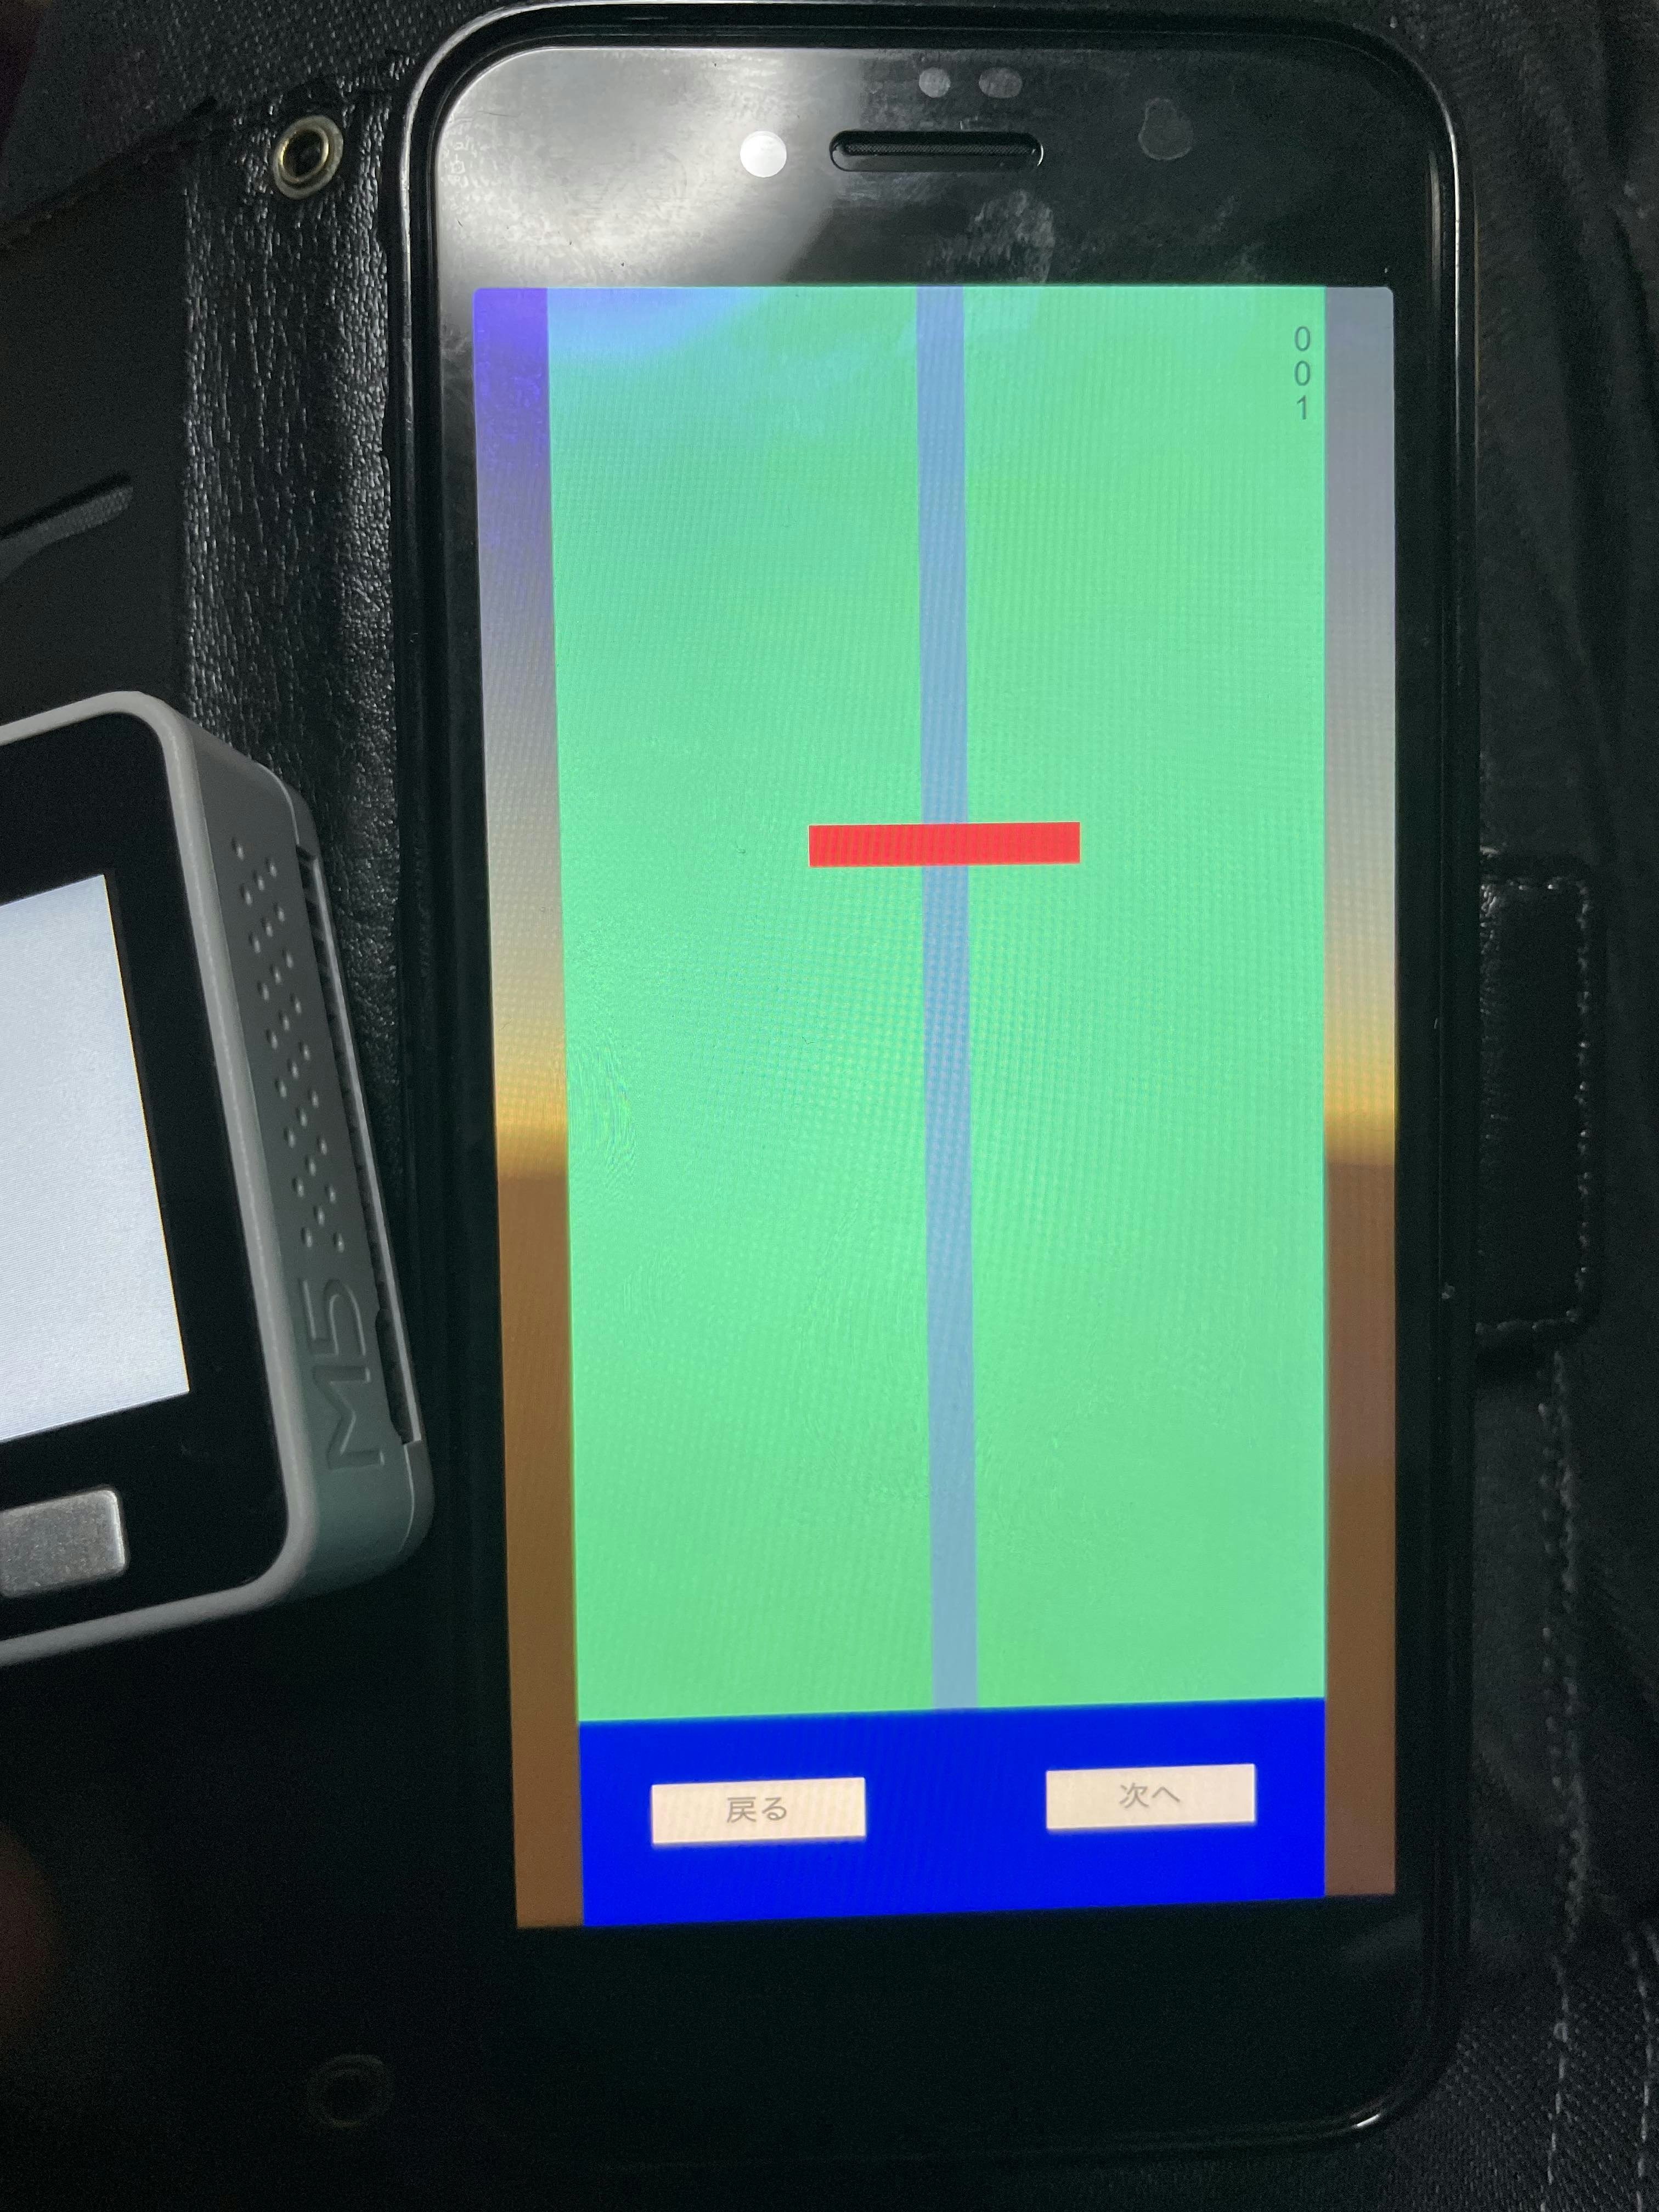
・Unity上で、プログラムの開始ボタンを押した後、cubeの色が赤色になれば、BLE通信の接続ができておりIMUの情報が表示されている状態となります。

xcode用コード生成
・Build setting の 「Build」します。問題なければ、「Build sucsessful」 が表示され
xcodeファイル「Unity -iPhone.xcodeproj」が生成されます。
xcode用Build設定
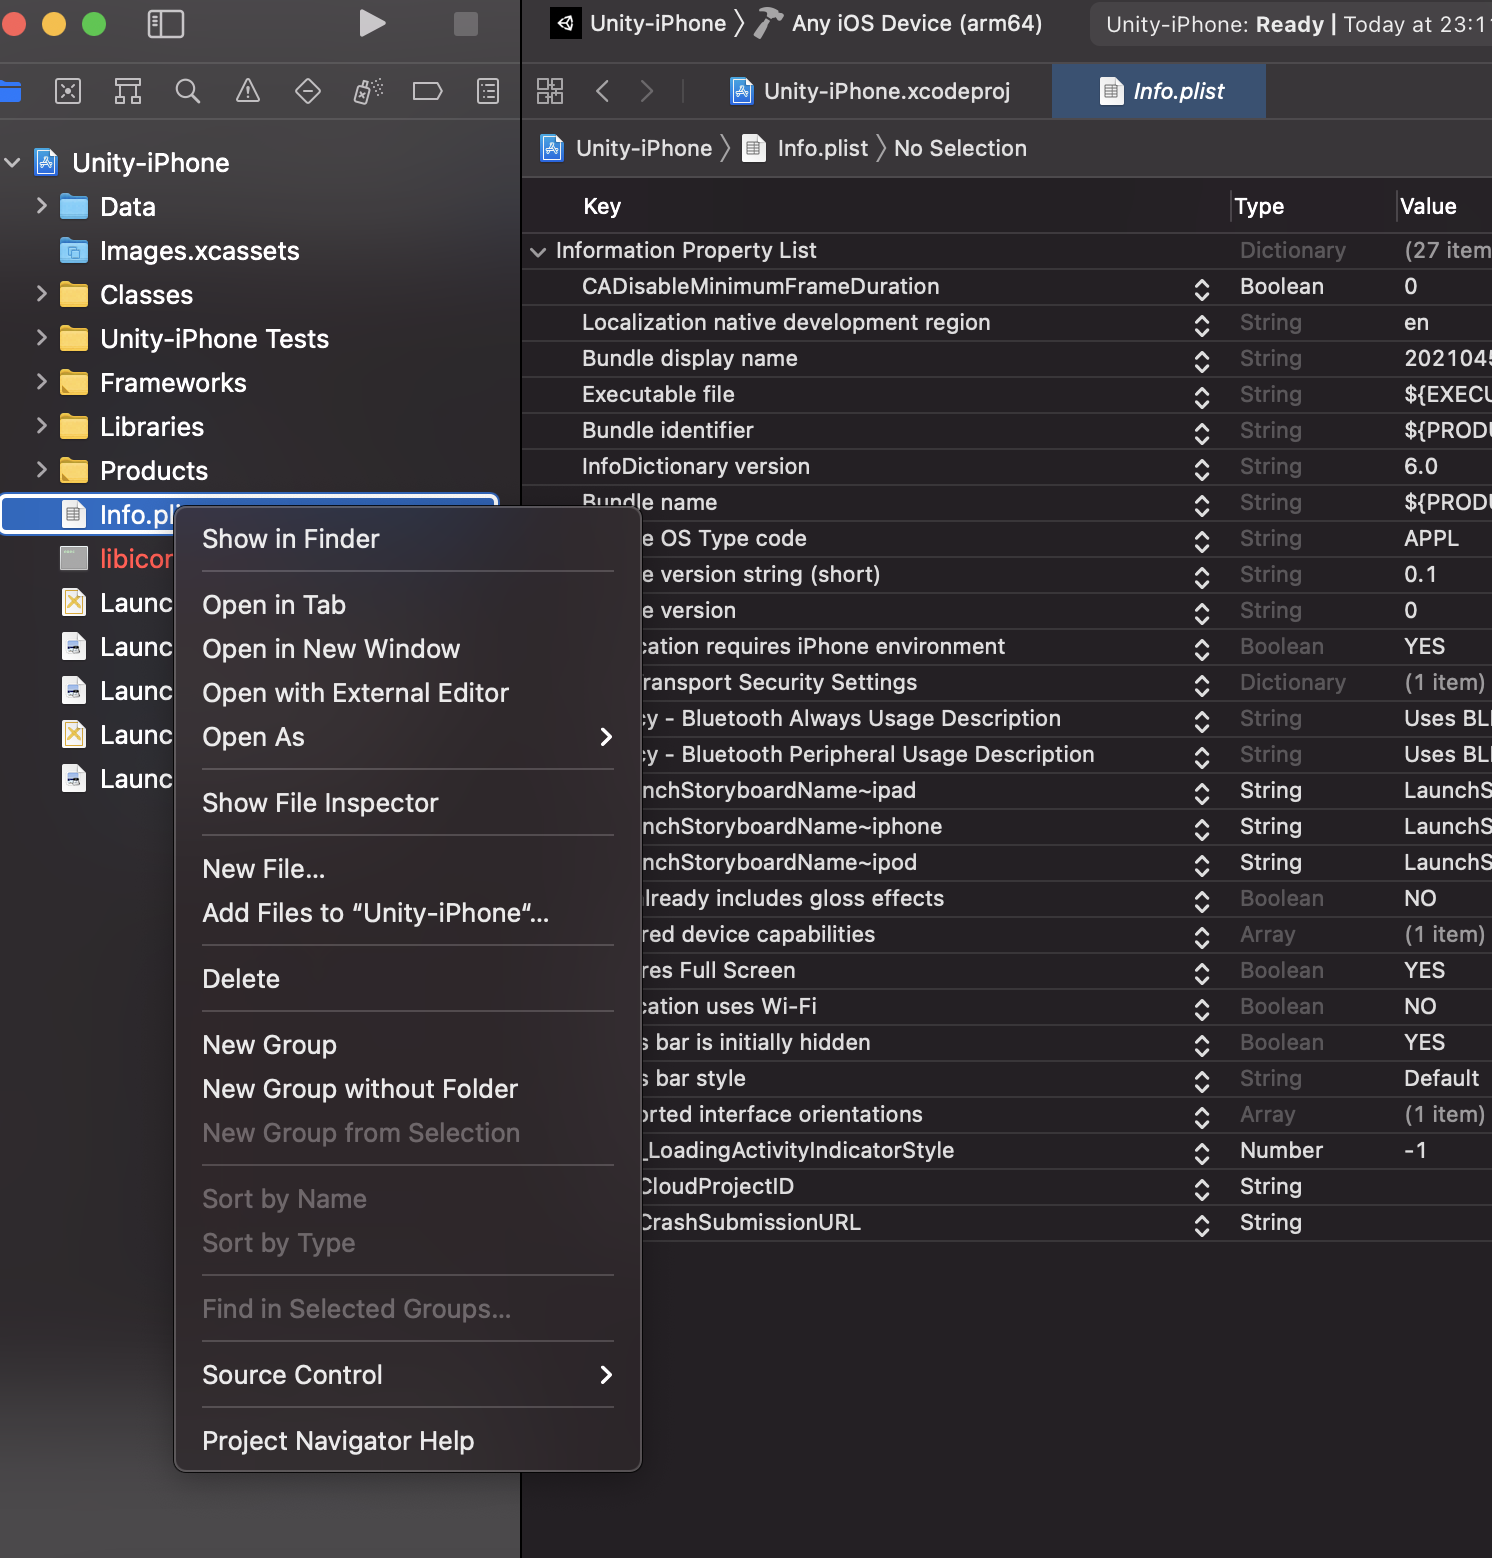
・生成された「Unity -iPhone.xcodeproj」を開きます。「Unity-iPhone」「Product」「info.plist」のcodeを右クリックして 「Open As」「Soruce Code」で開きます。
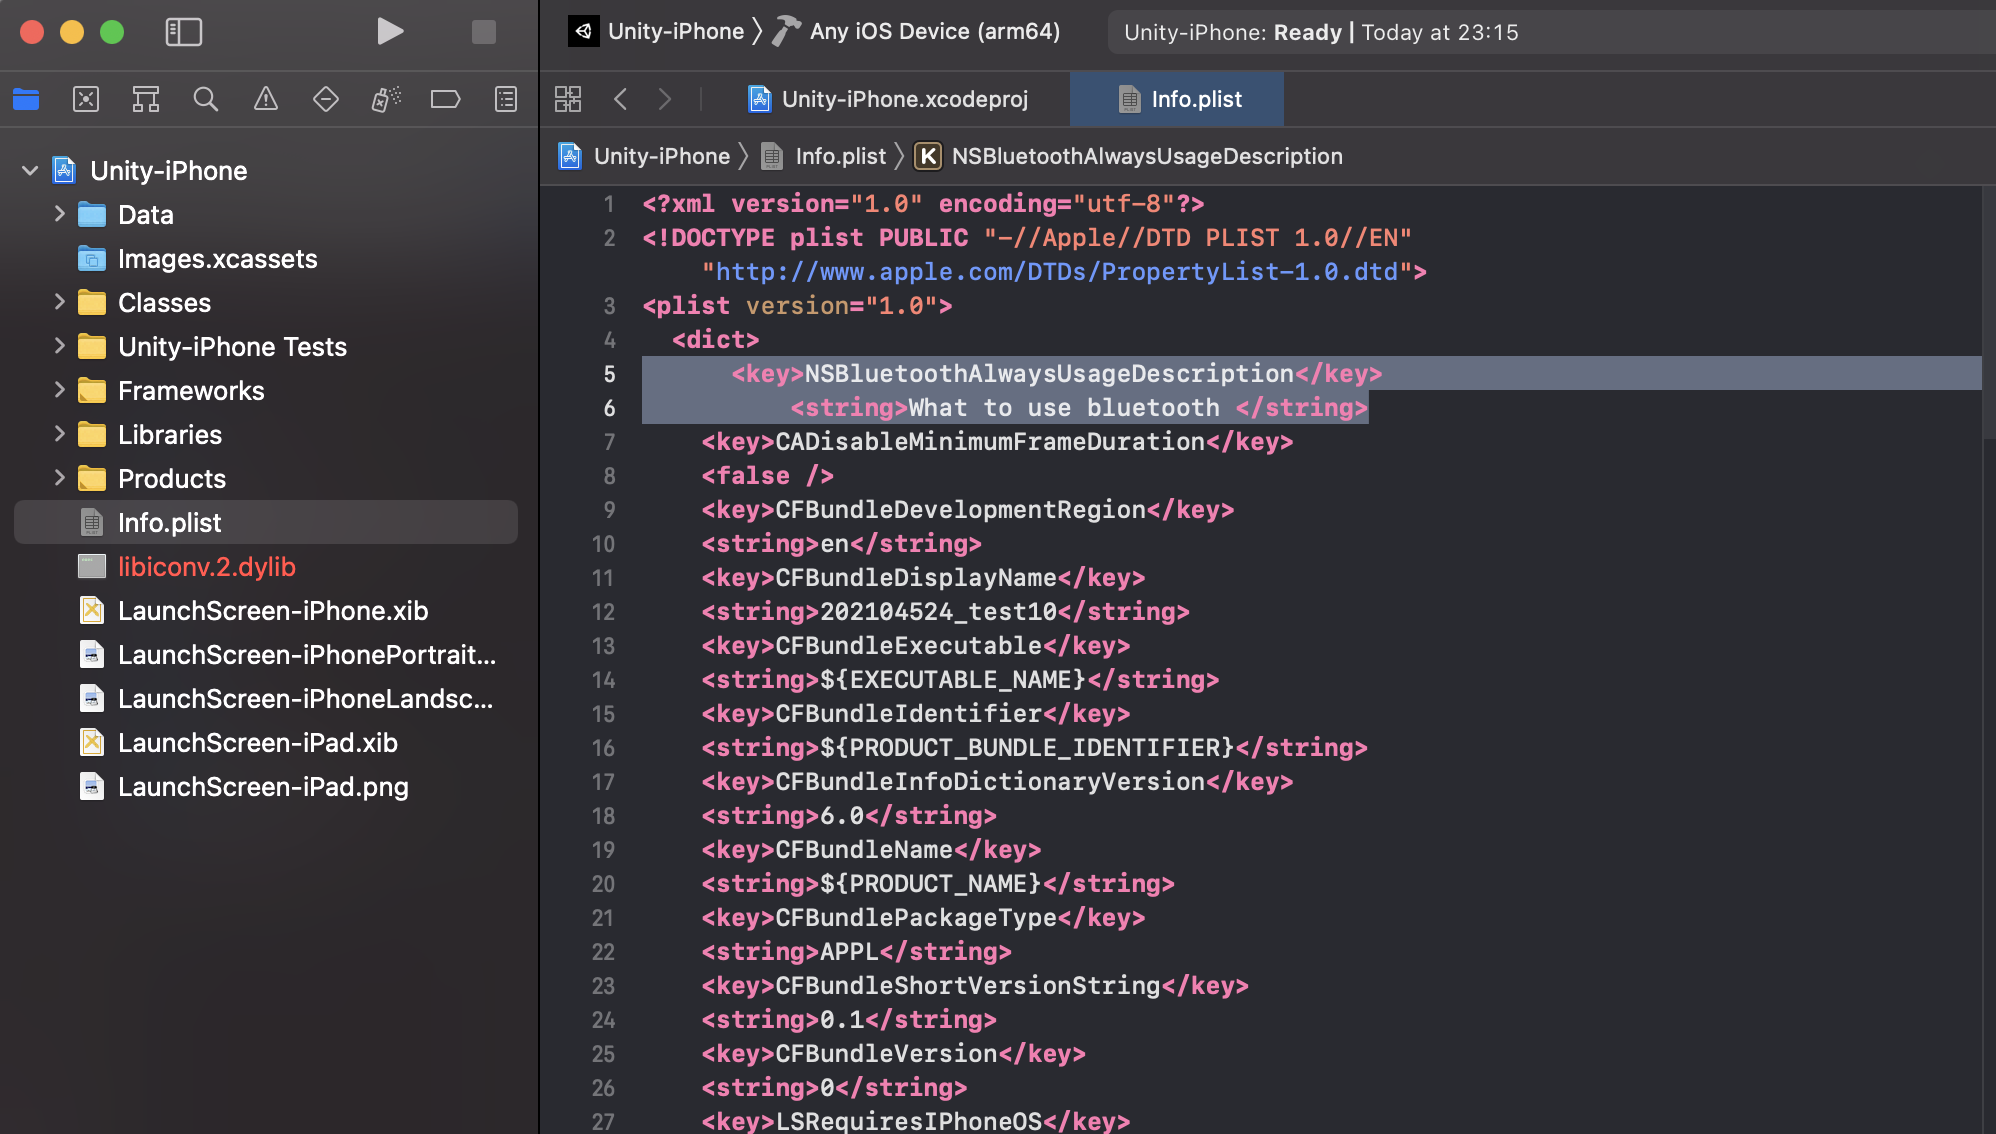
・App上で、Bluetoothを使う許可表示をするために、下記のcodeを<dict>に追加します。
<key> NSBluetoothAlwaysUsageDescription</key>
<string> What to use bluetooth </string>
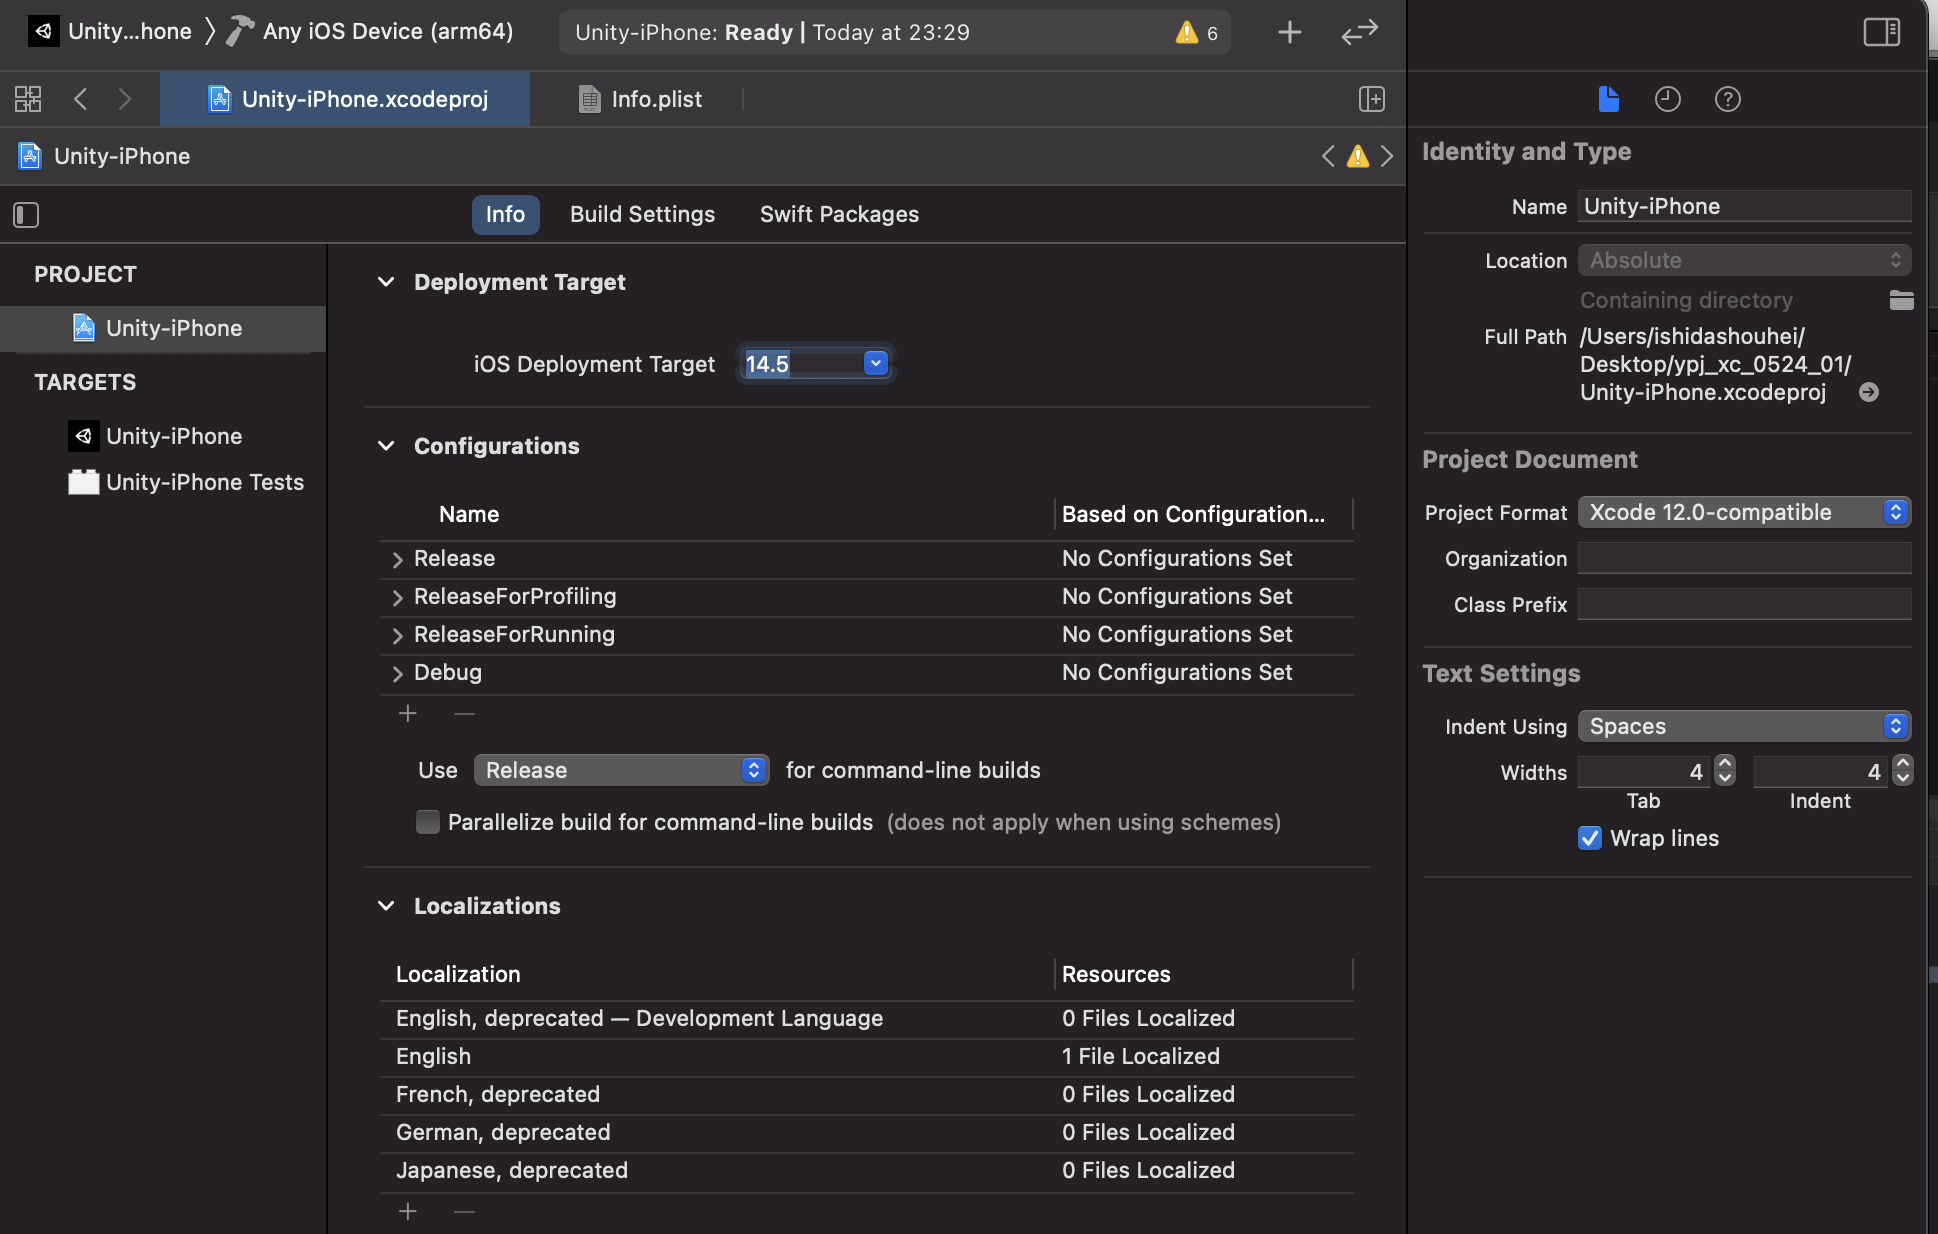
・「Unity-iPhone」をダブルクリックして「PROJECT」の「Unity-iPhone」「info」で
iOS Deployment Target を最新版に設定します。現在だと「14.5」
・「Identity and Type 」の 「Project format」 のxcodeを最新版に設定します。
xcode 12.0 - compatible
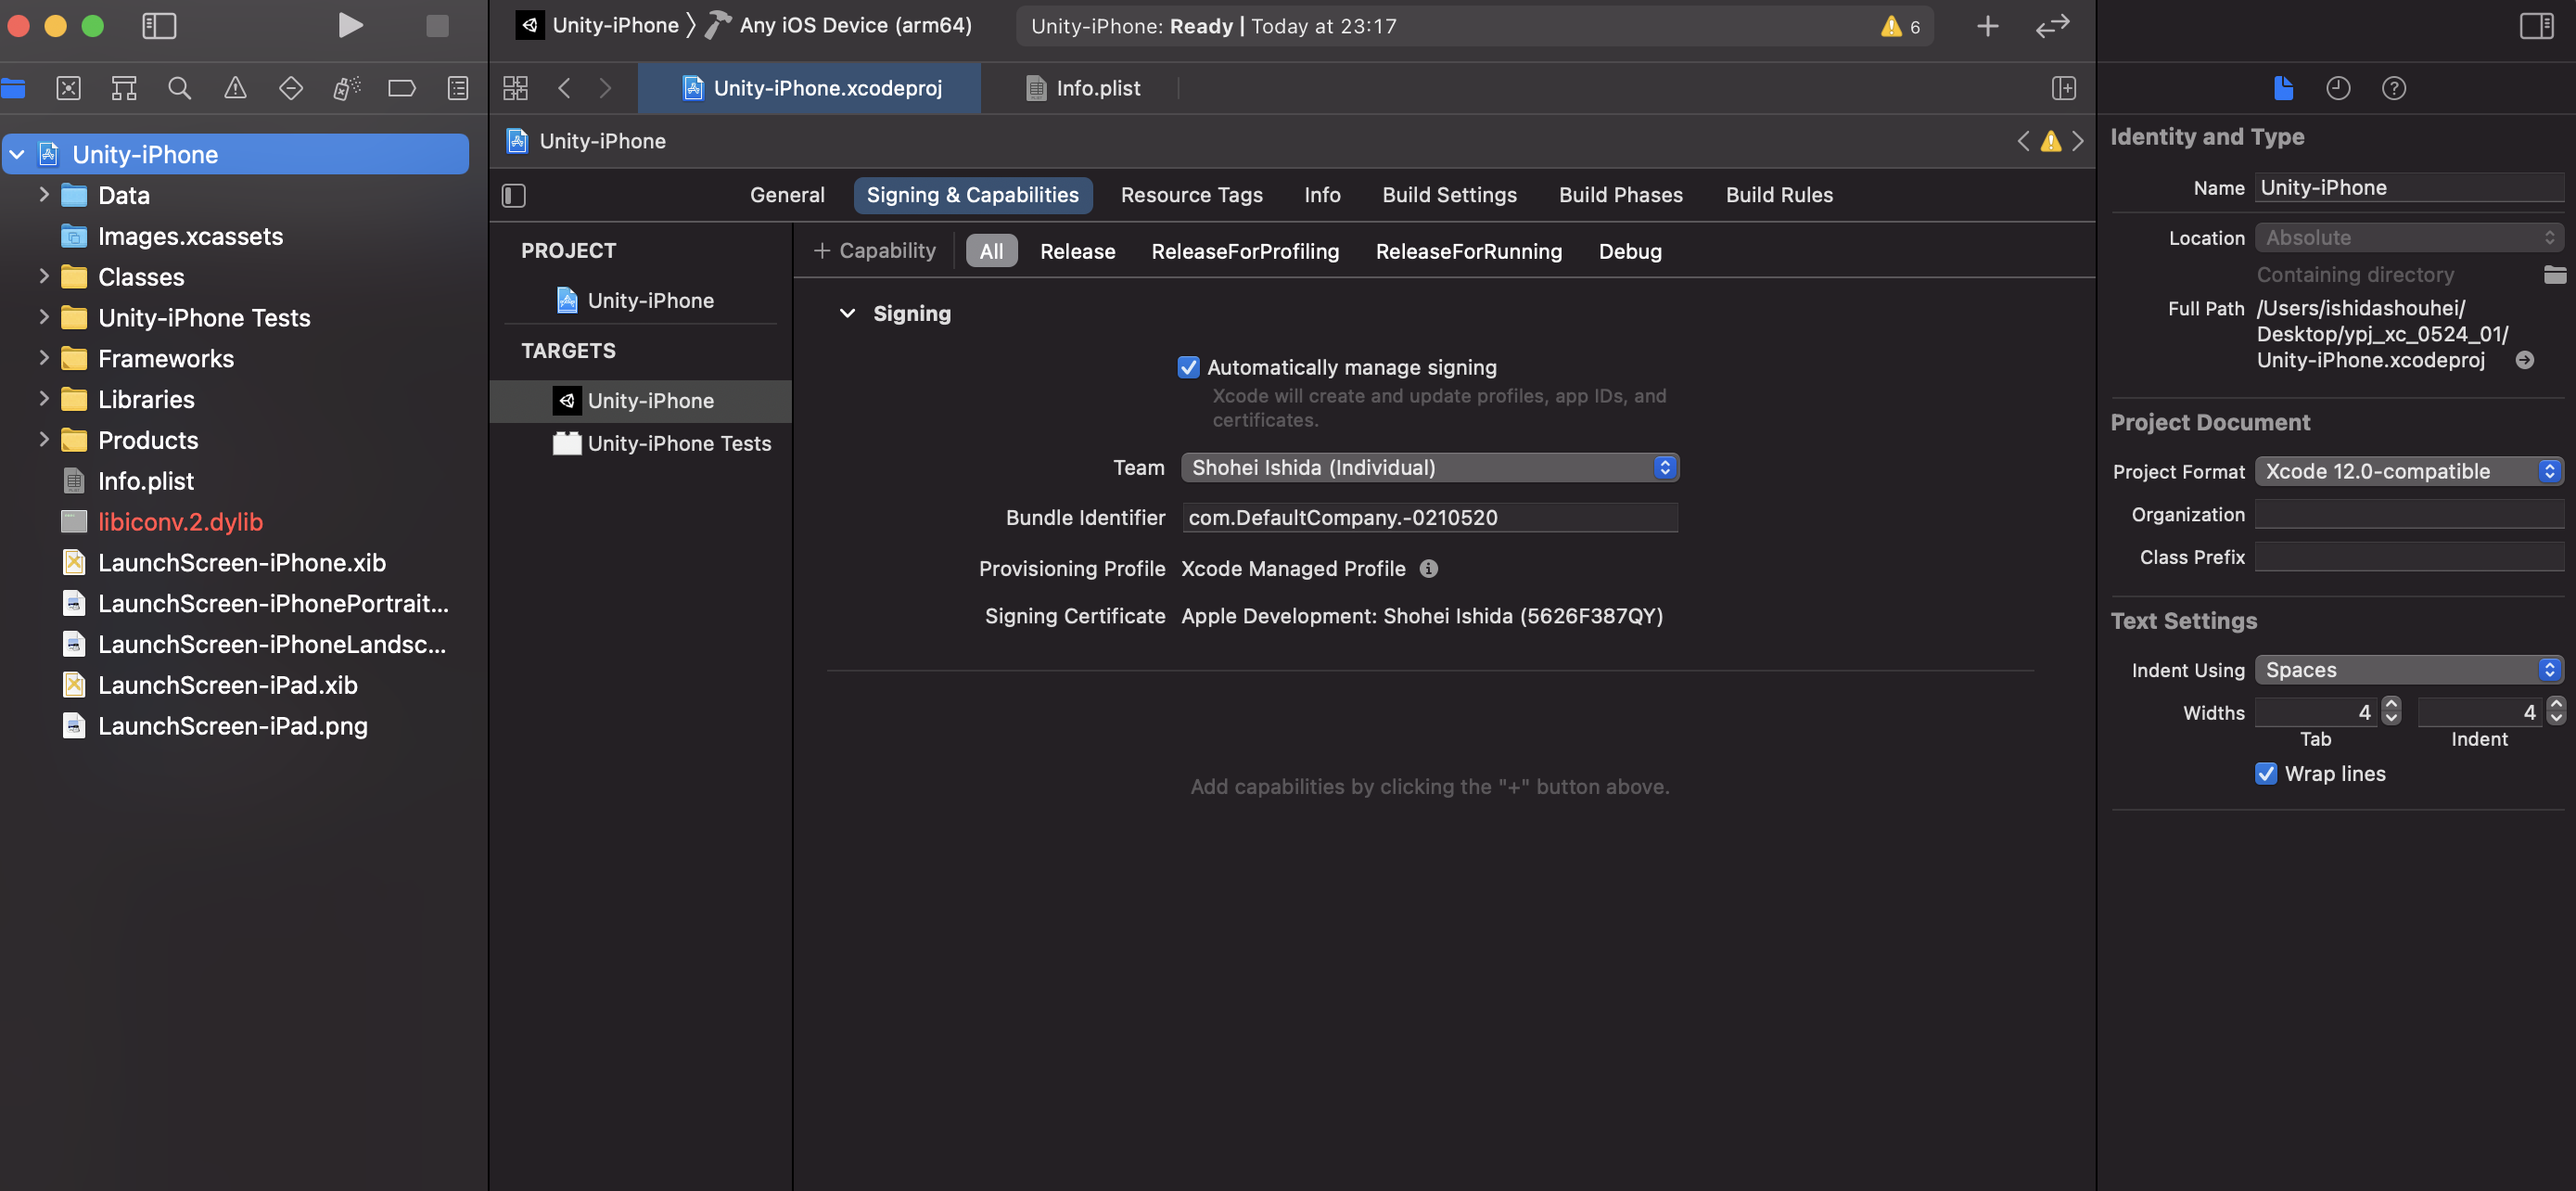
・「Unity-iPhone」をダブルクリックして
「TARGETS 」「Unity-iPhone」「Signing & Capabilities」を設定します。
「Automatically manage signing」をチェック
「Team」の選択で、Apple developperの登録したアカウントを選択します。
「 Bundle Identifier」 でエラー(既に使われている的な?)が出ていたら
登録名を変更します。
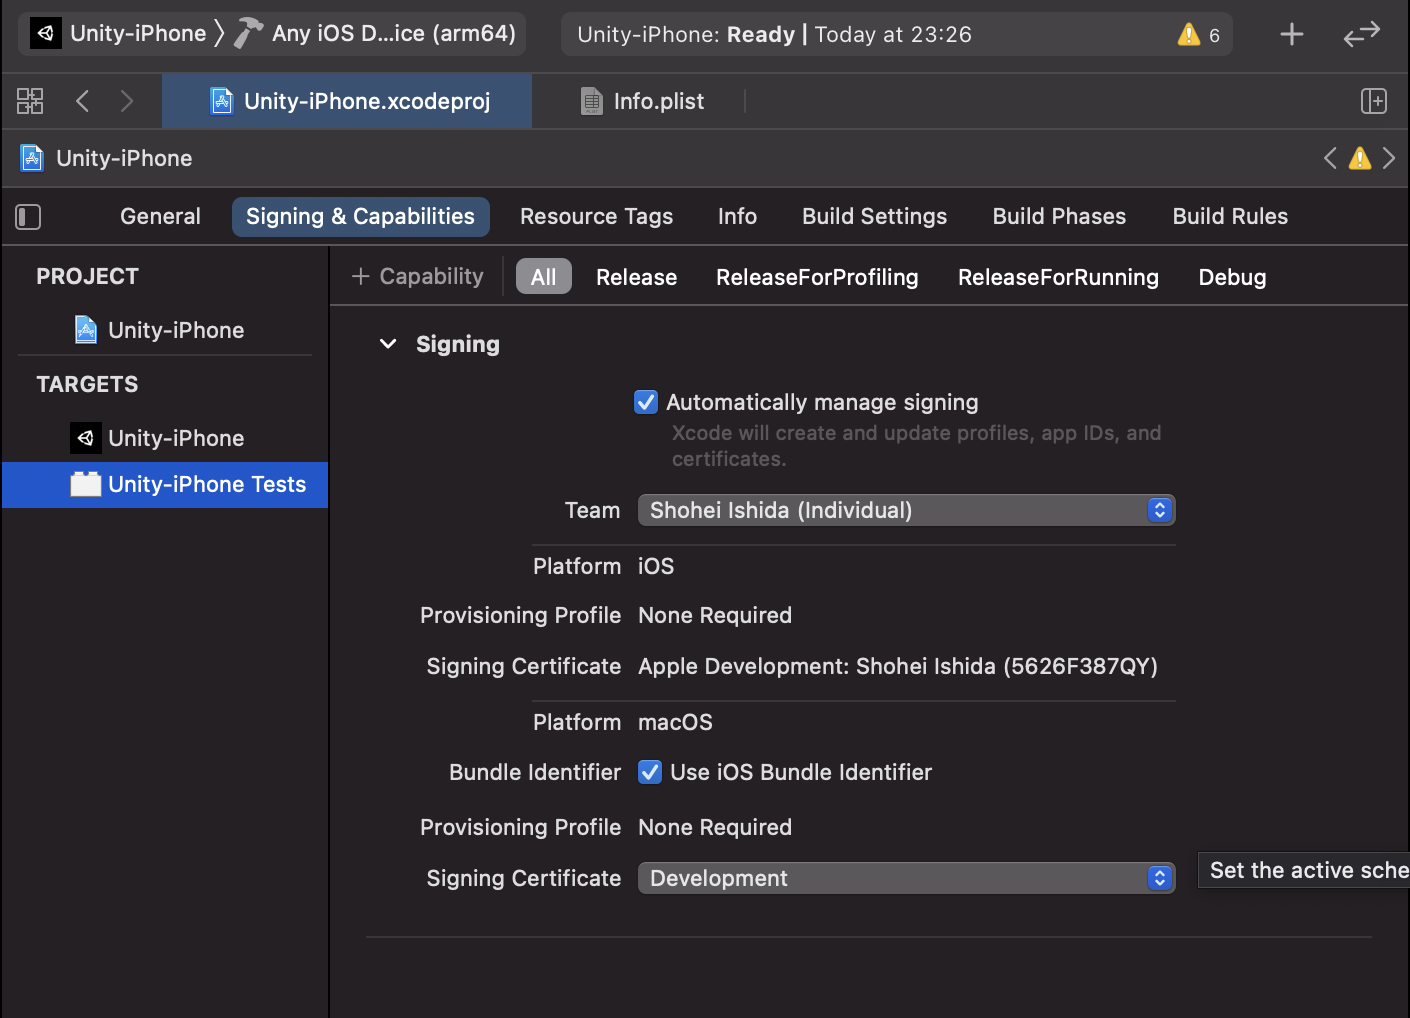
・「TARGETS 」「Unity-iPhone Tests」 でも同様に設定をいたします。
「Signing & Capabilities」を設定します。
・「Unity-iPhone」をダブルクリックして
「TARGETS 」「Unity-iPhone」「Signing & Capabilities」を設定します。
「Automatically manage signing」をチェック
「Team」の選択で、Apple developper 登録したアカウントを選択します。
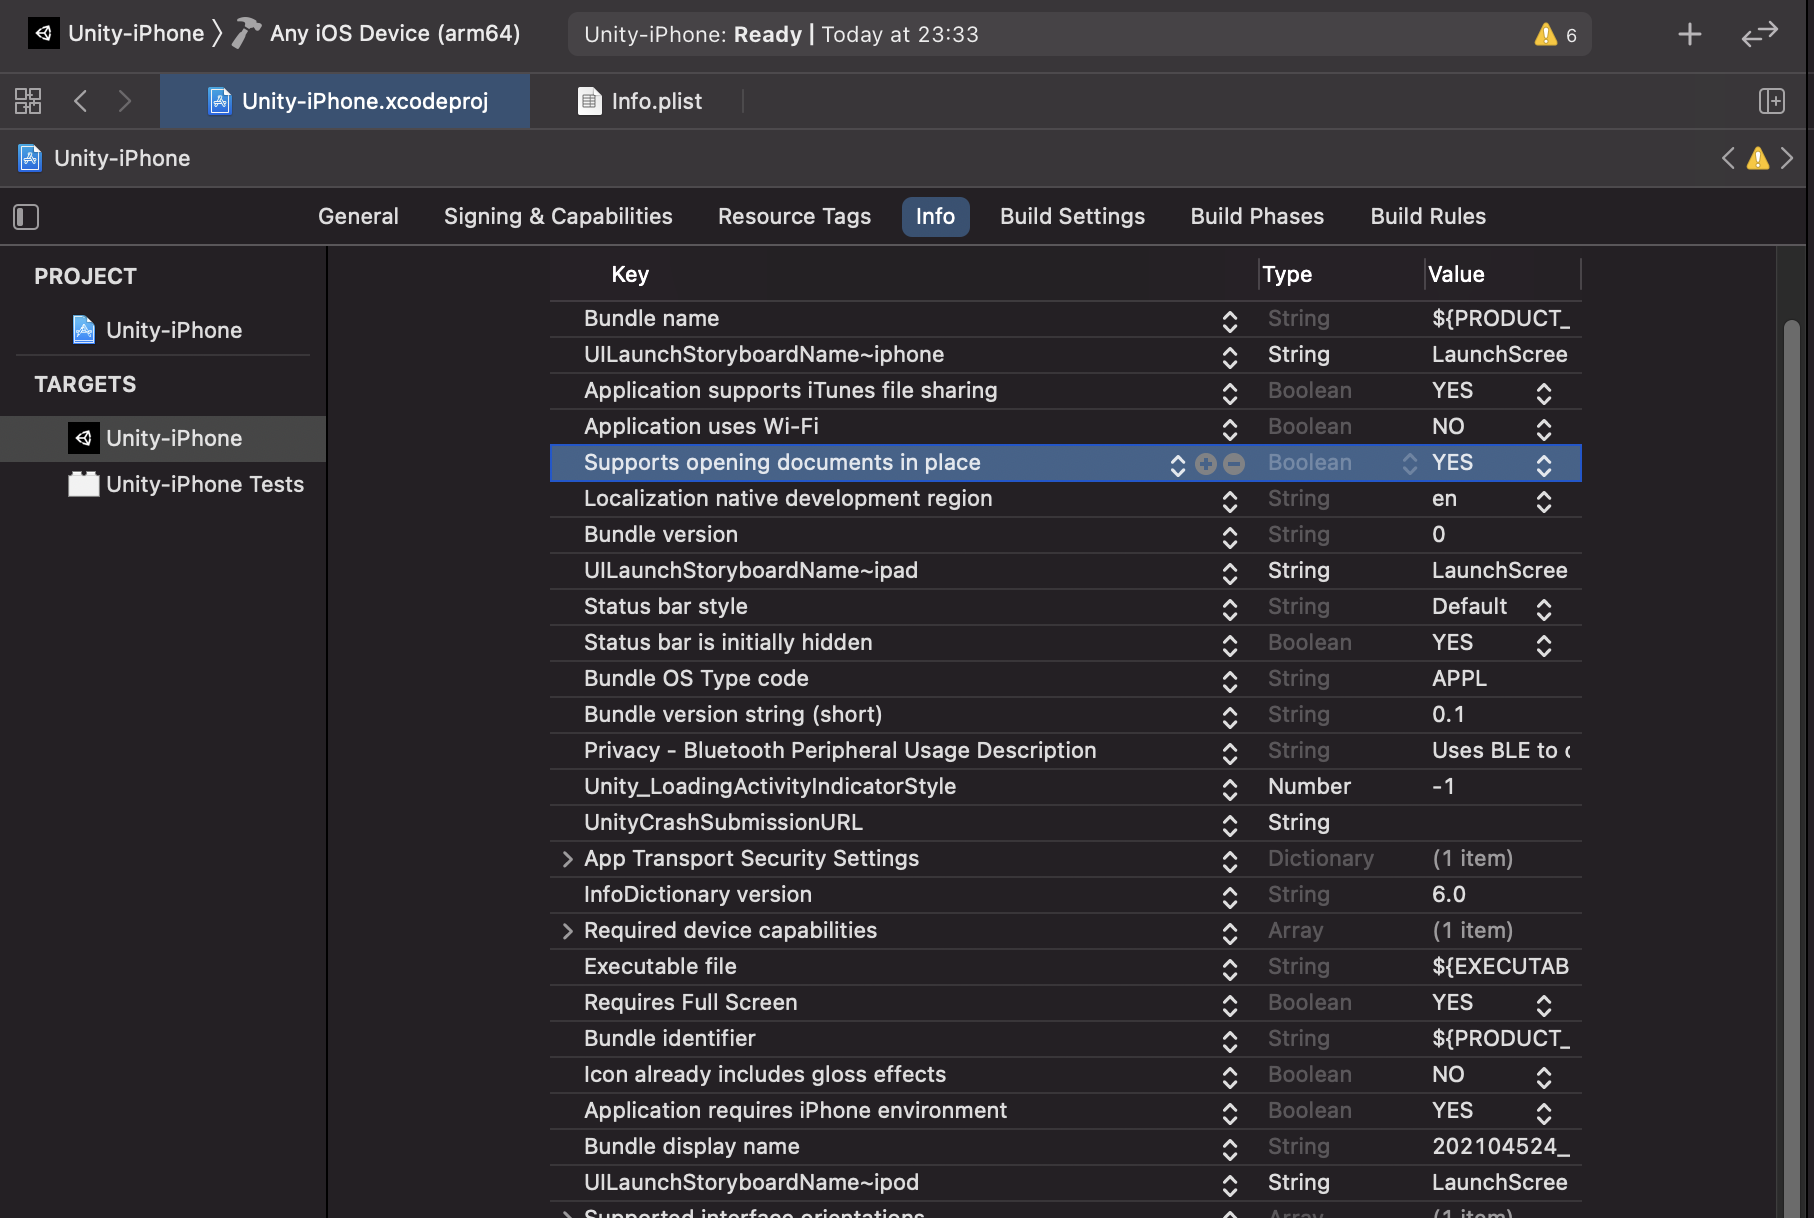
・もし csvファイル保存設定がある場合には
「TARGETS」「Unity-iPhone」「info」のKeyの欄で+を押して
「Application supports iTunes file Sharing」
「Supports opening documents in place」
を追加してYESに設定します。
iOSアプリ生成
・上記の設定が終わったら、Appを実装したいiPhoneとMacを接続して、「Any iOS Device」の欄をクリックして、自分のiPhoneを選択します。「▶️」を押して、Build します。成功したら、iPhone上で自動でAppが起動します。
・起動したら、Iphoneとの接続を一回切って、iphone側のAppも一度終了します。( なぜかいつも動かない )
・AppleDevelopperが無料の場合はiphone上で許可設定が必要です。
・AppleDevelopperが無料の場合は、iphone上で、「設定」「一般」「プロファイルとデバイス管理」で〇〇を信頼をクリックする。
・Appを立ち上げて、最初にBluetoothの許可がどうたらこうたら表示されるので「はい」で、Appが起動開始する。

Qiita, GitHubの初登録、初投稿なのでわかりにくい部分とかあるかと思いますがまた適宜更新します。