##概要
Elasticsearch運用をDockerに移行する為に、とりあえずは手元のMac環境でElasticsearchを立ててみる。ついでに、terraformで立てたEC2に、dockerhubに登録したイメージをデプロイする。
それぞれバラバラにしか触ったことなかった、docker,terraformをしっかり触って理解するのが目的。
##チェックポイント
まずは、やってみたレベルなのでここを目標にする
- elasticserch1.6のDockerイメージを作る
- ローカルで2台起動してクラスタ構成の確認
- ドキュメントの登録と両ノードで引けることを確認
- 作ったイメージをEC2にデプロイしてみる
##elasticserch1.6のDockerイメージを作る
- cloneとDockerFileの修正
テストなので、elasticsearch-headのプラグイン追加(Dockerfile)とクラスタ、ノード名の指定(config/elasticsearch.yml)だけしてみる
#まずは、dockerのライブラリをクローンしてくる(バージョン指定するので必要)
$ git clone https://github.com/docker-library/elasticsearch.git

#今回は1.6のファイルをいじる
[クローンディレクトリ]/elasticsearch/1.6
Dockerfile
#追加
RUN plugin install mobz/elasticsearch-head

#コピー先を ./configから変更
COPY config /usr/share/elasticsearch/config
config/elasticsearch.yml(新規に作成する)
##リッスンIP
network.host: 0.0.0.0

##クラスタ名
cluster.name: nagais-cluster

##ノード名
node.name: ${NODE_NAME}
- ビルドして新しいDockerイメージを生成
先程編集したファイルから、es16:latestとうDockerイメージを作る
#build開始
$ docker build -t es16:latest ../1.6

Sending build context to Docker daemon  7.68 kB
Step 1 : FROM java:8-jre
・
・
・
Successfully built b310f239f3b2

#イメージが無事出来ている事を確認
$ docker images |grep es16
es16                      latest              b310f239f3b2        45 minutes ago      347.9 MB
##ローカルで2台起動してクラスタ構成の確認
- dockerを2台起動
es0,es01というホストを起動する
#es0起動
$ docker run --name es0 -p9200:9200 -p 9300:9300 -e "NODE_NAME=es0" -d es16:latest

#es01起動
$ docker run --name es01 -p9201:9200 -p 9301:9300 -e "NODE_NAME=es01" -d es16:latest

#es起動確認

$ curl -XGET localhost:9200
{
  "status" : 200,
  "name" : "es0",
  "cluster_name" : "nagais-cluster",
  "version" : {
    "number" : "1.6.2",
    "build_hash" : "622039121e53e5f520b5ff8720fdbd3d0cb5326b",
    "build_timestamp" : "2015-07-29T09:24:47Z",
    "build_snapshot" : false,
    "lucene_version" : "4.10.4"
  },
  "tagline" : "You Know, for Search"
}
$ curl -XGET localhost:9201
{
  "status" : 200,
  "name" : "es01",
  "cluster_name" : "nagais-cluster",
  "version" : {
    "number" : "1.6.2",
    "build_hash" : "622039121e53e5f520b5ff8720fdbd3d0cb5326b",
    "build_timestamp" : "2015-07-29T09:24:47Z",
    "build_snapshot" : false,
    "lucene_version" : "4.10.4"
  },
  "tagline" : "You Know, for Search"
}
- headプラグインからクラスタ状態確認
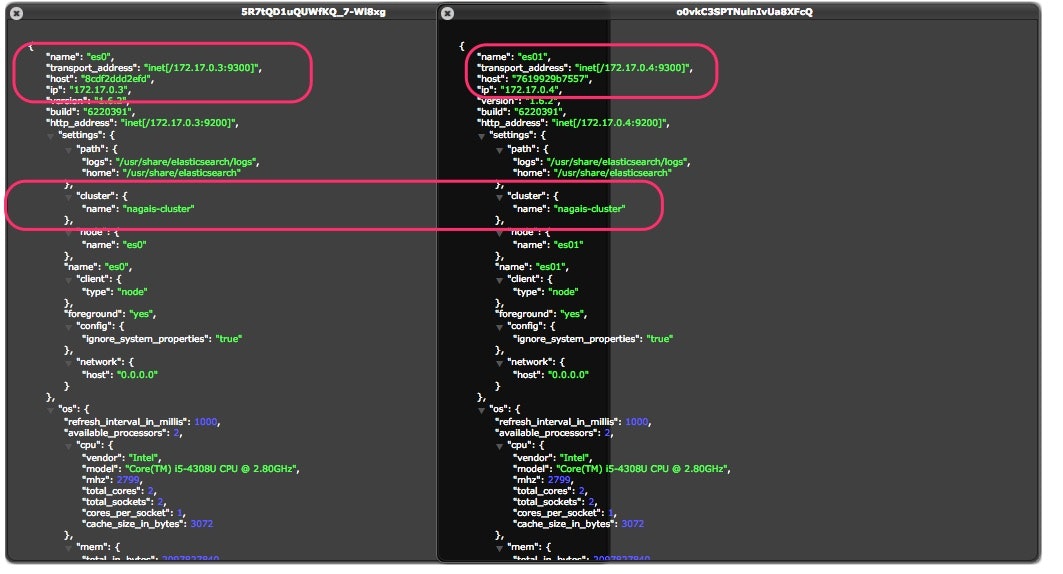
ClusterNodeInfoだと下記のように見える
##ドキュメントの登録と両ノードで引けることを確認
- ドキュメントを登録する
es0の方にドキュメントを登録してみる
$ curl -XPUT 'http://localhost:9200/docker/docker/1' -d '
{"id":1,
"name":"es0"
},'^C
- 両方のノードから登録したドキュメントが検索出来る事を確認
$ curl -XGET 'http://localhost:9200/docker/_search?pretty'

{
  "took" : 62,
  "timed_out" : false,
  "_shards" : {
    "total" : 5,
    "successful" : 5,
    "failed" : 0
  },
  "hits" : {
    "total" : 1,
    "max_score" : 1.0,
    "hits" : [ {
      "_index" : "docker",
      "_type" : "docker",
      "_id" : "1",
      "_score" : 1.0,
      "_source":
{ "id":1,
"name":"es0"
}
    } ]
  }
}
$ curl -XGET 'http://localhost:9201/docker/_search?pretty'
{
  "took" : 23,
  "timed_out" : false,
  "_shards" : {
    "total" : 5,
    "successful" : 5,
    "failed" : 0
  },
  "hits" : {
    "total" : 1,
    "max_score" : 1.0,
    "hits" : [ {
      "_index" : "docker",
      "_type" : "docker",
      "_id" : "1",
      "_score" : 1.0,
      "_source":
{ "id":1,
"name":"es0"
}
    } ]
  }
}
##作ったイメージをEC2にデプロイしてみる
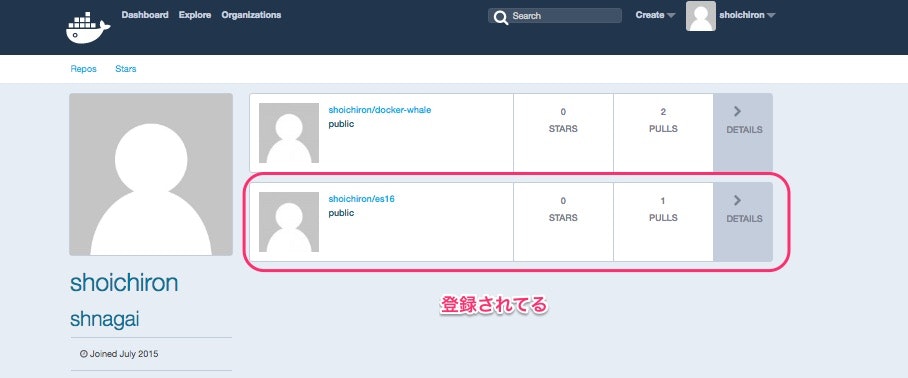
先程ローカルで動かしていたイメージを、dockerhubに登録して、EC2にデプロイして同じイメージを
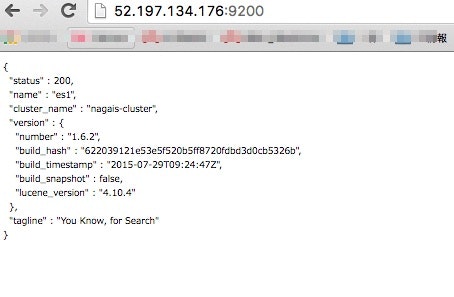
####EC2のインスタンスにログインせずに、外部からelasticsearchのstatus確認URLを突くことをとりあえずのゴールとする
###事前準備としてDockerhubにイメージを登録
#再ビルド
$ docker build -t shoichiron/es16:latest ../1.6

#リポジトリにpush
$ docker push shoichiron/es16
###VPC,セキュリティグループ,サブネット,routing等
下記のテンプレートファイルで、オフィスからのみ接続出来るvpcを事前に作っておく
resource "aws_instance" "es001-ecs" {
  ami = "ami-2b08f44a"
  instance_type = "t2.micro"
  key_name = "nagais_publickey"
  vpc_security_group_ids = ["sg-c76d40a3"]
  iam_instance_profile = "ecs"
  user_data = "${file("userdata-ecs.sh")}"
}

resource "aws_instance" "es002" {
  ami = "ami-374db956"
  instance_type = "t2.micro"
  key_name = "nagais_publickey"
  subnet_id = "${aws_subnet.elasticsearch-subnet.id}"
  vpc_security_group_ids = ["${aws_security_group.allow_ssh_es.id}"]
  associate_public_ip_address = "true"
  tags {
    Name = "es_docker_tst"
  }
}
MBP05-NAGAIS:nagais-terraform nagais$ cat vpc-ikyuvpc.tf
resource "aws_vpc" "ikyuvpc" {
  cidr_block = "10.0.0.0/16"
  tags {
    Name = "ikyuvpc"
  }
}

resource "aws_internet_gateway" "main-gw" {
  vpc_id = "${aws_vpc.ikyuvpc.id}"
  tags {
    Name = "internet-gw"
  }
}

resource "aws_route_table" "r" {
  vpc_id = "${aws_vpc.ikyuvpc.id}"
  route {
    cidr_block = "0.0.0.0/0"
    gateway_id = "${aws_internet_gateway.main-gw.id}"
  }

  tags {
    Name = "ikyuvpc-routing-table"
  }
}

resource "aws_subnet" "elasticsearch-subnet" {
  vpc_id = "${aws_vpc.ikyuvpc.id}"
  cidr_block = "10.0.1.0/24"
  tags {
    Name = "elasticsearch-subnet"
  }
}

resource "aws_security_group" "allow_ssh_es" {
  name = "allow_ssh_es"
  description = "Allow SSH And Elasticsearch inbound from office"
  vpc_id = "${aws_vpc.ikyuvpc.id}"
  ingress {
    from_port = 22
    to_port = 22
    protocol = "tcp"
    cidr_blocks = ["office ip"]
  }

  ingress {
    from_port = 9200
    to_port = 9200
    protocol = "tcp"
    cidr_blocks = ["office ip"]
  }

  egress {
      from_port = 0
      to_port = 0
      protocol = "-1"
      cidr_blocks = ["0.0.0.0/0"]
  }

  tags {
    Name = "allow_ssh_es_office"
  }
}

resource "aws_main_route_table_association" "a" {
  vpc_id = "${aws_vpc.ikyuvpc.id}"
  route_table_id = "${aws_route_table.r.id}"
}
###インスタンス作成
- 上で作ったsubnetにマッピングする形で作成
- publicipを付与
AMIは通常の、AmazonLinuxを利用
resource "aws_instance" "es002" {
  ami = "ami-374db956"
  instance_type = "t2.micro"
  key_name = "nagais_publickey"
  subnet_id = "${aws_subnet.elasticsearch-subnet.id}"
  vpc_security_group_ids = ["${aws_security_group.allow_ssh_es.id}"]
  associate_public_ip_address = "true"
  tags {
    Name = "es_docker_tst"
  }
}
###sshログインして、dockerインストールとコンテナ起動する
$ ssh -i [登録した公開鍵に対応するsshのキー] ec2-user@[publicip]

$ sudo yum install -y docker

$ sudo service docker start

$ sudo docker --version
Docker version 1.11.2, build b9f10c9/1.11.2

#dockerイメージデプロイ
$ sudo docker run --name es1 -p9201:9200 -p 9301:9300 -e "NODE_NAME=es1" -d shoichiron/es16:latest

$ sudo docker ps
CONTAINER ID        IMAGE                    COMMAND                  CREATED             STATUS              PORTS                                            NAMES
a4284a927a60        shoichiron/es16:latest   "/docker-entrypoint.s"   31 seconds ago      Up 30 seconds       0.0.0.0:9200->9200/tcp, 0.0.0.0:9300->9300/tcp   es1

#ローカルでESにアクセス
$ curl -XGET localhost:9200
{
  "status" : 200,
  "name" : "es1",
  "cluster_name" : "nagais-cluster",
  "version" : {
    "number" : "1.6.2",
    "build_hash" : "622039121e53e5f520b5ff8720fdbd3d0cb5326b",
    "build_timestamp" : "2015-07-29T09:24:47Z",
    "build_snapshot" : false,
    "lucene_version" : "4.10.4"
  },
  "tagline" : "You Know, for Search"
}
###オフィスからESにアクセス
オフィスからもひとまず接続出来たので一通りの検証完了!!
次は、Amazon ECSを触ってみよう
##所感
- terraformはやはり便利。AWSのコンソールからだとその場はいいけど、後からこれどうしてたかなとかの確認がもはや運用出来ないレベル
- dockerはまだ触りしか触ってないけど、dockerhubというエコシステムがあるので、いい感じに出来そう
- dockerでの課題となる、データの部分とかセキュリティの部分は今度触って確かめる
- ただ、複数台だと運用辛そうなのでECSにかなり期待!!
##参考
http://yukofeb.hatenablog.com/entry/2016/03/26/120732
https://www.terraform.io/docs/providers/aws/r/ecs_task_definition.html


