経緯
ios12はiPad系のアップデートが多いという噂もあり、今後アプリをiPadや他の端末などに対応するという機会も増えてくるのではないかと思っています。
その際にSize Classesを使用する機会も増えるのかなと思いますが、
設定が非常に難しいと感じています。
Interface Builder(IB)を使用する場合、
Size Classesは部分的にサイズや制約を付け替えると、どこに何を設定したのかがわからなくなることが多々あります。
また、特定のサイズにのみ適用するために「Vary for Traits」を押し忘れ、元々の制約を意図せずに変更してしまうなどもよくやらかしてしまいます。
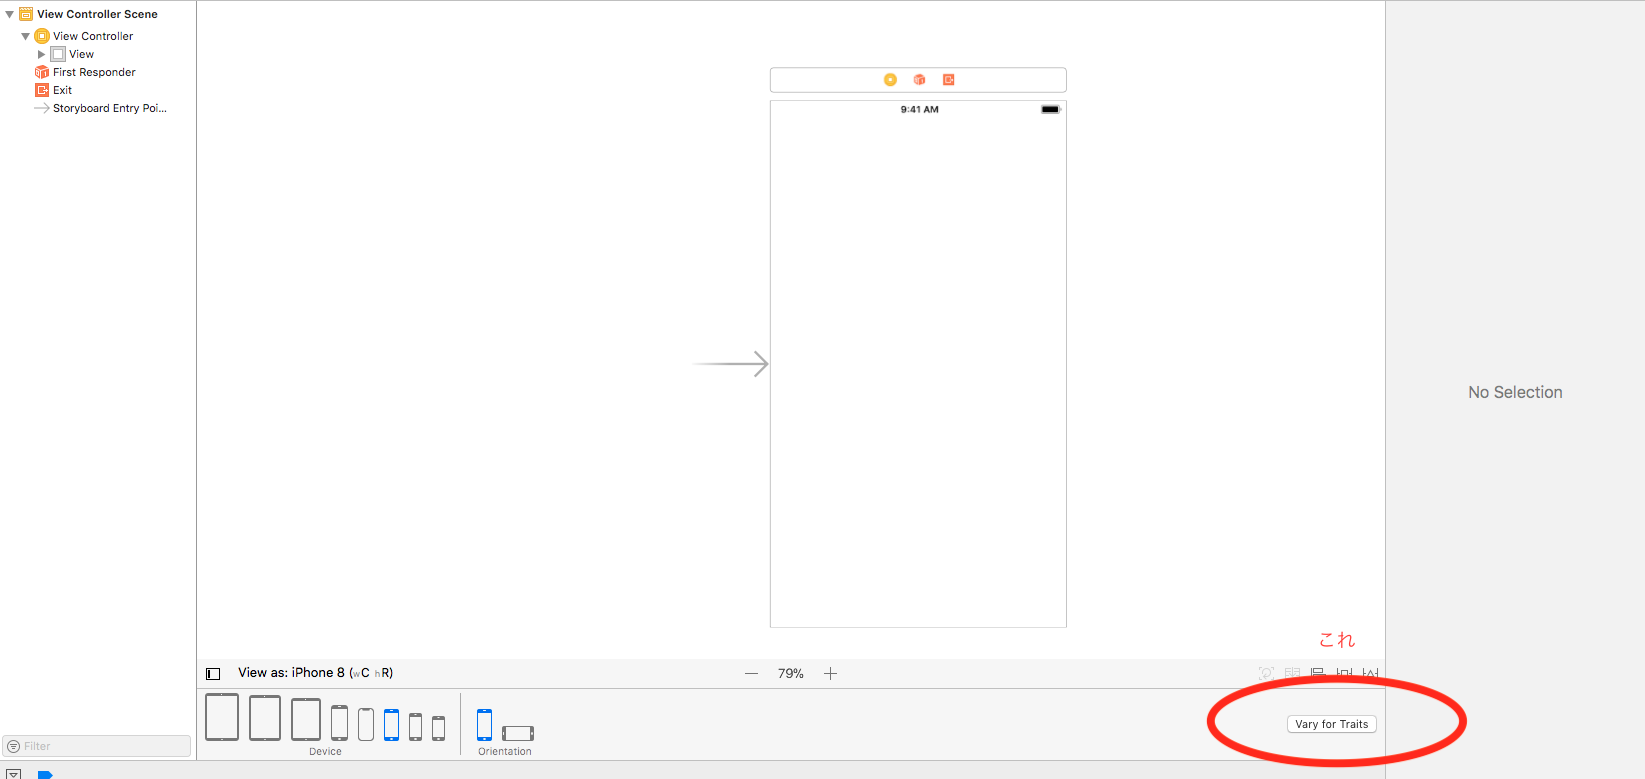
※何か良い方法ご存知の方いらっしゃいましたら教えていただけたら嬉しいです![]()
今までSize Classesを使う機会が少なく使う場合もIBを使用していたため、
コードで書く経験はなかったのですが、
印象として場合分けが増え、それはそれで煩わしくなってしまうのではないかと思っていました。
ただ、何か良い方法はないかと調べてみたところ、
protcolを使用してUITraitCollectionを管理する方法を見つけ、
試してみたので学んだことの記録を残します。
こちらを活用しています。
https://possiblemobile.com/2016/08/reimagining-uitraitcollection-with-briggs/
概要
やっていることはかなりシンプルでメインの登場メソッドは1つ
override func traitCollectionDidChange(_ previousTraitCollection: UITraitCollection?)
このメソッドを活用して
UITraitCollectionの変化を伝播させ、それに合わせてビューを変更する
といういわゆるリアクティブプログラミングで用いられているような手法です。
定義と仕組み
いくつかのprotocolとstructを定義します。
protocol AdaptiveElement {

    var traitCollection: UITraitCollection { get }

    func update(for incomingTraitCollection: UITraitCollection)
}
これが基本要素を表し、変数のtraitCollectionはupdateを適用する条件です。
UITraitCollectionは
func containsTraits(in trait: UITraitCollection?) -> Bool
https://developer.apple.com/documentation/uikit/uitraitcollection/1623506-containstraits
というメソッドがあり、変化したUITraitCollectionが変数traitCollectionに合致した際にビューを変更します。
この変化を色々なものに適用するために下記のようなstructを定義します。
struct AdaptiveConstraintContainer: AdaptiveElement {

    let traitCollection: UITraitCollection
    let constraints: [NSLayoutConstraint]

    func update(for incomingTraitCollection: UITraitCollection) {
        if incomingTraitCollection.containsTraits(in: traitCollection) {
            NSLayoutConstraint.activate(constraints)
        } else {
            NSLayoutConstraint.deactivate(constraints)
        }
    }
}
これはUITraitCollectionが変化した場合に制約を変更するためのstructです。
変数traitCollectionの条件に合致した場合は制約をactivateし、それ以外はdeactivateします。
これ以外にもviewを追加、削除を行うための、AdaptiveViewControllerや何かを実装するAdaptiveBehaviorなども用意します。
struct AdaptiveViewContainer: AdaptiveElement {

    let traitCollection: UITraitCollection
    unowned let parent: UIView
    let child: UIView

    func update(for incomingTraitCollection: UITraitCollection) {
        if incomingTraitCollection.containsTraits(in: traitCollection) {
            if child.superview != parent {
                parent.addSubview(child)
            }
        } else {
            if child.superview != nil {
                child.removeFromSuperview()
            }
        }
    }
}
struct AdaptiveBehavior: AdaptiveElement {

    typealias Behavior = () -> Void

    let traitCollection: UITraitCollection
    let behavior: Behavior
    let counterBehavior: Behavior?

    func update(for incomingTraitCollection: UITraitCollection) {
        if incomingTraitCollection.containsTraits(in: traitCollection) {
            behavior()
        } else {
            counterBehavior?()
        }
    }
}
上記の要素へUITraitCollectionの変化を伝播させる役割をprotocolで定義します。
protocol AdaptiveInterface: class, AdaptiveElement {
    var adaptiveElements: [AdaptiveElement] { get set }
}
シンプルにAdaptiveElementを保持します。
また、自身もAdaptiveElementであるためupdateメソッドを定義します。
extension AdaptiveInterface {

    func update(for incomingTraitCollection: UITraitCollection) {
        adaptiveElements.filter { incomingTraitCollection.containsTraits(in: $0.traitCollection) == false }.forEach { $0.update(for: incomingTraitCollection) }
        adaptiveElements.filter { incomingTraitCollection.containsTraits(in: $0.traitCollection) == true }.forEach { $0.update(for: incomingTraitCollection) }
    }
}
このようにデフォルト実装を定義しておき、各Elementへ変化を伝播されます。
AdaptiveInterfaceを適用したクラスの中で最初に提示したメソッドの中でupdateメソッドを呼び出します。
override func traitCollectionDidChange(_ previousTraitCollection: UITraitCollection?) {
    super.traitCollectionDidChange(previousTraitCollection)
    update(for: traitCollection)
}
基本的な仕組みとしては以上です。
これに加えて、よりコードを簡略にするための要素を用意します。
protocol AdaptiveAttribute {
    func generateTraitCollection() -> UITraitCollection
}
これはUITraitCollectionの各要素を表すためのprotocolで、
enum SizeClass: AdaptiveAttribute {

    case horizontalCompact
    case horizontalRegular
    case verticalCompact
    case verticalRegular

    func generateTraitCollection() -> UITraitCollection {
        switch self {
        case .horizontalCompact: return UITraitCollection(horizontalSizeClass: .compact)
        case .horizontalRegular: return UITraitCollection(horizontalSizeClass: .regular)
        case .verticalCompact: return UITraitCollection(verticalSizeClass: .compact)
        case .verticalRegular: return UITraitCollection(verticalSizeClass: .regular)
        }
    }
}
enum Idiom: AdaptiveAttribute {

    case phone
    case pad
    case tv
    case carPlay

    func generateTraitCollection() -> UITraitCollection {
        switch self {
        case .phone: return UITraitCollection(userInterfaceIdiom: .phone)
        case .pad: return UITraitCollection(userInterfaceIdiom: .pad)
        case .tv: return UITraitCollection(userInterfaceIdiom: .tv)
        case .carPlay: return UITraitCollection(userInterfaceIdiom: .carPlay)
        }
    }
}
のようなenumを定義し、UITraitCollectionへ変換方法を定義します。
この各要素を一つのUITraitCollectionにまとめるために、Extensionを定義します。
extension UITraitCollection {
    static func create(with attributes: [AdaptiveAttribute]) -> UITraitCollection {
        let traitCollections = attributes.map { $0.generateTraitCollection() }
        return self.init(traitsFrom: traitCollections)
    }
}
また、AdaptiveAttributeがUITraitCollectionの条件に合うかの判定をするためのメソッドも用意します。
extension UITraitCollection {
    func contains(_ attribute: AdaptiveAttribute) -> Bool {
        return containsTraits(in: attribute.generateTraitCollection())
    }
}
AdaptiveInterfaceにAdaptiveElementを追加するためのメソッドも追加します。
extension AdaptiveInterface {

    func addBehavior(for traitCollection: UITraitCollection, behavior: @escaping AdaptiveBehavior.Behavior, counterBehavior: AdaptiveBehavior.Behavior? = nil) {
        let adaptiveBehavior = AdaptiveBehavior(traitCollection: traitCollection, behavior: behavior, counterBehavior: counterBehavior)

        adaptiveElements.append(adaptiveBehavior)
    }

    func addBehavior(for attributes: [AdaptiveAttribute], behavior: @escaping AdaptiveBehavior.Behavior, counterBehavior: AdaptiveBehavior.Behavior? = nil) {
        let traitCollection = UITraitCollection.create(with: attributes)
        addBehavior(for: traitCollection, behavior: behavior, counterBehavior: counterBehavior)
    }

    func addBehavior(for attribute: AdaptiveAttribute, behavior: @escaping AdaptiveBehavior.Behavior, counterBehavior: AdaptiveBehavior.Behavior? = nil) {
        let traitCollection = UITraitCollection.create(with: [attribute])
        addBehavior(for: traitCollection, behavior: behavior, counterBehavior: counterBehavior)
    }

    func addConstraints(for traitCollection: UITraitCollection, constraints: [NSLayoutConstraint]) {
        let container = AdaptiveConstraintContainer(traitCollection: traitCollection, constraints: constraints)

        adaptiveElements.append(container)
    }

    func addConstraints(for attributes: [AdaptiveAttribute], constraints: NSLayoutConstraint...) {
        let traitCollection = UITraitCollection.create(with: attributes)
        addConstraints(for: traitCollection, constraints: constraints)
    }

    func addConstraints(for attributes: [AdaptiveAttribute], constraints: [NSLayoutConstraint]) {
        let traitCollection = UITraitCollection.create(with: attributes)
        addConstraints(for: traitCollection, constraints: constraints)
    }

    func addConstraints(for attribute: AdaptiveAttribute, constraints: NSLayoutConstraint...) {
        let traitCollection = UITraitCollection.create(with: [attribute])
        addConstraints(for: traitCollection, constraints: constraints)
    }


    // 以下はNSLayoutConstraintをKeyPathで指定できるようにしたメソッド用のメソッド
    // 最後に余談で記載します。
    func addView(for traitCollection: UITraitCollection, view: UIView, parent: UIView, constraints: [Constraint]) {

        parent.addSubview(view)

        let viewContainer = AdaptiveViewContainer(traitCollection: traitCollection, parent: parent, child: view)
        adaptiveElements.append(viewContainer)

        let constructedConstraints = constraints.map { $0(view, parent) }

        if constructedConstraints.isEmpty == false {
            let constraintContainer = AdaptiveConstraintContainer(traitCollection: traitCollection, constraints: constructedConstraints)
            adaptiveElements.append(constraintContainer)
        }
    }

    func addView(for attributes: [AdaptiveAttribute], view: UIView, parent: UIView, constraints: [Constraint] = []) {
        let traitCollection = UITraitCollection.create(with: attributes)
        addView(for: traitCollection, view: view, parent: parent, constraints: constraints)
    }

    func addView(for attribute: AdaptiveAttribute, view: UIView, parent: UIView, constraints: [Constraint] = []) {
        let traitCollection = UITraitCollection.create(with: [attribute])
        addView(for: traitCollection, view: view, parent: parent, constraints: constraints)
    }
}
以上で定義は完了です。
サンプル
サンプルを作成してみました。
https://github.com/stzn/NekoJealousy
※サンプルあくまでiPhoneでの設定を想定しています。条件を色々変えることでiPadへの対応もできます。
最初の画面では、
横画面の時に中央の画像を出さないようにする
縦画面の時にボタンの色を青にする。それ以外は赤色にする
遷移後の画面では
横画面の時にstackViewを.horizontalにする
ということをやっています。
// SizeClassが.horizontalCompact、.verticalCompactの場合に中央の画像を非表示にする
addConstraints(
    for: [SizeClass.horizontalCompact, SizeClass.verticalCompact],
    constraints: equal(\.heightAnchor, constant: 0)(imageView, stackView))
// SizeClassが.verticalRegularの場合にボタンの色を青にする。それ以外は赤色にする
addBehavior(for: [SizeClass.verticalRegular], behavior: {
    self.button.backgroundColor = .blue
}, counterBehavior: {
    self.button.backgroundColor = .red
})
// SizeClassが.horizontalCompact、.verticalCompactの場合にstackViewは水平にそれ以外は垂直方向にする
addBehavior(for: [SizeClass.horizontalCompact, SizeClass.verticalCompact], behavior: {
    self.stackView.axis = .horizontal
}, counterBehavior: {
    self.stackView.axis = .vertical
})
余談
途中出てきたConstraintですが、NSLayoutConstraintをKeyPathで宣言できるようにするためのtypealiasです。
こちらの記事を参考にして検証のために使用しています。
http://chris.eidhof.nl/post/micro-autolayout-dsl/
下記のようなメソッドを定義しています。
typealias Constraint = (_ child: UIView, _ parent: UIView) -> NSLayoutConstraint

func equal<Axis, Anchor>(_ keyPath: KeyPath<UIView, Anchor>, _ to: KeyPath<UIView, Anchor>, constant: CGFloat = 0) -> Constraint where Anchor: NSLayoutAnchor<Axis> {
    return { view, parent in
        view[keyPath: keyPath].constraint(equalTo: parent[keyPath: to], constant: constant)
    }
}

func equal<Axis, Anchor>(_ keyPath: KeyPath<UIView, Anchor>, _ toKeyPath: KeyPath<UIView, Anchor>, _ from: UIView, _ to: UIView, constant: CGFloat = 0) -> Constraint where Anchor: NSLayoutAnchor<Axis> {
    return { _, _ in
        from[keyPath: keyPath].constraint(equalTo: to[keyPath: toKeyPath], constant: constant)
    }
}
func equal<Axis, Anchor>(_ keyPath: KeyPath<UIView, Anchor>, constant: CGFloat = 0) -> Constraint where Anchor: NSLayoutAnchor<Axis> {
    return equal(keyPath, keyPath, constant: constant)
}

func equal<Anchor>(_ keyPath: KeyPath<UIView, Anchor>, constant: CGFloat) -> Constraint where Anchor: NSLayoutDimension {
    return { view, _ in
        view[keyPath: keyPath].constraint(equalToConstant: constant)
    }
}

func aspectRatio<Anchor>(_ keyPath: KeyPath<UIView, Anchor>, _ to: KeyPath<UIView, Anchor>, multiplier: CGFloat) -> Constraint where Anchor: NSLayoutDimension {
    return { view, _ in
        view[keyPath: keyPath].constraint(equalTo: view[keyPath: to], multiplier: multiplier)
    }
}
extension UIView {

    func addSubview(_ child: UIView, constraints: [Constraint]) {
        addSubview(child)
        child.translatesAutoresizingMaskIntoConstraints = false
        NSLayoutConstraint.activate(constraints.map { $0(child, self) })
    }
}

extension UIStackView {

    func addArrangedSubview(_ child: UIView, constraints: [Constraint]) {
        addArrangedSubview(child)
        child.translatesAutoresizingMaskIntoConstraints = false
        NSLayoutConstraint.activate(constraints.map { $0(child, self) })
    }
}
こんな感じで使います。
imageView.addSubview(modeImageView, constraints: [
    equal(\.topAnchor, constant: 12),
    equal(\.rightAnchor, constant: 0),
    equal(\.heightAnchor, constant: 80),
    aspectRatio(\.heightAnchor, \.widthAnchor, multiplier: 1)
    ])
まとめ
IBでのSizeClassesの管理が難しいというところから他に上手く管理する方法はないかと探してみました。
良かった点としては、
設定を行うコードを一箇所に宣言的にまとめられることで、
どこで何をしているのかがIBを使うよりもわかりやすくなったのかなと感じました。
一方で設定方法がちょっとわかりずらいとも感じており、
UITraitCollectionで変化するものと変化しないものを分けて書かなければいけないところもちょっとややこしいかなと思います。
また、対応しなければいけない要素はもっとたくさんあり、まだまだ改善できる余地がたくさんあると考えています。
最後に
今まであまりUITraitCollectionを直接使うことはなかったので、
大変勉強になったと個人的には思っています。
ご意見や間違っている点のご指摘などございましたら
ぜひよろしくお願いします![]()