はじめに
ローカル環境下でAWS Rekognitionを使用することを目的とし,対象とする画像もローカルに保存しているものを使用する.
Rekognitionで得られた認識結果を,画像にプロットすることで, 学べた感 を出す.
前提条件
・AWS CLI(Command Line Interface)が使えること
macOSへの導入設定をこちらに示しておきます
https://docs.aws.amazon.com/ja_jp/cli/latest/userguide/install-macos.html
・Pythonが使える環境が整っていること & 以下のコマンドでライブラリを追加しました
pip install --upgrade boto3
pip install pillow
pip install matplotlib
(pip install PyQt5) ← 実行しなくても動作する人は要らないはず
先に示しましたが,3.プログラムを動かす まで読んでから実行してください
使用環境
MacBook Pro
-- macOS Mojave version 10.14.3
-- 2.7 GHz Intel Core i7
-- 16 GB 2133 MHz LPDDR3
AWS
-- CLI
-- Rekognition
手順
1. AWS CLIの設定
https://docs.aws.amazon.com/ja_jp/cli/latest/userguide/cli-chap-configure.html
こちらのクイック設定で設定しました
2. コードを書く
# !/usr/bin/env python
# -*- coding: utf-8 -*-

from boto3 import client
from matplotlib import pyplot as plt
from PIL import Image
import random

def local_image_rekognition():
    # "samnple.jpg"は適宜変えてください
    local_image = "sample.jpg"

    img = Image.open(local_image)
    img_width = img.size[0]
    img_height = img.size[1]

    rekognition = client("rekognition", region_name='ap-northeast-1')

    response = rekognition.detect_labels(
        Image={
            'Bytes': open(local_image, "rb").read()
        },
        MaxLabels=128
    )

    colors = {}
    for label in response['Labels']:
        label_name = label['Name']
        if label_name not in colors:
            colors[label_name] = (random.random(), random.random(), random.random())
        for instance in label['Instances']:
            bb = instance['BoundingBox']

            rect = plt.Rectangle(
                (bb['Left'] * img_width,bb['Top'] * img_height),
                bb['Width'] * img_width,bb['Height'] * img_height,
                fill=False,
                edgecolor=colors[label_name])
            plt.gca().add_patch(rect)
    plt.imshow(img)
    plt.show()

if __name__ == "__main__":
    """
    """
    local_image_rekognition()
細かいことを気にせずに書いてます.
適宜,関数を別けたり追加したりしてください.
3. プログラムを動かす
実行コマンド(macのterminal上で実行)
python local_rekogniton.py
実行する際に私が詰まったところと,その解決策を示します.
コード内 response の内容を,読み込んだ画像にプロットするため
pip install matplotlib
でライブラリをインストールしたが,実行エラーとなった.
<解決策>
pip install PyQt5
rm ~/.matplotlib/matplotlibrc
echo "backend : Qt4Agg" >> ~/.matplotlib/matplotlibrc
色々な解決策がネット上で提示されているが,私ができたのはこの解決策でした.
実行結果はこのようになります.
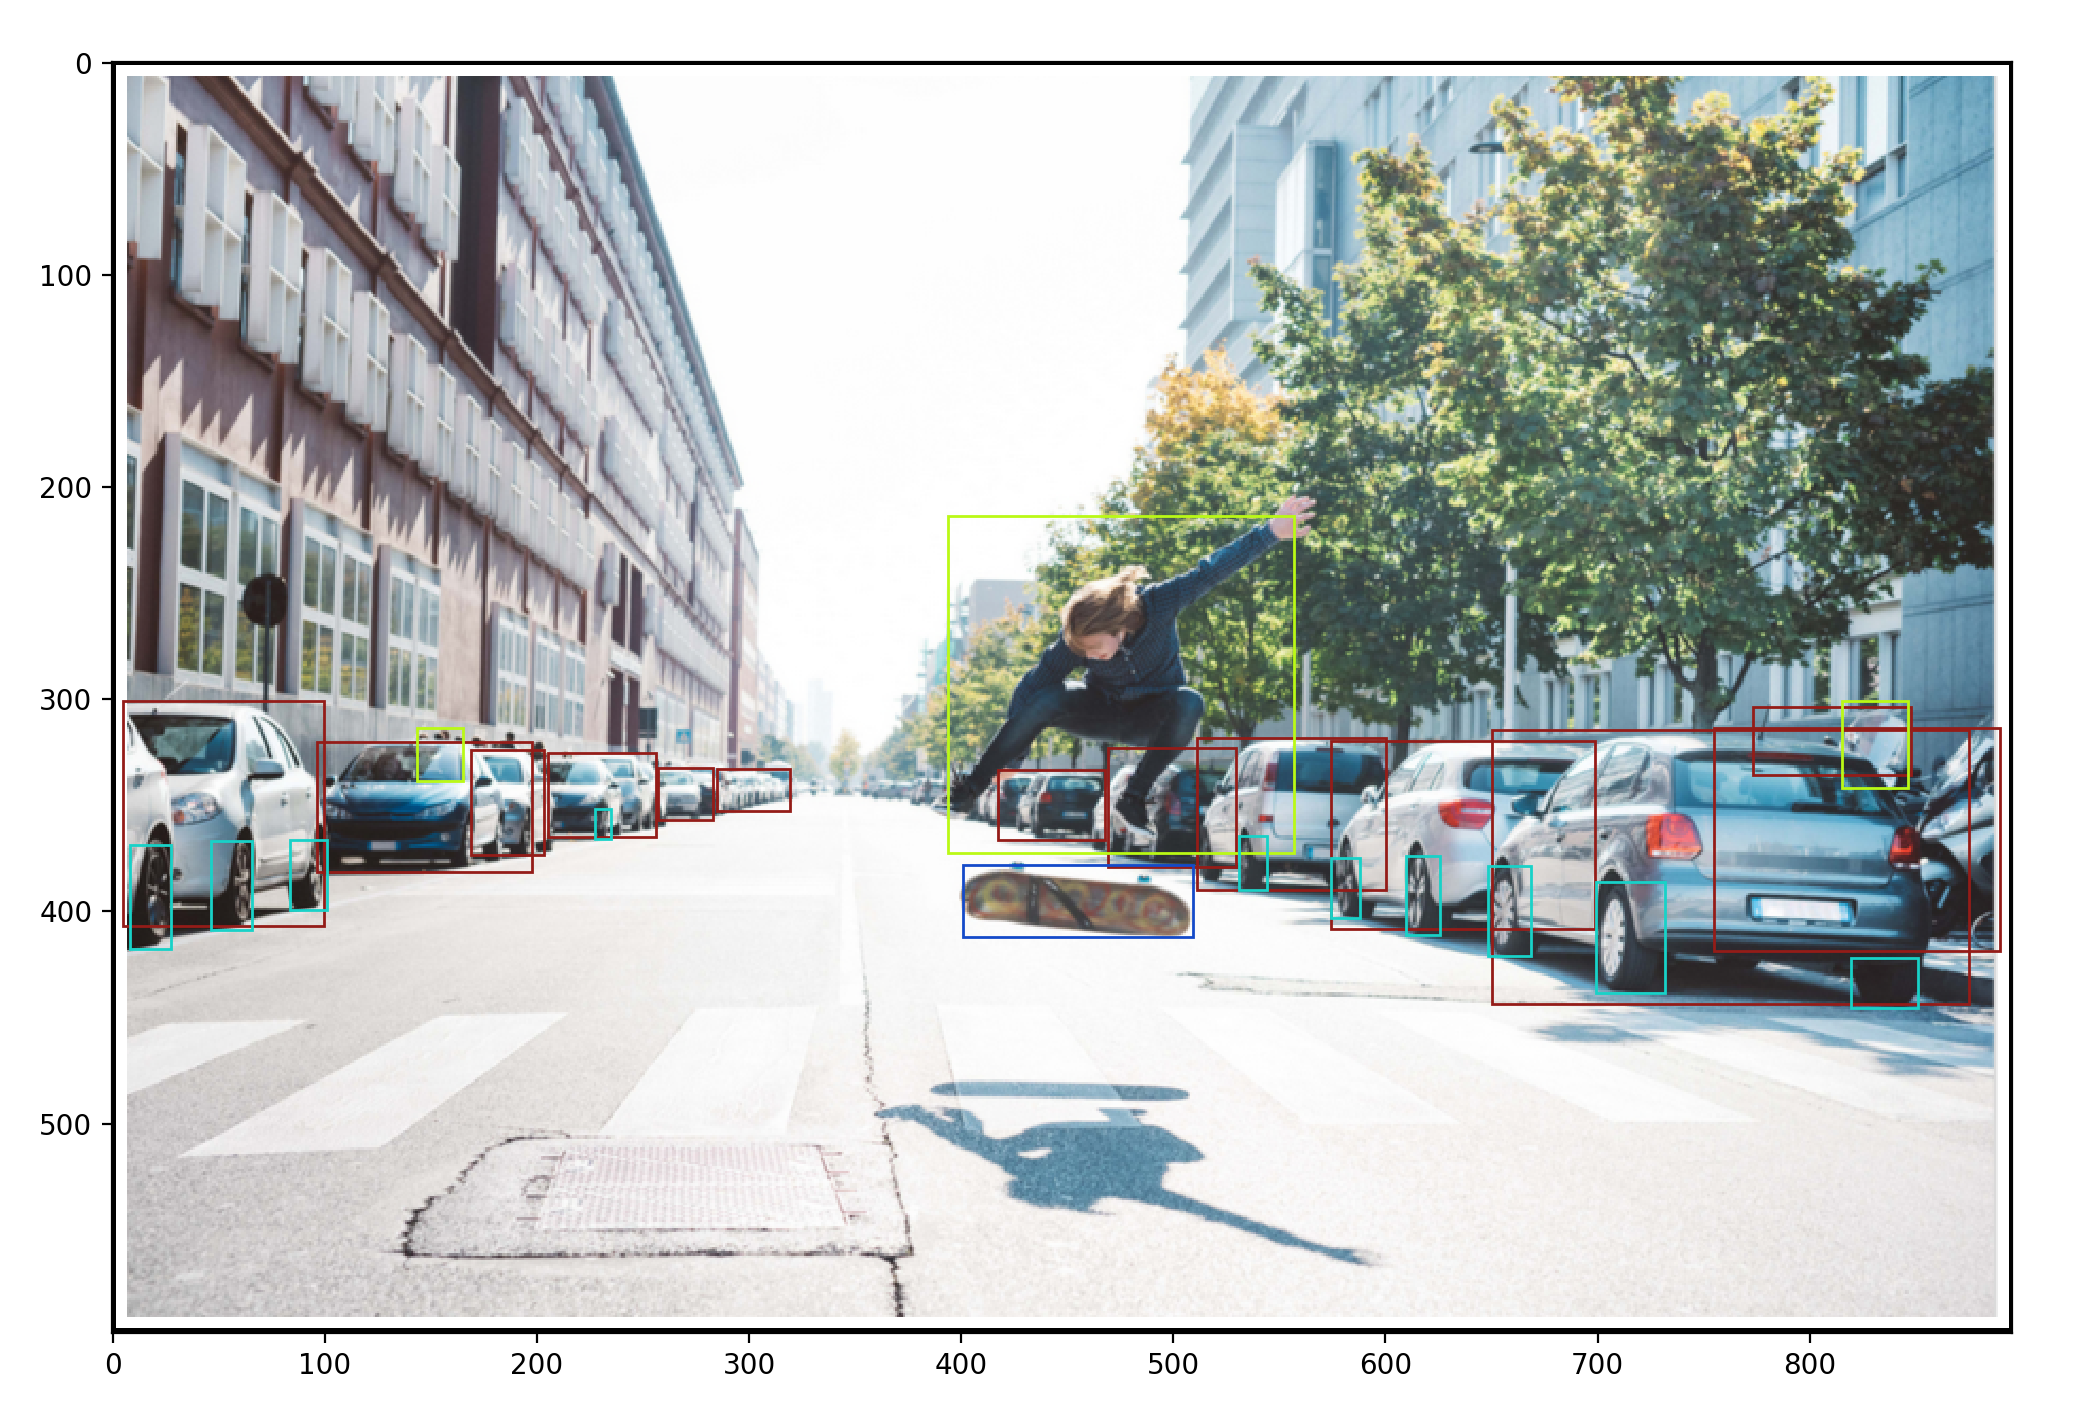
AWS Rekognitionのサイトで使用されている画像を使用しました.
同じ結果が得られていると思います!
参考サイト(圧倒的感謝)
https://qiita.com/ponsuke/items/15322e1adb0f3a41fe94
https://dev.classmethod.jp/machine-learning/amazon-rekognition-update-location/
https://qiita.com/masatomix/items/03419c7ea10262da18f3