先日社内でRailsをものすごい速さで習得しようよ合宿が開催された。
自分はRailsを少しだけかじったことがあったためまだ見ぬAPIモードを果敢に攻めてみたのでメモ。
環境
ruby : 2.2.4
Rails : 5.0.0.1
Angular: 1.5.8(だってAngular2はずっと-rc.~なんだもの)
Webpack: 1.13.2
AngularMaterial:1.1.1
ソースも置いとくので参考にどうぞ。
Railsの環境は出来ているものとして話を進めていくよ
1.RailsAPI
【参考】
Rails による API 専用アプリ
大事なことは全てRailsGuidesに(ちゃんと日本語で)書いてあるのでここでは端折ります。
API専用アプリを作るためにはいつものrails newコマンドに--apiオプションをつけるだけになります。
db使う場合は後から設定いじるのは手間なので-dオプションもつけましょう。
$rails new rails-api-angular --api
出てきたディレクトリ構成がこう

通常のRailsアプリと比較して
- app/helpers
- app/frontend
が減って
- app/jobs
が増えてる。
app/controllers/application_controller.rbも::Baseから::APIに変わってます。
class ApplicationController < ActionController::API
end
Gemfileもすっきり
source 'https://rubygems.org'


# Bundle edge Rails instead: gem 'rails', github: 'rails/rails'
gem 'rails', '~> 5.0.0', '>= 5.0.0.1'
# Use mysql as the database for Active Record
gem 'mysql2', '>= 0.3.18', '< 0.5'
# Use Puma as the app server
gem 'puma', '~> 3.0'
# Build JSON APIs with ease. Read more: https://github.com/rails/jbuilder
# gem 'jbuilder', '~> 2.5'
# Use Redis adapter to run Action Cable in production
# gem 'redis', '~> 3.0'
# Use ActiveModel has_secure_password
# gem 'bcrypt', '~> 3.1.7'

# Use Capistrano for deployment
# gem 'capistrano-rails', group: :development

# Use Rack CORS for handling Cross-Origin Resource Sharing (CORS), making cross-origin AJAX possible
# gem 'rack-cors'

group :development, :test do
  # Call 'byebug' anywhere in the code to stop execution and get a debugger console
  gem 'byebug', platform: :mri
end

group :development do
  gem 'listen', '~> 3.0.5'
  # Spring speeds up development by keeping your application running in the background. Read more: https://github.com/rails/spring
  gem 'spring'
  gem 'spring-watcher-listen', '~> 2.0.0'
end

# Windows does not include zoneinfo files, so bundle the tzinfo-data gem
gem 'tzinfo-data', platforms: [:mingw, :mswin, :x64_mingw, :jruby]
2.Angular
今回は作ったアプリの直下にAngularの環境も作ってしまい、
それをwebpackでbundleしてpublicに突っ込んであげるという方式を取ります。
【参考】
WebPackを使ってRailsからJavaScriptを楽に良い感じに分離する
Rails 4.2でSprocketsを捨ててwebpackに移行する
2-1.Angularとwebpackをインストール
まずはpackage.jsonを準備(既存プロジェクトから持ってきたので必要無いのが混ざってても気にしないでね)
{
  "name": "rails-api-angular",
  "version": "1.0.0",
  "description": "rails-api-angular",
  "scripts": {
    "dev": "webpack-dev-server --hot --inline --port 3500 --progress --profile --colors",
    "build": "NODE_ENV=production webpack -p --progress --profile --colors "
  },
  "dependencies": {
    "angular": "1.5.8",
    "angular-animate": "1.5.8",
    "angular-aria": "1.5.8",
    "angular-cookies": "1.5.8",
    "angular-material": "1.1.1",
    "angular-material-icons": "0.7.1",
    "angular-messages": "1.5.8",
    "angular-resource": "1.5.8",
    "angular-route": "1.5.8",
    "angular-sanitize": "1.5.8",
    "clean-webpack-plugin": "^0.1.9",
    "css-loader": "^0.23.1",
    "es6-promise": "~3.2.1",
    "eslint-plugin-jsx-a11y": "^1.5.5",
    "eslint-plugin-react": "^5.2.2",
    "extract-text-webpack-plugin": "^1.0.1",
    "file-loader": "^0.8.5",
    "font-awesome": "^4.6.3",
    "font-awesome-sass-loader": "^1.0.1",
    "imports-loader": "^0.6.5",
    "jquery": "^2.2.4",
    "json-loader": "^0.5.4",
    "node-sass": "^3.7.0",
    "sass-loader": "^3.2.0",
    "style-loader": "^0.13.1",
    "ts-loader": "^0.8.1",
    "url-loader": "^0.5.7",
    "webpack": "^1.13.2",
    "webpack-manifest-plugin": "^1.0.1"
  },
  "devDependencies": {
    "es5-shim": "^4.5.7",
    "eslint": "^2.9.0",
    "eslint-config-airbnb": "^9.0.1",
    "eslint-import-resolver-webpack": "^0.2.4",
    "eslint-plugin-import": "^1.7.0",
    "typescript": "^1.8.10",
    "webpack-dev-middleware": "^1.6.1",
    "webpack-dev-server": "^1.14.1",
    "webpack-hot-middleware": "^2.10.0"
  }
}
インストールします
$npm install
2-2. Angularプロジェクト作成
必要最低限のAngularプロジェクト作っていきます。
$mkdir app/angular
$cd app/angular/
$mkdir javascripts
$touch javascripts/application.ts
$mkdir stylesheets
$touch stylesheets/application.sass
Typescriptの型定義を用意します。
今回はいつも使っているdtsm使っていきますがどの型定義管理ツールも大体勝手は一緒なので好きなものを使ったらいいじゃない。
$dtsm init
できたdtsm.jsonを書き換えます。
{
  "repos": [
    {
      "url": "https://github.com/DefinitelyTyped/DefinitelyTyped.git",
      "ref": "master"
    }
  ],
  "path": "typings",
  "bundle": "typings/bundle.d.ts",
  "link": {
    "npm": {
      "include": true
    }
  },
  "dependencies": {
    "node/node.d.ts": {
      "ref": "17795ae18fc214be862fe578ad48c28fecfef8a6"
    },
    "angularjs/angular.d.ts": {
      "ref": "17795ae18fc214be862fe578ad48c28fecfef8a6"
    },
    "angular-material/angular-material.d.ts": {
      "ref": "17795ae18fc214be862fe578ad48c28fecfef8a6"
    },
    "angular-cookie/angular-cookie.d.ts": {
      "ref": "17795ae18fc214be862fe578ad48c28fecfef8a6"
    },
    "angularjs/angular-animate.d.ts": {
      "ref": "0c5c7a2d2bd0ce7dcab963a8402a9042749ca2da"
    }
  }
}
インストールします
$dtsm install
javascripts/application.tsでangularとその他諸々、stylesheets/application.sassをrequireします
/// <reference path="./typings/bundle.d.ts"/>

// angular
import angular = require('angular')
require('angular-material')
require('angular-cookies')
require('angular-resource')
require('angular-sanitize')
require('angular-route')
require('angular-animate')
require('angular-material-icons')
require('es5-shim')

let app = angular.module('App', [
	'ngMaterial',
	'ngCookies',
	'ngResource',
	'ngSanitize',
	'ngRoute',
	'ngMdIcons',
	'ngAnimate'
]);

//stylesheets
require('../stylesheets/application')

//angular-materialのTheme
app.config(($mdThemingProvider) => {
	$mdThemingProvider.theme('default')
					  .primaryPalette('grey', {
						  'default': '100'
					  })
					  .accentPalette('pink', {
						  'default': '700'
					  });
});

//Controllerも一緒に定義しちゃいました
export default class AppCtrl {
	private title: string = 'Hello RailsAPI × Angular!'
	static $inject = ['$rootScope', '$scope', '$cookies', '$window', '$timeout', '$location']
	constructor(
		private rootScope: ng.IRootScopeService,
		private scope: ng.IScope,
		private cookies: any,
		private window: ng.IWindowService,
		private timeout: ng.ITimeoutService,
		private location: ng.ILocationService
	) {
	}
}

app.controller('AppCtrl', AppCtrl)
stylesheets/application.sassでangular-materialをimportします
@import '~angular-material/angular-material.css'

body
  background-color: whitesmoke

.header
  md-toolbar
    color: #D81B60
    button
      height: 100%
      margin: 0px

// angularの評価式が一瞬見えちゃう問題対応
[ng\:cloak], [ng-cloak], [data-ng-cloak], [x-ng-cloak], .ng-cloak, .x-ng-cloak
  display: none !important
2-3.webpack設定
プロジェクト直下にwebpack.config.jsを作成する
const DEBUG = process.env.NODE_ENV === 'development' || process.env.NODE_ENV === undefined;
const webpack = require('webpack');
const path = require('path');

/**
 * Require webpack plugins
 */
const ManifestPlugin = require('webpack-manifest-plugin');
const ExtractTextPlugin = require('extract-text-webpack-plugin');
const CleanWebpackPlugin = require('clean-webpack-plugin');

/**
 * Environment settings
 */
const devtool = DEBUG ? '#inline-source-map' : '#eval';
const fileName = DEBUG ? '[name]' : '[name]-[hash]';
const publicPath = DEBUG ? 'http://localhost:3500/assets/' : '/assets/';

/**
 *  Entries
 */
const entries = {
	application: ['./app/angular/javascripts/application.ts']
}

/**
 * Add plugins
 */
const plugins = [
	new ExtractTextPlugin(fileName + '.css')
]

if (DEBUG) {
	plugins.push(new webpack.NoErrorsPlugin());
} else {
	plugins.push(new ManifestPlugin({fileName: 'webpack-manifest.json'}));
	plugins.push(new webpack.optimize.UglifyJsPlugin({compress: {warnings: false}}));
	plugins.push(new CleanWebpackPlugin(['assets'], {
		root: __dirname + '/public',
		verbose: true,
		dry: false
	}));
}

module.exports = {
	entry: entries,
	output: {
		path: __dirname + '/public/assets',
		filename: fileName + '.js',
		publicPath: publicPath
	},
	devtool: devtool,
	plugins: plugins,
	module: {
		loaders: [
			{
				test: /\.ts$/,
				loader: 'ts',
				exclude: [/node_modules/]
			},
			{
				test: /\.css$/,
				loader: ExtractTextPlugin.extract('style-loader', 'css-loader?minimize')
			},
			{
				test: /\.scss$/,
				loader: ExtractTextPlugin.extract('style-loader', 'css-loader!sass-loader?minimize')
			},
			{
				test: /\.sass$/,
				loader: ExtractTextPlugin.extract('style-loader', 'css-loader!sass-loader?minimize')
			},
			{
				test: /\.svg(\?v=\d+\.\d+\.\d+)?$/,
				loader: 'url-loader?mimetype=image/svg+xml'
			},
			{
				test: /\.woff(\d+)?(\?v=\d+\.\d+\.\d+)?$/,
				loader: 'url-loader?mimetype=application/font-woff'
			},
			{
				test: /\.eot(\?v=\d+\.\d+\.\d+)?$/,
				loader: 'url-loader?mimetype=application/font-woff'
			},
			{
				test: /\.ttf(\?v=\d+\.\d+\.\d+)?$/,
				loader: 'url-loader?mimetype=application/font-woff'
			},
			{
				test: /\.(jpg|png|gif)$/,
				loader: DEBUG ? 'file-loader?name=[name].[ext]' : 'file-loader?name=[name]-[hash].[ext]'
			}
		]
	},
	resolve: {
		root: path.resolve(__dirname, 'app', 'angular'),
		extensions: ['', '.js', '.ts', '.css', '.scss', '.sass'],
	},
	devServer: {
		headers: {
			"Access-Control-Allow-Origin": "http://localhost:3000",
			"Access-Control-Allow-Credentials": "true"
		}
	}
}
これで開発中はサーバーを立ち上げてwatchしてくれるようになる。便利。
先ほどのpackage.jsonにこっそり定義しておいたコマンドを叩いてみる
$npm run dev
するとこんなエラー出た
ERROR in ./app/angular/javascripts/application.ts
Module build failed: TypeError: Path must be a string. Received undefined
    at assertPath (path.js:7:11)
    at Object.dirname (path.js:1324:5)
    at ensureTypeScriptInstance (/Users/nozakishohei/WorkSpace/repository/sample/rails-api-angular/node_modules/ts-loader/index.js:156:103)
    at Object.loader (/Users/nozakishohei/WorkSpace/repository/sample/rails-api-angular/node_modules/ts-loader/index.js:403:14)
 @ multi application
なるほど。ts-loaderはtsconfig.jsonが必須だってよ!
というわけで作ってあげる
$touch app/angular/javascripts/tsconfig.json
{
  "compilerOptions": {
    "target": "es5",
    "sourceMap": true
  },
  "exclude": [
    "node_modules"
  ]
}
これで再度npm run devすると成功した。
あとは画面から呼ぶだけ。
3.画面作る
タイトルから一貫してRailsAPIという単語を使ってきたがここにきて掟をぶち破る。(root設定して1画面だけ作っちゃう)
3-1 rootの設定をしてしまう(1画面だけだから許して)
routes.rbにrootを設定する
もう何も思いつかなくてroot#indexにしてしまったが好きな名前をつけてね。
Rails.application.routes.draw do
	root 'root#index'
end
コントローラーも作る
class RootController < ActionController::Base
	def index
	end
end
それっぽいトップ画面も作る
<html ng-app="App">
<head>
  <meta charset="UTF-8">
  <meta name="viewport", content="width=device-width, initial-scale=1, maximum-scale=1">
  <title>rails-api-angular</title>
</head>
<body ng-controller="AppCtrl as appCtrl" ng-cloak>
  <header class="header md-whiteframe-3dp">
    <md-toolbar md-scroll-shrink>
      <div class="md-toolbar-tools">
        <h3>
          <span>rails-api-angular</span>
        </h3>
        <span flex></span>
        <md-button class="md-accent">Sign up</md-button>
        <md-button class="md-accent">Log in</md-button>
      </div>
    </md-toolbar>
  </header>

  <div layout="row" layout-align="center center">
    <h1>{{appCtrl.title}}</h1>
  </div>

<%= stylesheet_link_tag webpack_asset_path('application.css') %>
<%= javascript_include_tag webpack_asset_path('application.js')%>
</body>
</html>
webpackしたリソースを読み分けるヘルパー関数webpack_asset_pathを生やす。
module RootHelper
	def webpack_asset_path(path)
		if Rails.env.development?
			return "http://localhost:3500/assets/#{path}"
		end

		host = Rails.application.config.action_controller.asset_host
		manifest = Rails.application.config.assets.webpack_manifest
		path = manifest[path] if manifest && manifest[path].present?
		"#{host}/assets/#{path}"
	end
end
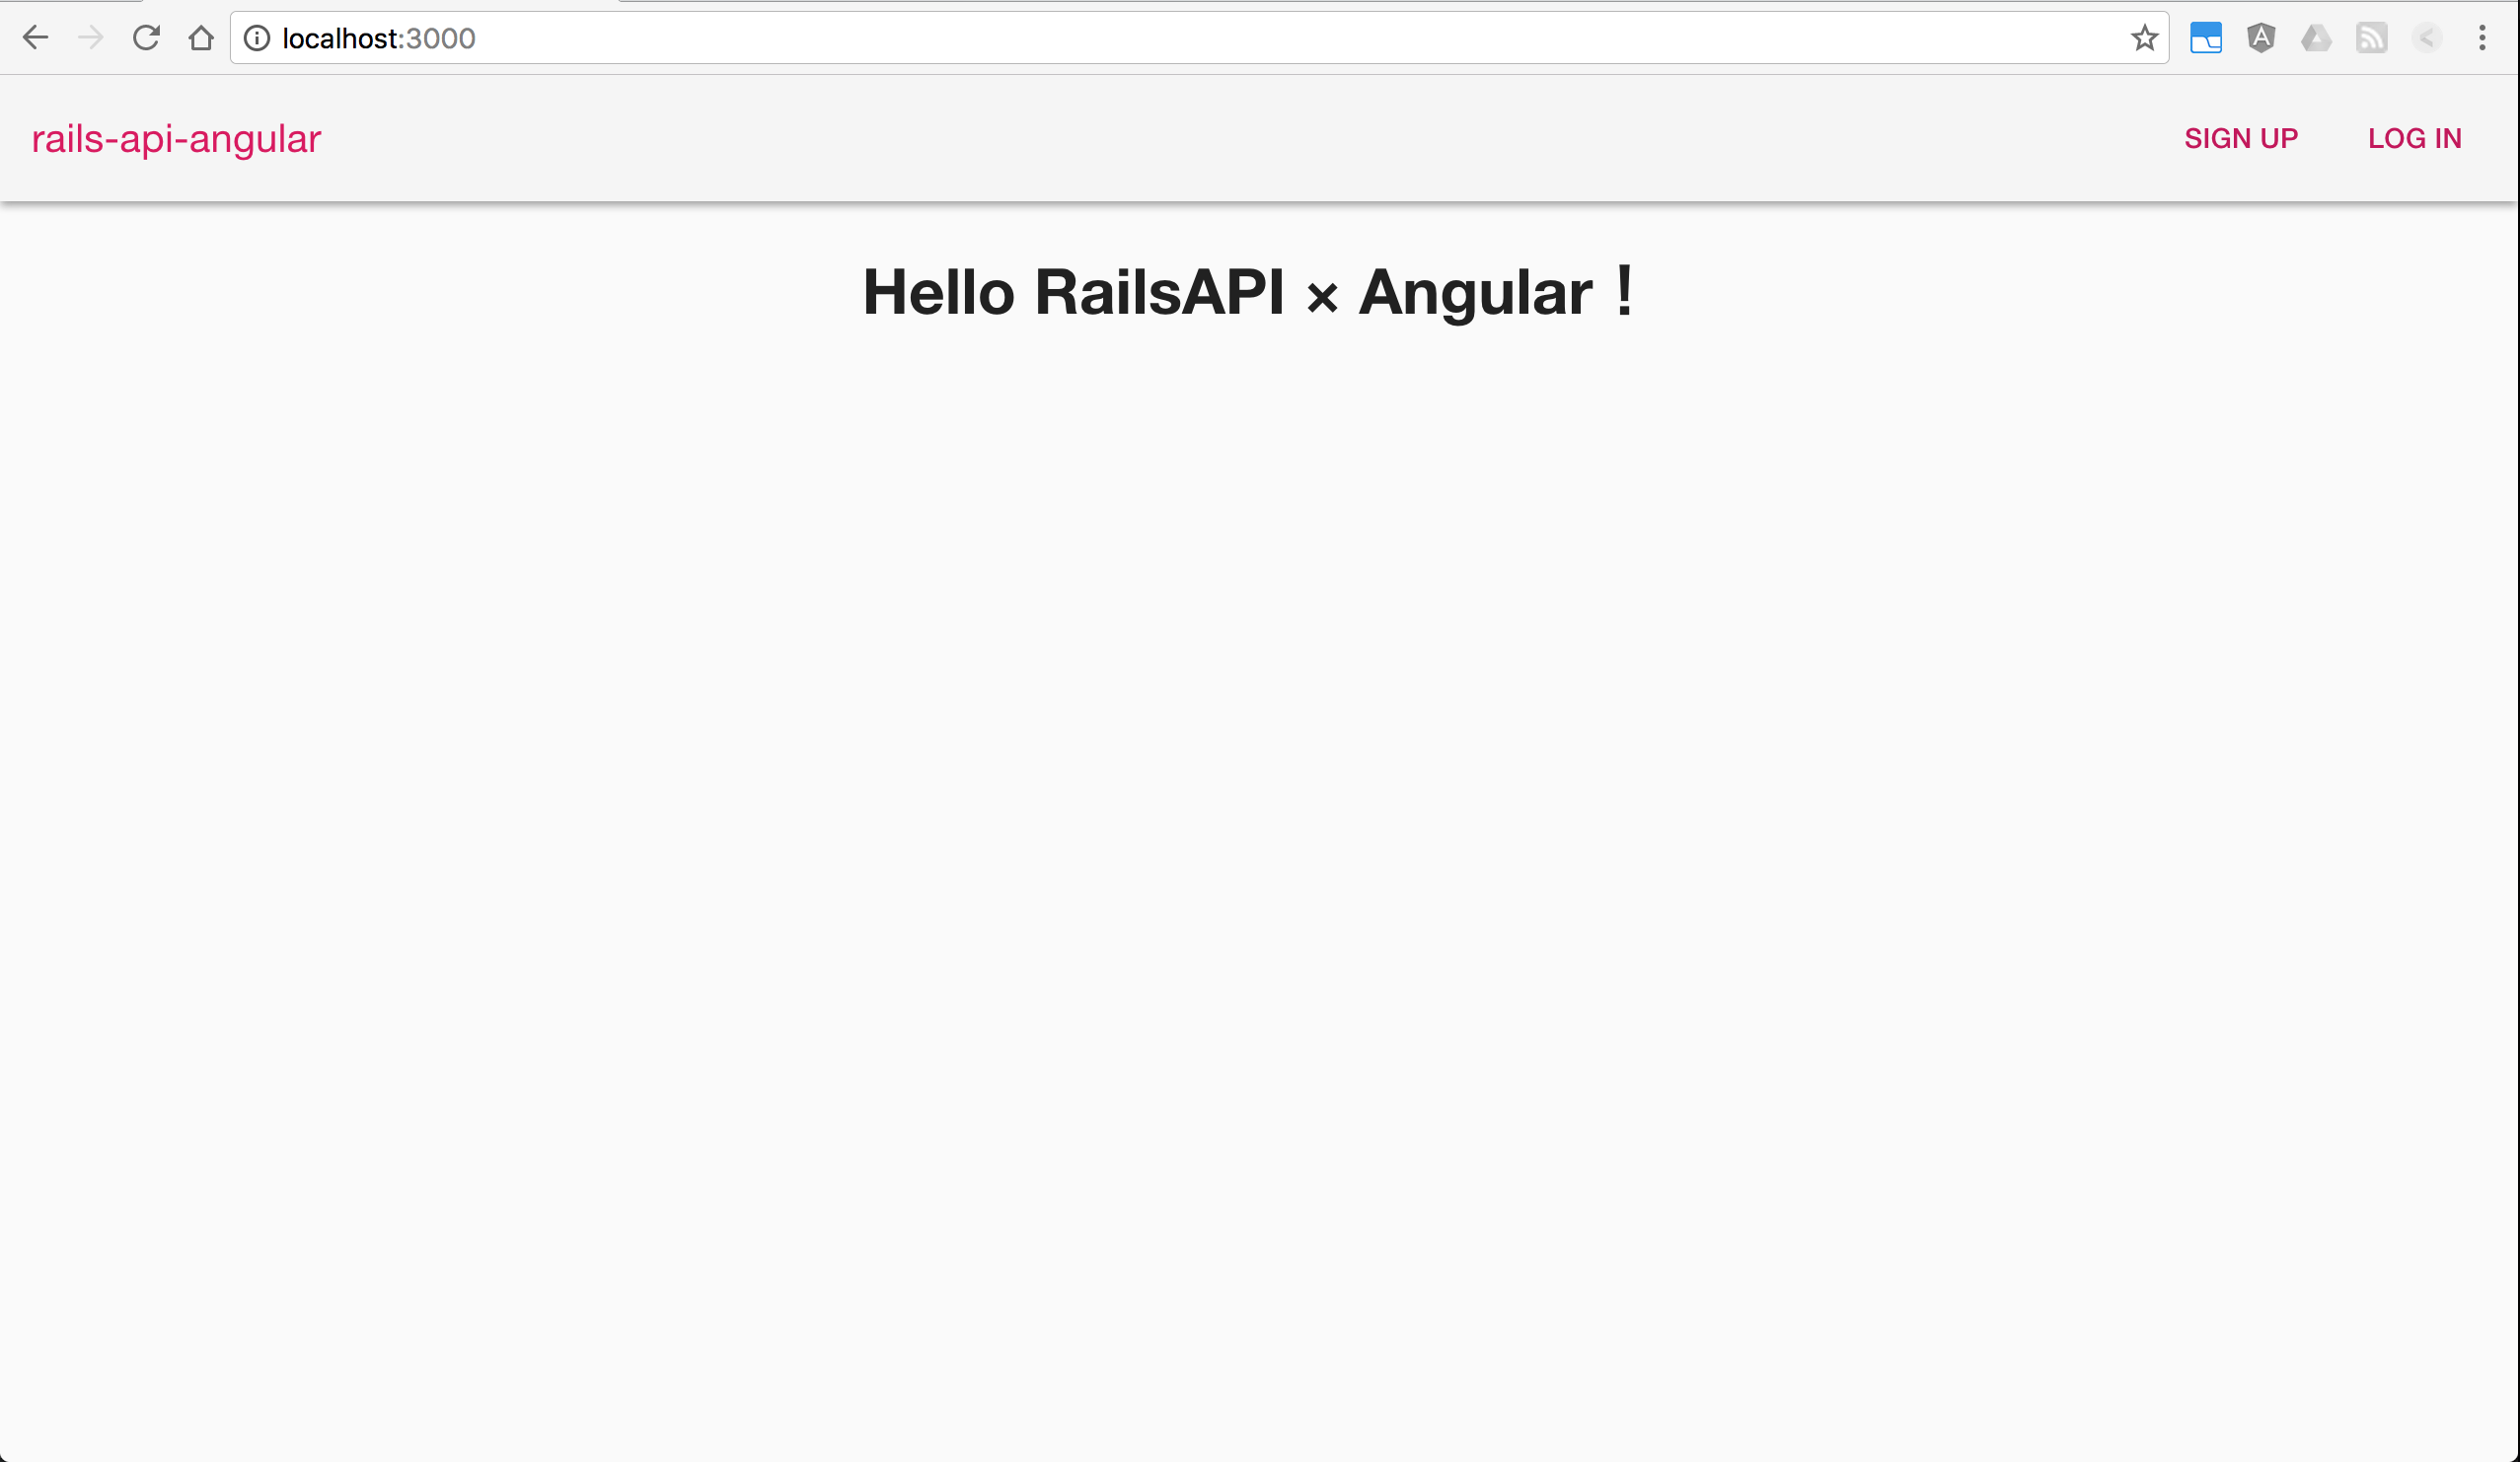
ついにrailsを起動してlocalhost:3000にアクセスしてみる
$rails s
きた!
