はじめに
前回、NeumorphismなUIのポモロードタイマーを作ったので
今回、NeoBrutalismっぽいUIでポモドーロタイマーを作ってみる。
前回の記事
NeoBrutalismとは、(AIによる解説より)
Neo-Brutalism(ネオ・ブルータリズム)は、従来のブルータリズムを現代的に再解釈したデザインスタイルです。ブルータリズムの特徴である無骨さや機能性を継承しつつ、より洗練された要素を取り入れ、現代のウェブデザインやUIデザインに適合させています。

ブルータリズムの基本要素:

* 大胆なタイポグラフィ: 大きく、読みやすいフォントを使用。

* コントラストの強い配色: モノクロや限定的な色使いで、はっきりとしたコントラストを出す。

* シンプルなレイアウト: 装飾を極力排除し、機能性を重視。

現代的な洗練さ:

* アクセシビリティへの配慮: ブルータリズムの弱点であったアクセシビリティを改善し、より多くのユーザーにとって使いやすいデザインを目指します。

* 微妙なグラデーションやシャドウの活用: ブルータリズムのフラットなデザインに、奥行きや立体感を与える要素を取り入れます。

* 限定的なアニメーションやインタラクションの追加: ユーザー体験を向上させるために、控えめなアニメーションやインタラクションを追加します。

* 意図的なデザインの崩し: グリッドシステムを完全に無視したり、要素を重ねたりすることで、意図的にデザインを崩し、独特な表現を生み出します。
今回作るポモドーロタイマー
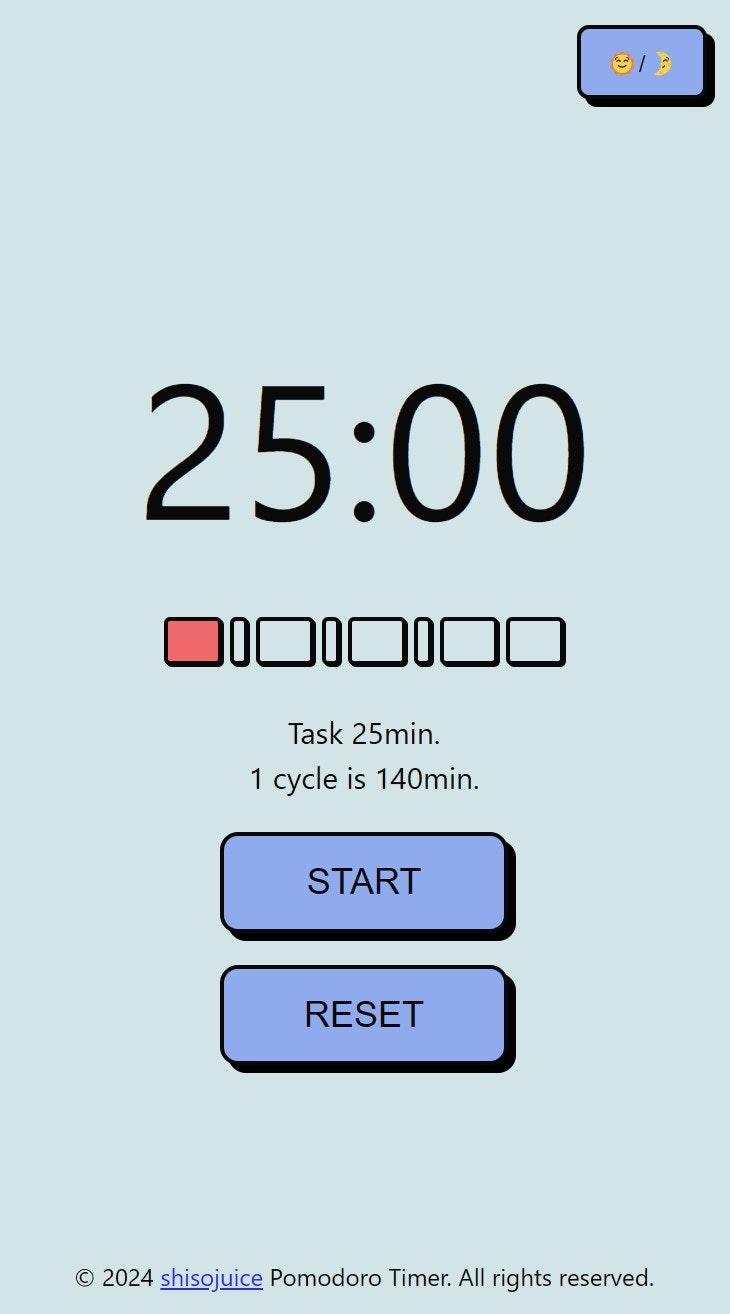
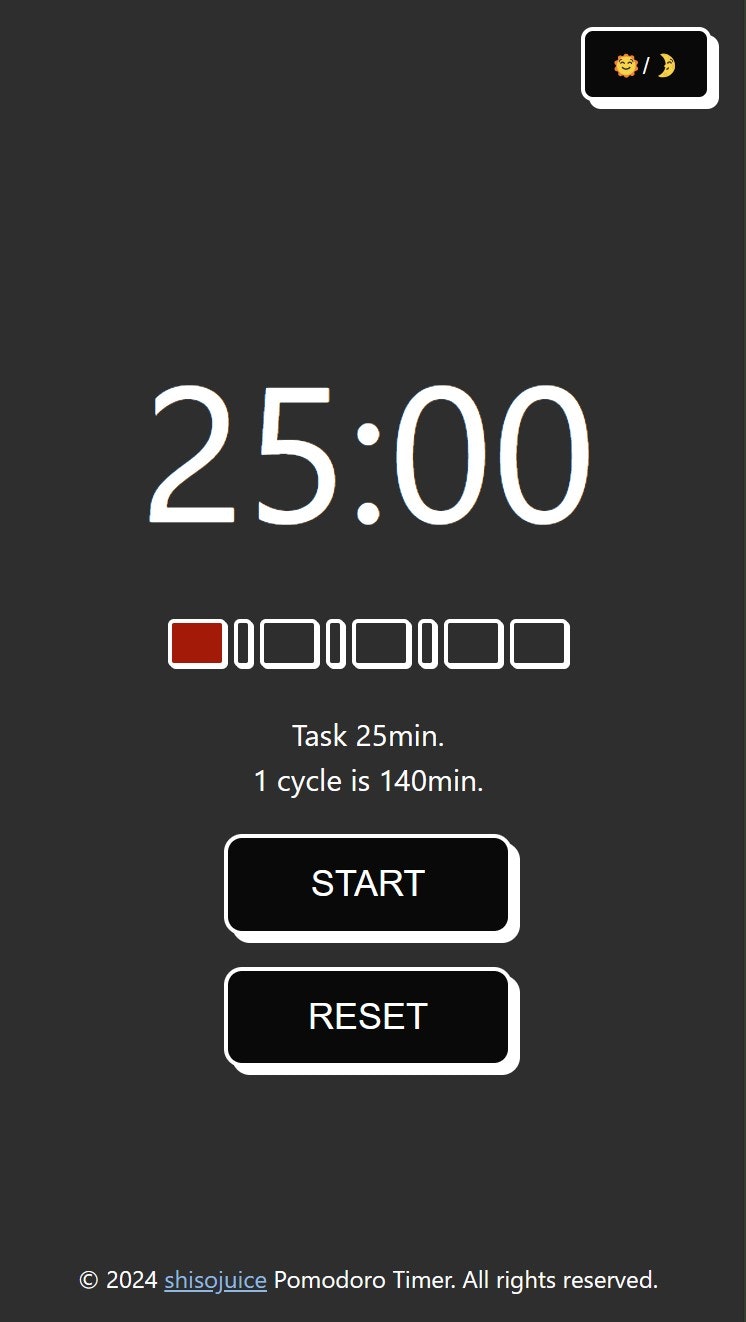
こんな感じのアプリを作成する。
(主にボタンなどに適用しているがシンプルなのにどこか洗練された印象!🧐)
主な機能は
- ポモドーロタイマー
- ダークモード
成果物デモサイト
参考になるサイト
- uiverse.io
- neobrutalism.dev
プロジェクトの作成
今回の構成は、React(SPA)とCssライブラリは使わずにVanillaのCssで作成する。
内部処理は前回の記事同様なので略します。
App.jsx
function App() {
  const dark = 'dark';
  const light = 'light';
  const [theme, setTheme] = useState(() => {
    const savedTheme = localStorage.getItem('theme');
    if (savedTheme) {
      return savedTheme;
    }
    const prefersDark = window.matchMedia('(prefers-color-scheme: dark)').matches;
    return prefersDark ? dark : light;
  });

  useEffect(() => {
    localStorage.setItem('theme', theme);
    document.body.classList.remove(light, dark);
    document.body.classList.add(theme);
  }, [theme]);

  const toggleTheme = (newTheme) => {
    setTheme(newTheme);
  };

  const longtime = 25 * 60;
  const shorttime = 5 * 60;
  const [timeIndex, setTimeIndex] = useState(0);
  const timecycle = [longtime, shorttime, longtime, shorttime, longtime, shorttime, longtime, longtime]; // (25+5)*3 + (25+25)
  const [timeLeft, setTimeLeft] = useState(timecycle[timeIndex]);
  const minutes = Math.floor(timeLeft / 60);
  const seconds = timeLeft % 60;
  const [isActive, setIsActive] = useState(false);

  useEffect(() => {
    let interval = null;
    if (isActive && timeLeft > 0) {
      interval = setInterval(() => {
        setTimeLeft(timeLeft => timeLeft - 1);
      }, 1000);
    } else if (!isActive && timeLeft !== 0) {
      clearInterval(interval);
    }
    else if (!isActive && timeLeft == 0) {
      setTimeLeft(timecycle[timeIndex]);
      clearInterval(interval);
    }
    return () => clearInterval(interval);
  }, [isActive, timeLeft, timeIndex]);

  const handleStart = () => {
    setIsActive(true);
  };

  const handleStop = () => {
    setIsActive(false);
    if (minutes == 0 && seconds == 0) {
      setTimeIndex(x => x + 1 > timecycle.length - 1 ? 0 : x + 1);
    }
  };

  const handleReset = () => {
    setTimeLeft(timecycle[timeIndex]);
    setIsActive(false);
  };

  return (
    <>
      <header>
        <button className='themebtn' onClick={() => { toggleTheme(theme == dark ? light : dark); }}>🌞/🌛</button>
      </header>
      <main>
        <div className='timer'>{minutes == 0 && seconds == 0 ? `Finish.` : `${minutes.toString().padStart(2, '0')}:${seconds.toString().padStart(2, '0')}`}</div>
        <div className="cycle_expain">
          <div className='count'>
            {timecycle.map((item, index) => (
              <div
                key={index}
                className={timeIndex == index ? (timeIndex % 2 == 1 ? 'timeindex_break' : 'timeindex_task') : 'timecycle'}
                style={{ width: `${item / 60}px` }}
              ></div>
            ))}
          </div>
          <br />
          <span>{timeIndex % 2 == 1 ? `Break ${timecycle[timeIndex] / 60}min.` : `Task ${timecycle[timeIndex] / 60}min.`}</span>
          <br />
          <span>1 cycle is 140min.</span>
        </div>
        {isActive ?
          (<button onClick={() => { handleStop(); }}>STOP</button>)
          : (<button onClick={() => { handleStart(); }}>START</button>)}
        <button onClick={() => { handleReset(); }}>RESET</button>
      </main>
      <footer>
        <span> © 2024 <a href="https://github.com/shisojuice" target="_blank" rel="noopener noreferrer" _mstmutation="1">shisojuice</a> Pomodoro Timer. All rights reserved.</span>
      </footer>
    </>
  )
}
(先ほど紹介したneobrutalism.devをベースに作ってみる)
NeoBrutalismは複雑なアニメーションを使わずに
シンプルでフラットなデザインにshadowを付けメリハリのあるデザインにする。
App.css
:root {
    --text-color: #090909;
    --background-color: #88aaee;
    --base-background-color: #cfe4e5;
    --text-shadow: 0 0 #0000, 0 0 #0000, 0 0 #0000, 0 0 #0000, 4px 4px 0px 0px #000;
    --timecycle-box-shadow: 1px 1px #090909;
    --timeindex_task-background: #ff6868;
    --timeindex_break-background: #78b9ff;
    --button-active-background-color: #fff;
    --button-active-box-shadow: 0 0 transparent, 0 0 transparent, 0 0 transparent, 0 0 transparent, 4px 4px 0px 0px transparent;
    --anchor-color: #1a2cee;
    color: var(--text-color);
    background-color: var(--base-background-color);
    text-shadow: var(--text-shadow);
}

.dark {
    --text-color: #fff;
    --background-color: #090909;
    --base-background-color: #2e2e2e;
    --text-shadow: 0 0 #0000, 0 0 #0000, 0 0 #0000, 0 0 #0000, 4px 4px 0px 0px #fff;
    --timecycle-box-shadow: 1px 1px #fff;
    --timeindex_task-background: #b01a00;
    --timeindex_break-background: #005bb0;
    --button-active-background-color: #fff;
    --button-active-box-shadow: 0 0 transparent, 0 0 transparent, 0 0 transparent, 0 0 transparent, 4px 4px 0px 0px transparent;
    --anchor-color: #83b8e2;
    color: var(--text-color);
    background-color: var(--base-background-color);
    text-shadow: var(--text-shadow);
}

.timer {
    color: var(--text-color);
    background: var(--base-background-color);
    font-size: 96px;
}

.timecycle {
    height: 20px;
    margin: auto 2px;
    border: 2px solid var(--text-color);
    border-radius: 3px;
    background: var(--base-background-color);
    box-shadow: var(--timecycle-box-shadow);
}

.timeindex_task {
    height: 20px;
    margin: auto 2px;
    border: 2px solid var(--text-color);
    border-radius: 3px;
    background: var(--timeindex_task-background);
    box-shadow: var(--timecycle-box-shadow);
}

.timeindex_break {
    height: 20px;
    margin: auto 2px;
    border: 2px solid var(--text-color);
    border-radius: 3px;
    background: var(--timeindex_break-background);
    box-shadow: var(--timecycle-box-shadow);
}

button {
    width: 144px;
    color: var(--text-color);
    padding: 0.7em 1.7em;
    font-size: 18px;
    border-radius: 0.5em;
    background: var(--background-color);
    border: 2px solid var(--text-color);
    transition: all 0.3s;
    box-shadow: var(--text-shadow);
}

button:hover {
    box-shadow: var(--button-active-box-shadow);
}

button:active {
    color: var(--background-color);
    background: #fff;
    box-shadow: var(--button-active-box-shadow);
}

a {
    color: var(--anchor-color);
}
成果物ソース
まとめ
今回は、NeoBrutalismなポモロードタイマーを作ってみた。
NeoBrutalismは、Brutalismのシンプルな印象に、
Shadowで立体感をつけることで洗練されたされた感じがあり、かっこいい!😎
(個人的には前回の記事のNeumorphismよりもNeoBrutalismのデザインが好き)

