新しいDRGのIPsec Connectionでは、NAT配下のVPN装置のIKE認証KeyをPrivate IP等に 設定できるようになり、設定項目も増えました。
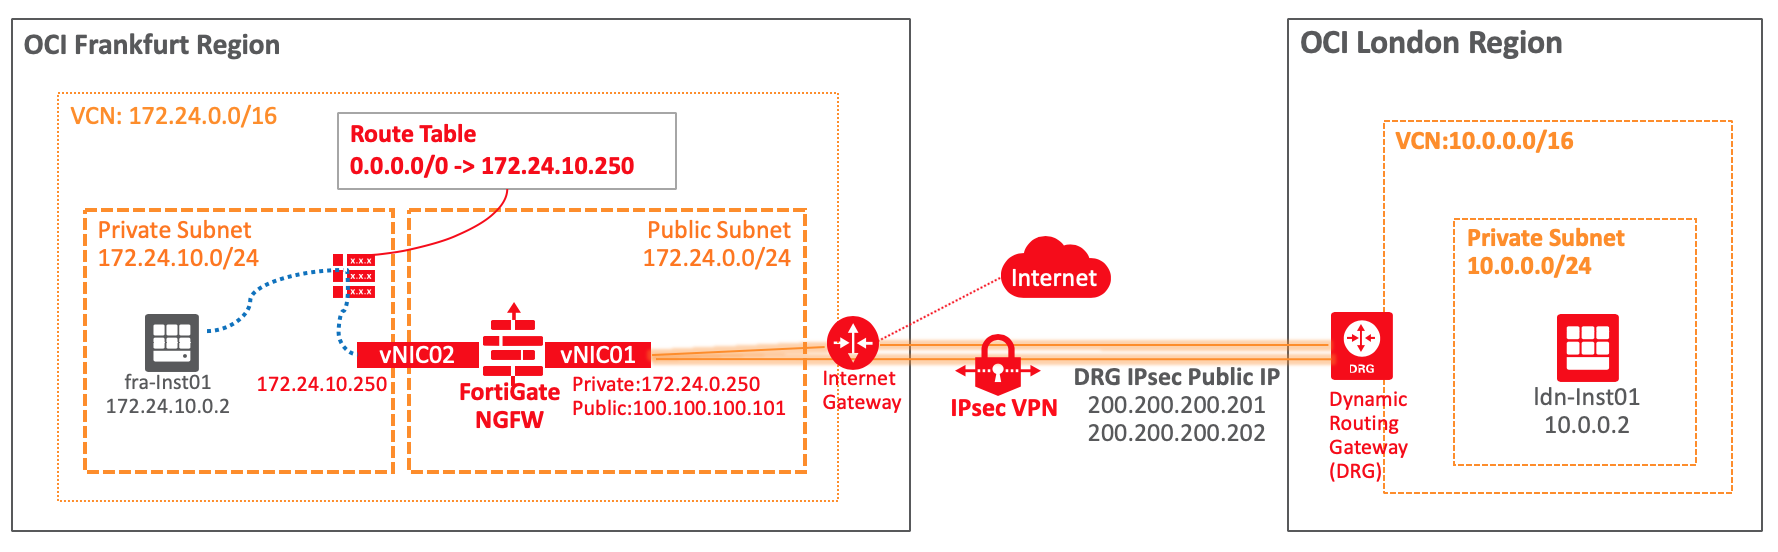
ということで、Oracle Cloud Infrastructure(OCI)上に配置したFortiGateと別リージョンのDRGをIPsec VPN接続してみます。
■ 構成
今回は、FortiGate-VMを使用します。
FortiGate-VMは物理ハードウェアと同じOSが使われているので設定は同じになります。
FortiGate-VMの構成手順は,
Oracle Cloud:Fortinet FortiGate Next-Generation Firewall(NGFW) を導入してみてみた を参照
また、FortiGate-VMなどのSoftware Routerを使用するとOCIのSevice Limit超える多拠点接続や他社クラウド・プロバイダと接続する事もできます。
■ OCI DRG環境
● Customer-Premises Equipment作成
OCIの[Networking] > [ICustomer-Premises Equipment] 画面から[Create Customer-Premises Equipmentn]をクリックし以下内容を設定
・NAME:適当な名前を設定
・DRG:IPsec接続させる作成済みのDRGを設定
・STATIC ROUTE CIDER:対向側(FortiGate)のCIDERを設定 *後から追加変更削除可能です
・CPE IKE IDENTIFIER : FortiGateのWAN側Private IPを設定
 [Create Premises Equipment]をクリックして作成
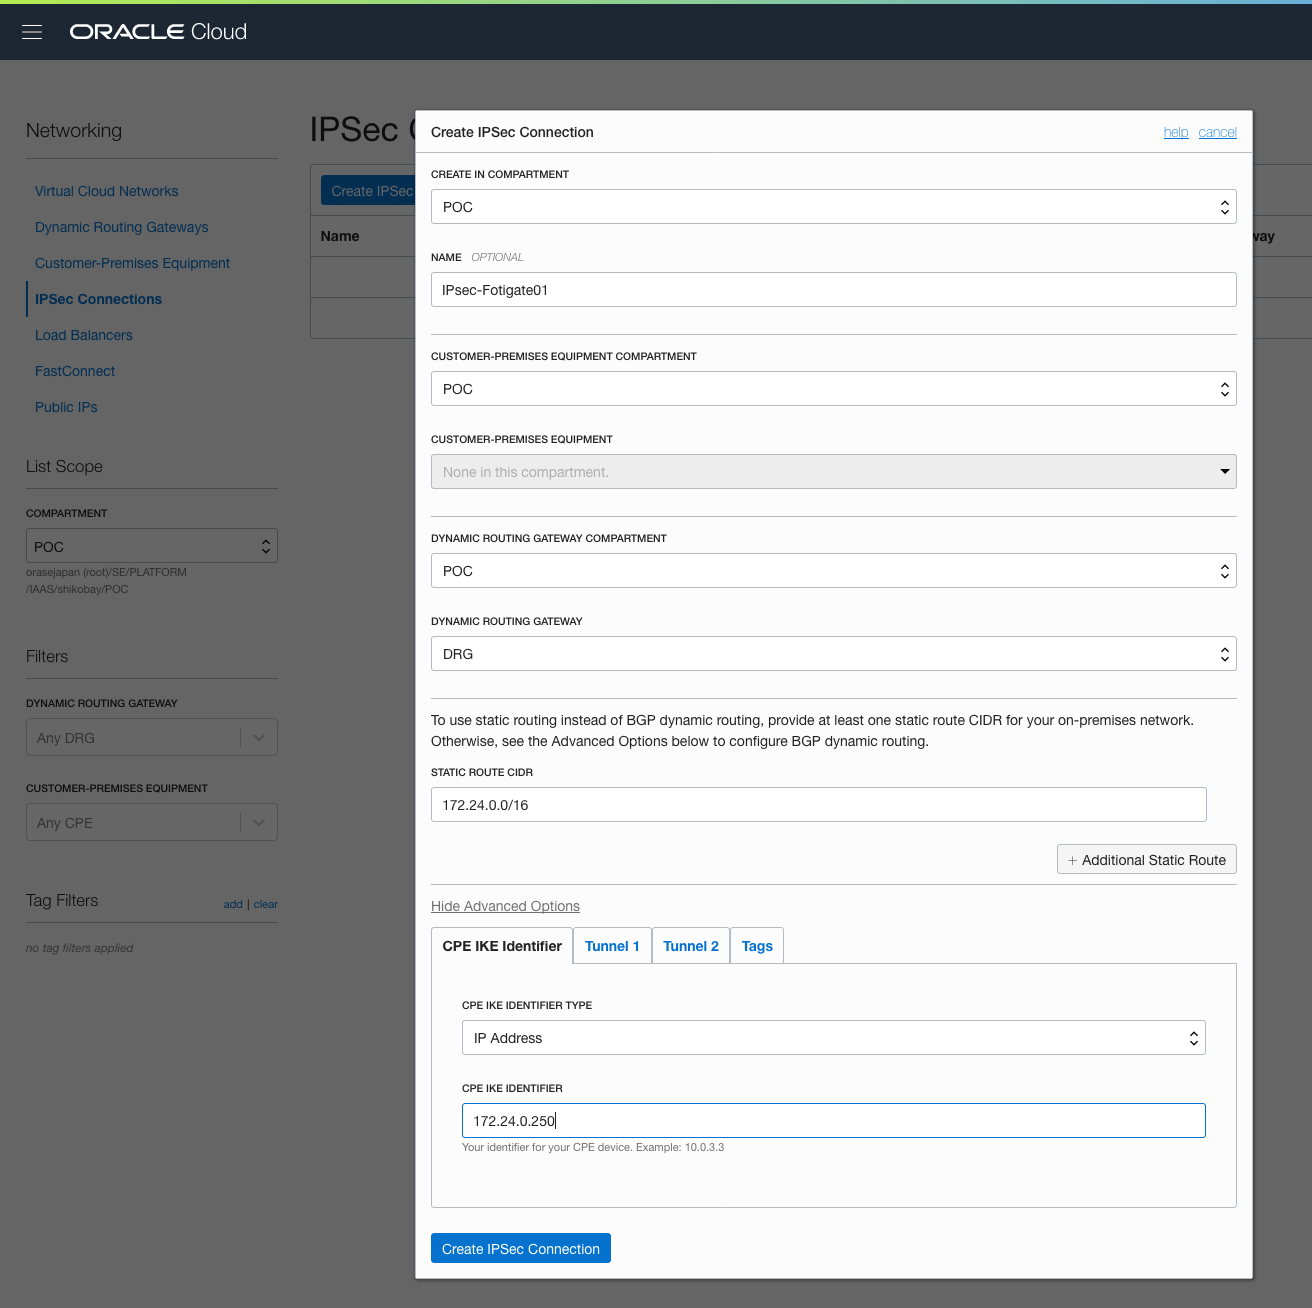
● IPsec Connection作成
① OCIの[Networking] > [IPsec Connetion] 画面から[Create IPsec COnnection]をクリックし以下内容を設定
[Create IPsec Connection]をクリックして作成

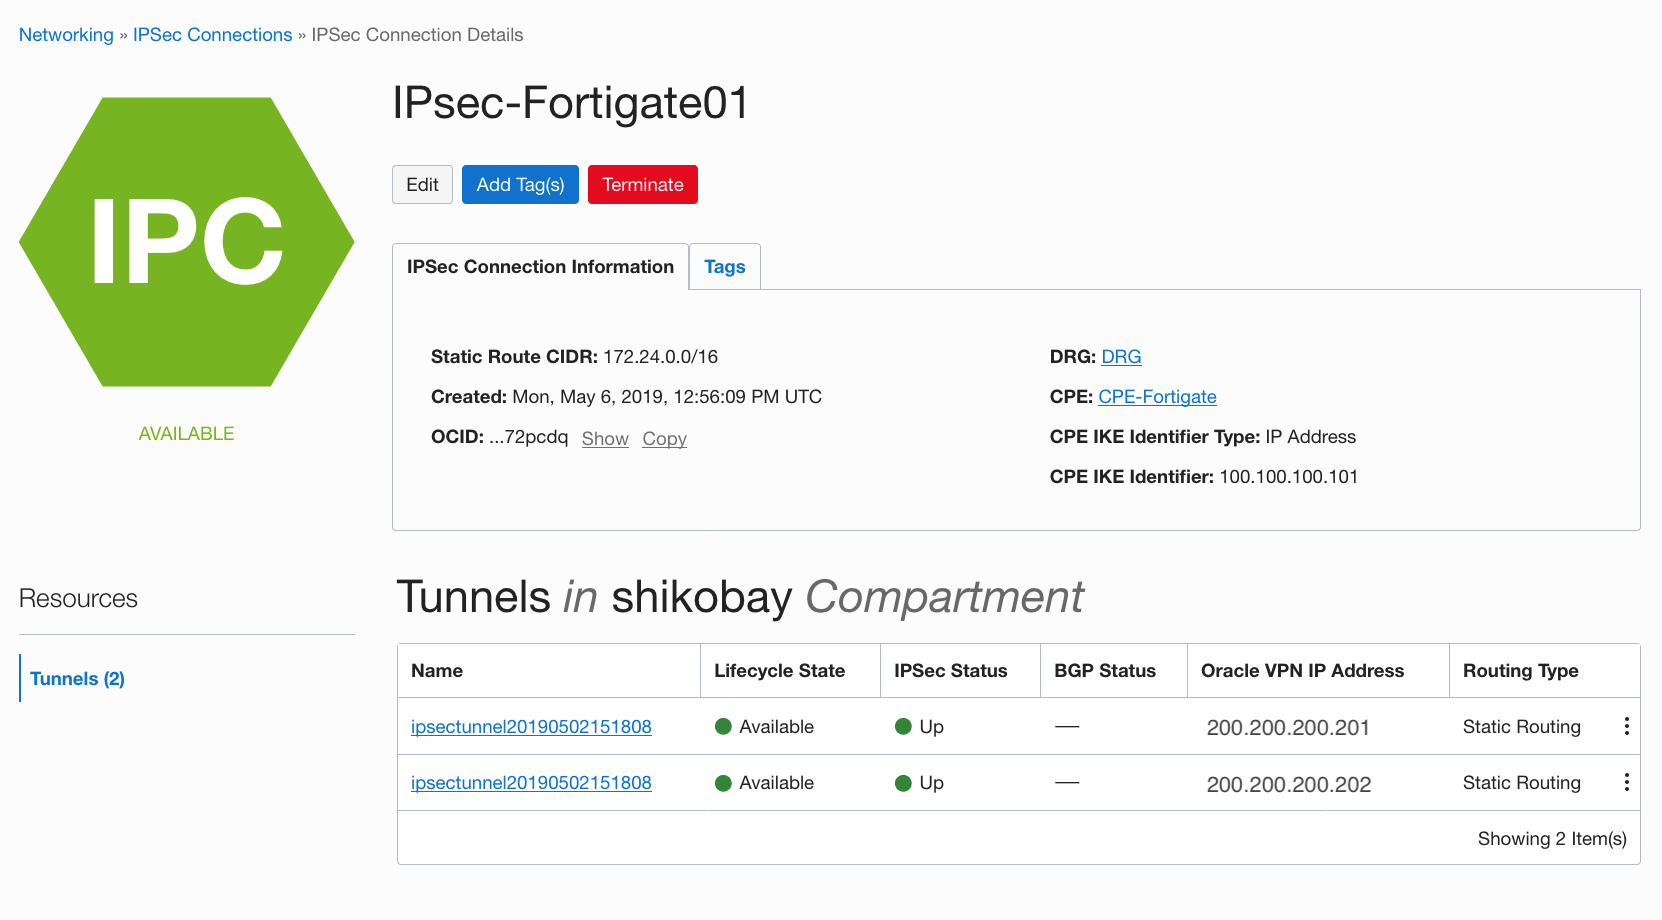
② 作成したIPsec ConnetionのVPN IP Addressを確認
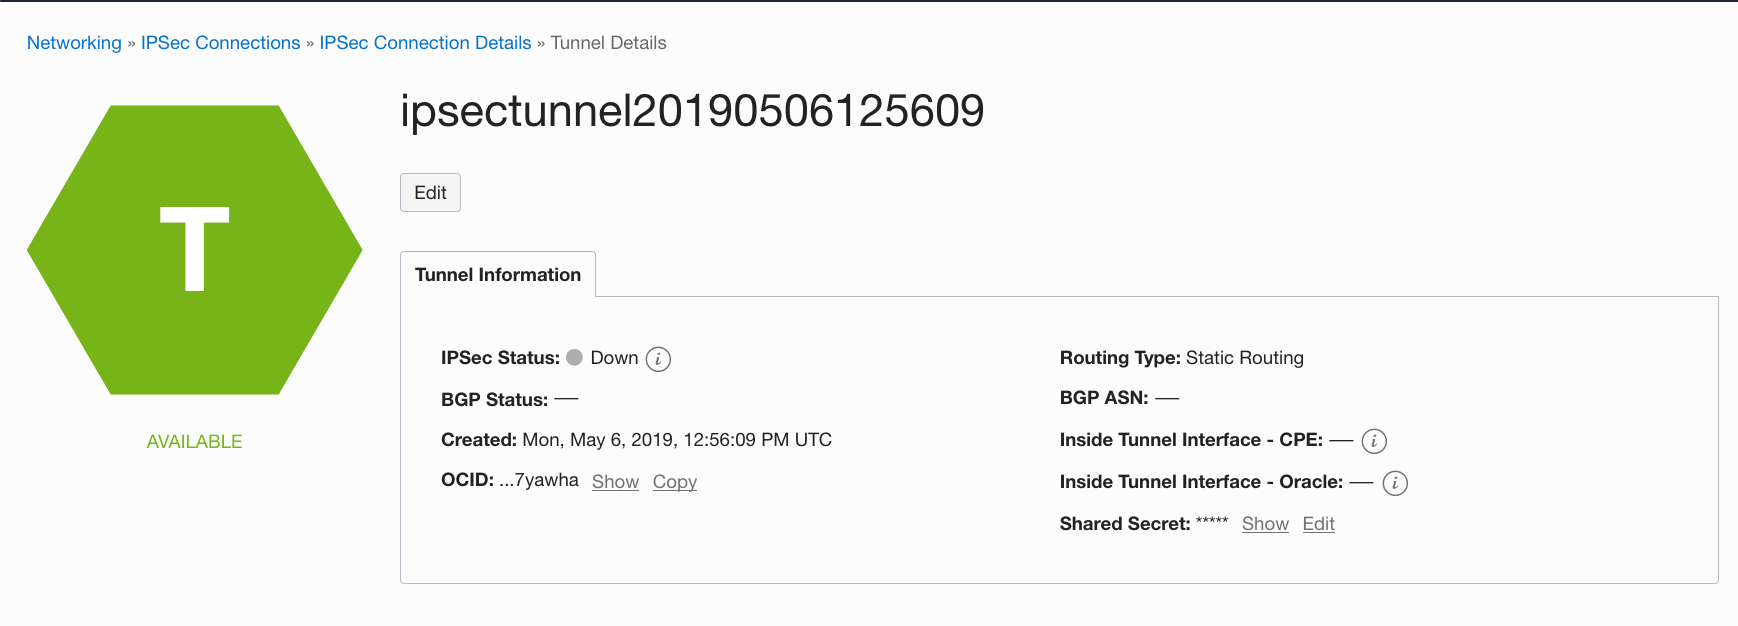
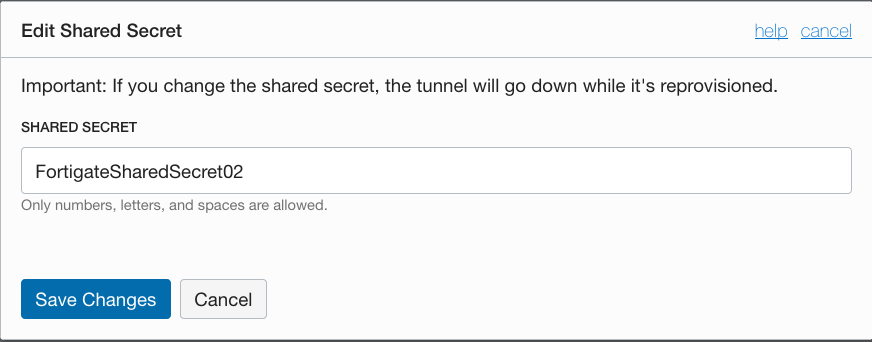
③ 作成したIPsec ConnetionのShared Secretを確認
・Tunnel1(200.200.200.201)のShared Secret
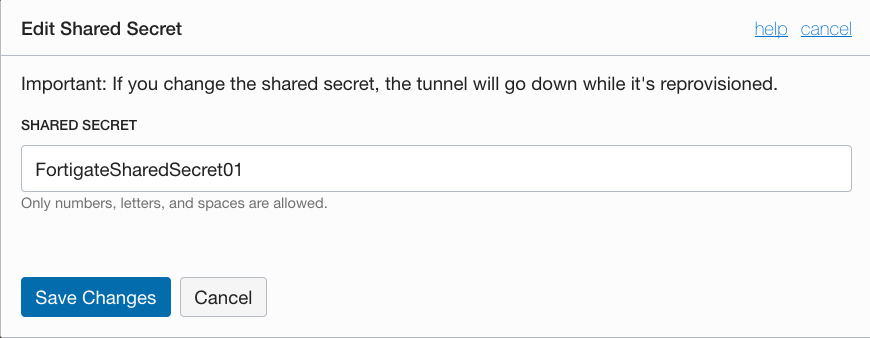
・Tunnel2(200.200.200.202)のShared Secret
■ Fotigate環境設定
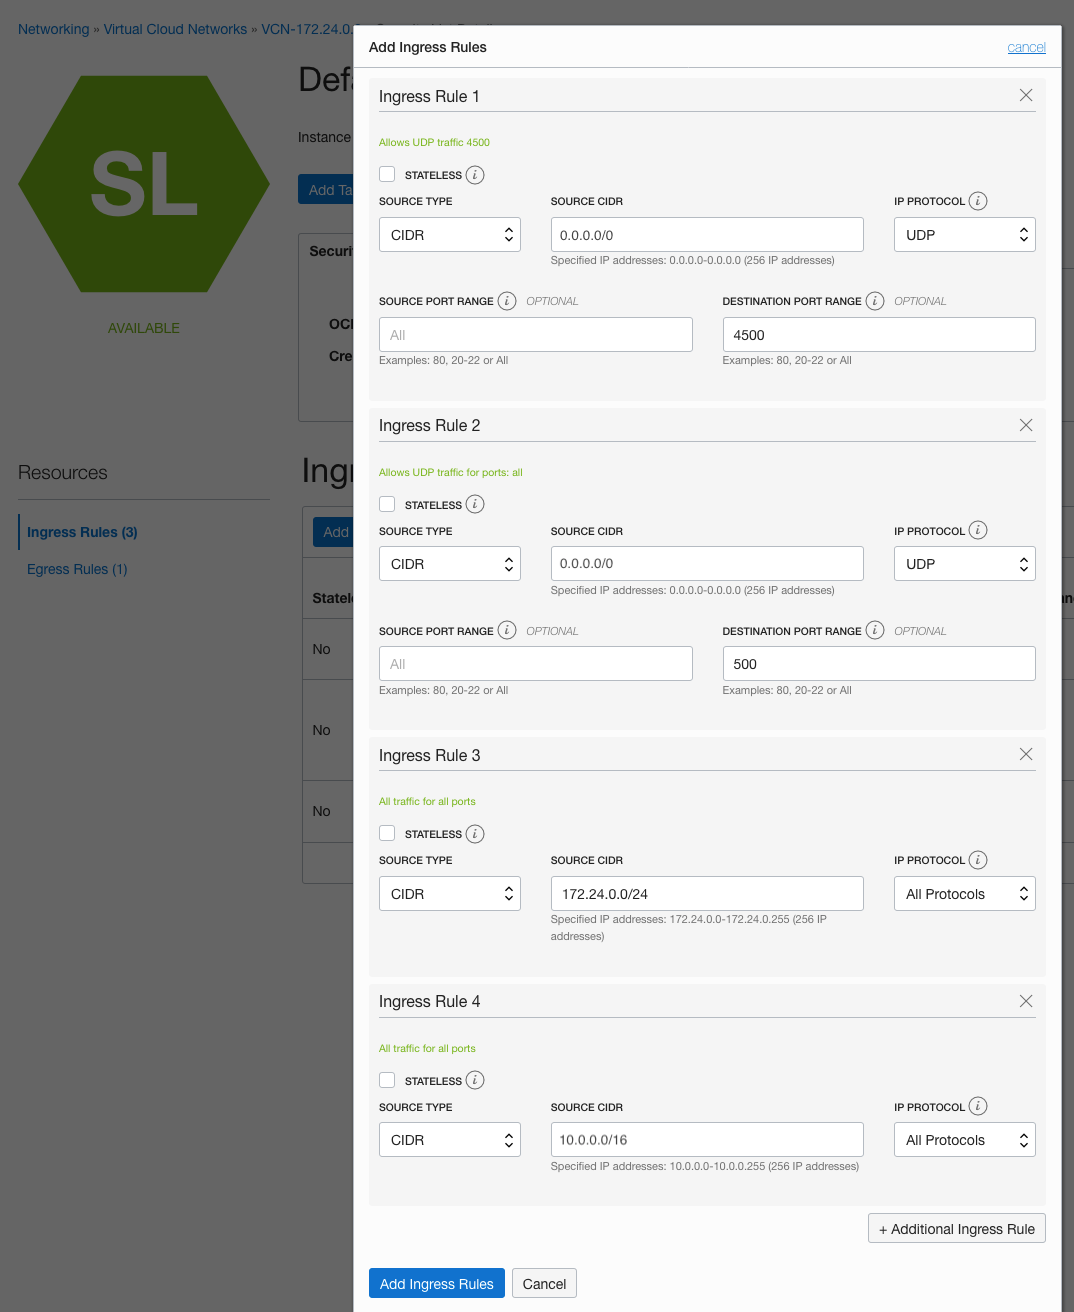
● OCI Secrity List設定
IPsecに必要なポート:4500と500を設定
● IPsec設定
① SSHログイン
Fortigateにsshログイン
[opc@inst01 ~]$ ssh admin@100.100.100.101
 admin@100.100.100.101's password:
 Fortigate-inst01 #
② ファイアウォール構成
config firewall address
    edit any_ipv4
    next
    edit OracleVcn-AshVCN_remote_subnet
        set subnet 10.0.0.0 255.0.0.0
    next
end

config firewall addrgrp
    edit OracleVcn-AshVCN_local
        set member any_ipv4
    next
    edit OracleVcn-AshVCN_remote
        set member OracleVcn-AshVCN_remote_subnet
    next
end
config firewall policy
    edit 101
        set name vpn_200.200.200.201_local
        set srcintf port1
        set dstintf 200.200.200.201
        set srcaddr OracleVcn-AshVCN_local
        set dstaddr OracleVcn-AshVCN_remote
        set action accept
        set schedule always
        set service ALL
        set comments "VPN: Oracle 200.200.200.201"
    next
    edit 102
        set name vpn_200.200.200.201_rhosiemote
        set srcintf 200.200.200.201
        set dstintf port1
        set srcaddr OracleVcn-AshVCN_remote
        set dstaddr OracleVcn-AshVCN_local
        set action accept
        set schedule always
        set service ALL
        set comments "VPN: Oracle 200.200.200.201"
    next
    edit 103
        set name vpn_200.200.200.202_local
        set srcintf port1
        set dstintf 200.200.200.202
        set srcaddr OracleVcn-AshVCN_local
        set dstaddr OracleVcn-AshVCN_remote
        set action accept
        set schedule always
        set service ALL
        set comments "VPN: Oracle 200.200.200.202"
    next
    edit 104
        set name vpn_200.200.200.202_remote
        set srcintf 200.200.200.202
        set dstintf port1
        set srcaddr OracleVcn-AshVCN_remote
        set dstaddr OracleVcn-AshVCN_local
        set action accept
        set schedule always
        set service ALL
        set comments "VPN: Oracle 200.200.200.202"
    next
end
③ ISAKMPフェーズ1を構成
config vpn ipsec phase1-interface
    edit 200.200.200.201
        set interface port1
        set keylife 28800
        set proposal aes256-sha384 aes256-sha256
        set comments "VPN: Oracle 200.200.200.201"
        set dhgrp 5
        set remote-gw 200.200.200.201
        set psksecret FortigateSharedSecret01
    next
    edit 200.200.200.202
        set interface port1
        set keylife 28800
        set proposal aes256-sha384 aes256-sha256
        set comments "VPN: Oracle 200.200.200.202"
        set dhgrp 5
        set remote-gw 200.200.200.202
        set psksecret FortigateSharedSecret02
    next
end
④ IPSecの構成 - ISAKMPフェーズ2
config vpn ipsec phase2-interface
    edit 200.200.200.201
        set phase1name 200.200.200.201
        set proposal aes256-sha1
        set dhgrp 5
        set replay disable
        set auto-negotiate enable
        set comments "VPN: Oracle 200.200.200.201"
        set keylifeseconds 3600
    next
    edit 200.200.200.202
        set phase1name 200.200.200.202
        set proposal aes256-sha1
        set dhgrp 5
        set replay disable
        set auto-negotiate enable
        set comments "VPN: Oracle 200.200.200.202"
        set keylifeseconds 3600
    next
end
⑤ VCNに静的ルートを構成
config vpn ipsec phase2-interface
    edit 200.200.200.201
        set phase1name 200.200.200.201
        set proposal aes256-sha1
        set dhgrp 5
        set replay disable
        set auto-negotiate enable
        set comments "VPN: Oracle 200.200.200.201"
        set keylifeseconds 3600
    next
    edit 200.200.200.202
        set phase1name 200.200.200.202
        set proposal aes256-sha1
        set dhgrp 5
        set replay disable
        set auto-negotiate enable
        set comments "VPN: Oracle 200.200.200.202"
        set keylifeseconds 3600
    next
end
● IPsec Tunnel確認
Fortigate-inst01 # diagnose vpn tunnel list
        list all ipsec tunnel in vd 0
        ------------------------------------------------------
        name=200.200.200.202 ver=1 serial=2 172.24.0.251:0->200.200.200.202:0
        bound_if=3 lgwy=static/1 tun=intf/0 mode=auto/1 encap=none/0
        proxyid_num=1 child_num=0 refcnt=11 ilast=0 olast=60 ad=/0
        stat: rxp=0 txp=0 rxb=0 txb=0
        dpd: mode=on-demand on=1 idle=20000ms retry=3 count=0 seqno=0
        natt: mode=none draft=0 interval=0 remote_port=0
        proxyid=200.200.200.202 proto=0 sa=0 ref=2 serial=1 auto-negotiate
          src: 0:0.0.0.0/0.0.0.0:0
          dst: 0:0.0.0.0/0.0.0.0:0
        ------------------------------------------------------
        name=200.200.200.201 ver=1 serial=1 172.24.0.251:0->200.200.200.201:0
        bound_if=3 lgwy=static/1 tun=intf/0 mode=auto/1 encap=none/0
        proxyid_num=1 child_num=0 refcnt=11 ilast=7 olast=67 ad=/0
        stat: rxp=0 txp=0 rxb=0 txb=0
        dpd: mode=on-demand on=1 idle=20000ms retry=3 count=0 seqno=0
        natt: mode=none draft=0 interval=0 remote_port=0
        proxyid=200.200.200.201 proto=0 sa=0 ref=2 serial=1 auto-negotiate
          src: 0:0.0.0.0/0.0.0.0:0
          dst: 0:0.0.0.0/0.0.0.0:0
● DRG IPsec Connection Status UP確認
IPsec ConnectionのStatusがUPしていることを確認
● 対向インスタンスping疎通確認
Fortigate-inst01から対向のlondon-inst01へpingできることを確認
Fortigate-inst01 # execute ping 10.0.0.2
    PING 10.0.0.2 (10.0.0.2): 56 data bytes
    64 bytes from 10.0.0.2: icmp_seq=0 ttl=62 time=47.2 ms
    64 bytes from 10.0.0.2: icmp_seq=1 ttl=62 time=47.0 ms
    64 bytes from 10.0.0.2: icmp_seq=2 ttl=62 time=47.1 ms
    64 bytes from 10.0.0.2: icmp_seq=3 ttl=62 time=47.1 ms
    ^C
    --- 10.0.0.2 ping statistics ---
    4 packets transmitted, 4 packets received, 0% packet loss
    round-trip min/avg/max = 47.0/47.1/47.2 ms
■ 接続確認
● ssh接続確認
・Frankfurt --> London間インスタンス ssh接続確認
対向インスタンスのホスト名が出力されることを確認
[opc@fra-inst01 ~]$ ssh -i <ssh鍵> opc@10.0.0.2 hostname
    ldn-inst1
・London --> Frankfurt間インスタンス ssh接続確認
対向インスタンスのホスト名が出力されることを確認
[opc@ldn-inst1 ~]$ ssh -i <ssh鍵> opc@172.24.0.10.2 hostname
    fra-inst01
■ Appendix
● デバッグ
IPsec Tunnelが通信できない場合などは、デバッグ ログを有効化して確認
・IKE デバッグ ログを有効化
    diag vpn ike log
    diag debug app ike -1
    diag debug enable
・IKE デバッグ ログ停止
    diagnose debug reset
    diagnose debug disable