OCIの ロード・バランサは、パブリック 又は プライベートIPアドレスのいずれかを使用してロード・バランサを作成することができます。
・Public Load Balancer :Internetからアクセスできる パブリックIPアドレスを利用
・Private Load Balancer:VCNサブネットからアクセスできる プライベートIPアドレスを利用
ここでは、プライベート・ロード・バランサを使用した、基本的なWebサーバー・アプリケーションの構成を作成します。
■本環境構成

■VCN と Web Server Instance 作成
上記構成図のようにVNCと Compute Instance を作成配置し、
次の手順で Compute Instance へ Web Server の設定を行います。
① Apache HTTP Server を Install
	[opc@web01 ~]$ sudo yum -y install httpd
		Loaded plugins: langpacks, ulninfo
		Resolving Dependencies
		--> Running transaction check
		---> Package httpd.x86_64 0:2.4.6-80.0.1.el7_5.1 will be installed
		--> Processing Dependency: httpd-tools = 2.4.6-80.0.1.el7_5.1 for package: httpd-2.4.6-80.0.1.el7_5.1.x86_64
		--> Processing Dependency: /etc/mime.types for package: httpd-2.4.6-80.0.1.el7_5.1.x86_64
		--> Processing Dependency: libaprutil-1.so.0()(64bit) for package: httpd-2.4.6-80.0.1.el7_5.1.x86_64
		--> Processing Dependency: libapr-1.so.0()(64bit) for package: httpd-2.4.6-80.0.1.el7_5.1.x86_64
		--> Running transaction check
		---> Package apr.x86_64 0:1.4.8-3.el7_4.1 will be installed
		---> Package apr-util.x86_64 0:1.5.2-6.0.1.el7 will be installed
		---> Package httpd-tools.x86_64 0:2.4.6-80.0.1.el7_5.1 will be installed
		---> Package mailcap.noarch 0:2.1.41-2.el7 will be installed
		--> Finished Dependency Resolution

		Dependencies Resolved

		================================================================================
		 Package          Arch        Version                     Repository       Size
		================================================================================
		Installing:
		 httpd            x86_64      2.4.6-80.0.1.el7_5.1        ol7_latest      1.2 M
		Installing for dependencies:
		 apr              x86_64      1.4.8-3.el7_4.1             ol7_latest      103 k
		 apr-util         x86_64      1.5.2-6.0.1.el7             ol7_latest       91 k
		 httpd-tools      x86_64      2.4.6-80.0.1.el7_5.1        ol7_latest       89 k
		 mailcap          noarch      2.1.41-2.el7                ol7_latest       30 k

		Transaction Summary
		================================================================================
		Install  1 Package (+4 Dependent packages)

		Total download size: 1.5 M
		Installed size: 4.3 M
		Downloading packages:
		(1/5): apr-1.4.8-3.el7_4.1.x86_64.rpm                      | 103 kB   00:00
		(2/5): apr-util-1.5.2-6.0.1.el7.x86_64.rpm                 |  91 kB   00:00
		(3/5): httpd-tools-2.4.6-80.0.1.el7_5.1.x86_64.rpm         |  89 kB   00:00
		(4/5): mailcap-2.1.41-2.el7.noarch.rpm                     |  30 kB   00:00
		(5/5): httpd-2.4.6-80.0.1.el7_5.1.x86_64.rpm               | 1.2 MB   00:00
		--------------------------------------------------------------------------------
		Total                                              1.2 MB/s | 1.5 MB  00:01
		Running transaction check
		Running transaction test
		Transaction test succeeded
		Running transaction
		  Installing : apr-1.4.8-3.el7_4.1.x86_64                                   1/5
		  Installing : apr-util-1.5.2-6.0.1.el7.x86_64                              2/5
		  Installing : httpd-tools-2.4.6-80.0.1.el7_5.1.x86_64                      3/5
		  Installing : mailcap-2.1.41-2.el7.noarch                                  4/5
		  Installing : httpd-2.4.6-80.0.1.el7_5.1.x86_64                            5/5
		  Verifying  : httpd-2.4.6-80.0.1.el7_5.1.x86_64                            1/5
		  Verifying  : mailcap-2.1.41-2.el7.noarch                                  2/5
		  Verifying  : apr-util-1.5.2-6.0.1.el7.x86_64                              3/5
		  Verifying  : httpd-tools-2.4.6-80.0.1.el7_5.1.x86_64                      4/5
		  Verifying  : apr-1.4.8-3.el7_4.1.x86_64                                   5/5

		Installed:
		  httpd.x86_64 0:2.4.6-80.0.1.el7_5.1

		Dependency Installed:
		  apr.x86_64 0:1.4.8-3.el7_4.1               apr-util.x86_64 0:1.5.2-6.0.1.el7
		  httpd-tools.x86_64 0:2.4.6-80.0.1.el7_5.1  mailcap.noarch 0:2.1.41-2.el7

		Complete!
② Apache (HTTP and HTTPS) 用 Firewall設定:
			[opc@web01 ~]$ sudo firewall-cmd --permanent --add-port=80/tcp
				success
			[opc@web01 ~]$ sudo firewall-cmd --permanent --add-port=443/tcp
				success
③ Firewall再起動
		[opc@web01 ~]$ sudo firewall-cmd --reload
		success
④ Web Server 起動
	[opc@web01 ~]$ sudo systemctl start httpd
		Add an index.htm file on each server that indicates which server it is, for example:
④ テストページ設定
Web Server 1:
			[opc@web01 ~]$ sudo su
			[root@web01 opc]# echo 'WebServer1' >/var/www/html/index.html
			[root@web01 opc]# cat /var/www/html/index.html
				WebServer1
Web Server 2:
		[opc@web02 ~]$ sudo su
		[root@web02 opc]# echo 'WebServer2' >/var/www/html/index.html
		[root@web02 opc]# cat /var/www/html/index.html
			WebServer2
■ Load Balancer作成
・以下ように各項目を設定し作成
Name: 適切な名前を設定
Shape: 100 Mbps. 必要帯域を設定
Virtual Cloud Network: load balancerさせる VCNを設定
Visibility:  Private Load Balancer を設定
Subnet : Load Balancer の Subnet を設定.


■Load Balancer の Backend Set と Health Check設定
・以下ように各項目を設定
Name: 適切な名前を設定
Policy: ここでは Weighted Round Robinを選択
Protocol: Select HTTPを選択
Port: 80を設定
URL Path (URI):  / を設定
■Backend Setに 作成した2つのWeb Serve を追加
作成した Load Balancer 画面から Backend Setsをクリックし、
以下ように各項目を設定し、Web Server1 と Web Server2 を登録して作成
INSTANCE OCID:Web Server Instance のOCIDを記入
PORT:80を記入
WEIGHT:均等分散のため 空(Blank)

■Listener作成
作成した Load Balancer 画面から Listenersをクリックし。
以下ように各項目を設定して作成
Name: 適切な名前を設定
Protocol: HTTPを選択
Port: Port番号  80を設定
Backend Set: 作成Backend Setを選択


■ Load Balancer Subnet の Security List 設定
Internet traffic to the listener.
Security Lists画面から、LB Security List を選択し、
[Edit All Rules]をクリックして、Allow Rules for Ingress を 以下のように設定
・Allow Rules for Ingress:
	Source Type: CIDRを選択
	Source CIDR: 192.168.100.0/24 Customer NW 側の CIDRを記入
	IP Protocol: TCPを選択
	Destination Port Range:  Listener Port 80 を記入

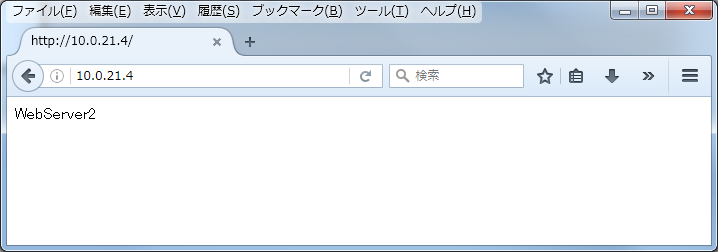
■ Load Balancerテスト
VPN接続された Customer NW 内のPCから Web Browser を起動し、
作成した Load Balancer の Private IPの URL を記入してアクセス確認
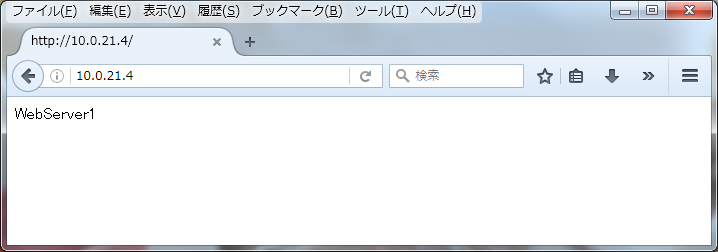
数回 URL を更新して、 Web Server1 と Web Server2 に分散接続されることを確認