FortiGate次世代ファイアウォール(NGFW)は、ハイブリッド環境でデータ、アセット、ユーザーを保護します。特許取得済みのフォーティネットのセキュリティプロセッサをベースに構築したFortiGate次世代ファイアウォールは、セキュリティとネットワークのパフォーマンスを加速し、データリッチトラフィックとクラウドベースのアプリケーションの増加に対応した効果的な保護が可能です。FortiGuard AIを活用したセキュリティサービスでサポートするFortiGate NGFWは、サイバー攻撃の防止とセキュリティリスクの最小化を支援し、最新の高度な脅威に対しても一貫したリアルタイムの保護とレスポンスを提供します。

FortiWiFiは、FortiGateと無線LANアクセスポイントの統合により、安全な無線LAN環境を実現します。一つの筐体で無線と有線LANの両方のアクセスを可能にするため、中小規模の企業、大企業の支店、そして店舗など多くのシーンでご利用できます。

ということで、Fortinet の FortiWiFi を購入したので、セットアップしてみてみます。
■ 起動と接続
● 起動
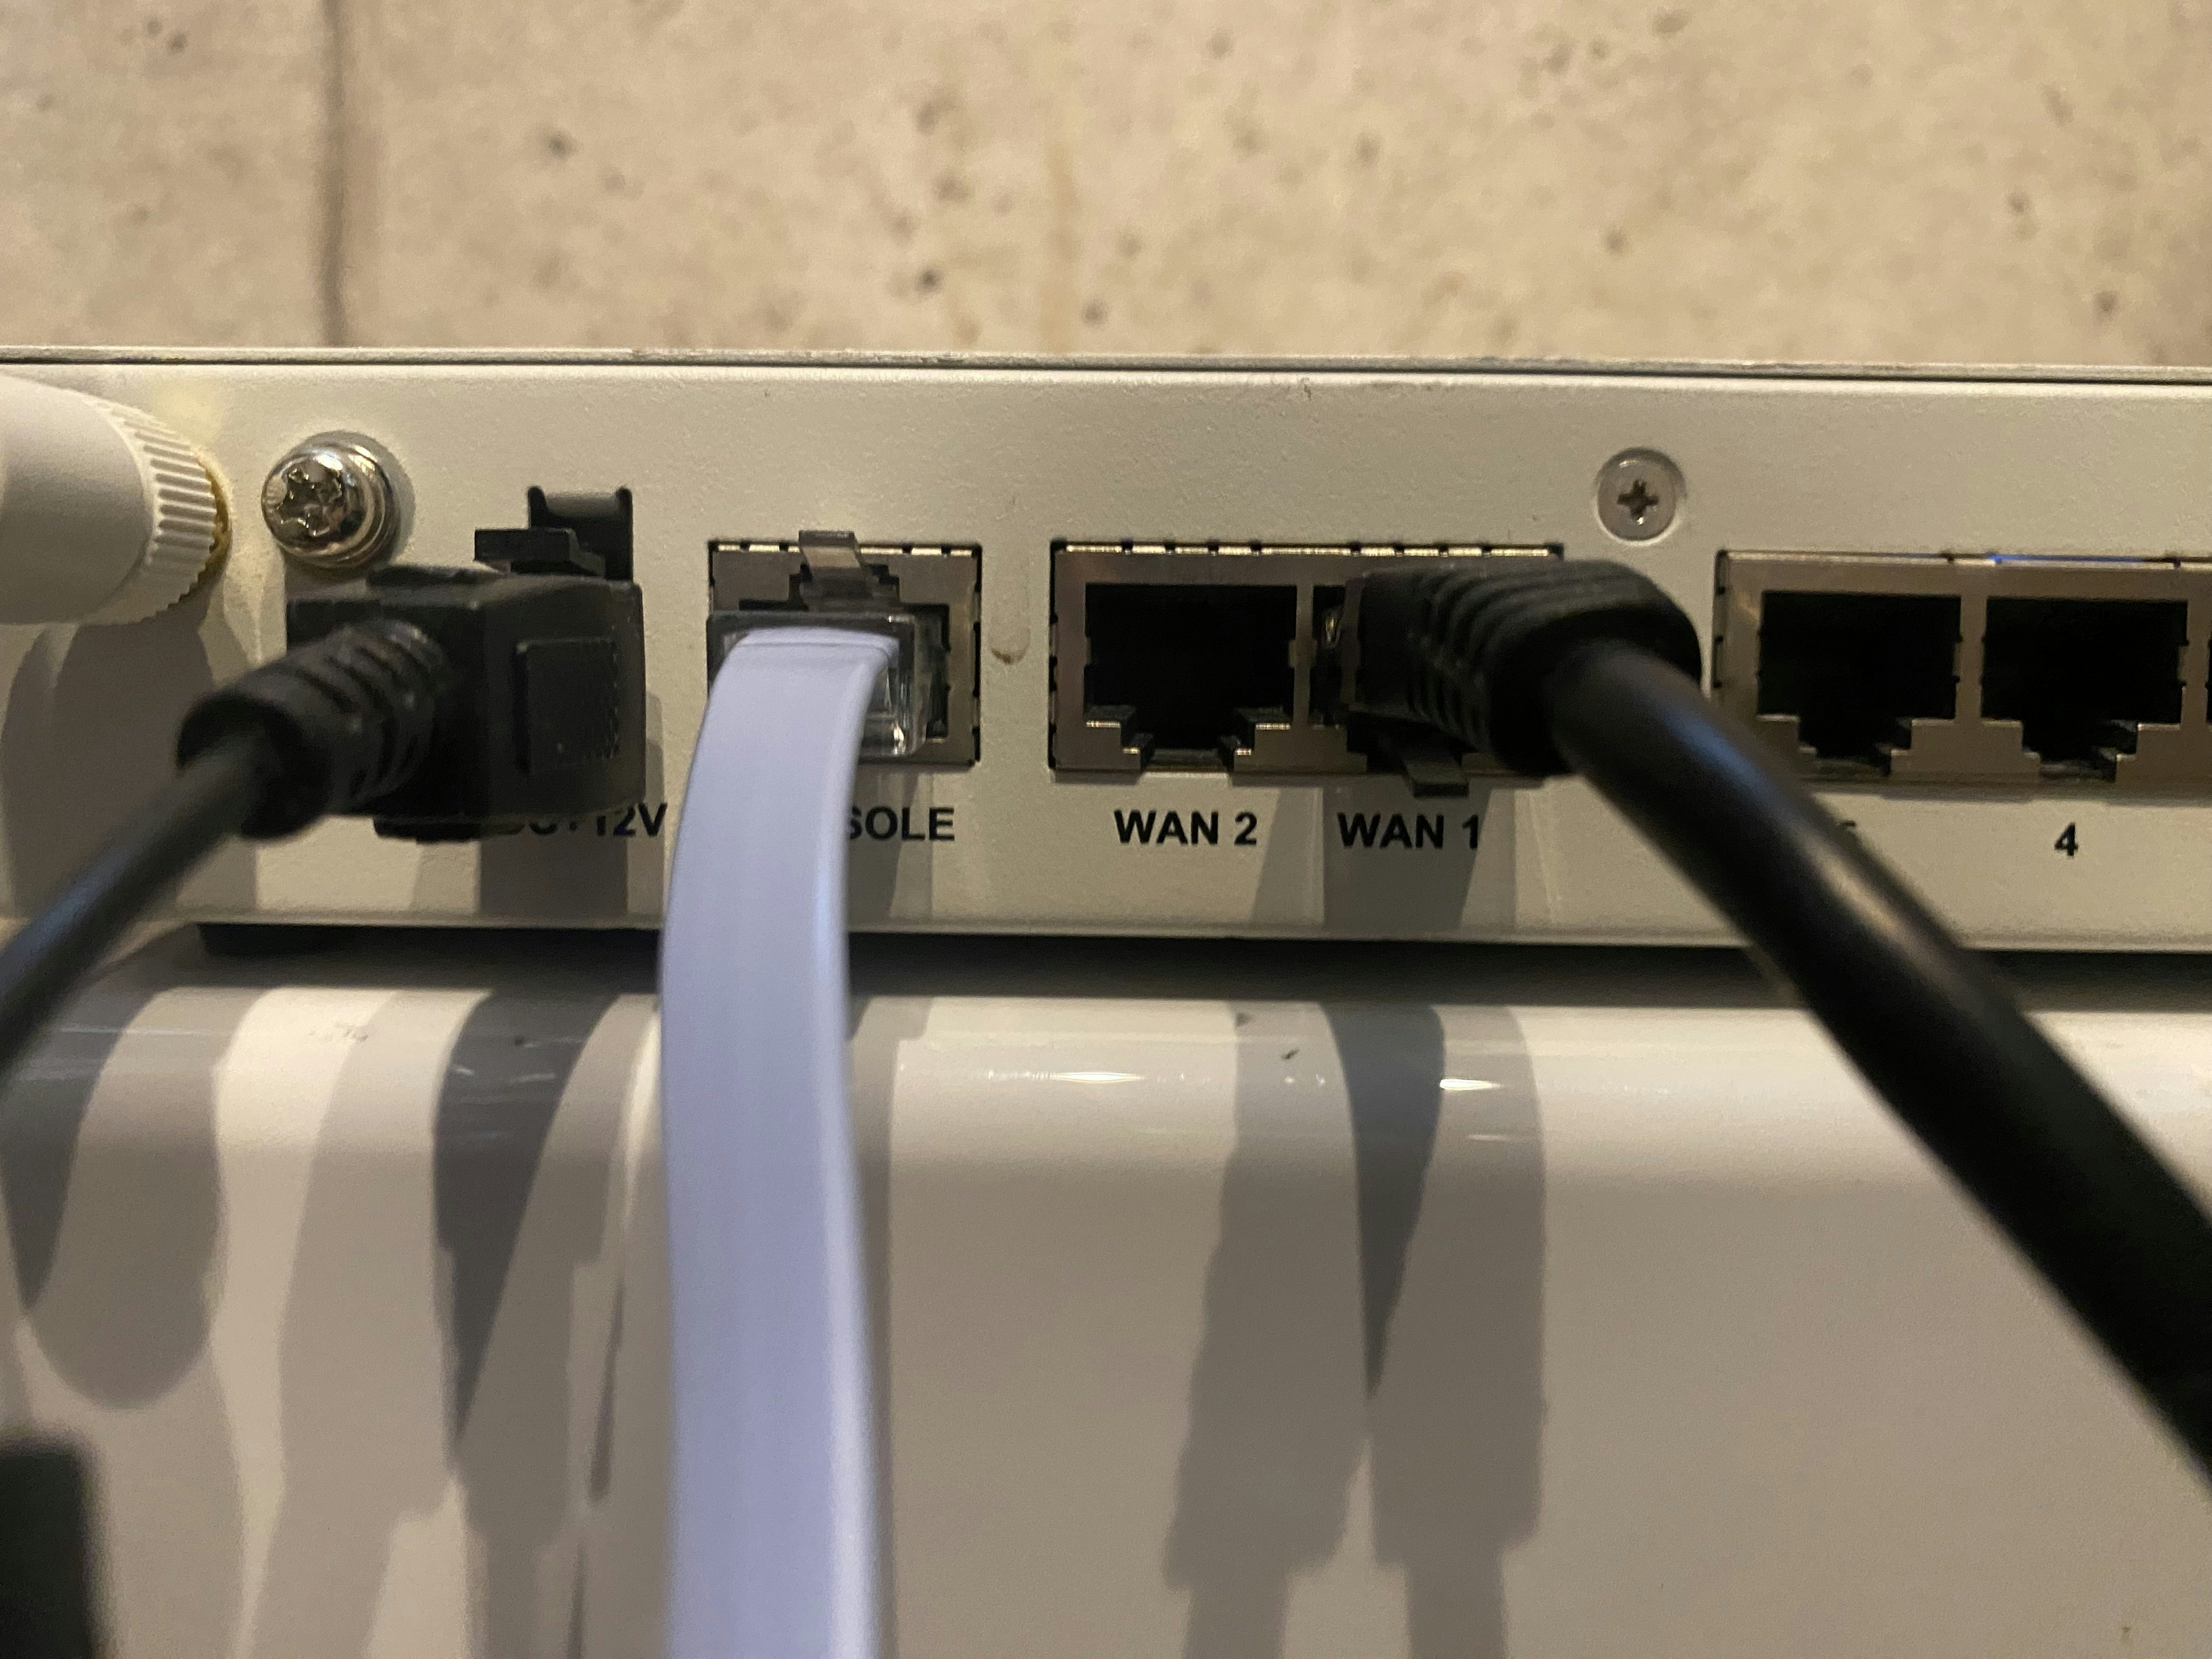
電源ケーブル接続すると電源が入り起動します。
1) 電源ケーブル接続
■ FortiGate 初期化
工場出荷時への戻し初期状態から設定します。
1) シリアル・コンソール・ケーブル接続
FortiGate と MacBook へコンソール・ケーブル接続します。
2) ターミナル接続
iTerm を起動して次のコマンドで、ターミナル接続
shirok@MacBook ~ % screen /dev/tty.usbserial-A9D1E9YS
3) Login
ターミナル接続完了すると loginを求められるので、ユーザー: admin , デフォルト・パスワード: Null(空)でログイン
FortiGate50E login: admin
Password: ************
Welcome!
4) 初期化実行
FortiGate50E # execute factoryreset
This operation will reset the system to factory default!
Do you want to continue? (y/n)y


System is resetting to factory default...


The system is going down NOW !!

FortiGate50E #
Please stand by while rebooting the system.
Restarting system.


FortiWiFi-50E-2R (14:48-02.21.2017)
Ver:05000007
CPU(00): 1600MHz
Total RAM: 2GB
Initializing boot device...
Initializing MAC... egiga1
Please wait for OS to boot, or press any key to display configuration menu..........

Booting OS...

Reading boot image... 4318720 bytes.
Initializing firewall...
■ 管理画面へログイン
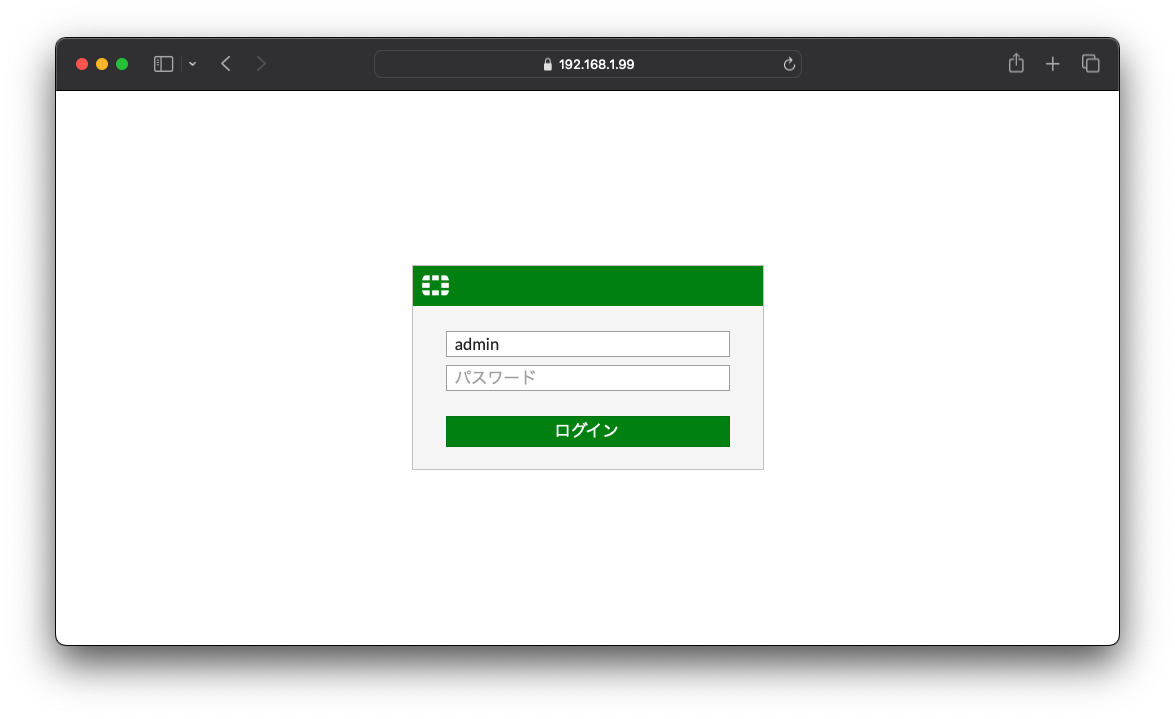
1) Webコンソール接続
Client から Webブラウザを起動して、FortiGateのデフォルトIPで https://192.168.1.99 へ接続
    ・ 管理画面IPアドレス:https://192.168.1.99/
    ・ ID:admin
    ・ Password:Null(空白)
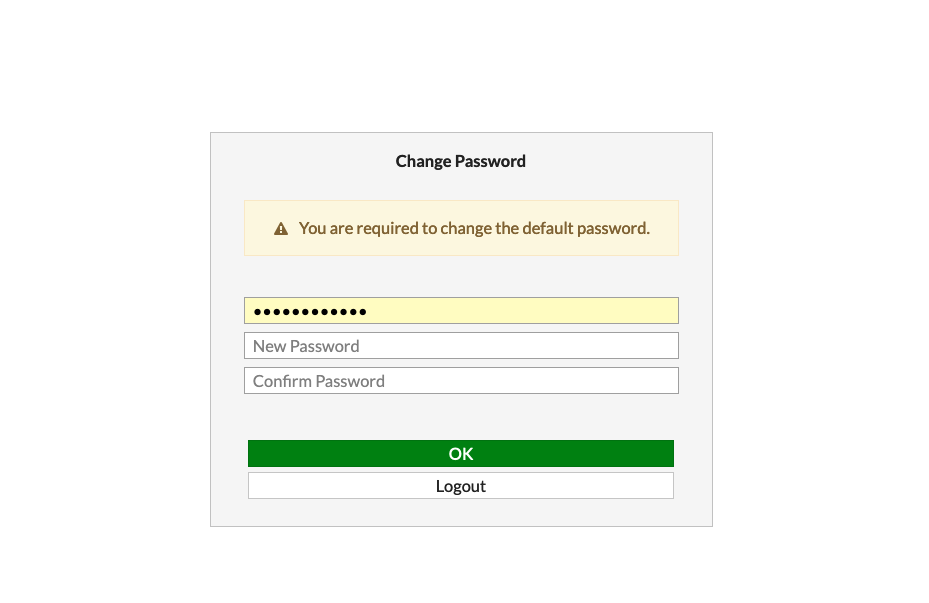
2) Change Password画面
3) FortiGate Setup画面
4) Specify Hostname画面
Hostnameを設定し、[OK]をクリック

■ Time Zone 設定
必要に応じてタイムゾーンを現在地のものに変更します。
[System] > [Setup] をクリックし、System Setup画面を表示し
Time Zone: Osaka,Sapporo,Tokyo へ変更
■ Internet接続設定
● FortiGate設定
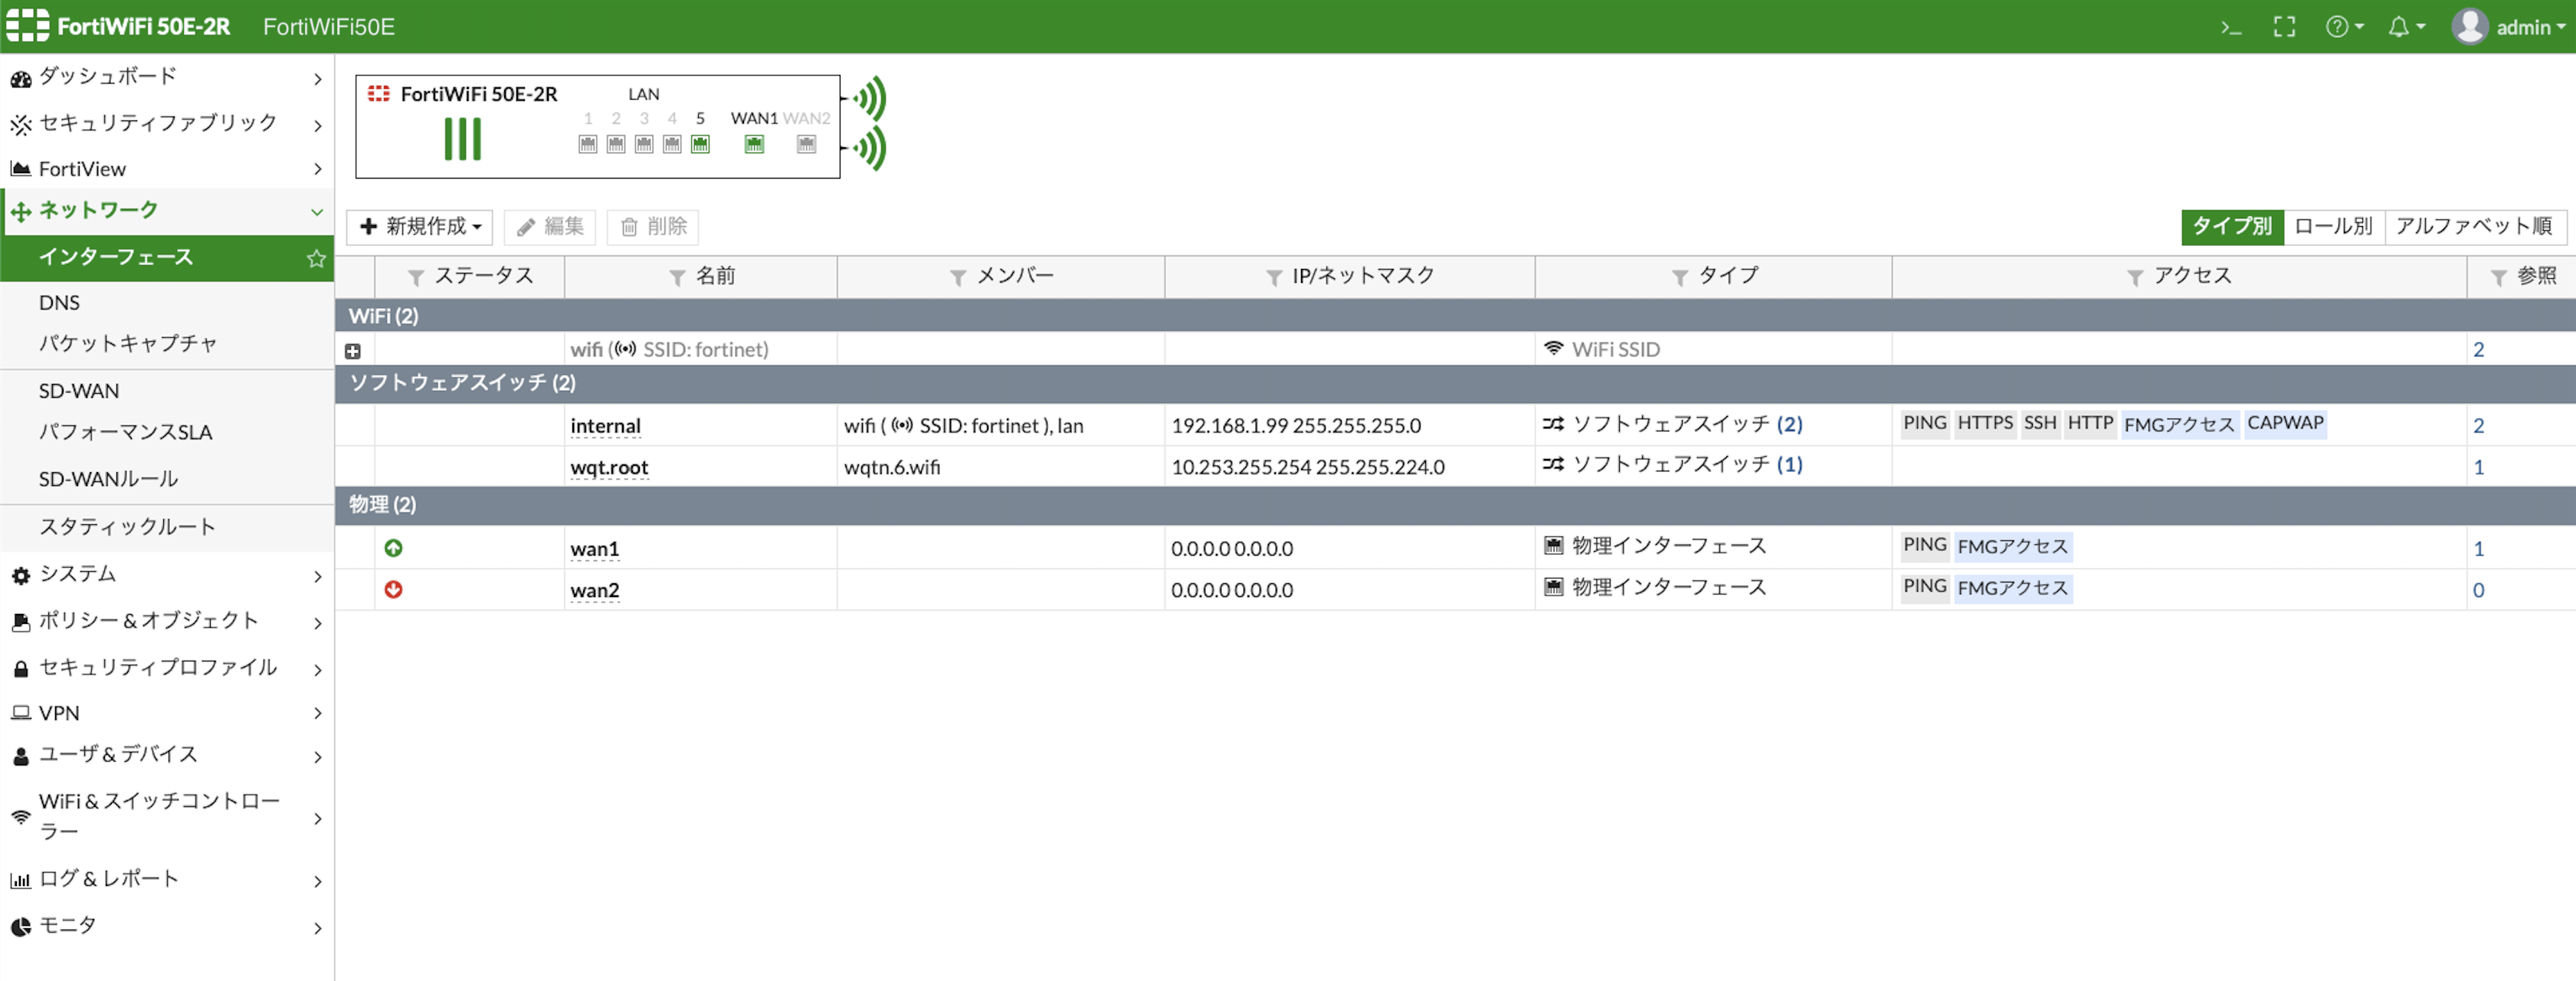
1) インターフェース画面
[ネットワーク] > [インターフェース]をクリックし、wan1 をクリック
2) wan1 インターフェースの編集画面
ここでは、PPPoE でインターネット接続の設定をします。
次の値を入力し、[OK]をクリック
アドレッシングモード: PPPoE を選択
ユーザー名: インターネット・プロバイダのユーザー名を入力
パスワード: インターネット・プロバイダのパスワードを入力
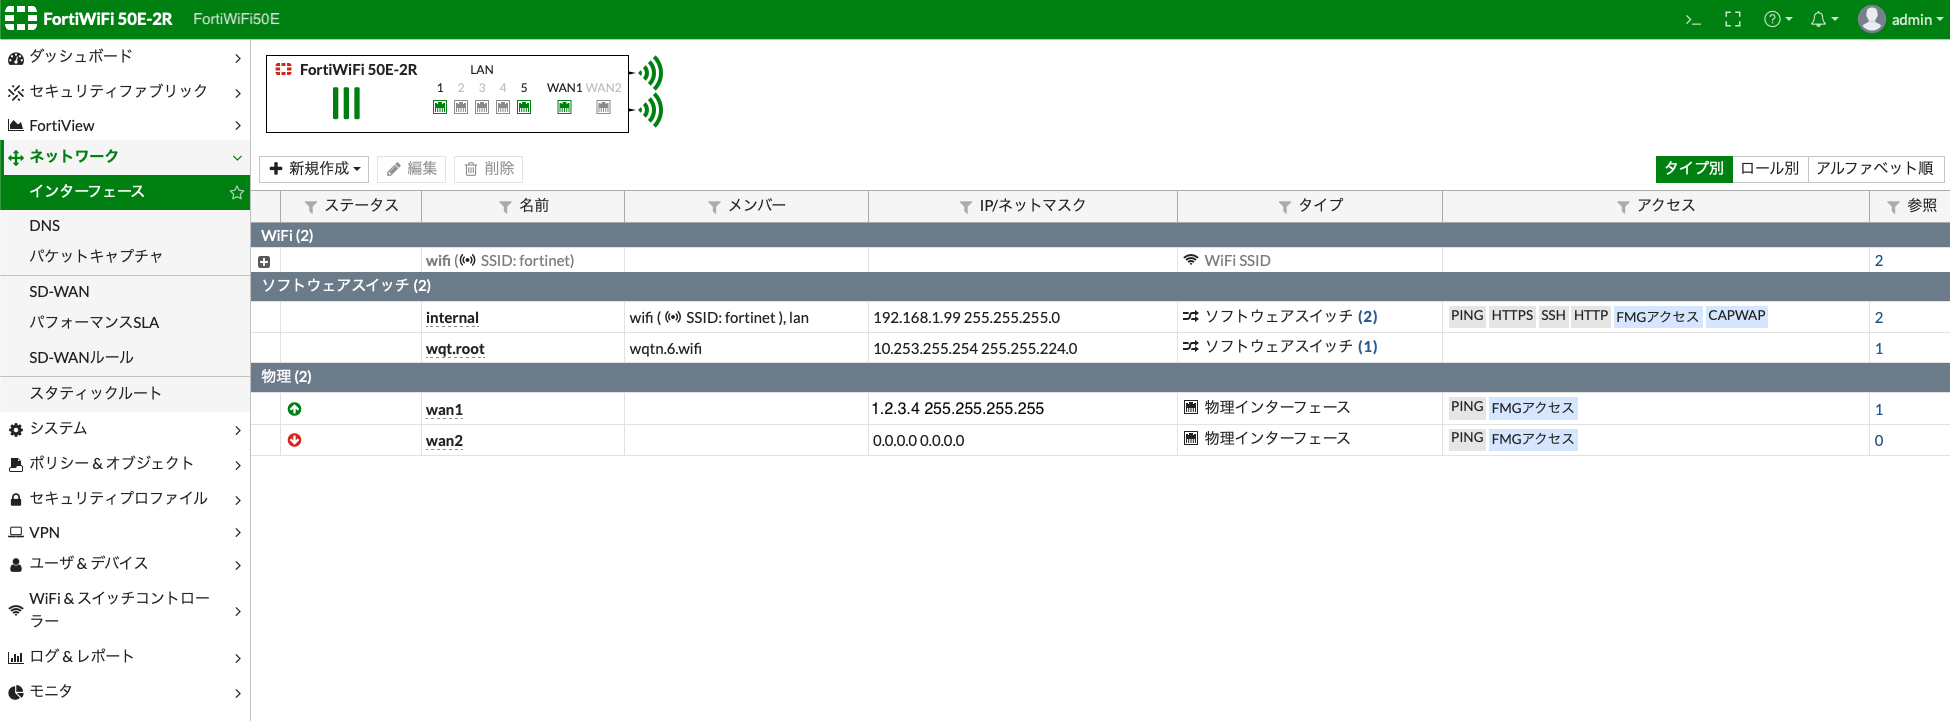
3) wan1 インターフェースのUP
インターネット・プロバイダ接続が成功し、wan1 インターフェースがUPすればOK
3) Internet接続確認
Fortigate へ Lginし、ping で Internetへ接続できることを確認
FortiWiFi50E # execute ping google.com
PING google.com (142.251.42.142): 56 data bytes
64 bytes from 142.251.42.142: icmp_seq=0 ttl=118 time=3.9 ms
64 bytes from 142.251.42.142: icmp_seq=1 ttl=118 time=3.2 ms
64 bytes from 142.251.42.142: icmp_seq=2 ttl=118 time=9.7 ms
64 bytes from 142.251.42.142: icmp_seq=3 ttl=118 time=3.1 ms
64 bytes from 142.251.42.142: icmp_seq=4 ttl=118 time=3.6 ms

--- google.com ping statistics ---
5 packets transmitted, 5 packets received, 0% packet loss
round-trip min/avg/max = 3.1/4.7/9.7 ms
■ WiFi 無線LAN設定
● FortiWiFi設定
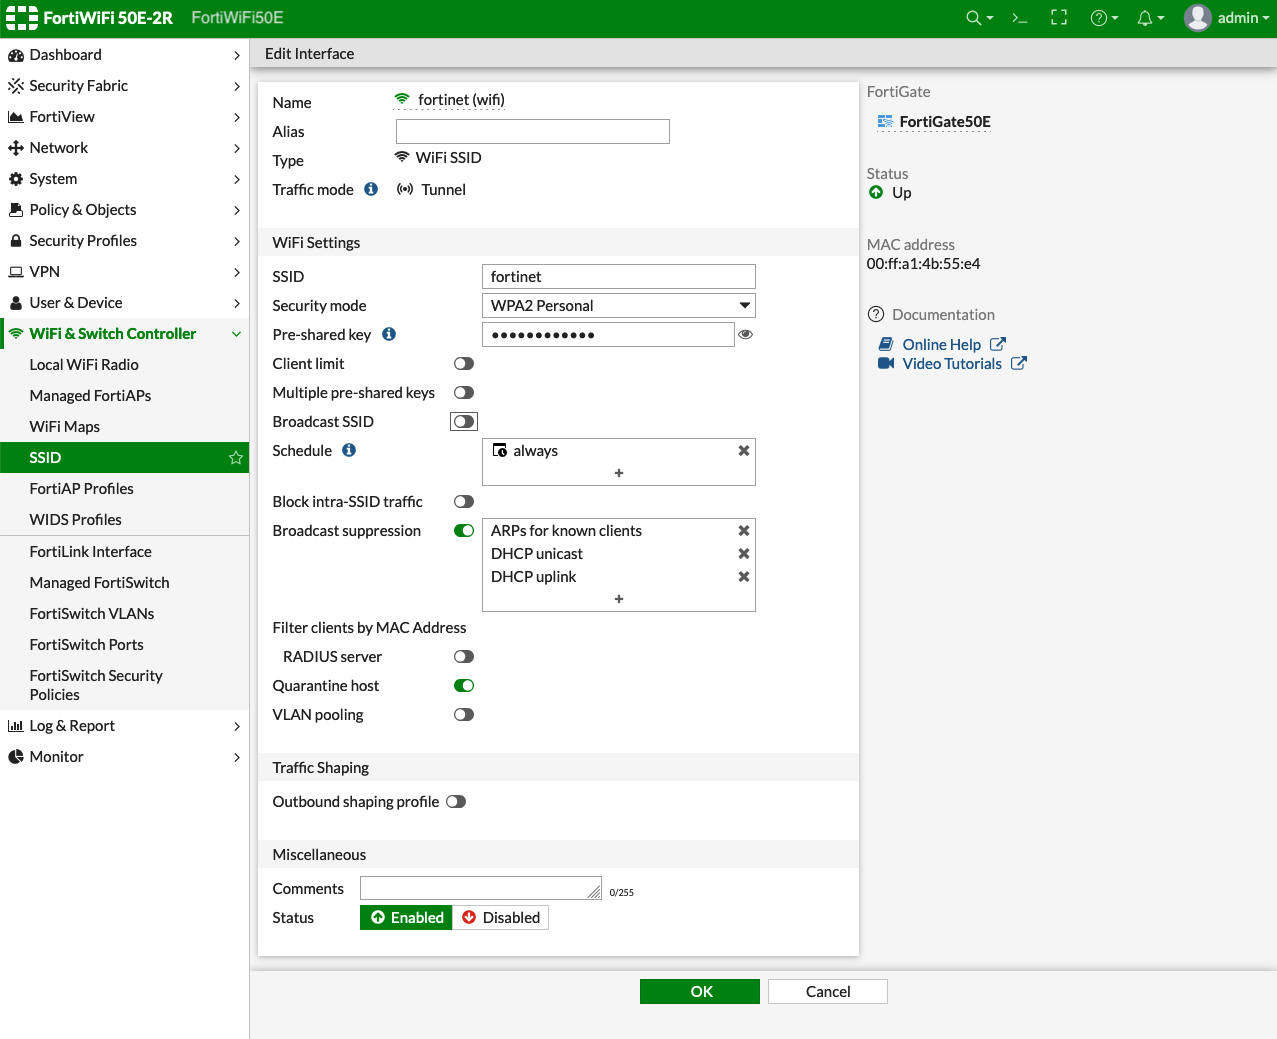
1) SSID画面
[WiFi & Switch Controller] > [SSID] をクリックし、対象の WiFiをクリック

2) Edit Interface画面
次の内容を確認し、[OK]をクリックして設定を反映
・ SSID: クライアントがWiFi接続するネットワーク名を設定
・ Security mode: クライアントがWiFi接続するセキュリティタイプを選択
・ Preshared key: クライアントがWiFi接続するパスワードを設定
● クライアント設定とInternet接続
1) MacBook の WiFi設定
WiFiネットワークから検出してFortiWiFiで設定したネットワーク名、パスワードを設定し接続

2) Internet接続確認
接続した MacBookの Webブラウザを起動してInternet接続できることを確認

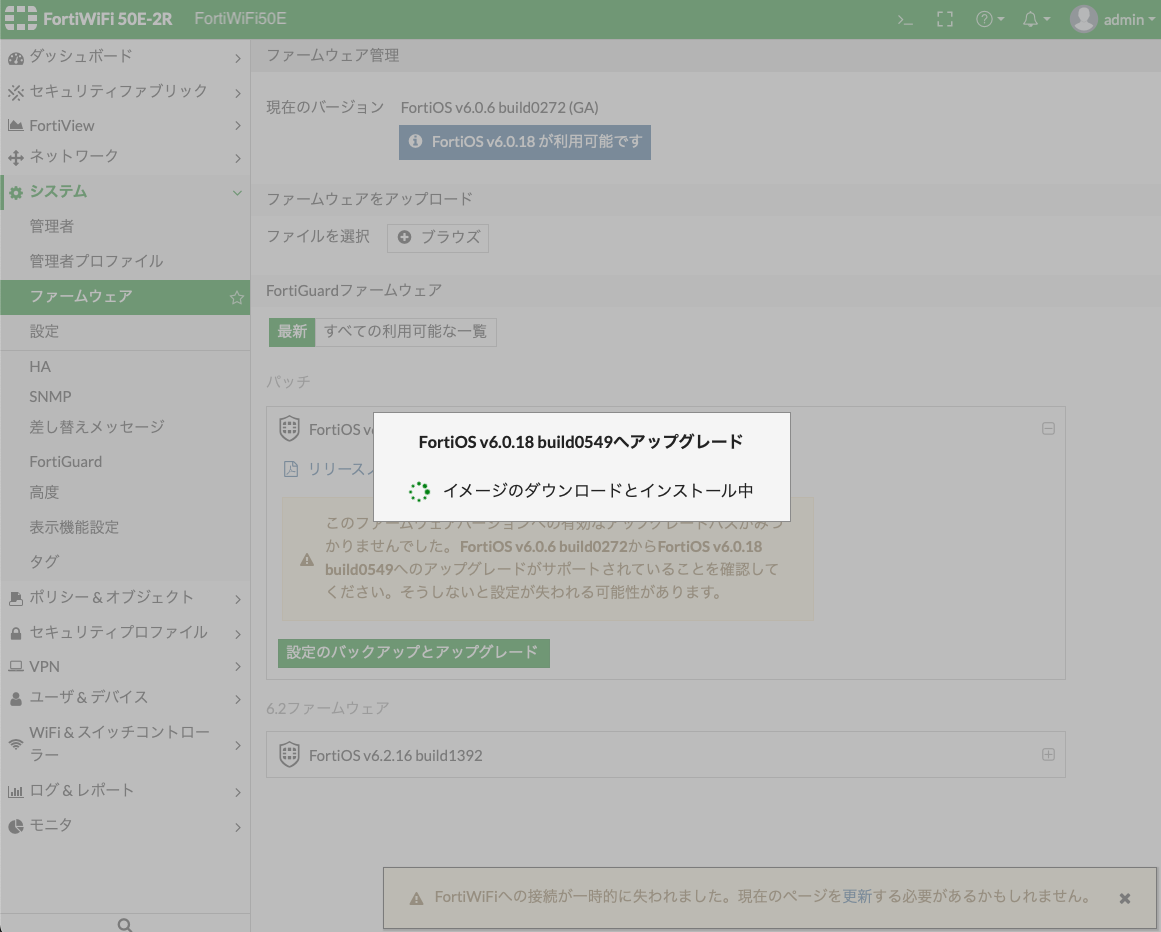
■ ファームウェアの更新
1) ファームウェア管理画面
[システム] > [ファームウェア]をクリック

■ バックアップ
右上のユーザー名をクリックし、[設定] > [バックアップ]で設定項目がバックアップでします。

■ 参考
・ リソース/ドキュメント
・ FortiGate End of Support
・ FortiGate / FortiWiFi 50E シリーズ
